Did you know clay crafting isn’t just fun—it’s amazing for kids? Here’s why:-
Builds creativity and confidence.
Strengthens fine motor skills.
Encourages family bonding.
Here are some easy and interesting clay craft ideas for your kids, Scroll down to know more.
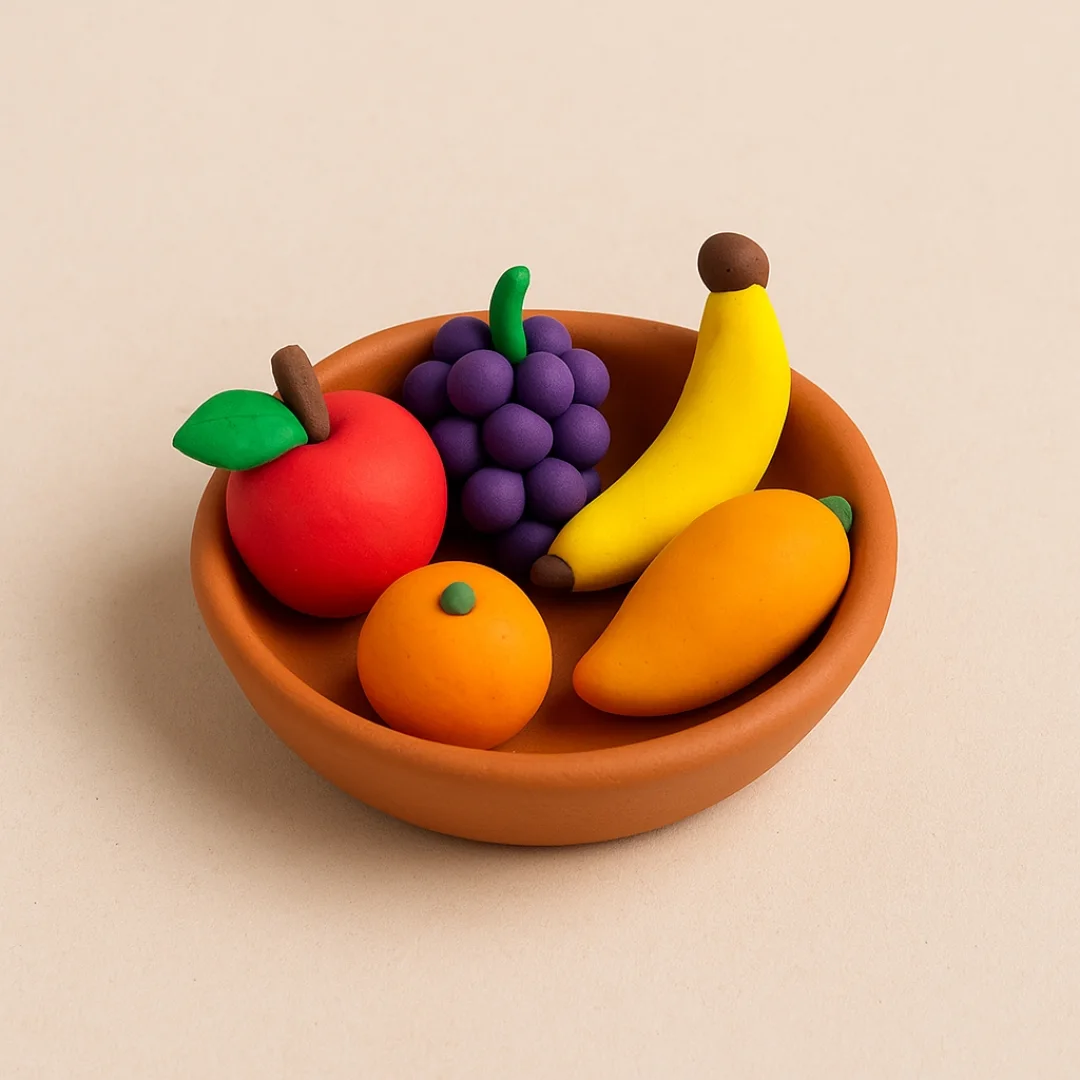
1.Clay Fruit Bowl Art
Here’s a simple step-by-step method to make a Clay Fruit Bowl Art for kids:
Clay Fruit Bowl Art – Step-by-Step Method
Materials Needed:
Different colored clay (red, yellow, green, orange, brown, purple, etc.)
A plastic or small real bowl (optional, for shape support)
Toothpick or plastic clay tools (optional, for detailing)
Rolling pin or smooth bottle (for flattening)
A mat or a clean surface
Step 1: Make the Bowl
1. Choose a base colour for your bowl (like brown or orange).
2. Roll the clay into a ball, then flatten it slightly with your hand or rolling pin.
3. Gently press the centre to form a bowl shape, like a shallow cup.
4. Smooth the edges and curve the sides upward to form the bowl walls.
5. (Optional) You can place your clay over an upside-down small bowl to shape it perfectly.
Step 2: Make the Fruits
Create mini fruits with colored clay:
Apple: Make a red ball, press slightly, and add a small green leaf and brown stem.
Banana: Roll yellow clay into a curved shape and taper the ends.
Orange: Roll a small orange ball. Use a toothpick to gently texture the surface.
Grapes: Roll small purple balls and cluster them together in a pyramid shape.
Mango: Use yellow and a bit of orange clay to form a mango shape (curved and pointed end).
Step 3: Assemble the Fruit Bowl
1. Carefully place each fruit inside the clay bowl.
2. Arrange them nicely, mixing colors and shapes to look like a real fruit basket.
3. Add small clay leaves or vines for decoration.
Step 4: Let It Set
Let the clay dry (if air-dry clay is used).
If using modelling clay, display it as is or reuse it later.
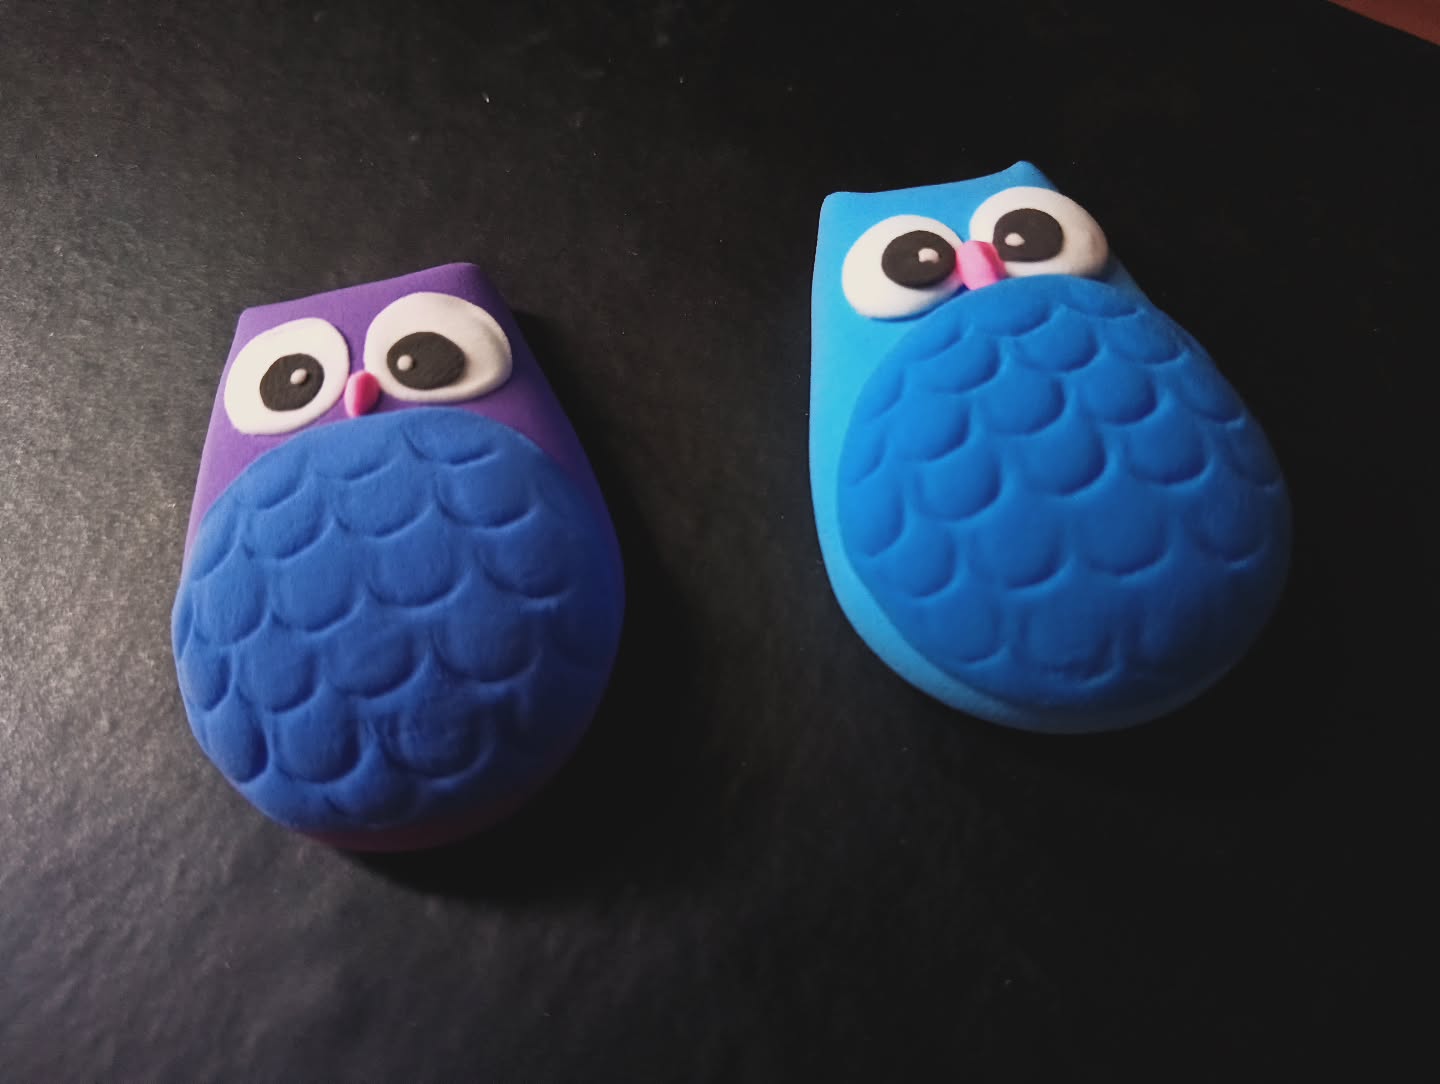
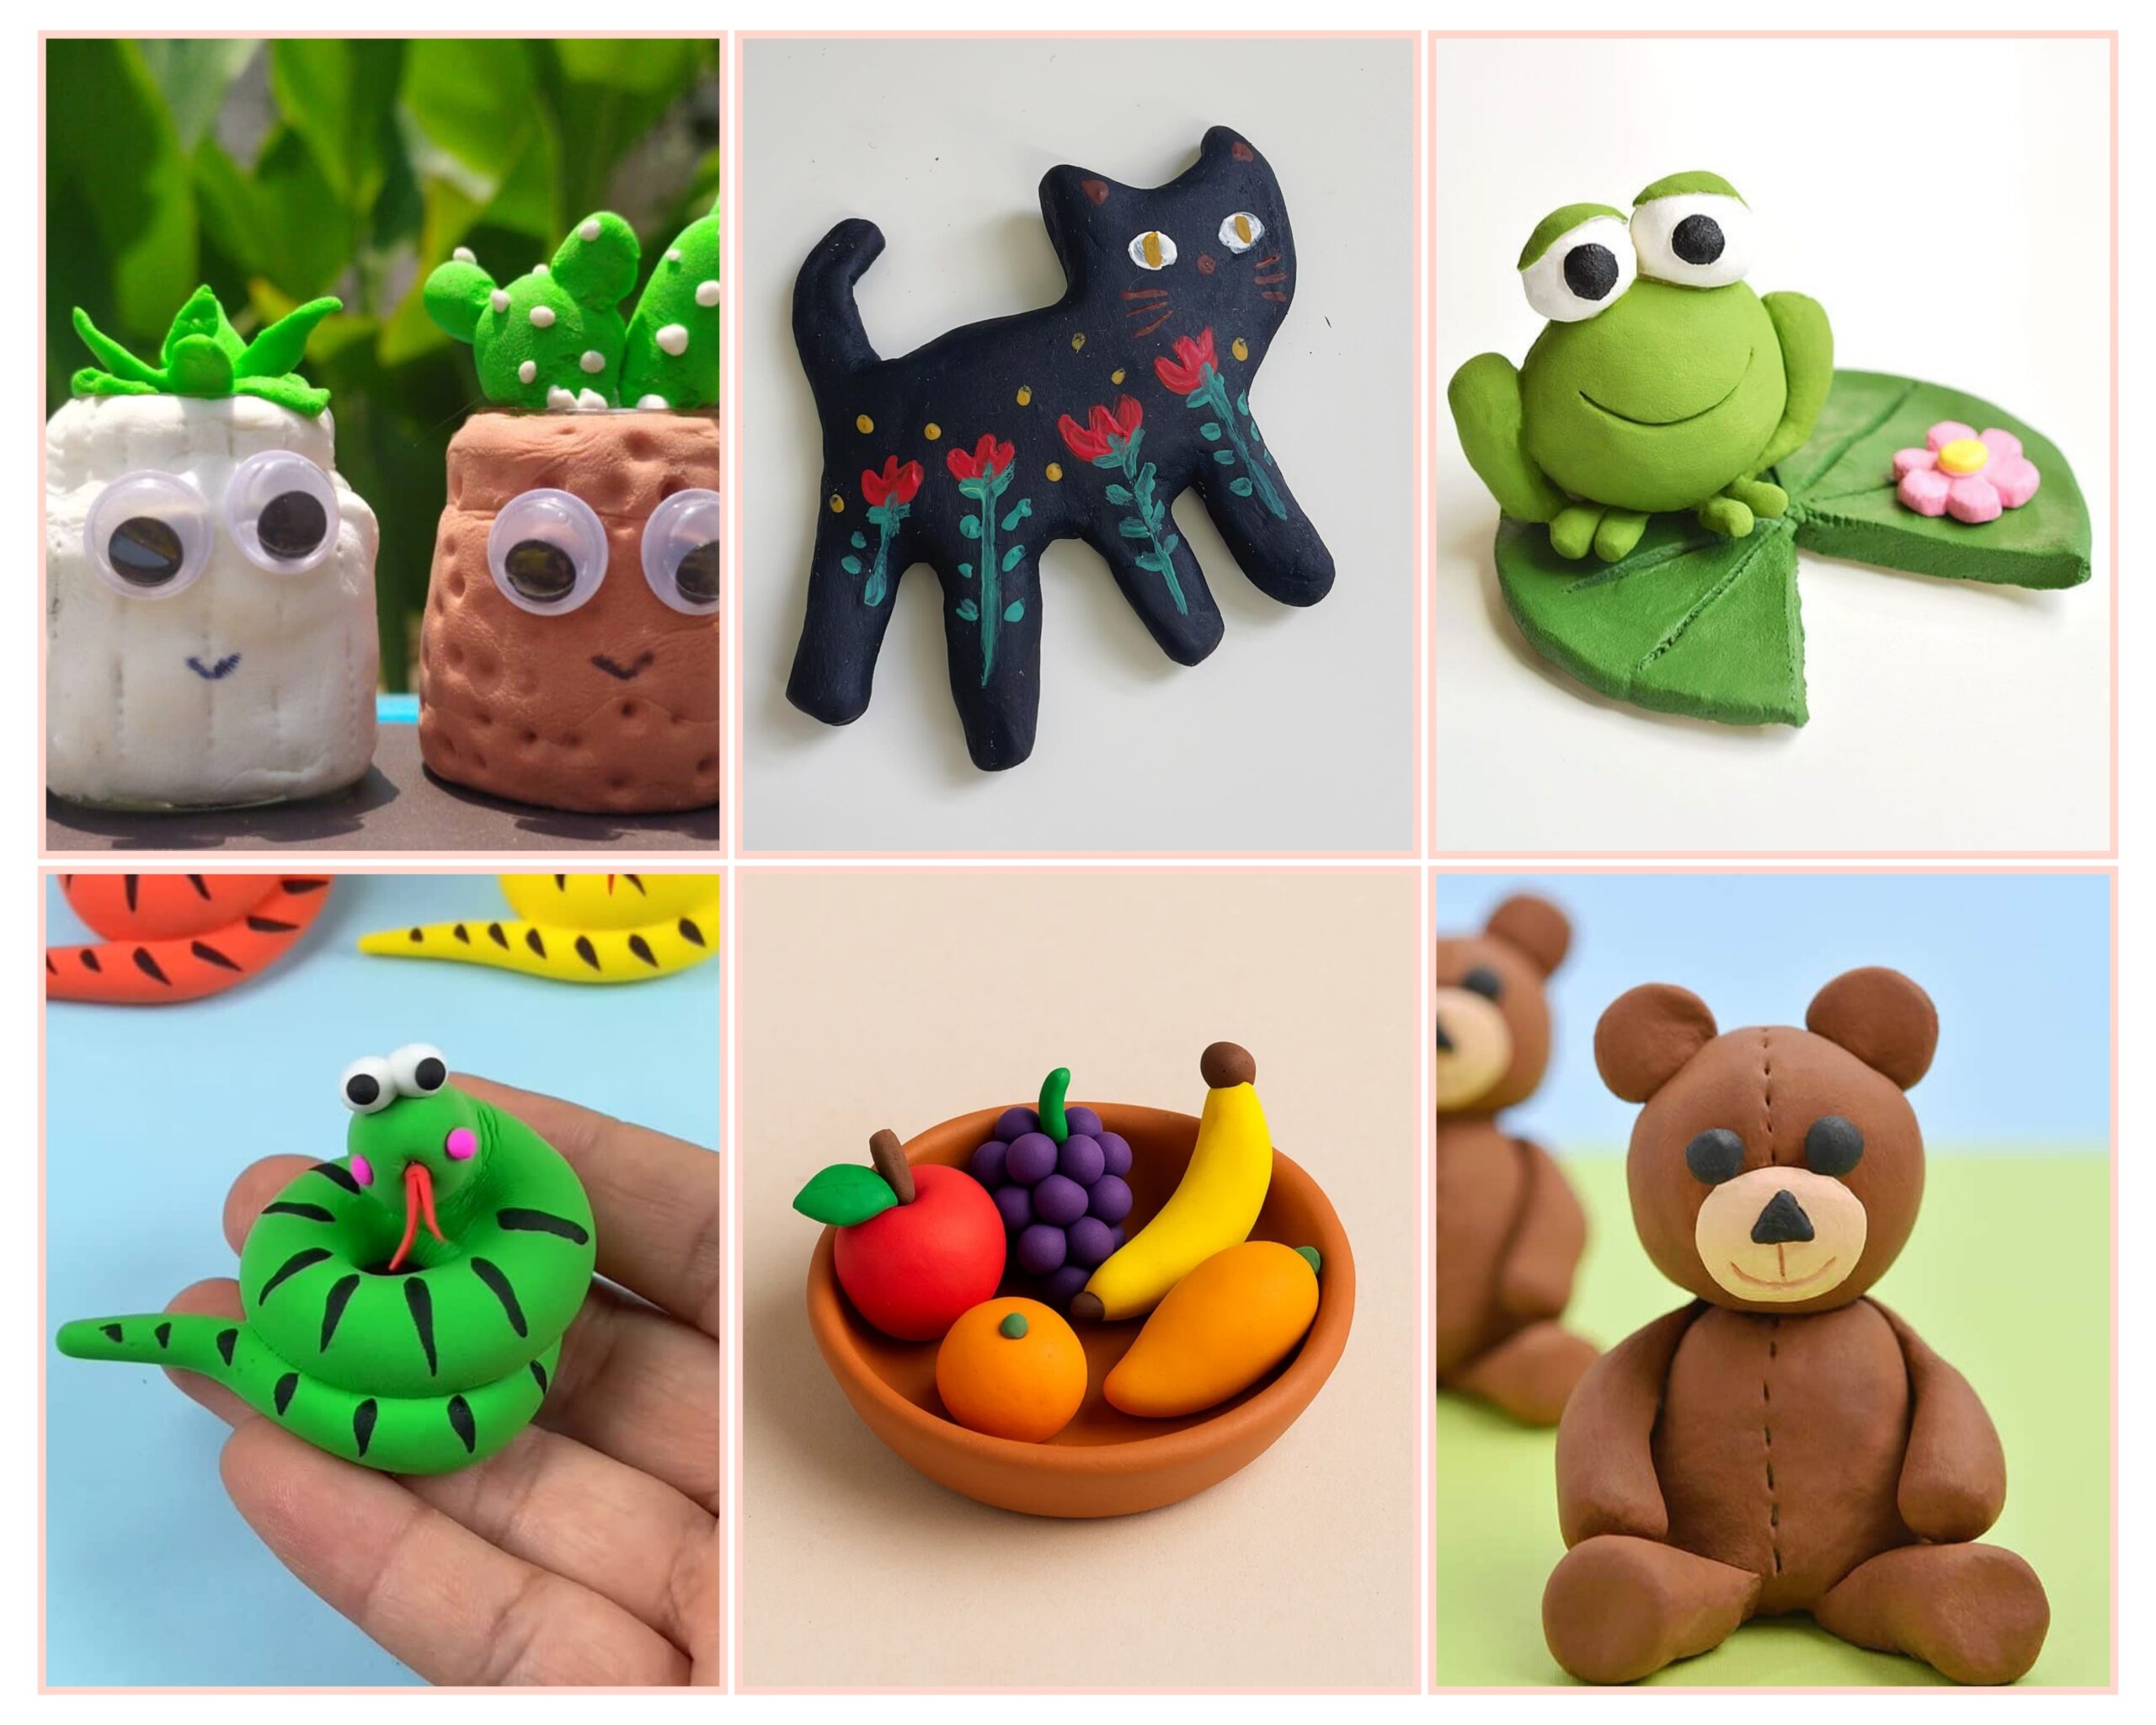
2. Clay Owl
To create a clay owl, begin by shaping an oval or egg-shaped body, slightly flattening the bottom to ensure it stands up. Then, roll a smaller ball of clay for the head and attach it to the top of the body, blending the connection smoothly with your fingers or a sculpting tool. Shape two small pointed pieces for the ears and place them on top of the head. For the wings, flatten and form two teardrop shapes and attach them to the sides of the body. For the face, create two small round eyes, add tiny balls for the pupils, and form a small triangle for the beak. Use a toothpick or sculpting tool to add feather-like texture to the wings and body. Once completed, allow the owl to dry or bake according to the instructions, then paint it to bring your owl to life with color and personality.
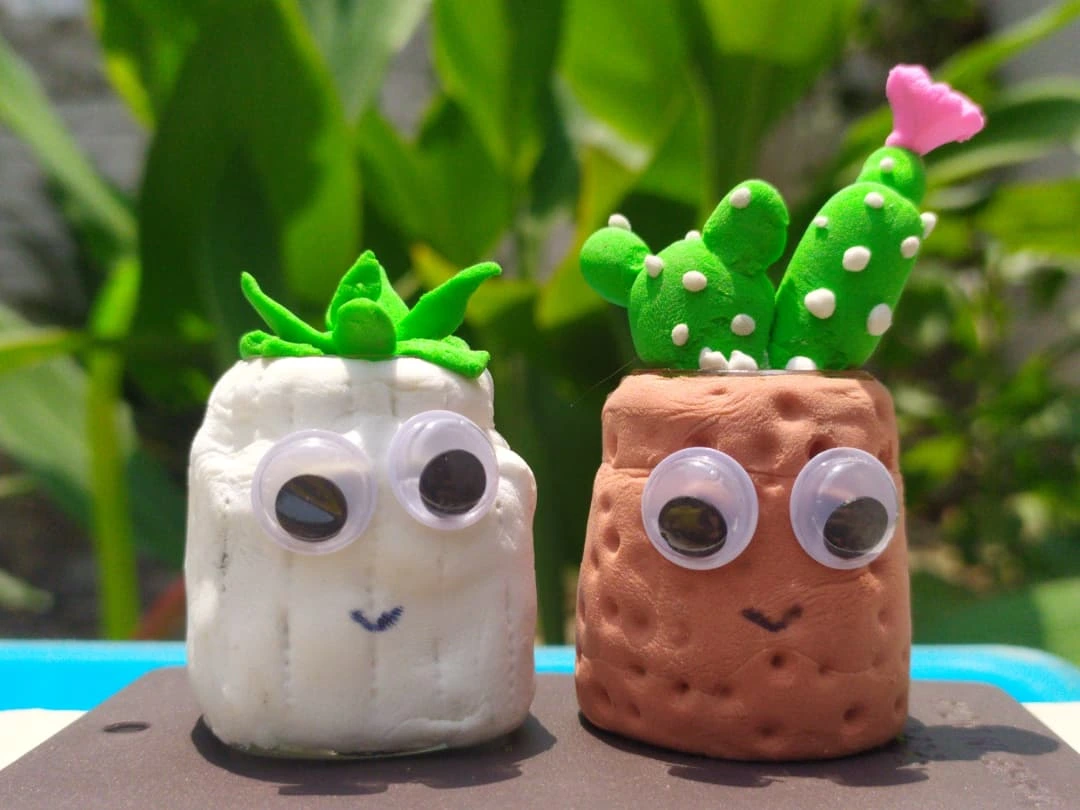
3. Clay Planters
To create small planters with clay, start by rolling out a flat piece of clay and cutting it into a rectangle or circle, depending on the shape you prefer. For a basic cylindrical planter, roll a long coil of clay and curl it into a circle, sealing the ends together, then smooth the edges to ensure it stays in place. For a square planter, assemble the shape by attaching four rectangular pieces, blending the joints seamlessly. After shaping the body, create a flat base to support the planter and make sure it’s level. For added decoration, you can add textures, patterns, or even small clay elements like handles.

4. Clay Leaf
These are wood earring studs with clay leaf. For this you will need one leaf cutter or else you clay take some clay, flatten it and make the lines of the leaves with a toothpick.
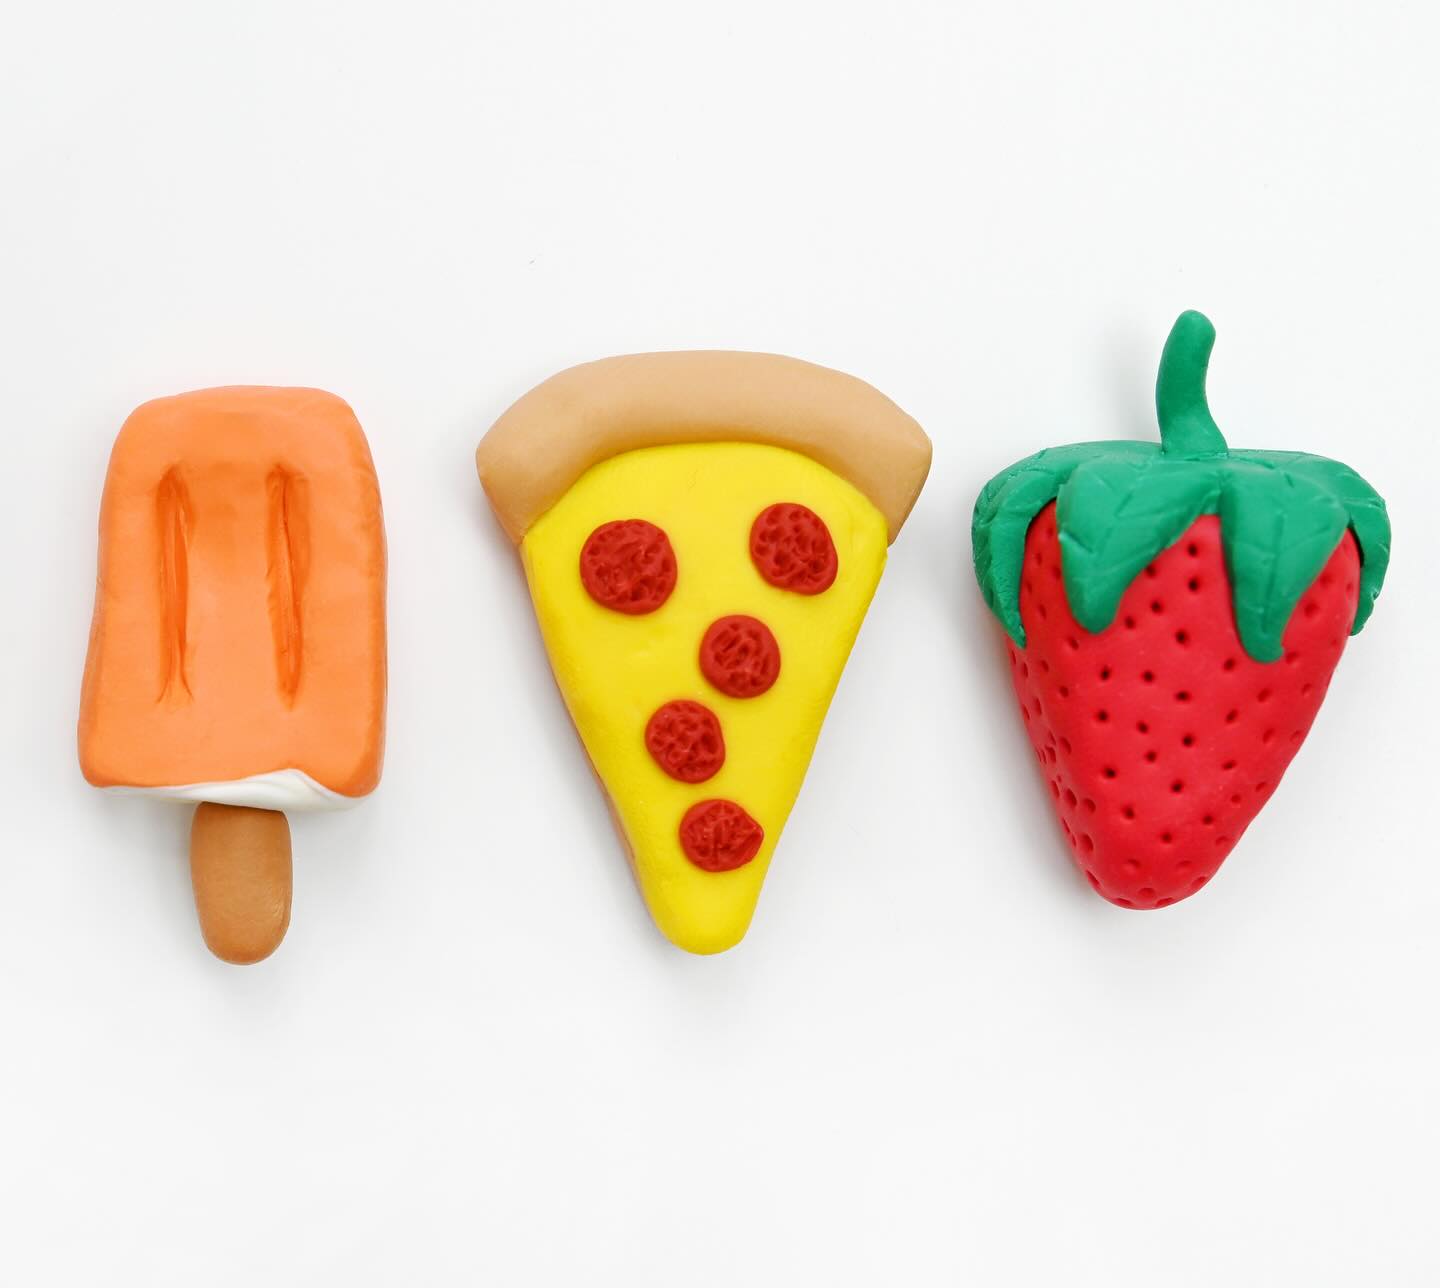
5. Clay Foods
To make small foods with clay, start by choosing the food item you want to create, such as a tiny pizza, burger, or piece of fruit. Begin by rolling out small amounts of clay into the appropriate shapes—like a flat circle for a pizza crust or a rounded shape for a fruit. For details, use different colors of clay to create toppings or layers, such as cheese, pepperoni, or lettuce. To add texture, use sculpting tools to carve or press patterns into the clay, such as seeds on a fruit or texture on a burger bun. For smaller details like eyes or a smile on food items like cupcakes or cookies, form tiny balls or shapes and attach them carefully. Once the food is fully shaped, let it dry or bake it according to the clay’s instructions, then paint or add glossy finishes for a realistic look. These miniature food creations can be used for crafting, jewelry, or as decoration.
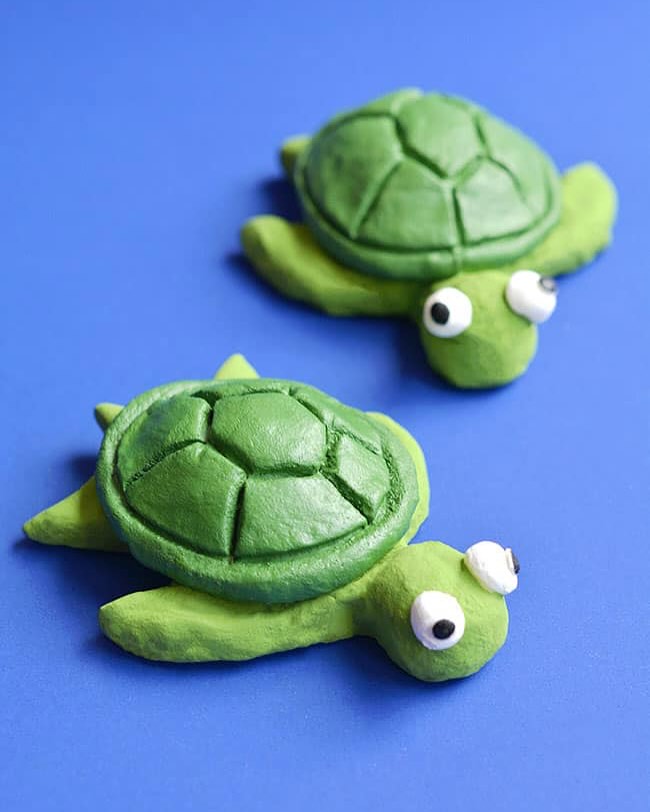
6. Clay Tortoise
To make a clay tortoise, begin by shaping a rounded oval for the shell, slightly flattening the top to resemble its dome-like shape. Next, form a smaller oval for the head and attach it to one end of the shell, smoothing the joint with your fingers or a tool. Create four short, thick legs and a tiny tail, then attach them underneath the shell in the appropriate positions. For added detail, use a toothpick or sculpting tool to carve patterns or texture on the shell, and make small indentations for the eyes on the head. Once the tortoise is fully assembled, let the clay air dry or bake it according to the clay’s instructions, and paint it if desired for a realistic or colorful finish.
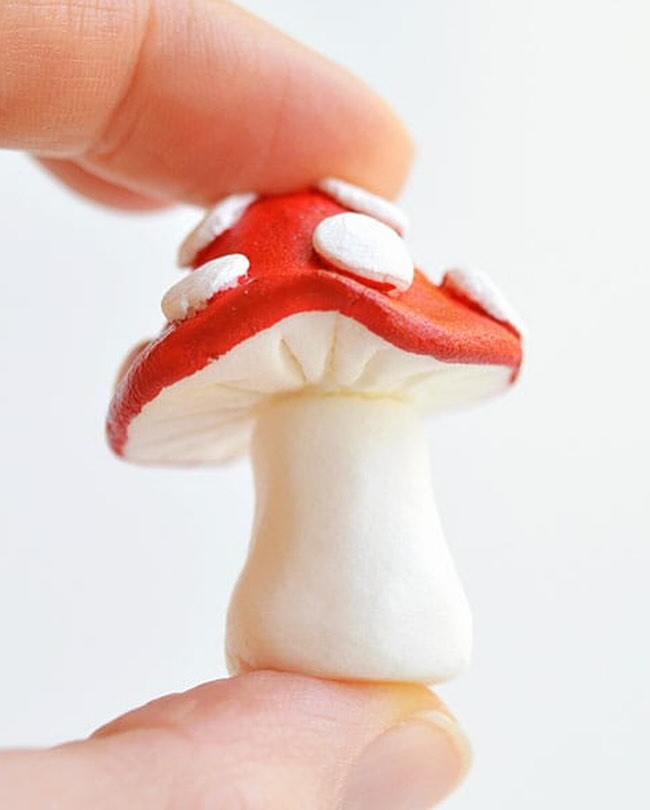
7. Clay Mushroom
To create a clay mushroom, begin by molding a small cone or cylindrical shape for the stem, gently flattening the base so it stands steadily. Next, form a rounded dome or half-sphere to serve as the cap, and carefully place it on top of the stem, blending the connection smoothly with your fingers or a tool. For added detail, use a toothpick or sculpting tool to carve gill-like lines beneath the cap. To give it a playful touch, you can roll tiny clay balls and stick them onto the cap as decorative spots. Once your mushroom is assembled, allow it to air dry or bake it following the clay’s guidelines, then paint it in your favorite colors to finish the look.
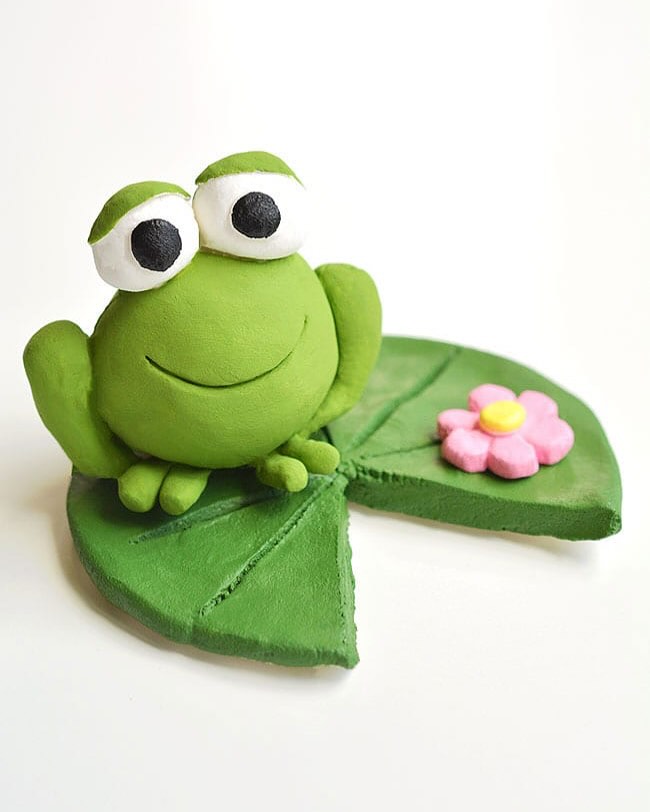
8. Clay Frog
To make a clay frog with a water lily leaf, start by shaping the frog’s body. Begin with an oval or rounded shape for the body and a smaller oval for the head, attaching them together smoothly. Roll out small pieces of clay to form the legs, making the back legs larger and more elongated for a jumping pose, and the front legs shorter. Attach the legs to the body, ensuring they’re positioned in a natural way. For the face, add two round eyes on top of the head, shaping them with small balls of clay and adding tiny dots for pupils. Next, create the water lily leaf by rolling out a flat circle of clay, shaping the edges into a slightly curled, organic form, and adding veins or texture with a sculpting tool. Position the frog on the leaf, securing it in place. Once the frog and leaf are fully shaped, let the clay dry or bake it according to the instructions, then paint it with shades of green for the frog and vibrant colors for the leaf to bring your creation to life.
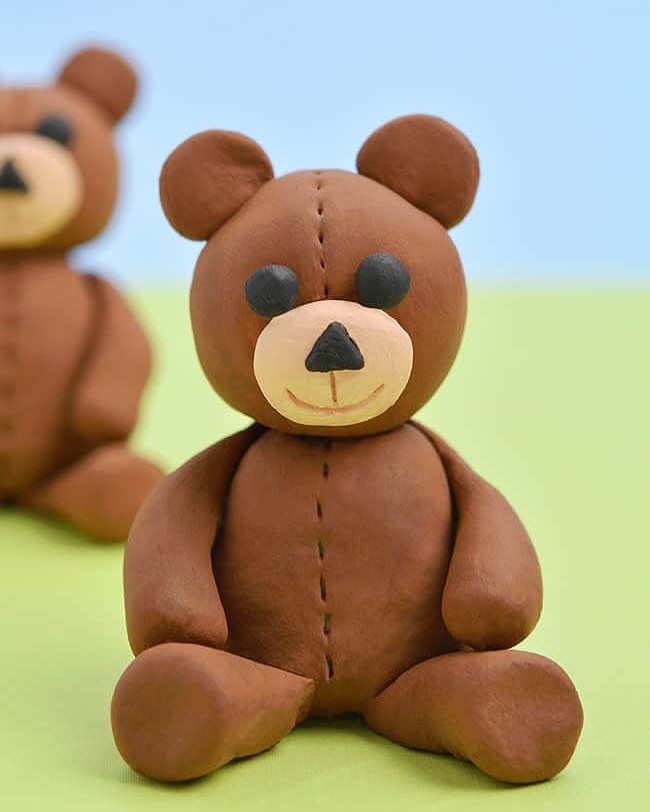
9. Clay Teddybear
To make a clay teddy bear, begin by forming a medium ball of clay into an oval shape for the body and a slightly smaller one for the head. Carefully attach the head to the top of the body and smooth the seam using your fingers or a sculpting tool. Next, create two small circular shapes for the ears and place them on top of the head. For the arms and legs, roll out four short, thick cylinders and attach them to the sides and bottom of the body. Use tiny bits of clay to shape the snout, nose, and eyes, gently pressing them into position. You can add fur-like texture using a toothpick or modeling tool. Finally, allow the bear to dry or bake it as directed, and paint it to bring your adorable teddy to life.
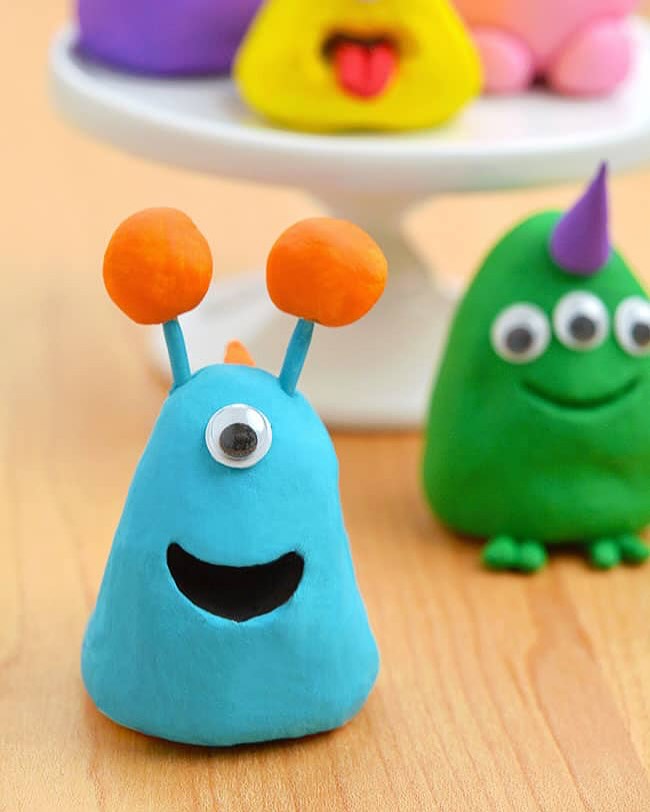
10. Cute Alien
To create a clay alien, begin by shaping an oval or elongated sphere for the body. Then, form a smaller sphere for the head and attach it to the body, smoothing the connection between the two. For the alien’s large eyes, shape two small ovals and place them on the head, adding tiny dots in the center for pupils. Next, roll out thin, long shapes for the arms and legs, attaching them to the body, and form the hands and feet by making small discs or elongated pieces of clay. You can add antennas by rolling out small coils of clay and attaching them to the top of the head. Use a sculpting tool to carve in extra details like lines or patterns on the body for a more alien look. Once your alien is complete, let it dry or bake according to the instructions, and paint it in bright, unusual colors to achieve an otherworldly appearance.
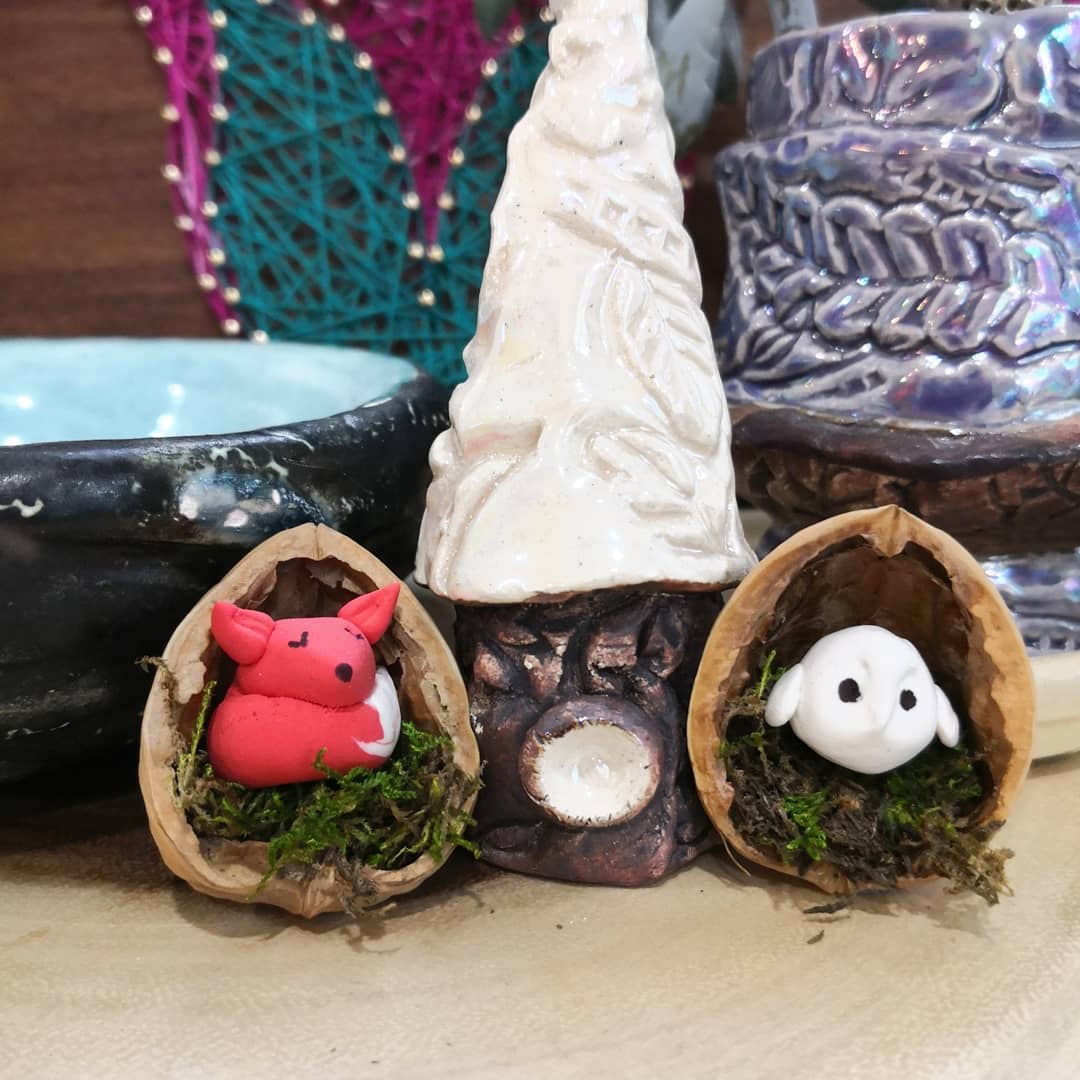
11. Cute Creatures with Clay
To create cute creatures with clay, start by envisioning a playful design, like a little monster, animal, or fantastical being. Shape the body using simple forms such as spheres, ovals, or cones to keep it soft and rounded. For the head, make a smaller shape and attach it to the body, blending the connection smoothly. Add charming features like oversized eyes, a tiny nose, or a small smiling mouth to give it a cute look. Use small pieces of clay to form tiny ears, arms, legs, or a tail, keeping the overall proportions endearing and compact. Add texture using a sculpting tool, carving patterns into the body or face, or create a fuzzy effect with tiny clay dots or lines. After completing the creature, let it dry or bake it according to the clay’s instructions, then paint it in bright, cheerful colors to bring your cute creature to life.
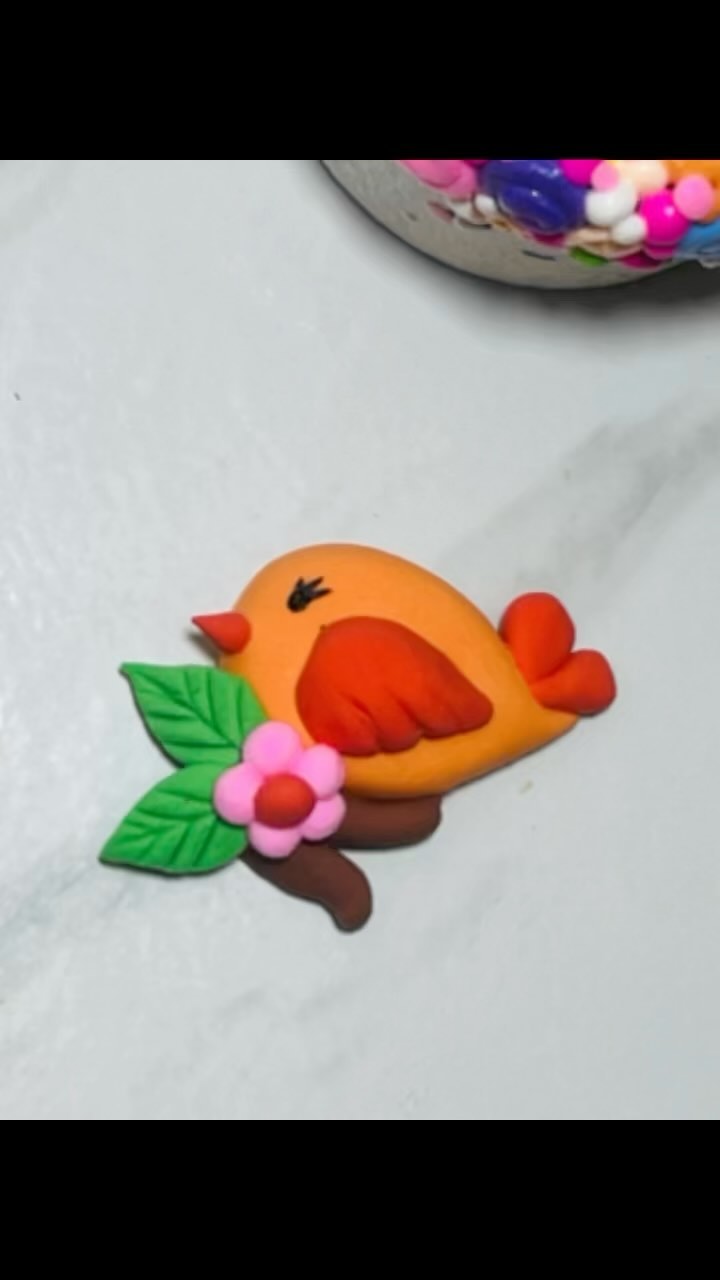
12. Cute Bird
Begin by molding a small piece of clay into an oval shape to form the bird’s body. Next, roll a smaller ball of clay for the head and carefully join it to one end of the body, smoothing the connection with your fingers or a sculpting tool. Shape two thin, curved pieces for the wings and attach them to the sides. For the tail, craft a fan-shaped piece and fix it to the back, adding texture using a toothpick or modeling tool. Make a tiny beak and eyes from small clay bits or carve them directly into the head. Allow the clay to air dry or bake it as directed, and once it’s set, you can paint the bird to enhance its appearance.
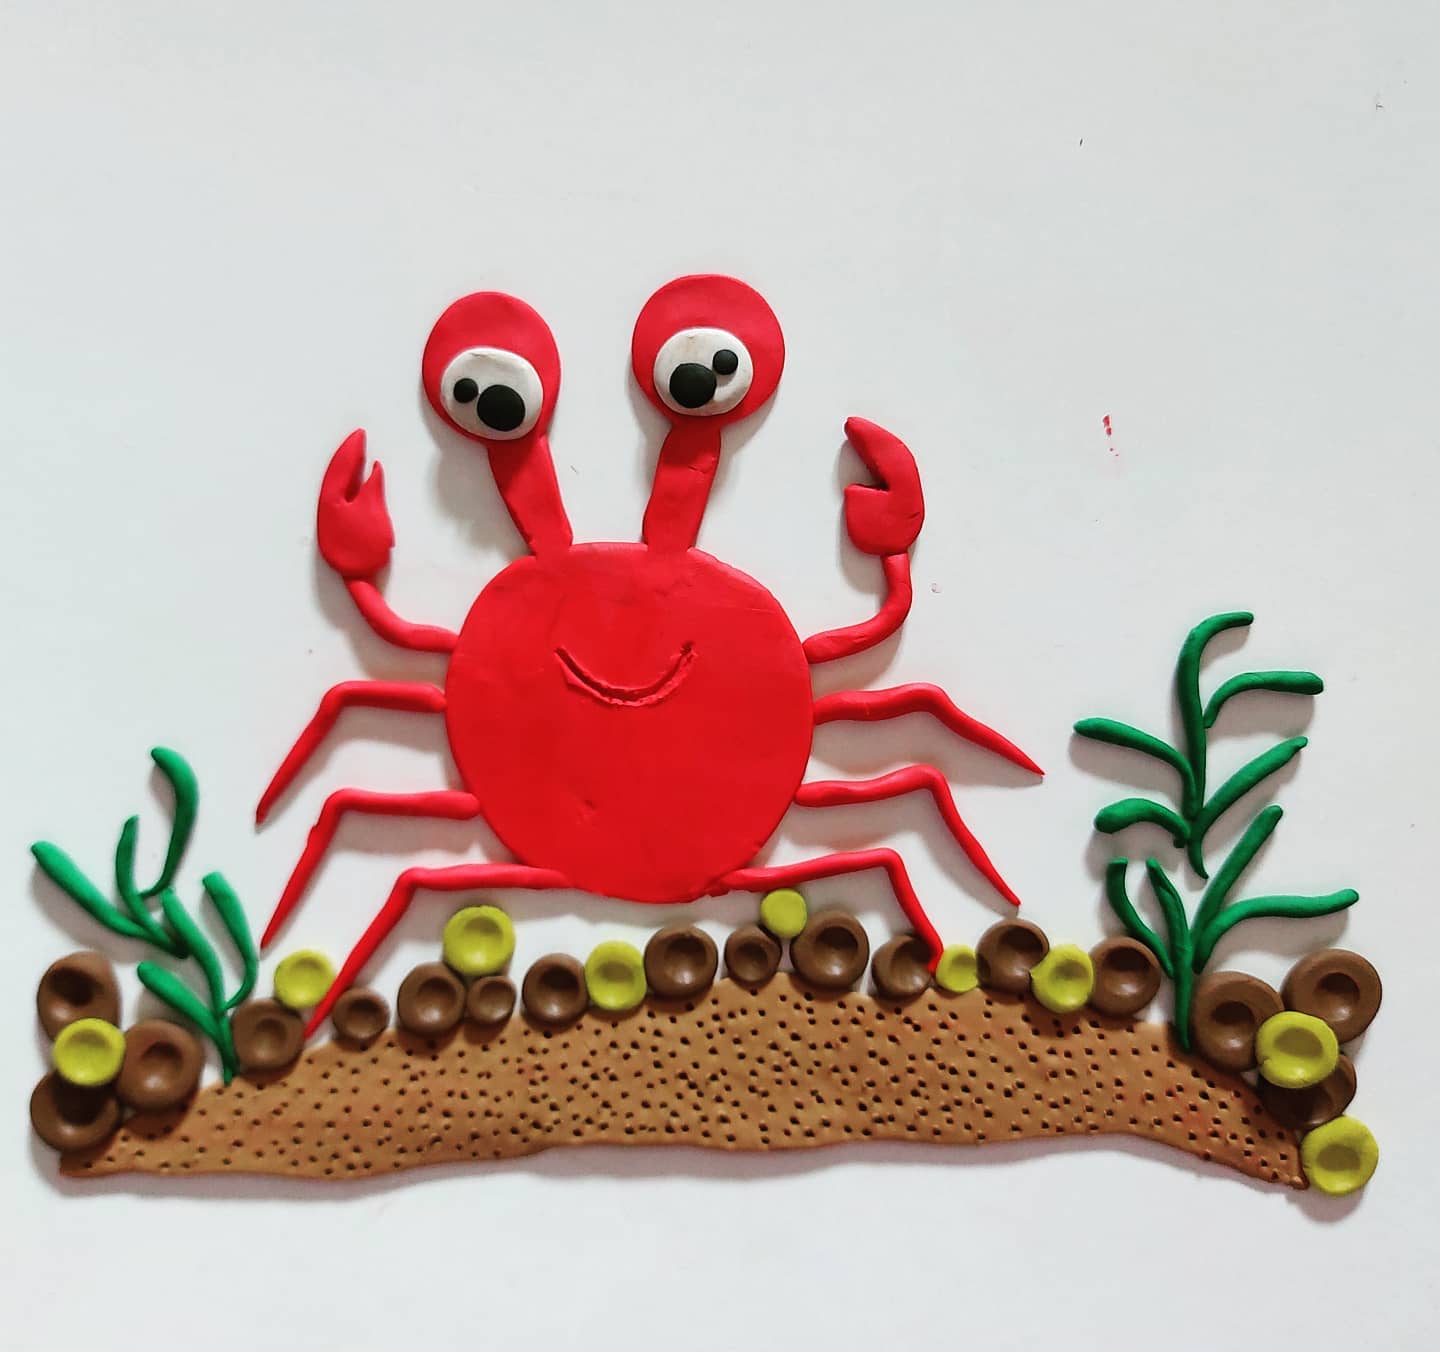
13. Clay Crab
To create a clay crab, begin by molding a flat, round disc to serve as the body. Roll out eight small, curved pieces of clay for the legs and attach four to each side. Then, shape two thicker pieces with pincer-like ends for the claws and secure them to the front of the body. For the eyes, form two tiny clay balls and place them on short stalks before positioning them on top of the body. Add details such as lines or segments to the legs and claws using a toothpick or sculpting tool. Once assembled, allow the crab to air dry or bake it according to the clay’s directions, and optionally, paint it for a vibrant look.
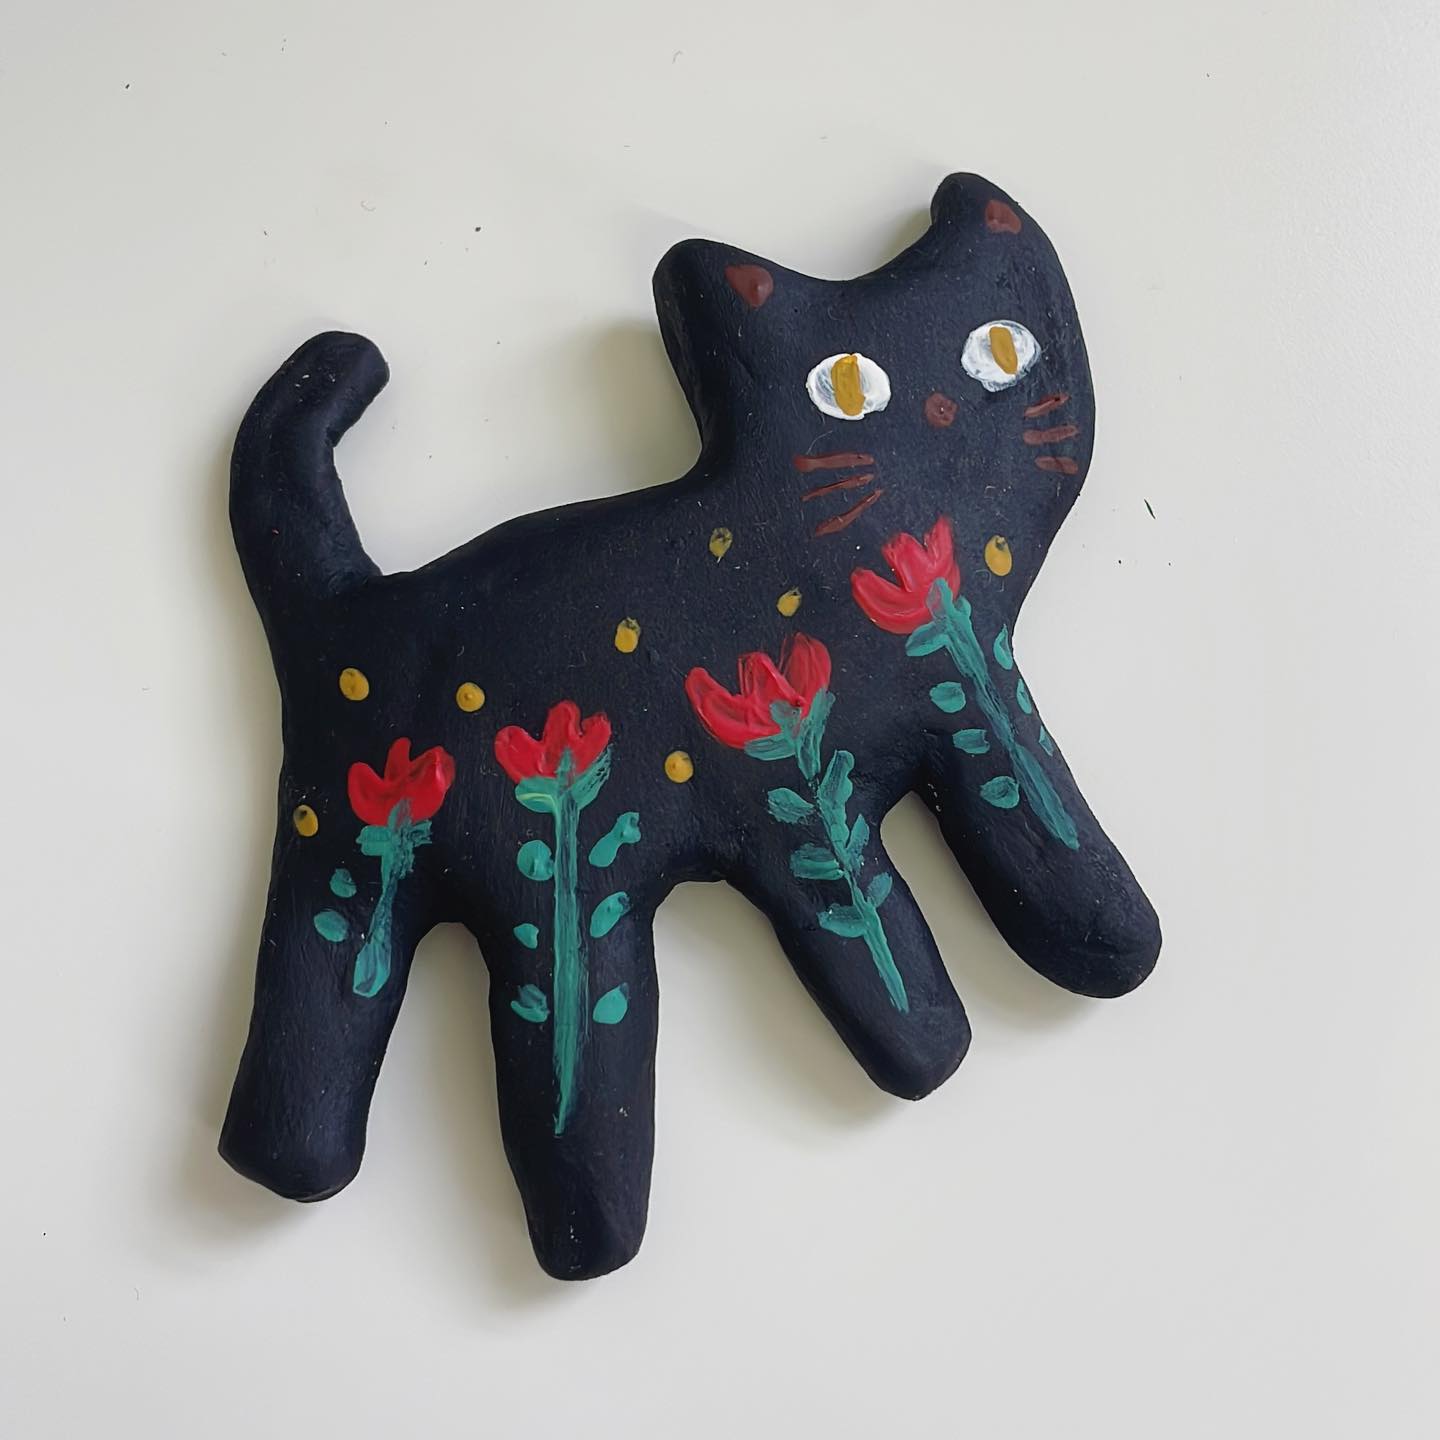
14. Creative Cat
To make this cute creative crab shape out some black clay in the form of a cat, definiting face, legs and a tail. Let it dry. After that draw the face with paint and design some flowers on the body.
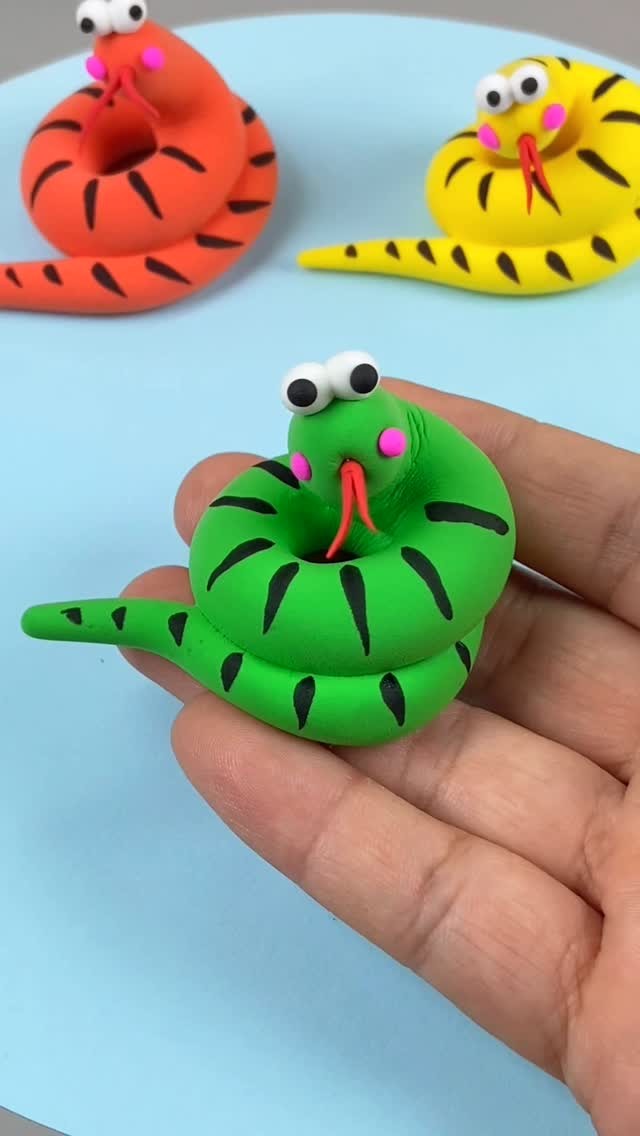
15. Clay Snake
To create a clay snake, begin by rolling a long, smooth cylinder of clay to form the body. Gradually taper one end for the tail, leaving the other end slightly wider for the head. Flatten the thicker end and shape it into either a rounded or triangular form, depending on the kind of snake you wish to make. Use a sculpting tool or a toothpick to add features like small indentations for eyes and a forked tongue at the front. You can also decorate the body with patterns by pressing small clay pieces onto the surface or carving lines to create scales. After finishing the snake, allow it to dry or bake it as per the clay’s instructions, and paint it for a realistic or creative touch.