

Origami is a quick and entertaining hobby that involves folding skills. Simply folding paper in different directions to create a range of patterns and crafts is the most basic origami technique.

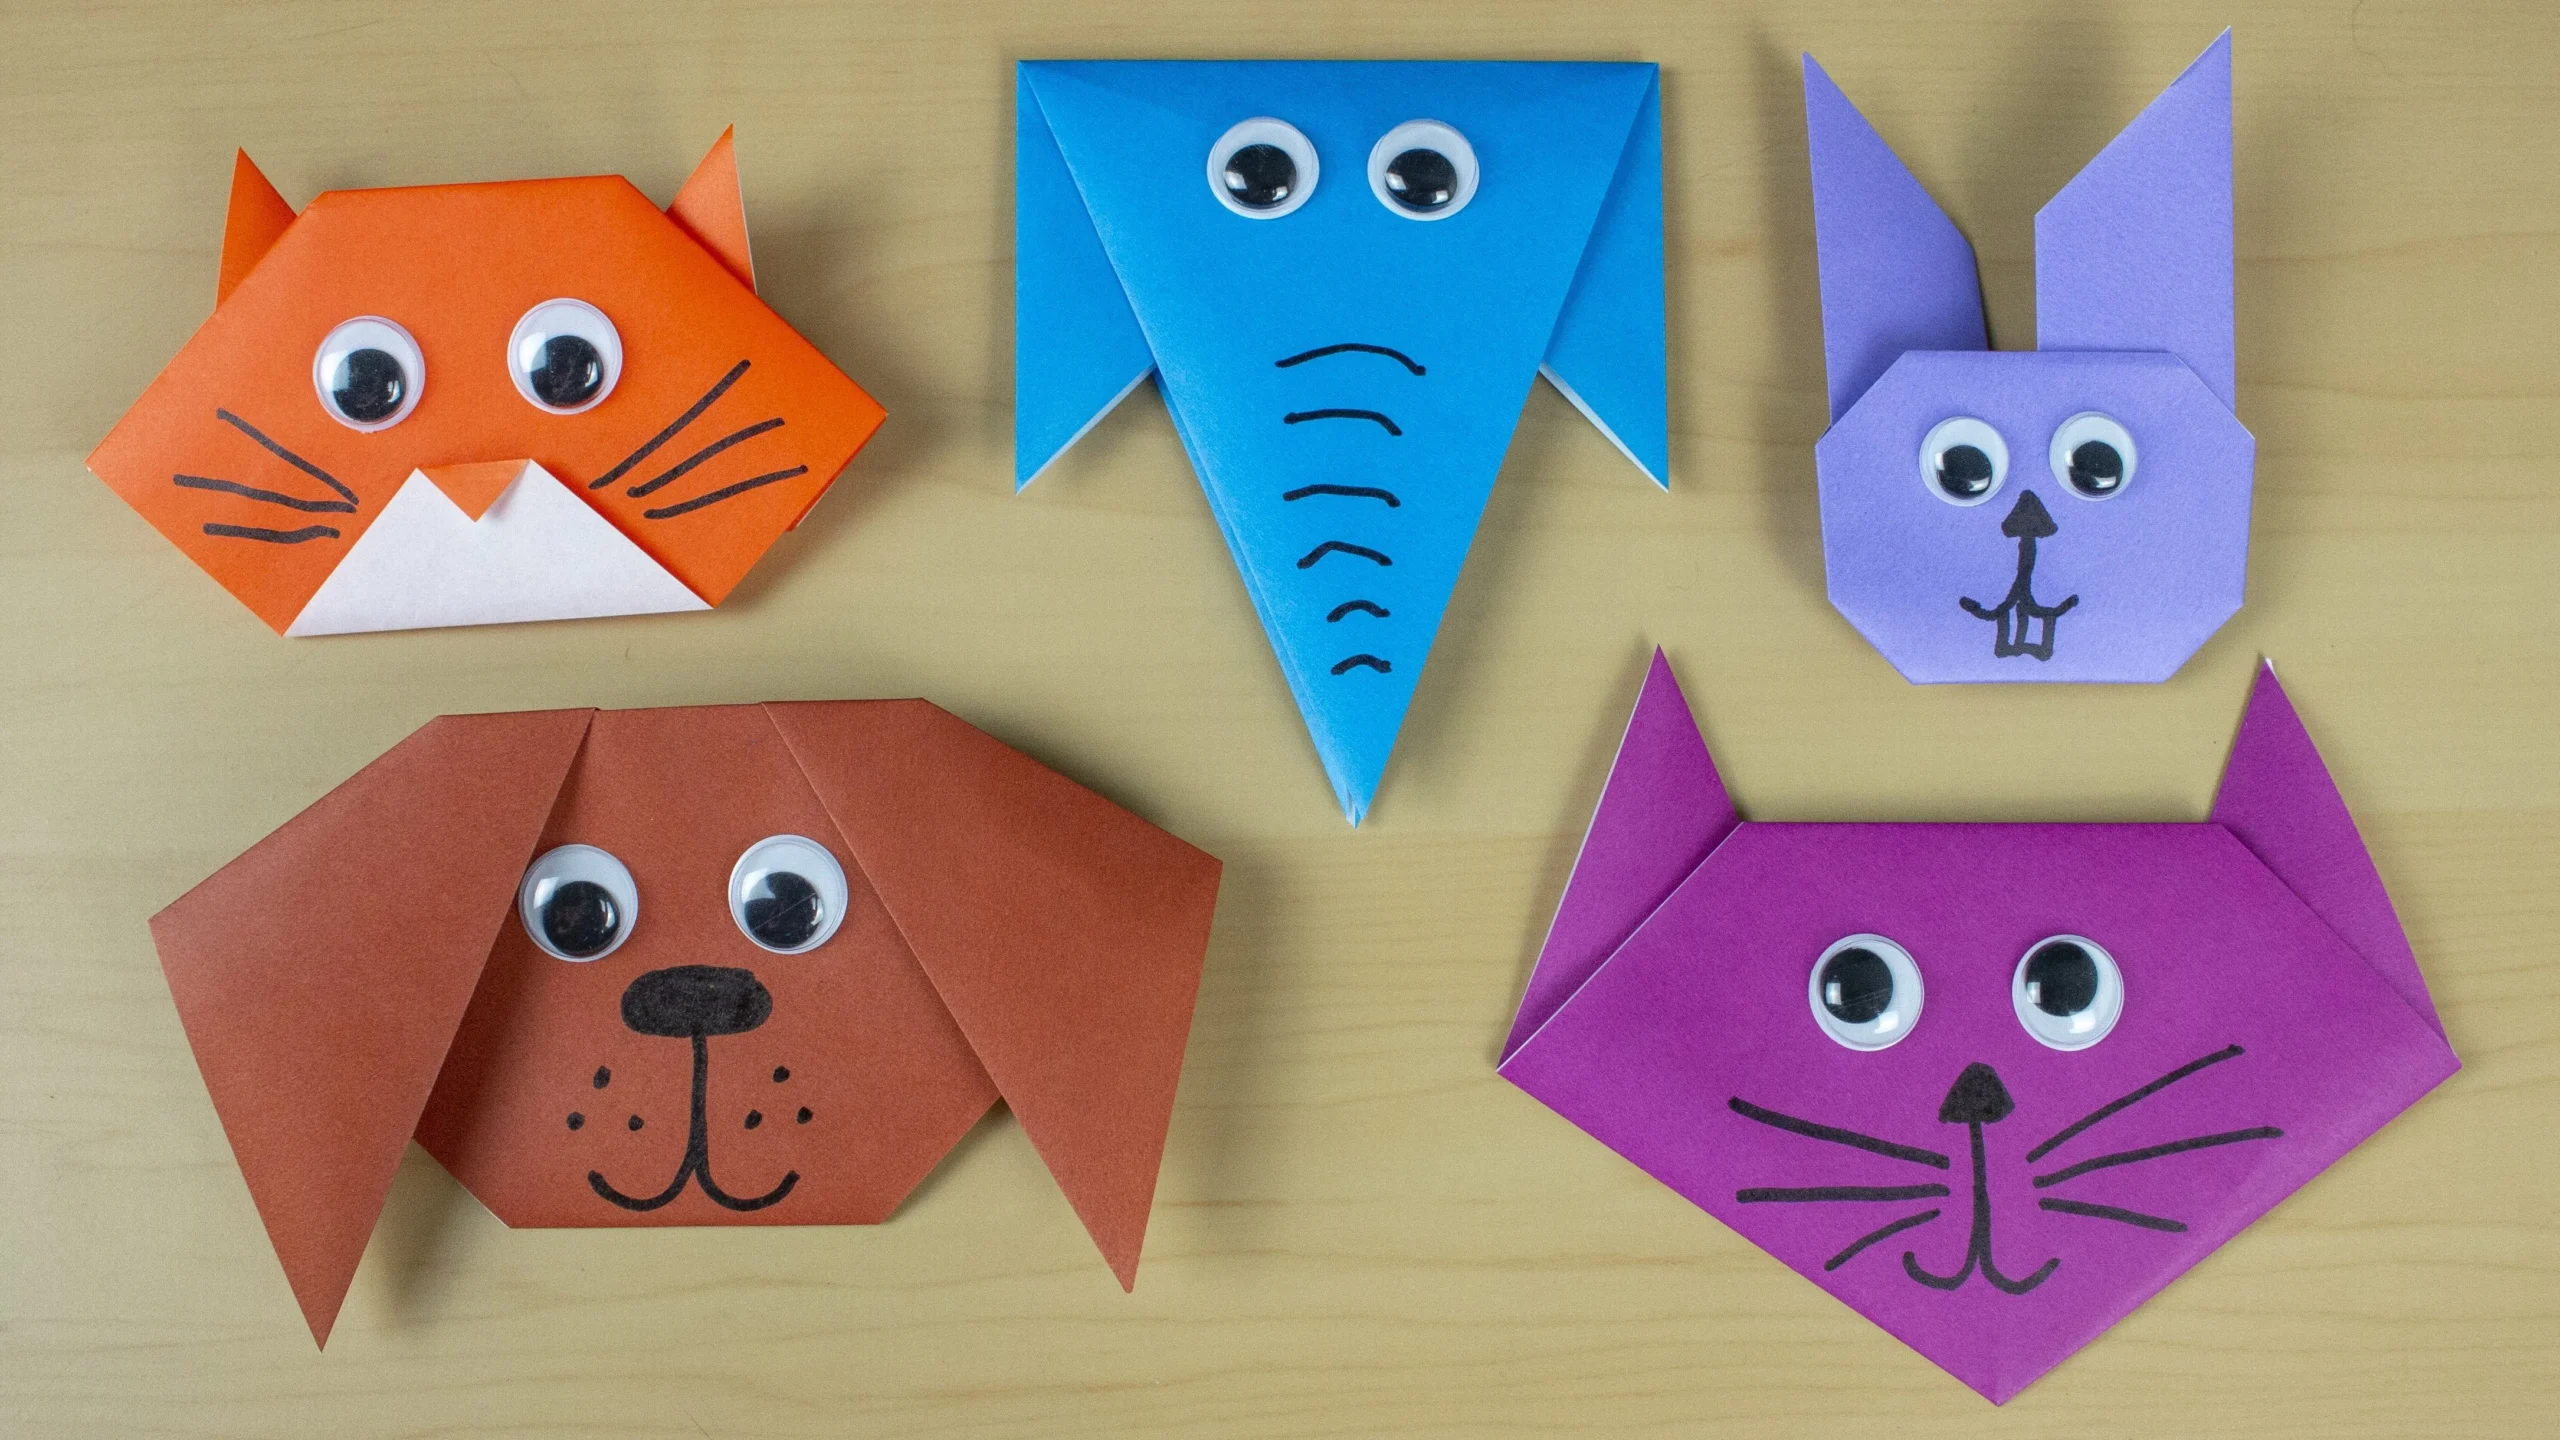
These origami animal faces will make great and creative playstuffs for kids. Kids can have a lot of fun playing with making these animal faces and this will also keep your kids away from the screen. Let’s check out this easy and entertaining tutorial today!
Materials You’ll Require :
- Coloured Origami Sheets– Dimensions – 15 CM X 15 CM
- Googly Eyes
- Glue
- Black Marker Pen
STEP-BY-STEP TUTORIAL:
How To Make Dog Face

STEP 1: Squared Paper
Choose a coloured piece of paper that is squared. A size of 15 cm by 15 cm is advised. Selecting vivid or neon-coloured paper for origami can also be visually appealing and calming.

STEP 2: Fold The Paper
Start folding the origami paper. Turn the paper horizontally and endpoint fold the paper from the bottom point to the top point.

STEP 3: Repeat Fold
Crease the fold nicely so that a division line can be visible. Repeat the step for the other side of the origami paper to make this dog face, so the entire paper is divided into four equal parts.

STEP 4: Making ears
Fold the pointed opposite sides of the triangle to form the ears of the dog. Now fold the third edge to create the mouth part.

STEP 5: Eyes and Nose
Add googly eyes using glue or use a marker to make the eyes. Draw a cute nose.
Your cute DIY Dog Face is ready!
How To Make Fox Face
STEP 1: Squared Paper
Choose a coloured piece of paper that is squared. A size of 15 cm by 15 cm is advised. Selecting vivid or neon-coloured paper for origami can also be visually appealing and calming.
STEP 2: Fold The Paper
Start folding the origami paper. Turn the paper horizontally and endpoint fold the paper from the bottom point to the top point.
STEP 3: Fold Again
Take the endpoint of the triangle and fold again to form a trapezium shape.
STEP 4: Making ears
Fold the pointed opposite sides of the triangle to form the ears of the fox. And rotate the whole piece upside down as shown in the figure.
STEP 5: Eyes and Nose
Add googly eyes using glue or use a marker to make the eyes. Draw a cute nose. Your cute DIY Fox Face is ready!
How To Make Cat Face
STEP 1: Squared Paper
Choose a coloured piece of paper that is squared. A size of 15 cm by 15 cm is advised.
STEP 2: Fold The Paper
Start folding the origami paper. Turn the paper horizontally and endpoint fold the paper from the bottom point to the top point.
STEP 3: Making ears
Fold the pointed opposite sides of the triangle to form the ears of the cat.
STEP 4: Fold Again
Fold the third edge of the triangle as shown in the image. This will give the shape of a cat’s face.
STEP 5: Eyes and Nose
Add googly eyes using glue or a marker to make the eyes and whiskers. Draw a cute nose. Your cute DIY Cat Face is ready!
How To Make Bunny Face
STEP 1: Take a squared paper and fold
Choose a coloured piece of paper that is squared. A size of 15 cm by 15 cm is advised.
STEP 2: Make Folds
Start folding the origami paper. Turn the paper horizontally and endpoint fold the paper from the bottom point to the top point. Fold again to make a smaller triangle.
STEP 3: Fold Again
Now open the paper and take the base of triangle and fold properly as shown in the image. This will give the shape of a boat. Again take the pointed side of the triangle and fold.
STEP 4: Making of the ears
Take both the opposite sides and fold. Make sure while folding, you must place your fingers in the middle so that both ears are of the same length and shape.
STEP 5: Flip
After folding the paper as per the instructions, flip the origami paper upside down and fold the opposite sides of the ears to make the structure of the bunny face.
STEP 6: Eyes and Nose
Flip again and add googly eyes and draw a cute nose. Your DIY Bunny Face is ready.
How To Make Pig Face
STEP 1: Squared Paper
Choose a coloured piece of paper that is squared. A size of 15 cm by 15 cm is advised. Selecting vivid or neon-coloured paper for origami can also be visually appealing and calming.
STEP 2: Fold The Paper
Start folding the origami paper. Take two opposite sides and fold the edge to the centre of the paper.
STEP 3: Repeat Fold
Repeat the same with the other side. A hexagon will form.
STEP 4: Making the Shape of the Face
Fold the hexagon shape in half.
STEP 5: Making the Ears
Take the straight line part and fold the two sides as shown. This will create the ears.
STEP 5: Making the Nose and Mouth
Take the pointed side and fold them. After folding take just one layer and unfold it. This will create the 3D effect of the nose part.
STEP 6: Add Eyes and Nose
Add googly eyes and draw a cute nose. Your DIY Pig Face is ready.
So far, we have made five cute animal faces using origami paper. These animal faces are simple to make and are a fun and creative task for your kids.


