Crafting isn’t just a fun activity for children—it offers a range of meaningful benefits too! It sparks imagination, boosts self-esteem, and helps enhance fine motor skills. Plus, it’s a fantastic opportunity for families to connect and make cherished memories together. Want to explore some simple and exciting craft ideas for your little one? Read on to discover more!
1. Kitty Craft
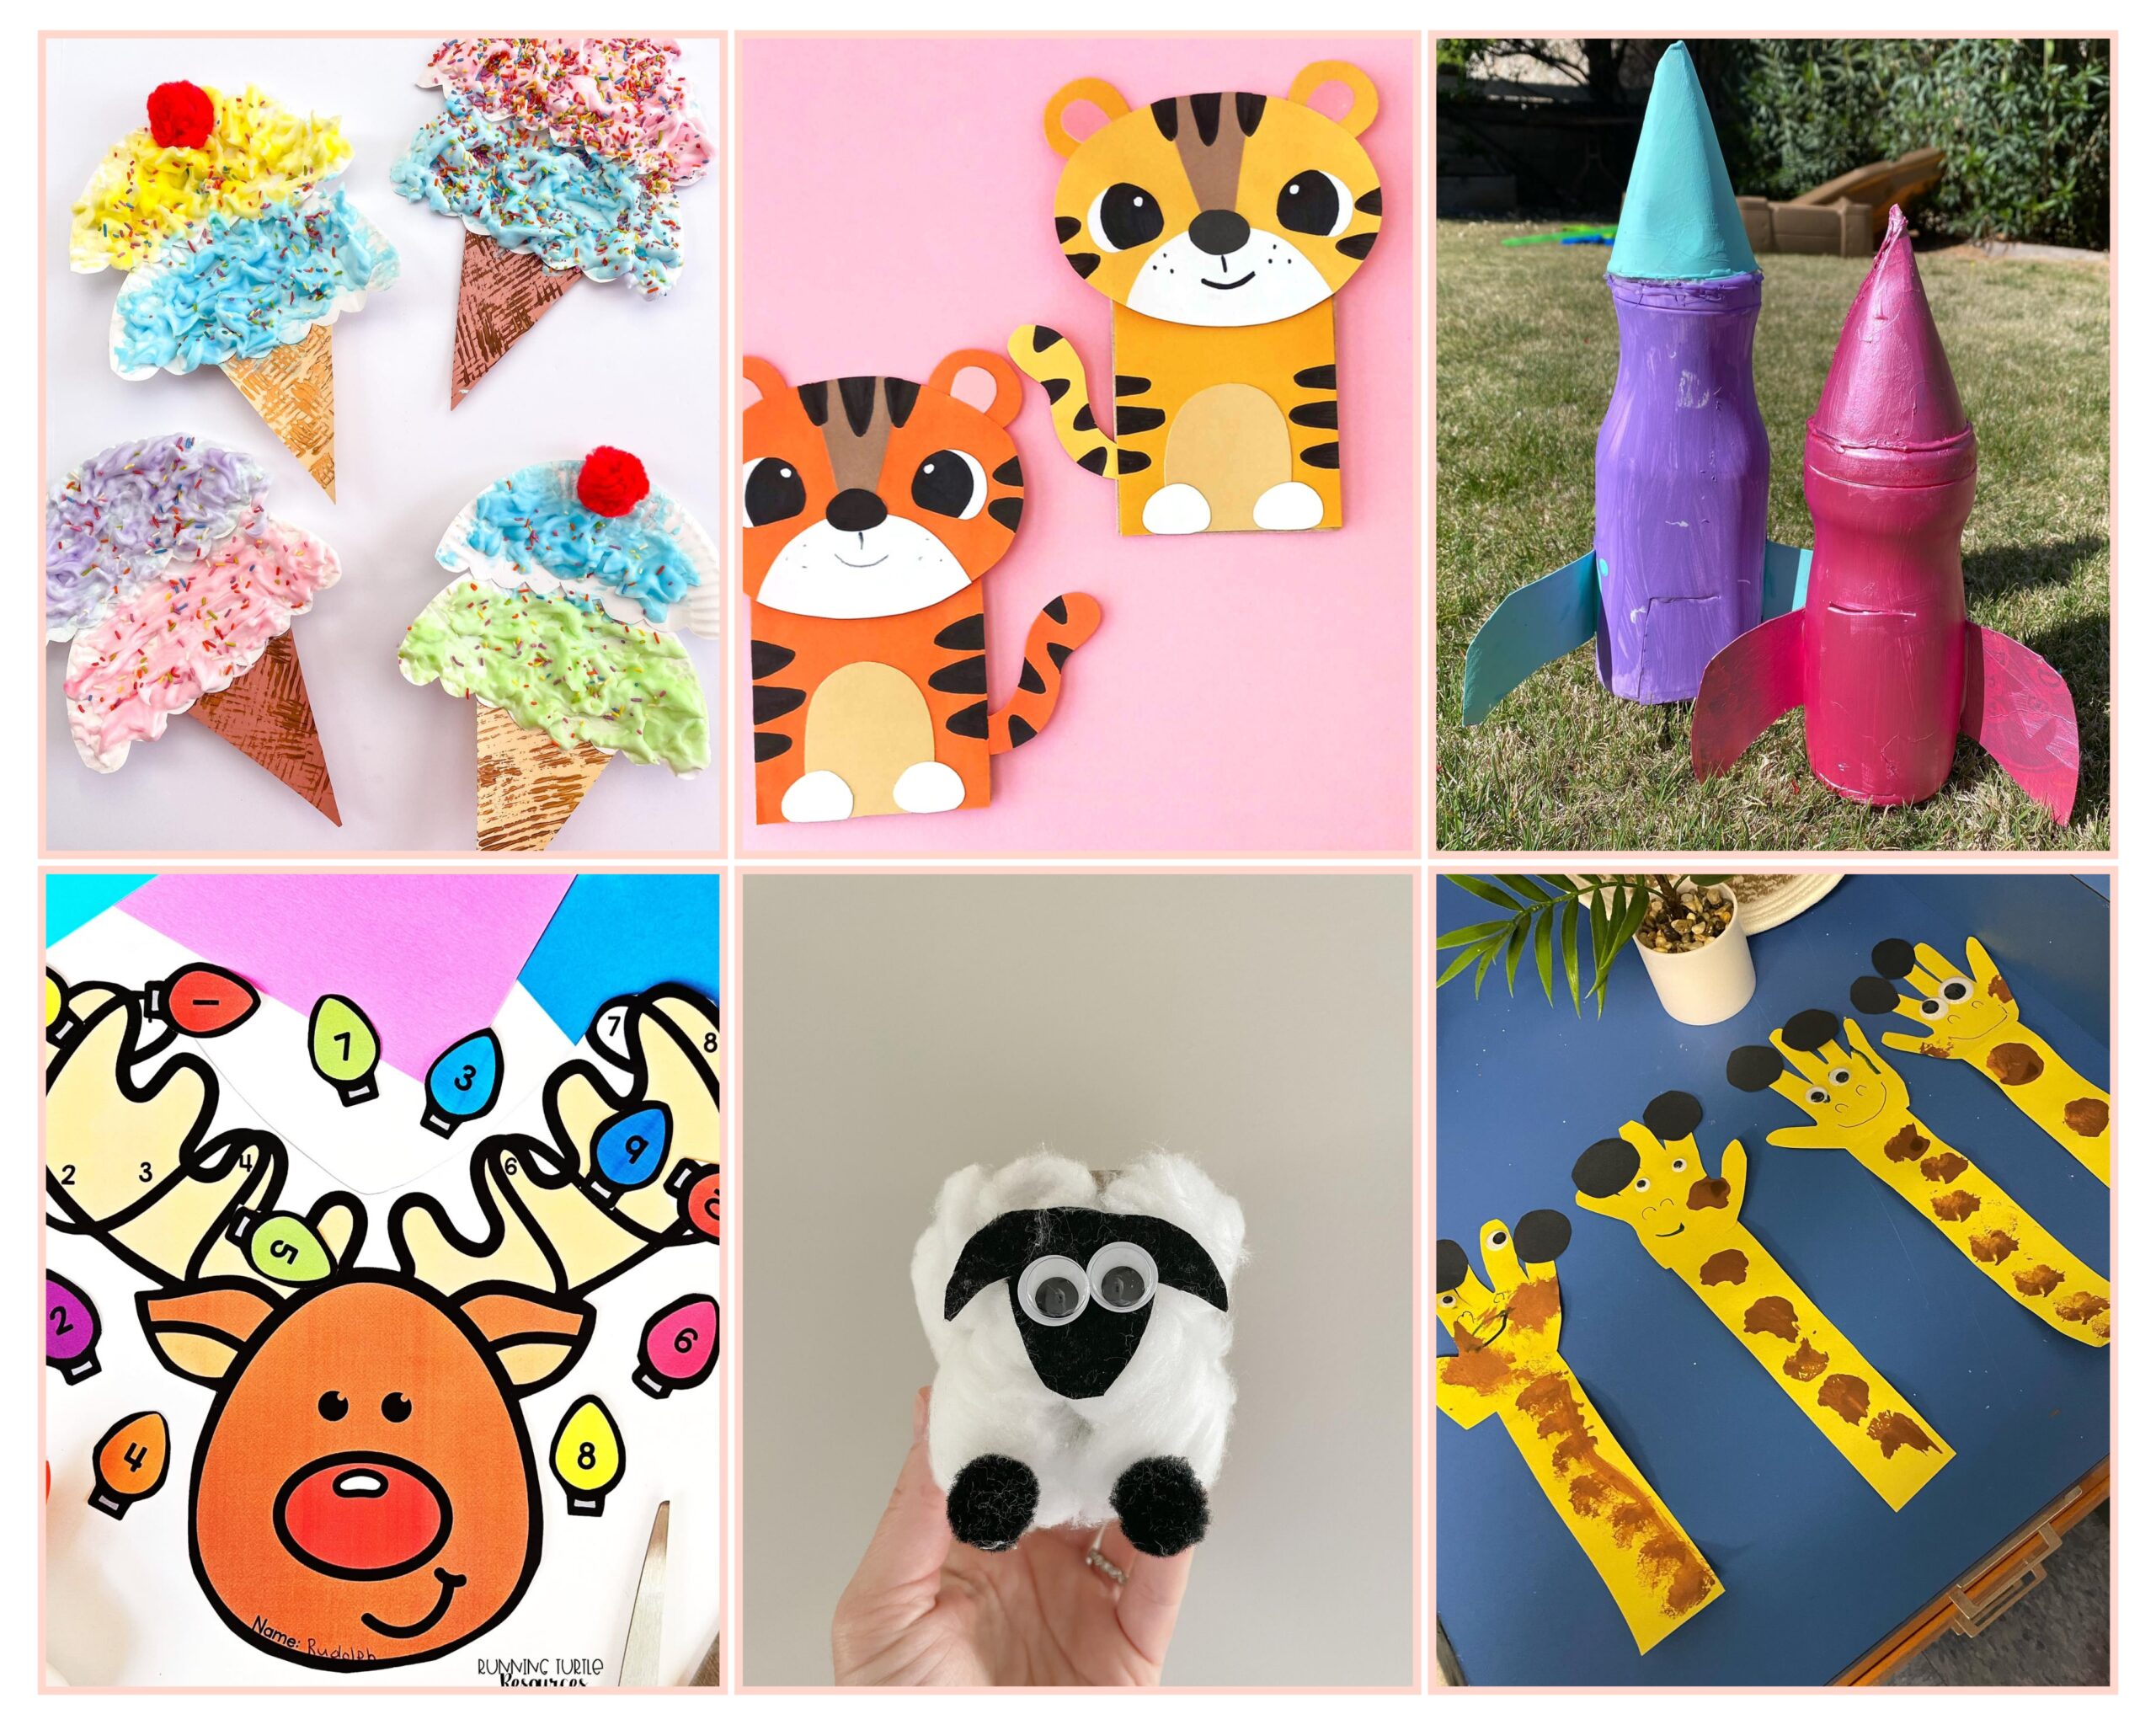
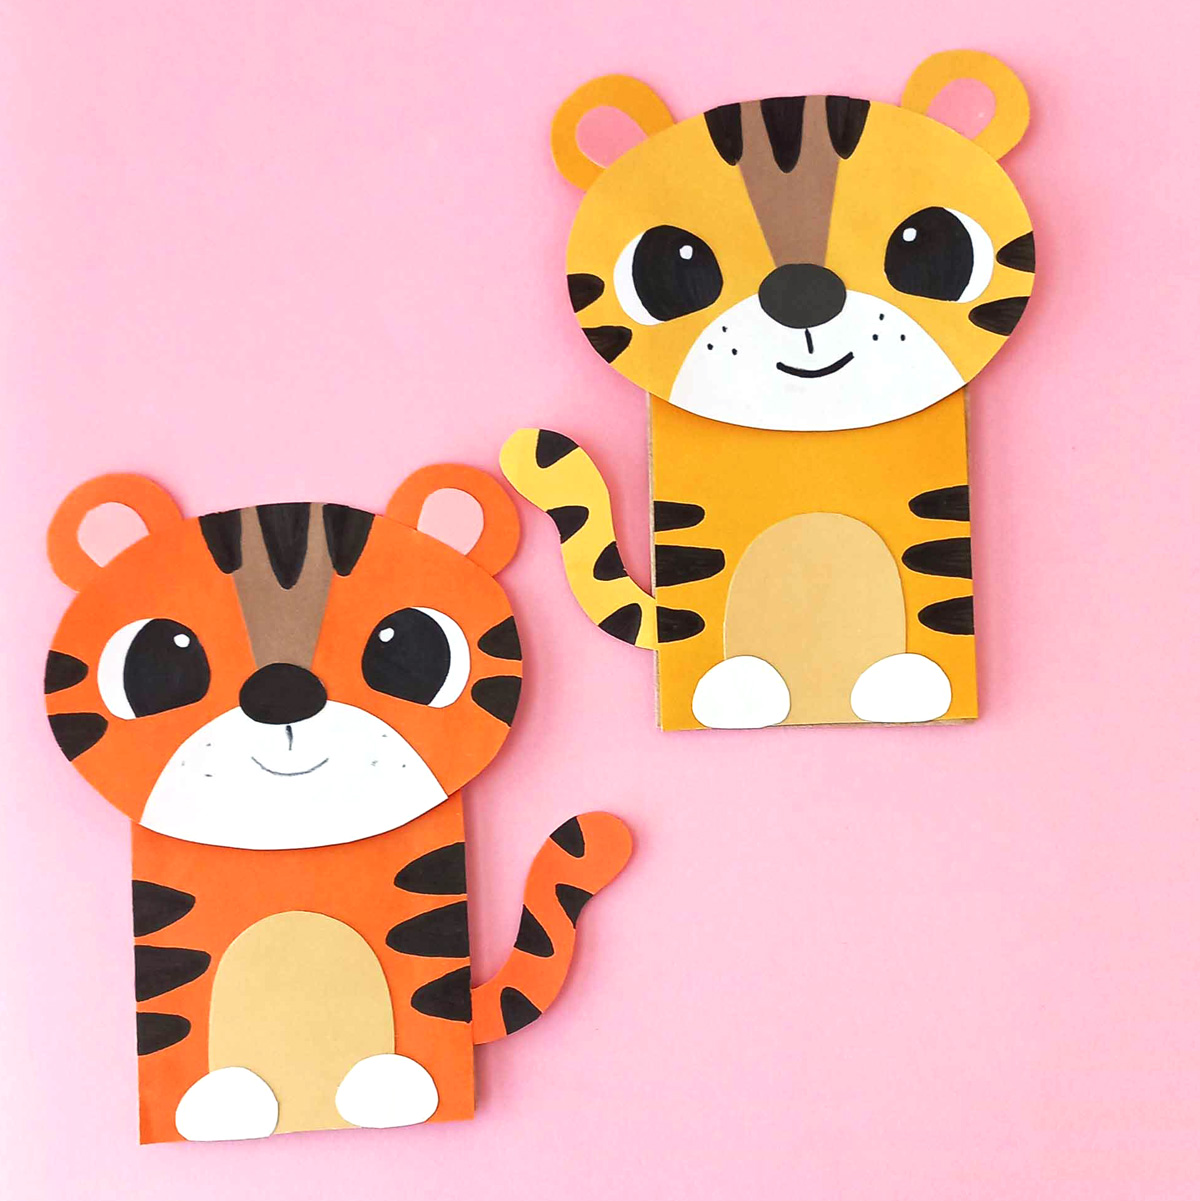
To make these cute tiger crafts, start by cutting out a rectangular piece of orange construction paper for the body. For the head, cut out a large circle from orange paper and then add smaller circles for the ears. Attach the head to the top of the body. Next, cut out the facial features: a white circle for the mouth, small black circles for the eyes, and a little nose from black paper. Use a black marker to draw tiger stripes on the face, body, and tail. For the body, cut a light brown oval for the tummy and glue it on. Then, cut out a tail from orange paper and add black stripes to it, gluing it to the back of the body. Finally, for the paws, cut out white circles and glue them to the bottom of the body. Let everything dry, and you’ll have adorable paper tigers to play with or display!
2. Cute Turtle
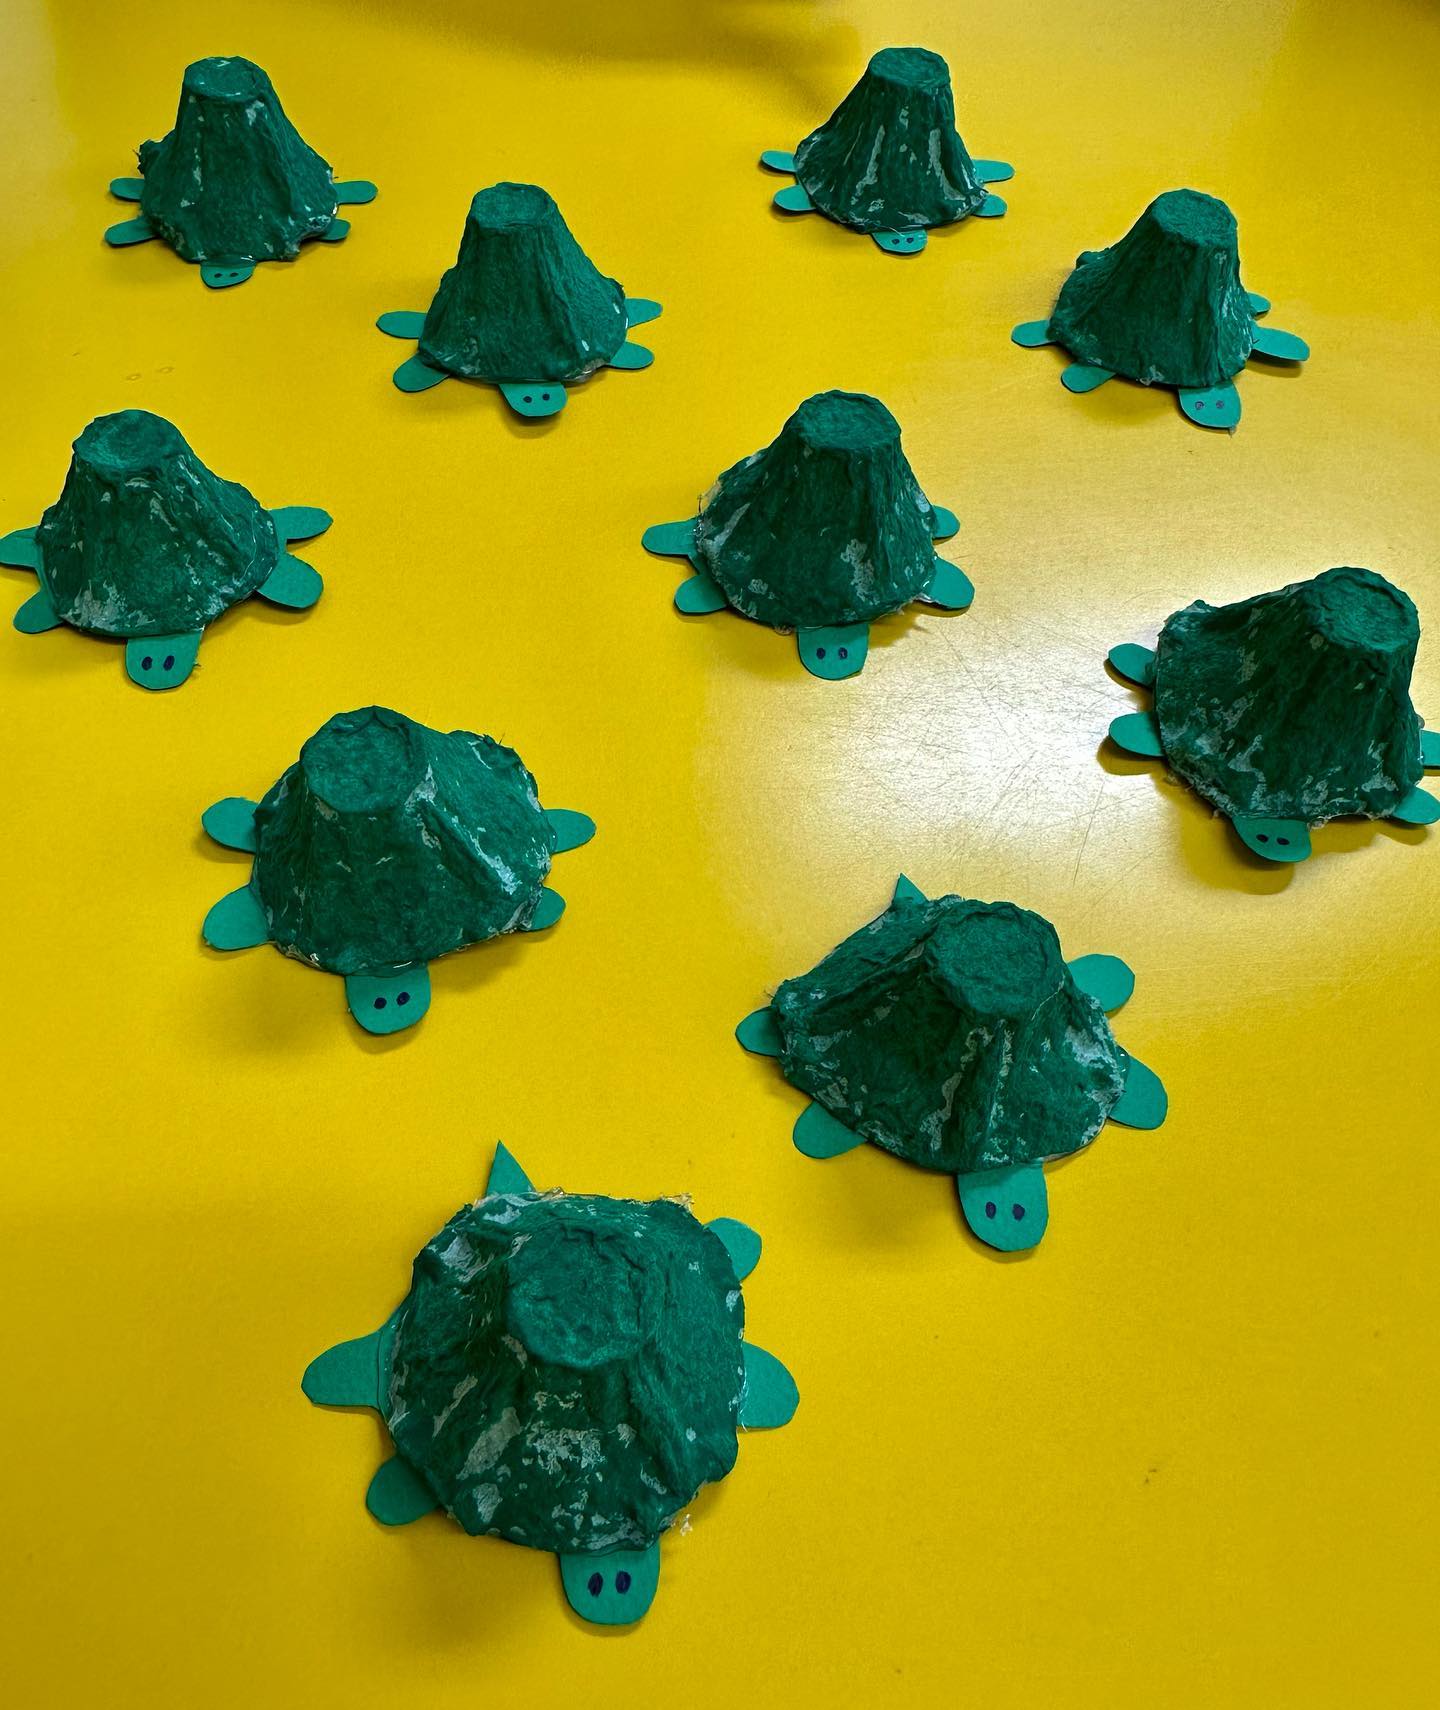
To make these cute egg carton turtles, start by cutting individual cups from an empty egg carton—these will be the turtle shells. Paint the cups green (or any turtle shell color you like) and let them dry completely. While the paint is drying, cut out turtle heads, legs, and tails from green construction paper. Use a marker to draw eyes on the heads. Once the shells are dry, glue the paper pieces underneath each cup, positioning the head at the front and legs on the sides. Optionally, add a bit of white paint or glitter for texture. These little turtles make a fun and easy recycled craft for kids!
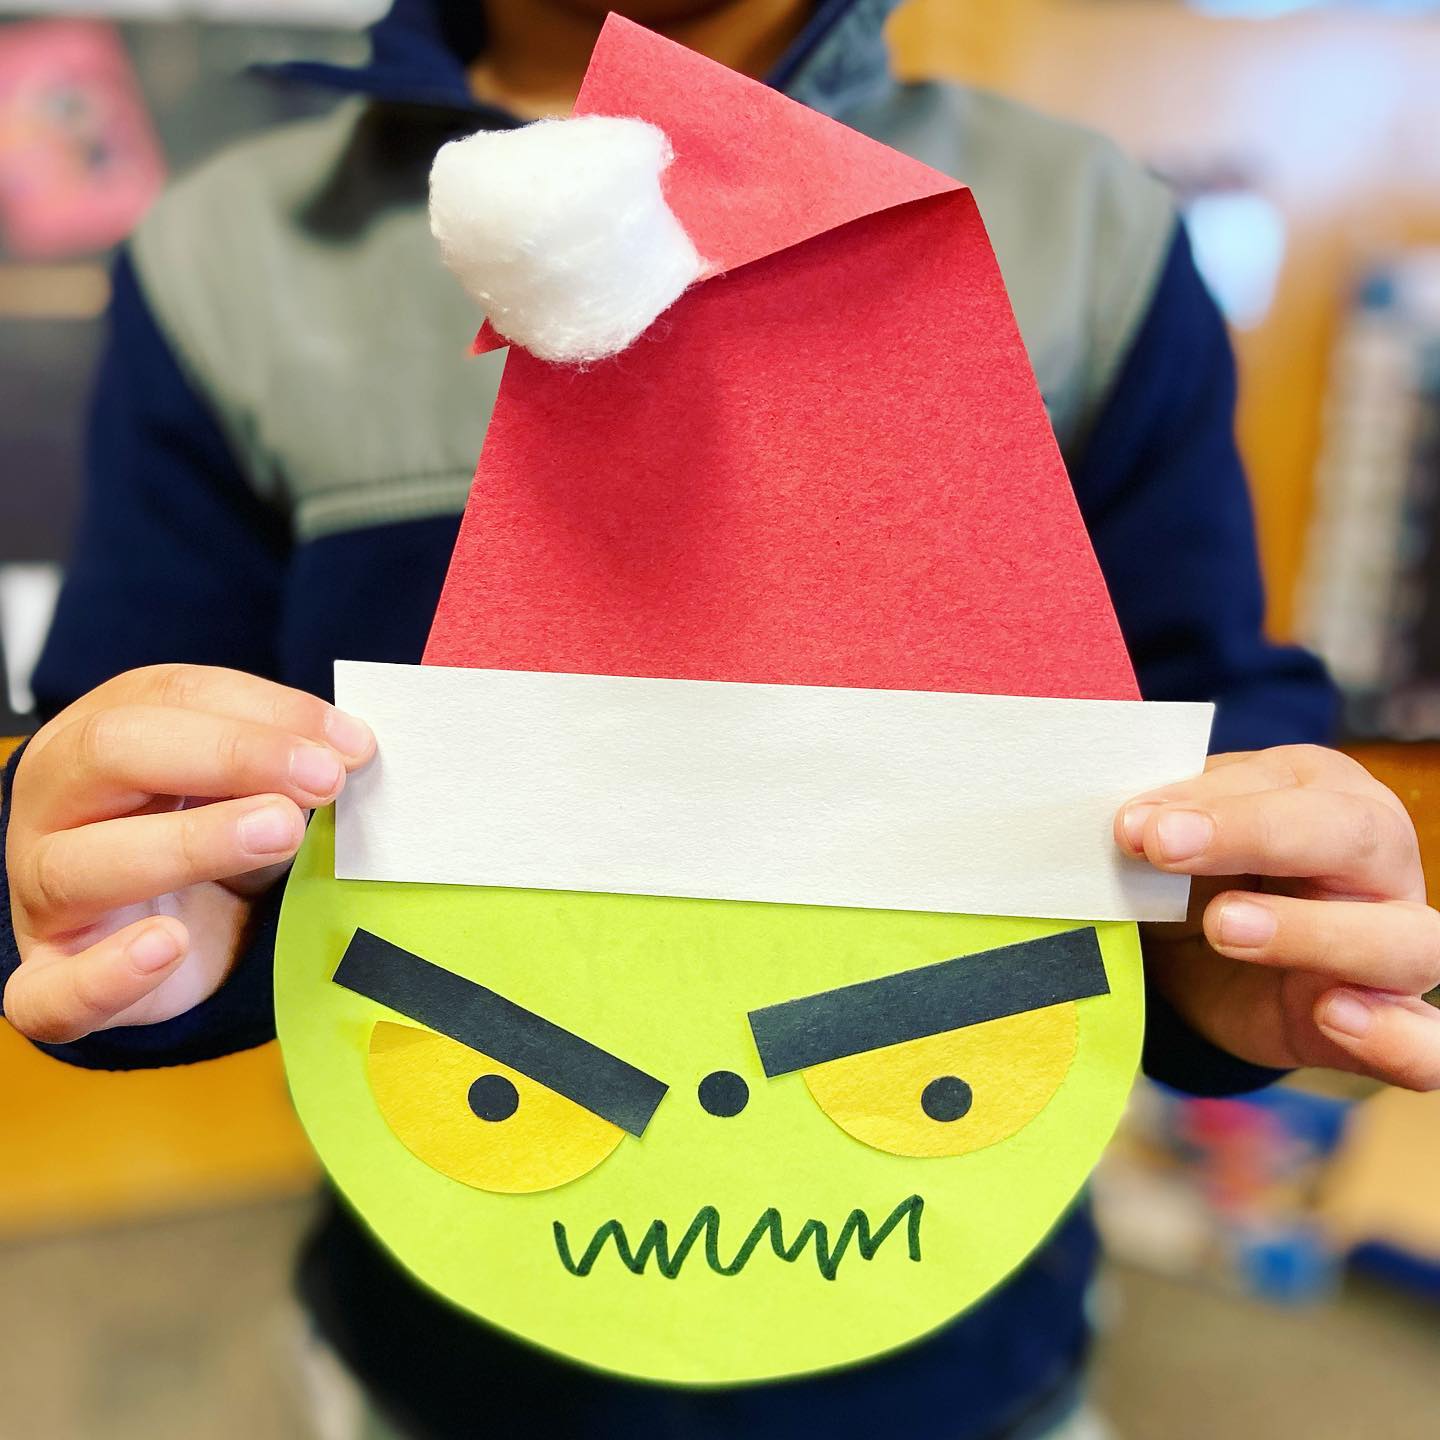
3. Villain
To make this fun Grinch-inspired Christmas craft, start by cutting a large circle out of green construction paper for the face. Next, cut out two yellow semicircles for the eyes and small black dots for the pupils. Add thick black eyebrows cut from black paper, angling them downward for that classic Grinchy expression. Use a marker to draw the nose and squiggly frown. For the Santa hat, cut a red triangle and a white strip for the brim. Glue the brim across the bottom of the triangle and attach the hat to the top of the face. Finally, add a cotton ball at the tip of the hat for a fluffy pom-pom. Let everything dry, and you’ve got a festive and mischievous Grinch face ready to display!
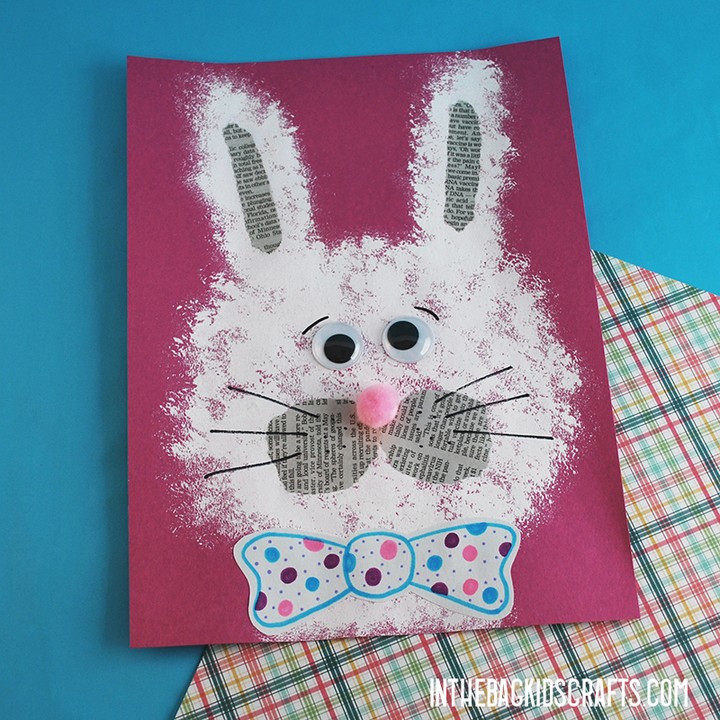
4. Rabbit
To create this adorable bunny craft, begin with a piece of colored construction paper as your background. Use a sponge dipped in white paint to dab the shape of a bunny’s head and long ears onto the paper—don’t worry about perfect edges, the fluffy texture adds to the charm. Cut out oval shapes from old newspaper for the bunny’s inner ears and cheeks, then glue them into place. Add two large googly eyes and a small pink pom-pom for the nose. Draw or glue on black whiskers and little eyebrow arches above the eyes. Finish the look with a cute bowtie cut from patterned paper for a playful touch. Let everything dry completely before displaying your bunny masterpiece!
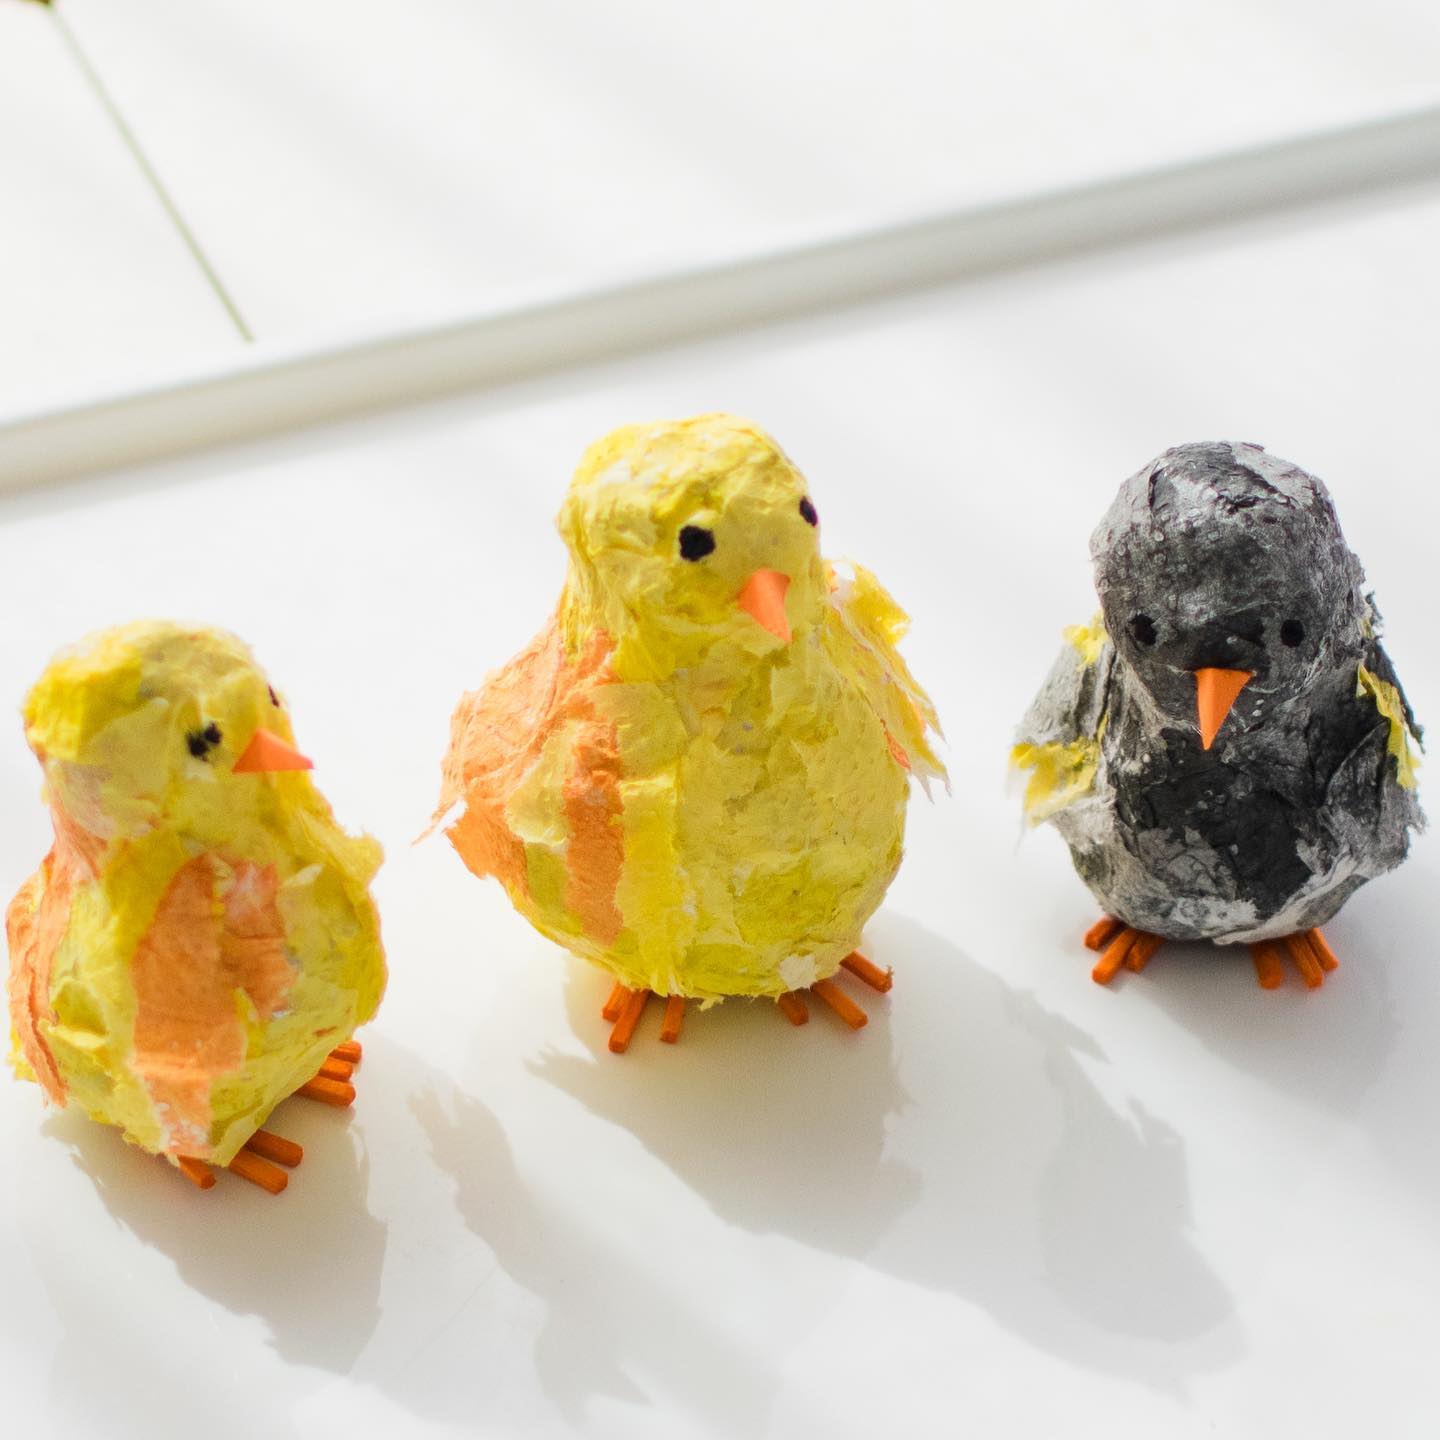
5. Bird
To make these adorable paper mache chicks, start by forming the chick body using crumpled newspaper or a small balloon as a base, then cover it with strips of newspaper dipped in a glue-water mixture (one part white glue to one part water). Once dry and firm, paint the body with yellow, orange, or black paint, or glue on torn pieces of colored tissue paper for texture and color. Add tiny googly eyes or use black marker dots for eyes, and make a small beak from folded orange paper. For the feet, cut and glue on short pieces of orange pipe cleaner. Let everything dry thoroughly before displaying your cute, handcrafted chicks!
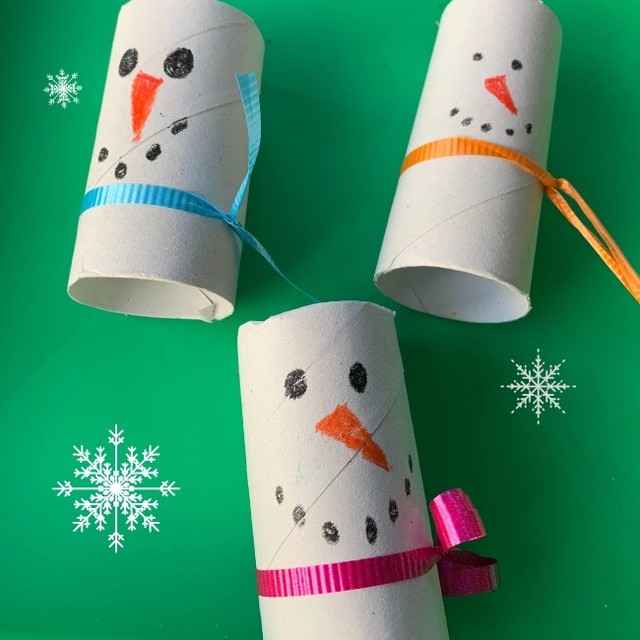
6. Snow Roll
To make this snow roll, take tissue paper rolls and draw nose eyes and mouth with wax crayons. Tie a colourful ribbon and your snow roll is ready.
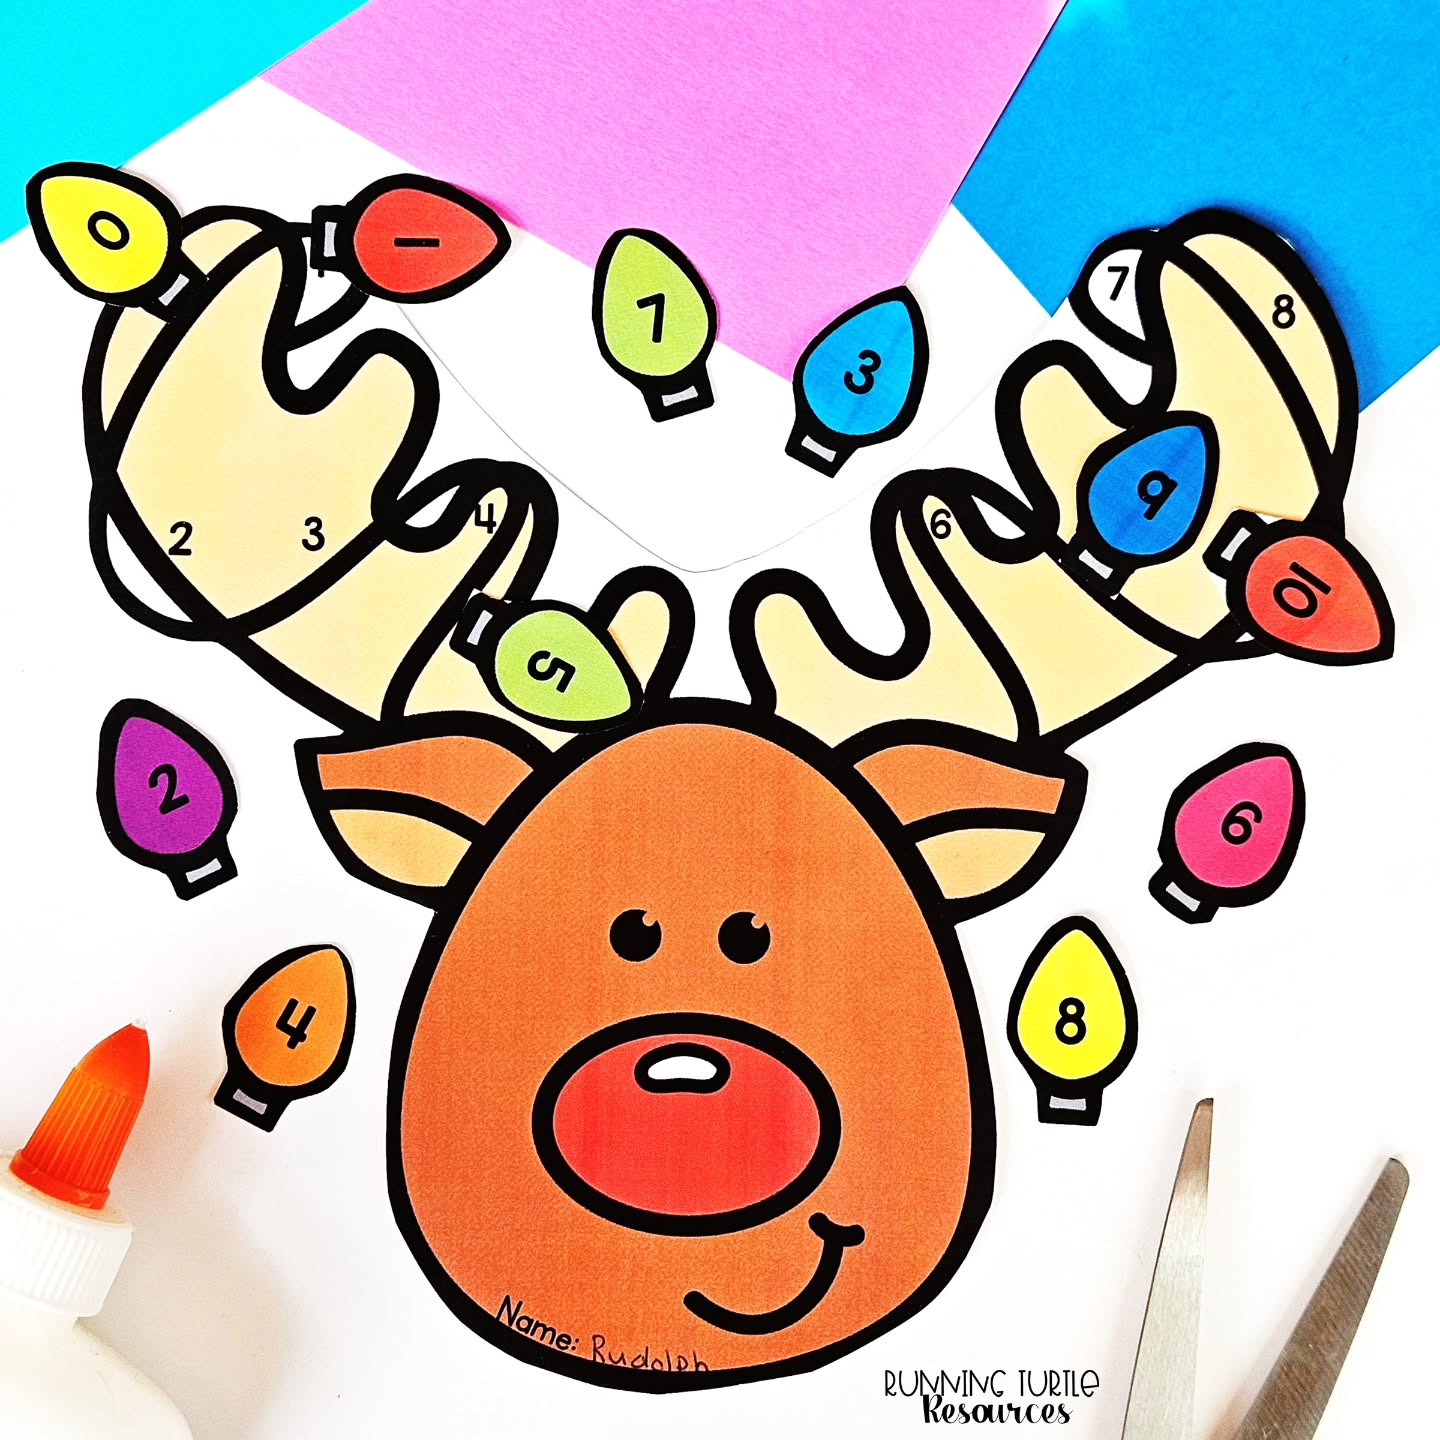
7. Deer
To make this fun reindeer number-matching craft, start by printing or drawing a reindeer face with large antlers on a sheet of paper or cardstock. Number spots on the antlers from 1 to 10. Then, cut out colorful paper Christmas light shapes and write numbers 1 to 10 on them as well. Have children match each light to the correct number on the antlers by gluing them in place. This activity is great for practicing number recognition while making a festive holiday craft. Add a name to personalize it, and use crayons or markers to color the reindeer if desired.
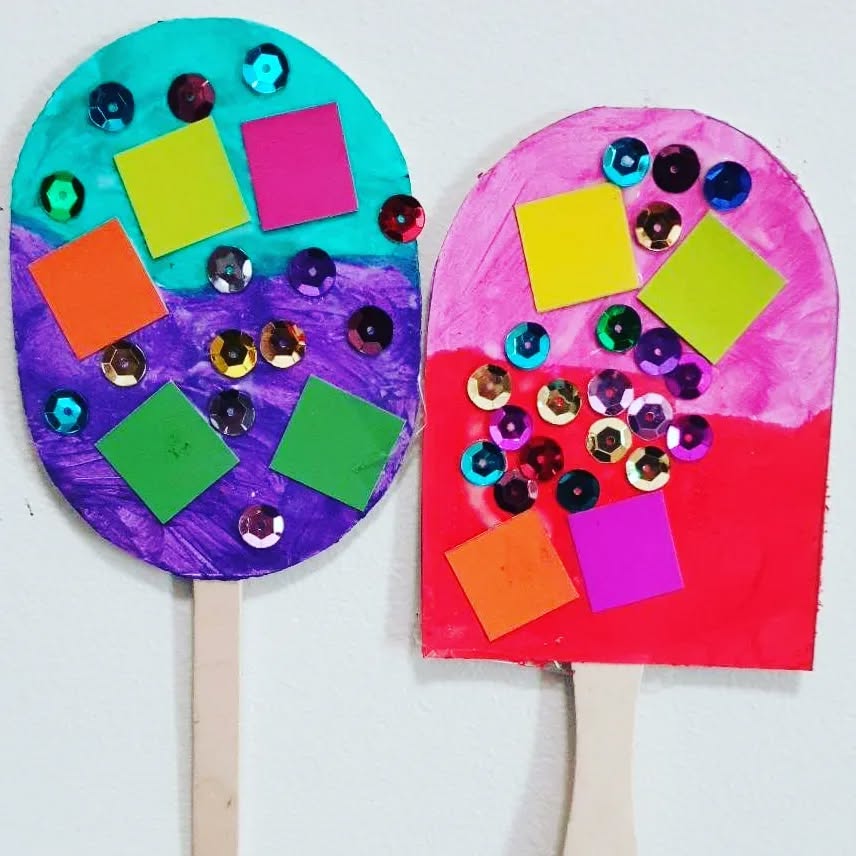
8. Icecream
To make this colorful popsicle craft, start by cutting popsicle shapes out of sturdy cardboard or thick paper. Have kids paint the popsicle shapes in two-tone colors using washable paints, letting them dry before the next step. Once dry, provide a variety of foam squares and sequins for decoration. Kids can glue the foam squares and sequins onto the popsicle shapes to create fun and sparkly designs. Finally, attach a wooden craft stick to the bottom of each popsicle using glue or tape to act as the handle. This craft is a bright and easy summer-themed activity perfect for young children.
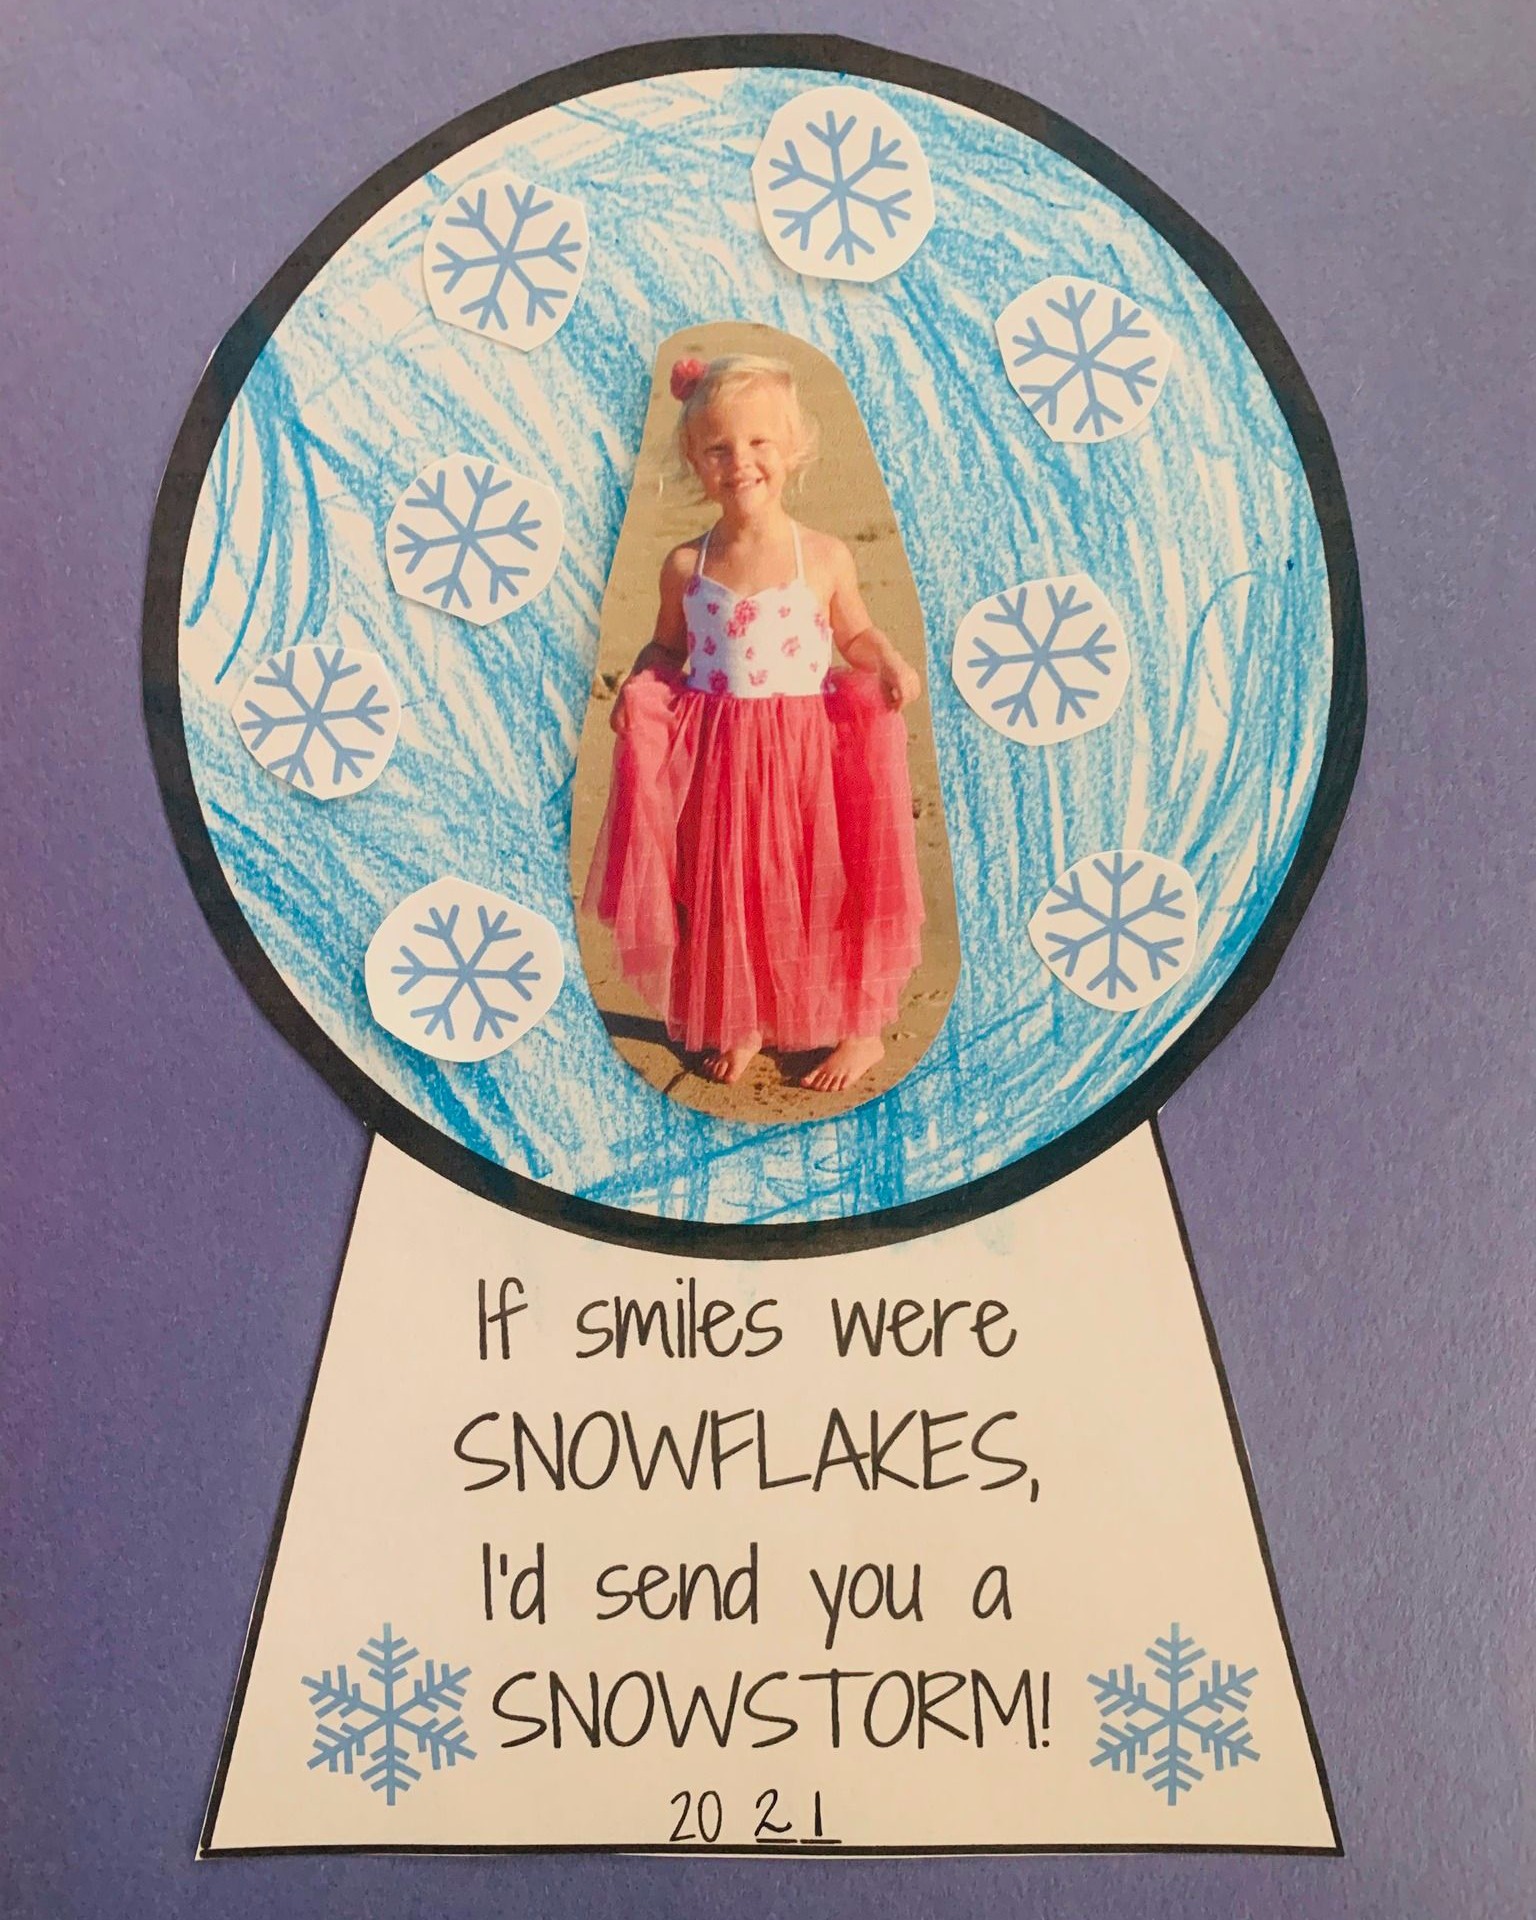
9. Cute Frame of Snow globe
To make this adorable snow globe craft, begin by cutting out a circle from white paper for the globe and a trapezoid shape from white paper for the base. Have your child color the globe background with blue crayon or marker to create a wintry scene. Print and cut out a small photo of the child and glue it in the center of the globe. Next, cut out or print small snowflake shapes and glue them around the photo inside the globe. Add a year at the bottom, then glue the globe and base together onto a piece of construction paper. This makes a perfect keepsake or holiday gift!
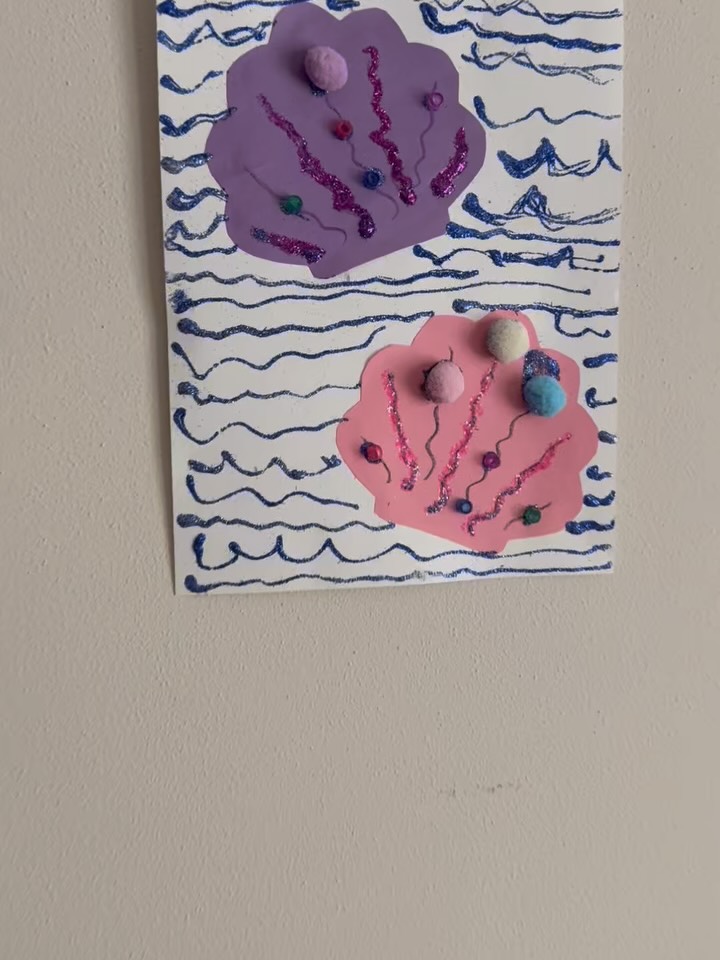
10. Clamp Shell
To make this under-the-sea shell craft, start with a piece of white cardstock as your background. Use a blue marker, crayon, or glitter glue to draw wavy ocean lines across the page. Next, cut out shell shapes from colored construction paper, like pink and purple, and glue them onto the background. Decorate the shells by drawing or gluing squiggly lines with glitter glue to represent the inside patterns. Add small pom-poms or beads to look like pearls or sea treasures. Let everything dry completely before displaying your sparkly sea scene!
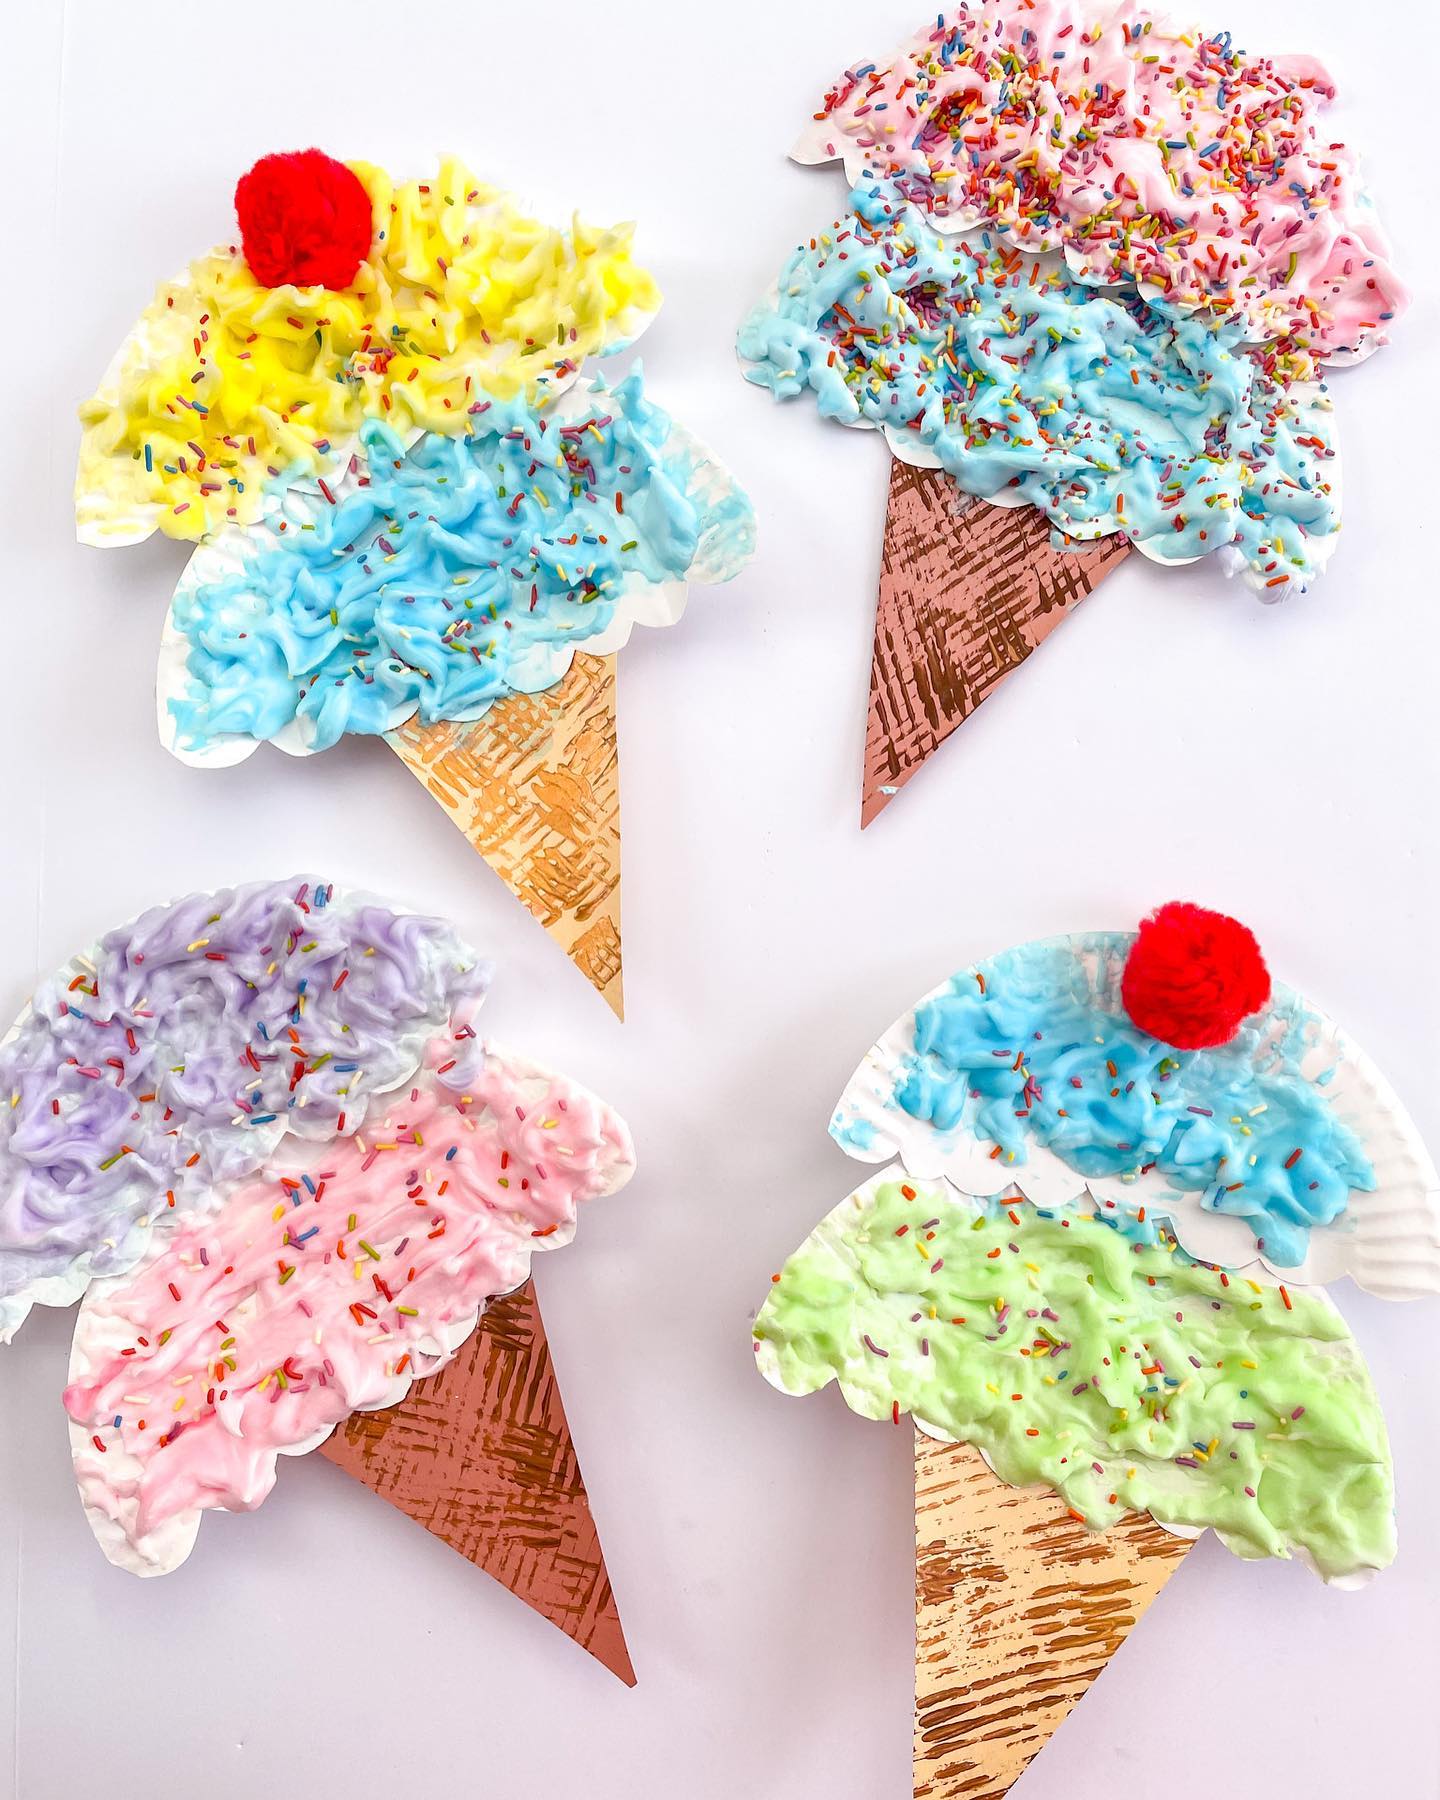
11. Ice cream Cone
To make these fun and colorful ice cream cone crafts, start by cutting a large triangle from brown construction paper to create the cone. For the ice cream scoops, take paper plates and cut them in half, then use a pair of scissors to trim the edges to create a wavy, scoop-like shape. Paint the paper plate halves in bright ice cream colors like pink, blue, yellow, purple, or green. Once the paint has dried, glue them to the top of the cone shape, stacking the scoops on top of each other. To add texture and make the scoops look more realistic, glue cotton balls or white tissue paper onto the painted areas. Finish by decorating with colorful sprinkles (use actual sprinkles or cut small pieces of colored paper) and adding a red pom-pom at the top to represent a cherry. Let everything dry, and you’ll have an adorable set of ice cream cone crafts to enjoy!
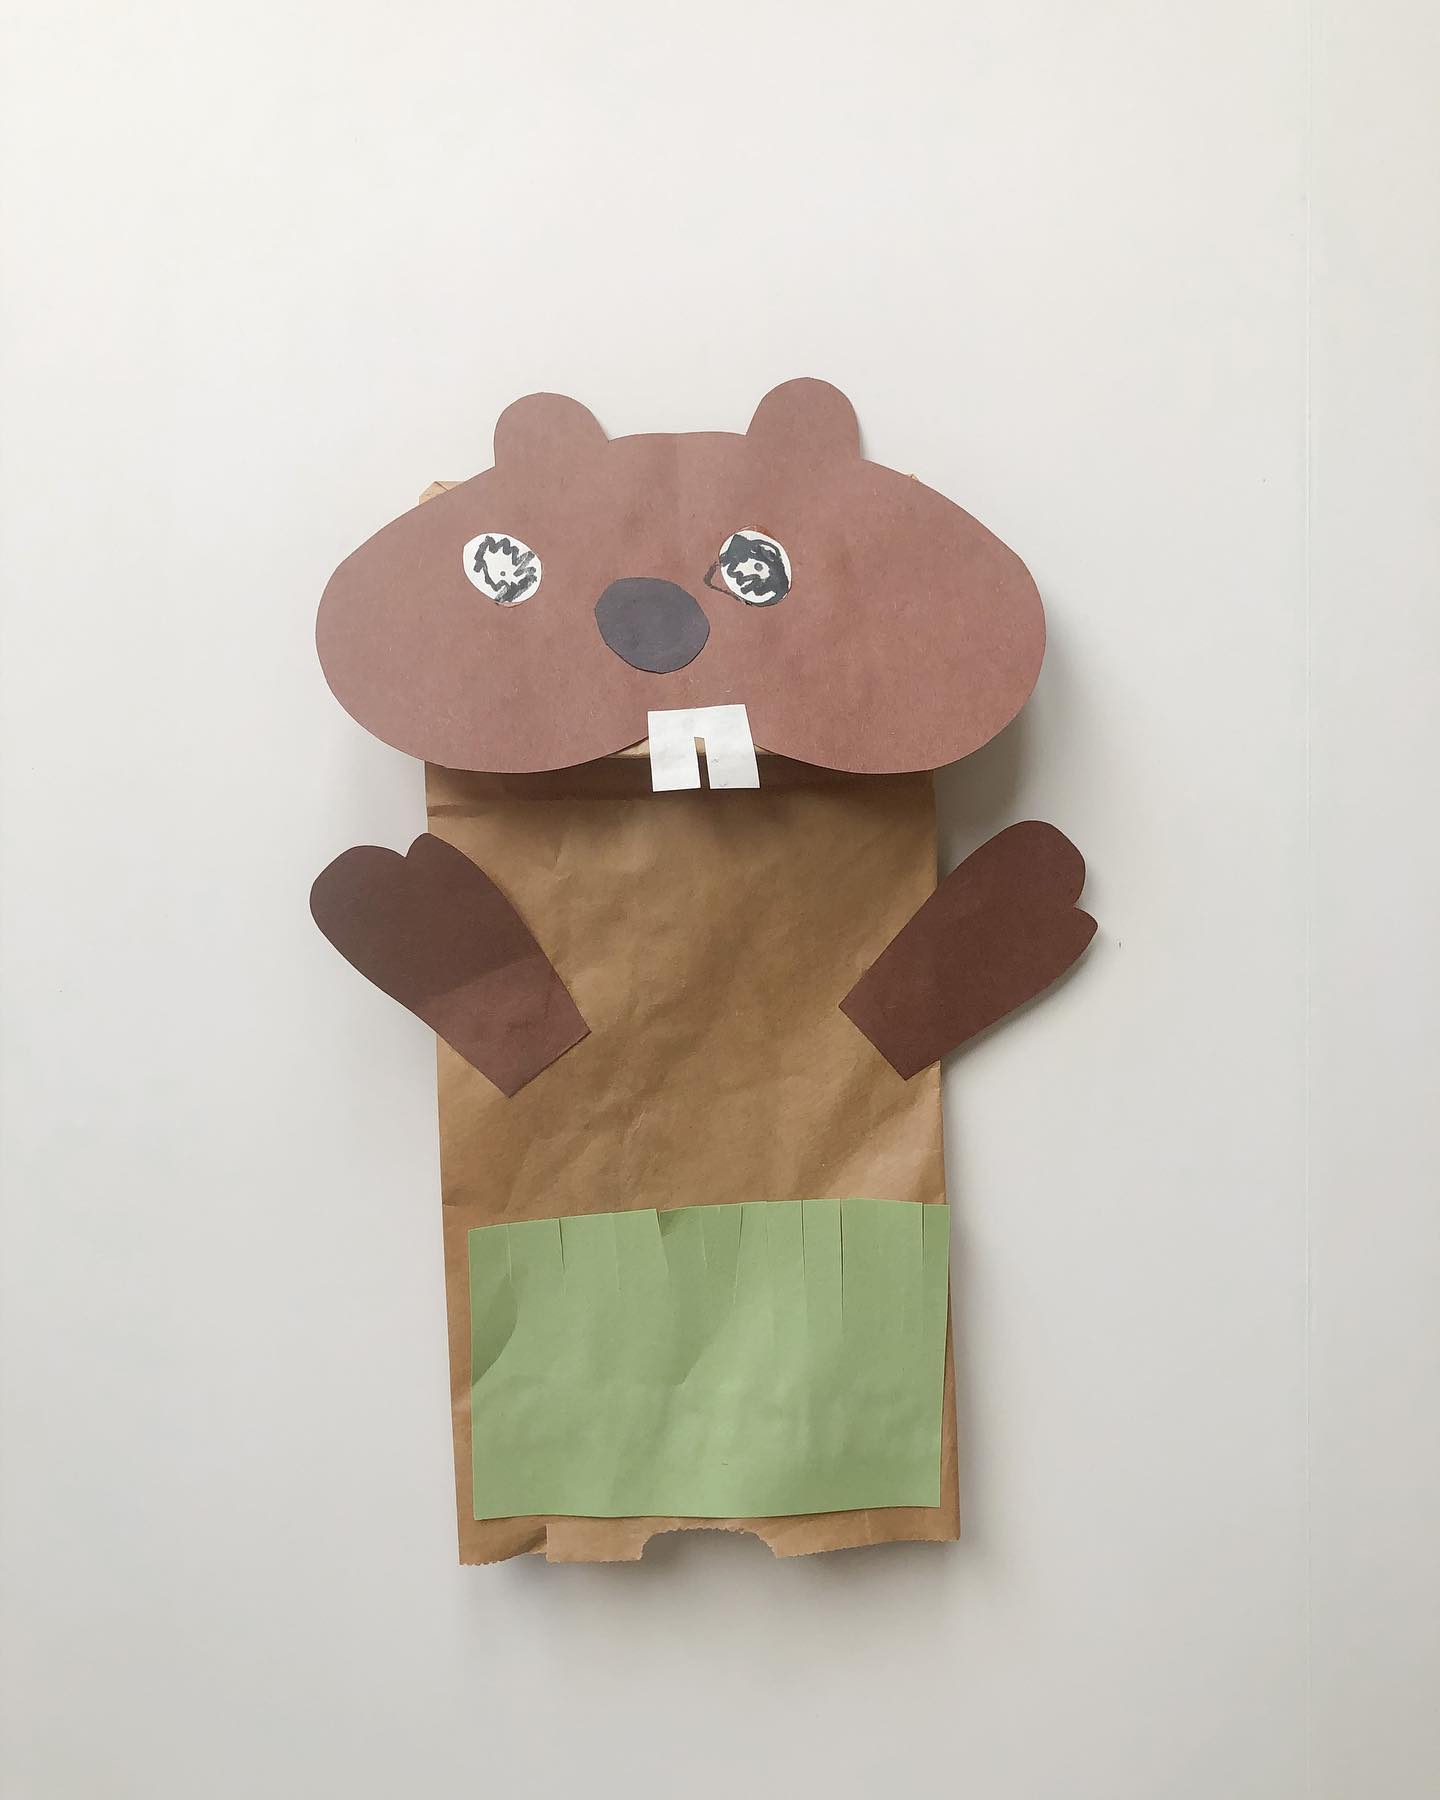
12. Ground Hog
To make this adorable beaver craft, start by using a brown paper lunch bag for the body. Lay the bag flat and then cut out a large round shape from brown construction paper for the beaver’s head. Attach it to the top of the bag with glue. For the ears, cut two small ovals from brown paper and glue them on either side of the head. Next, cut out two white teeth from paper and glue them at the bottom of the head. For the eyes, use white paper for the whites and black paper for the pupils, or use googly eyes. For the beaver’s arms, cut out two smaller brown shapes and glue them to the sides of the bag. For the base, cut strips of green paper to create a grass-like effect and glue them at the bottom of the bag.
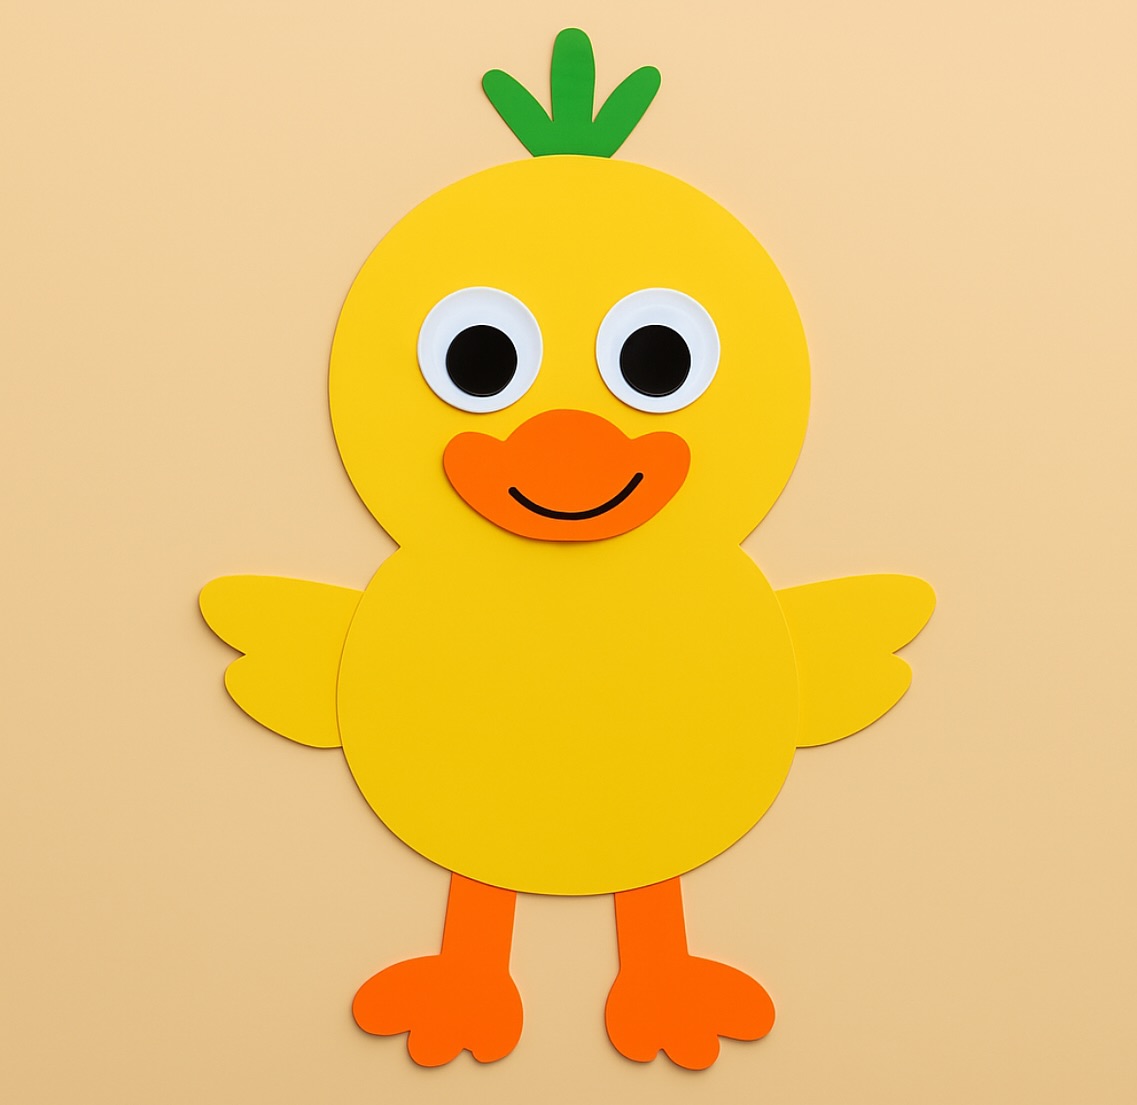
13. Duck
To make this cute duck craft, start by cutting out large shapes from colorful foam sheets. For the body, cut a large circle from yellow foam, and for the wings, cut two smaller oval shapes. Next, cut out a small orange shape for the beak and glue it to the middle of the circle. For the feet, cut out two shapes that resemble webbed feet from orange foam and glue them at the bottom of the circle. Use two large black-and-white googly eyes or cut out two big circles from white foam and smaller black circles for the pupils, then attach them to the head. Cut a small green piece of foam into a leaf shape and glue it to the top of the duck’s head for a little tuft of feathers.
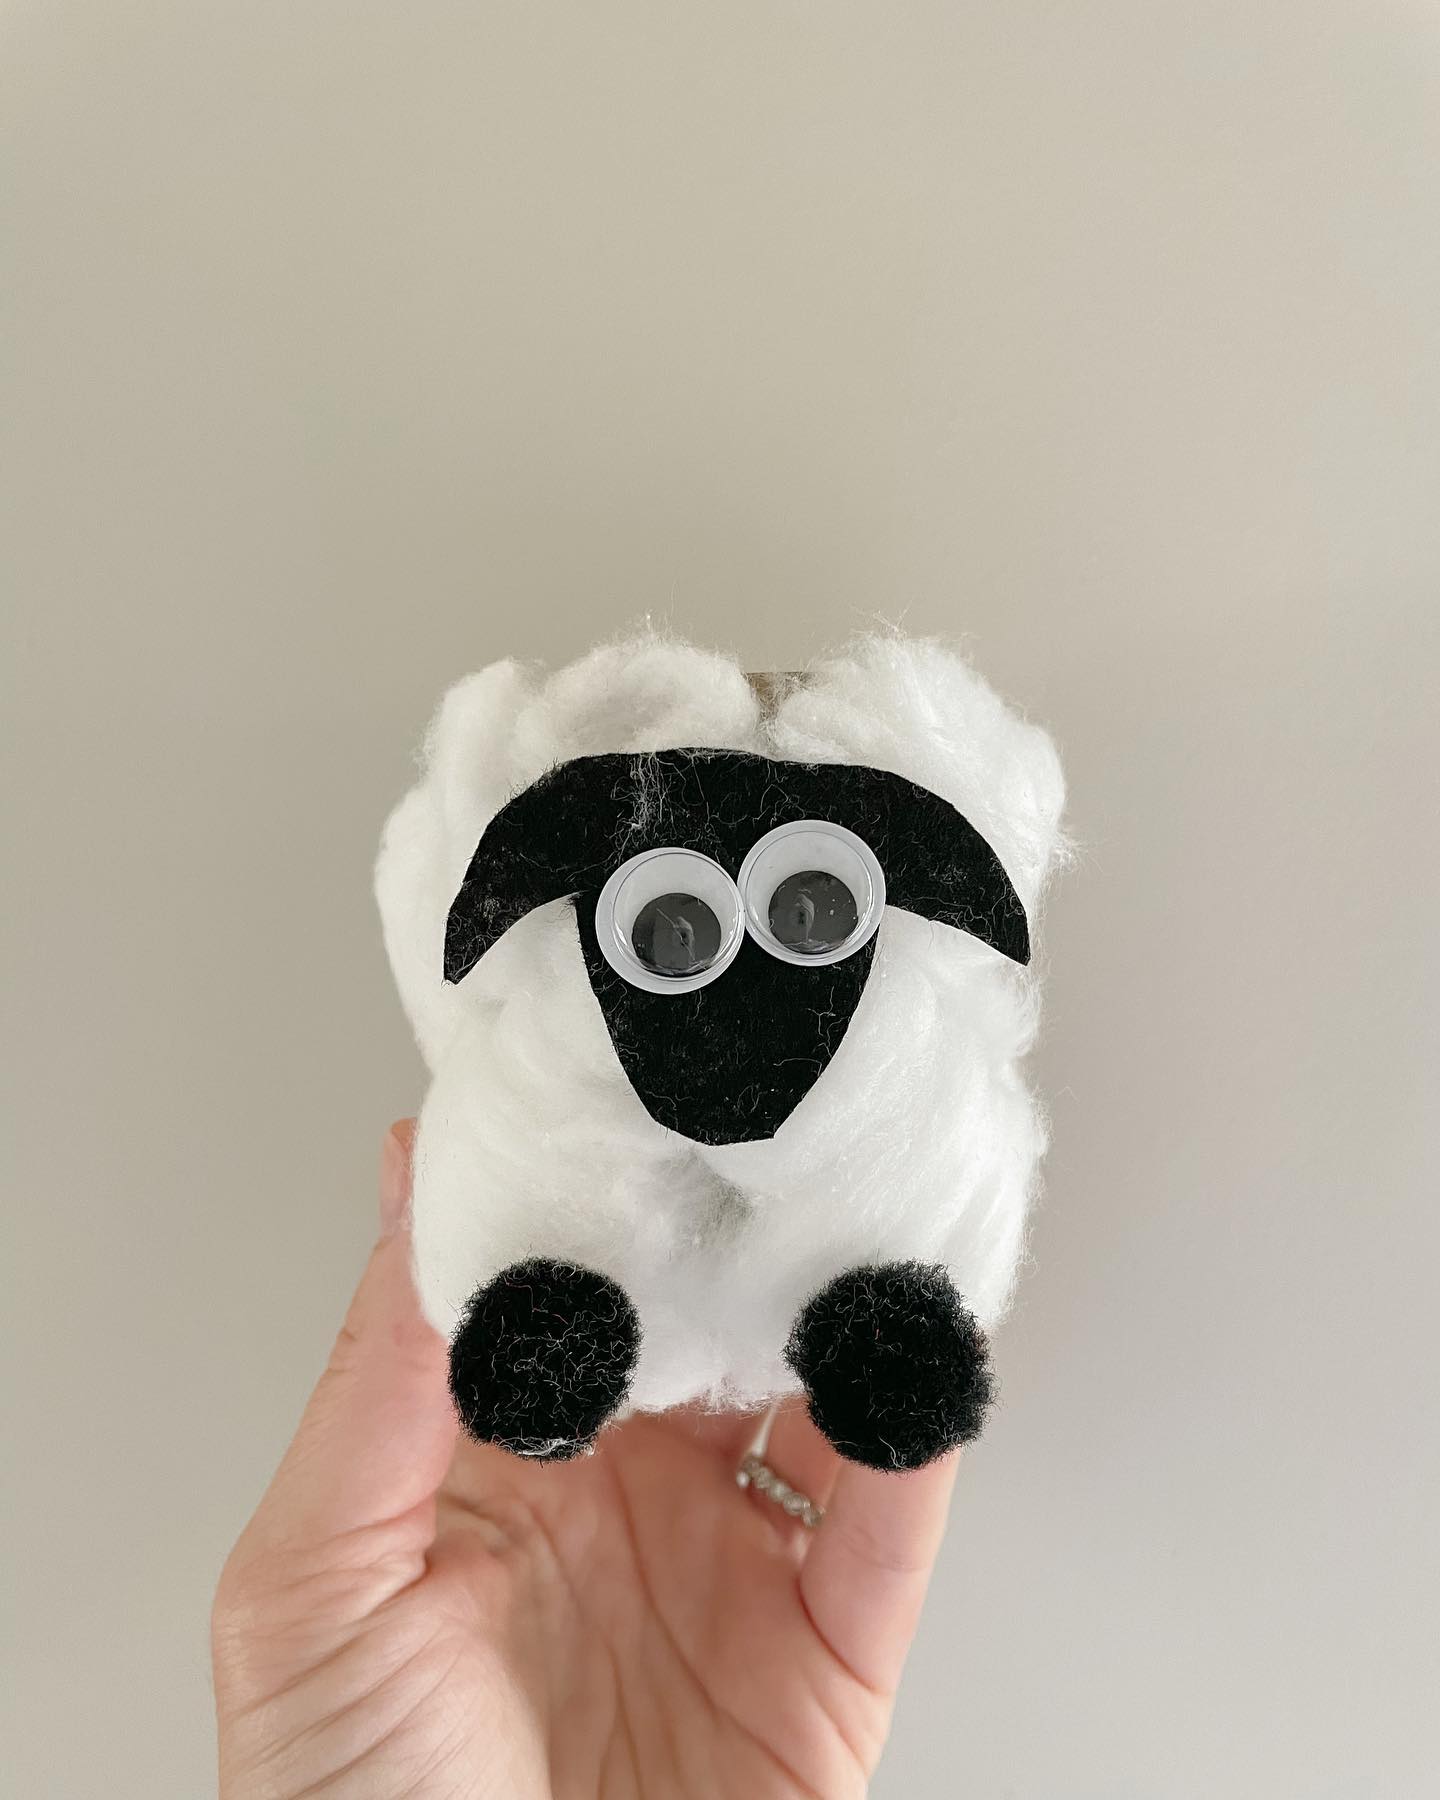
14. Cute Sheep
To make this adorable sheep craft, start with a small cardboard tube as the base. Cover the entire tube by gluing on fluffy white cotton balls to create the sheep’s wool. For the face, cut a sheep head shape from black felt or construction paper and glue it onto the front. Add two googly eyes to the face to give it a fun, animated expression. For the feet, glue on two small black pom-poms at the bottom of the tube. Let everything dry completely before handling. This simple and cute craft is perfect for a farm animal theme and fun for kids of all ages!
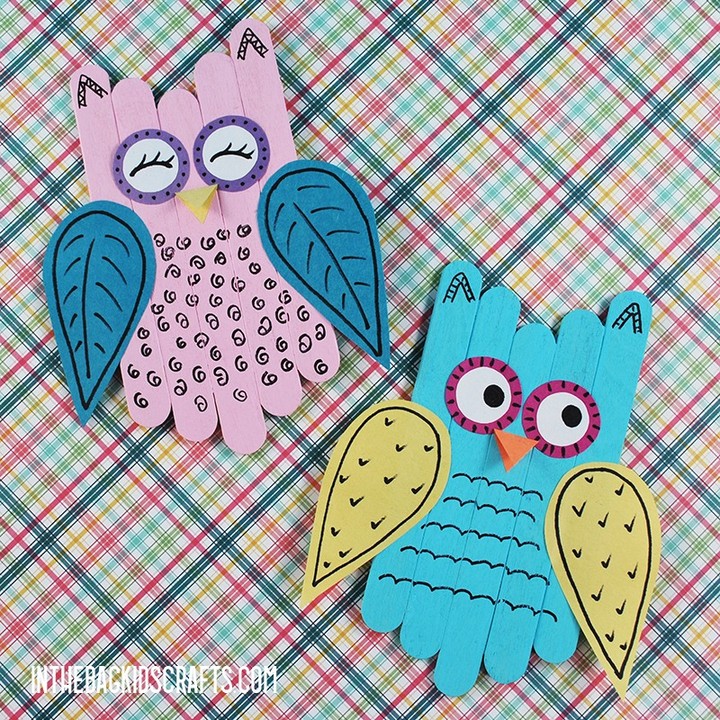
15. Owl
To make these colorful owl crafts, start by gluing five popsicle sticks side by side to form the owl’s body. Once the glue is dry, paint the sticks in bright colors like pink or blue. For the wings, cut out two leaf-shaped pieces from colored paper and draw feather details with a black marker. Glue the wings onto the sides of the popsicle stick body. Cut two large circles from white paper for the eyes, add smaller black circles for the pupils, and glue them on. For added detail, you can cut colored rings to go around the eyes. Use orange paper to make a small triangle beak and glue it between the eyes. Finally, use a marker to draw patterns like feathers or eyebrows on the owl’s body and head. Once everything is dry, your cheerful popsicle stick owls are ready to display!
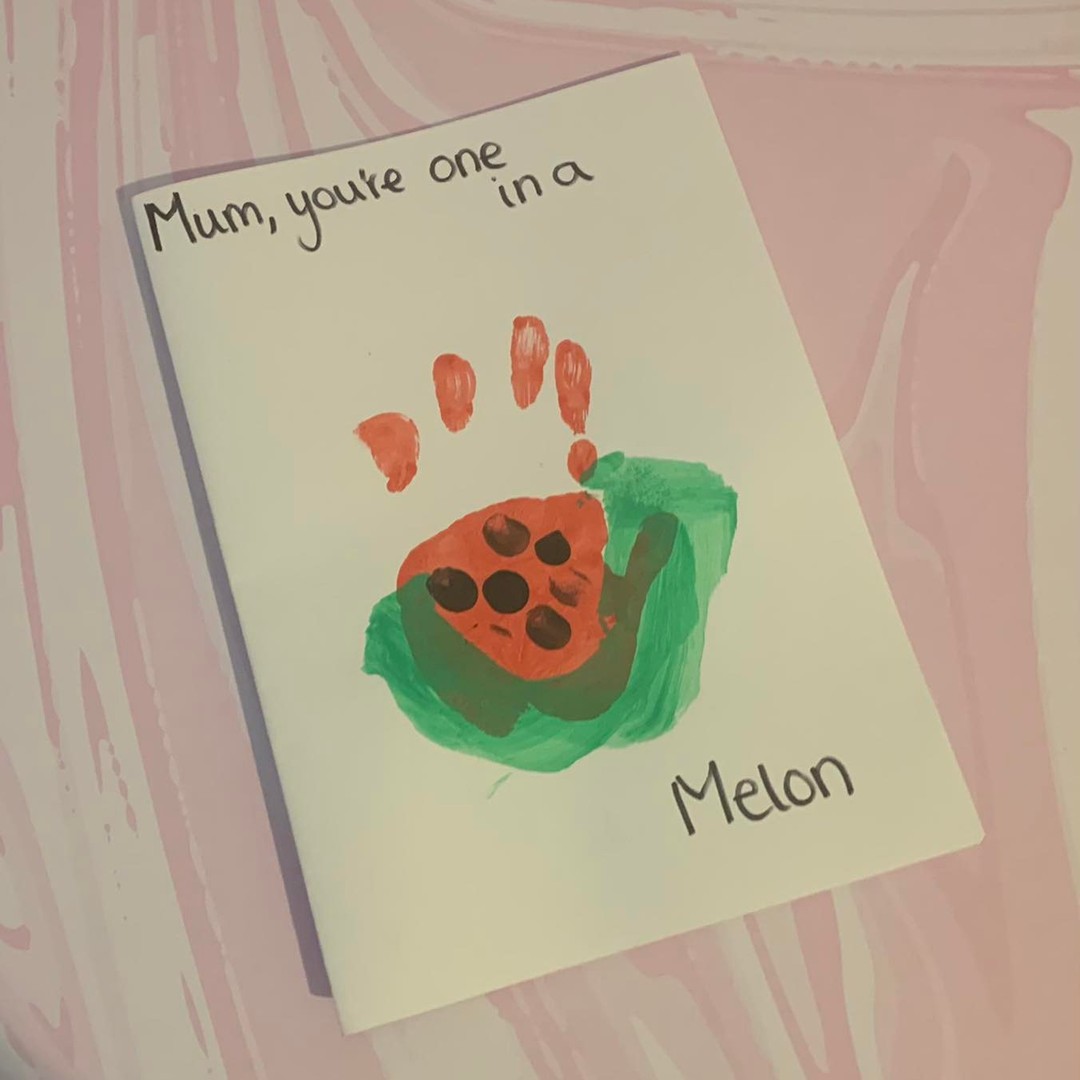
16. Cute Greeting Card
To make this adorable “Mum, you’re one in a melon” card, start with a blank piece of white cardstock folded in half to create your card base. Paint the palm of your child’s hand with red paint, the base of the palm with green (for the rind), and add a thin line of dark green along the edge for depth. Carefully press the painted hand onto the front of the card to form a watermelon shape. Once the handprint is dry, use black paint or a marker to add dots for seeds. Finally, write the sweet message “Mum, you’re one in a melon” above and below the handprint. This makes a perfect keepsake for Mother’s Day or any special occasion!
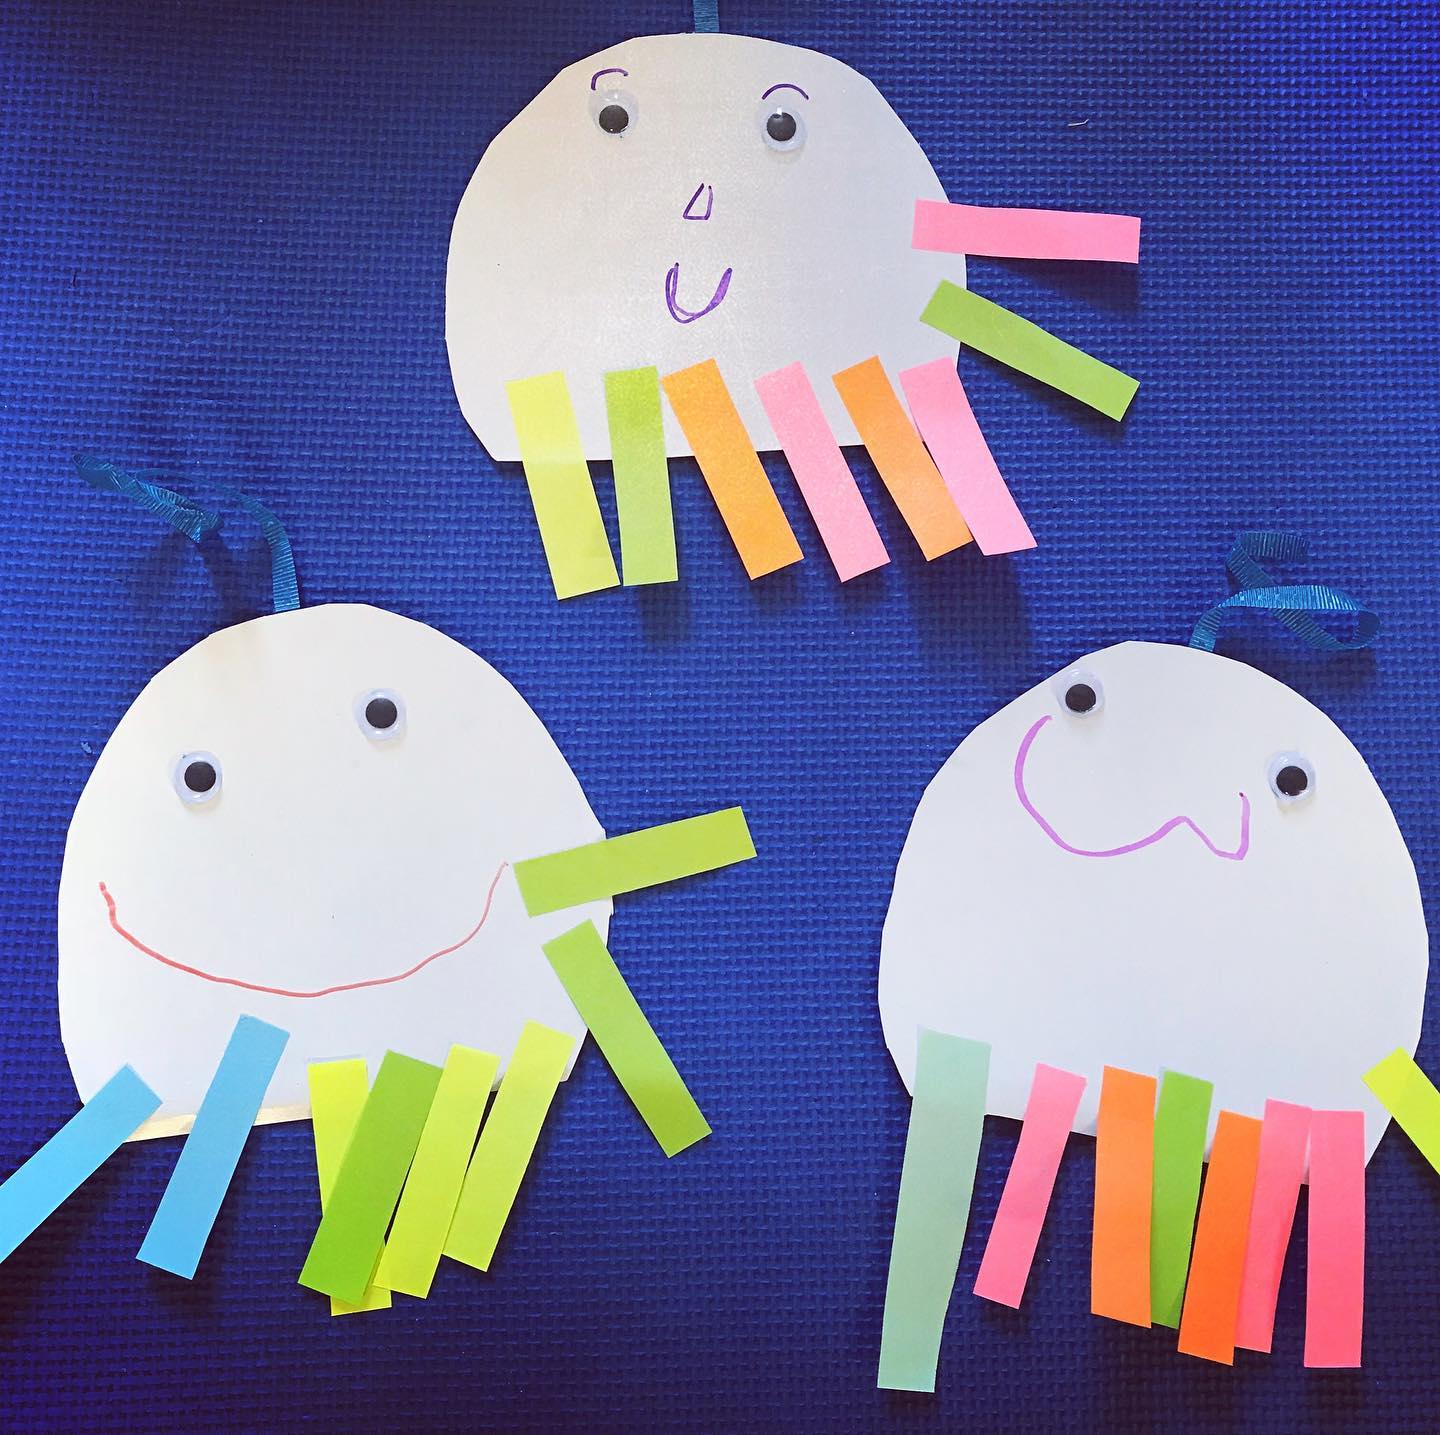
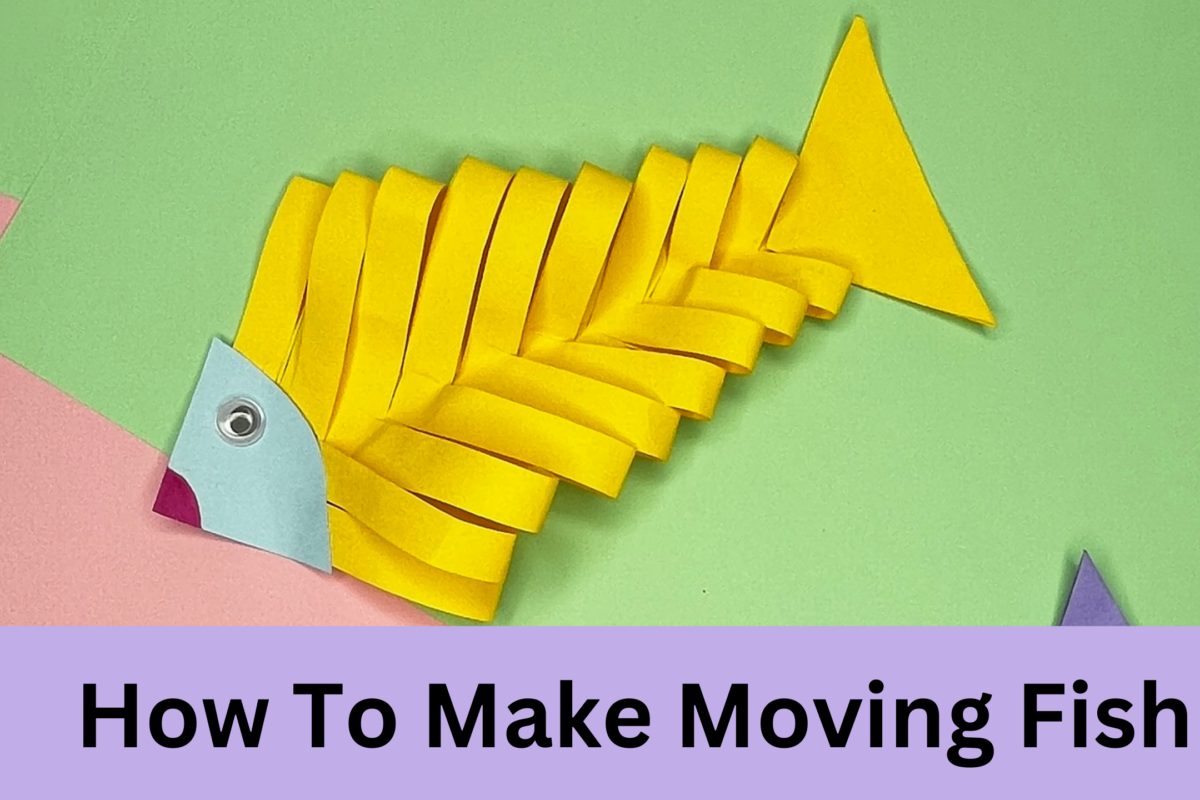
17. Jelly Fish
To make these cute jellyfish crafts, start by cutting out a simple round shape from white paper to serve as the jellyfish’s body. Next, glue on two googly eyes near the top of the circle to give it a playful look. For the jellyfish tentacles, cut colorful strips of paper in various bright colors, such as pink, green, and yellow. Glue these strips to the bottom edge of the paper circle, allowing them to hang down like tentacles. Then, use markers to draw a cute smile or other facial features on the jellyfish’s face. Lastly, for an added touch, you can attach a small ribbon or string to the top of the jellyfish to make it look like it’s floating. This simple craft is perfect for kids and can be a fun way to celebrate ocean-themed activities!
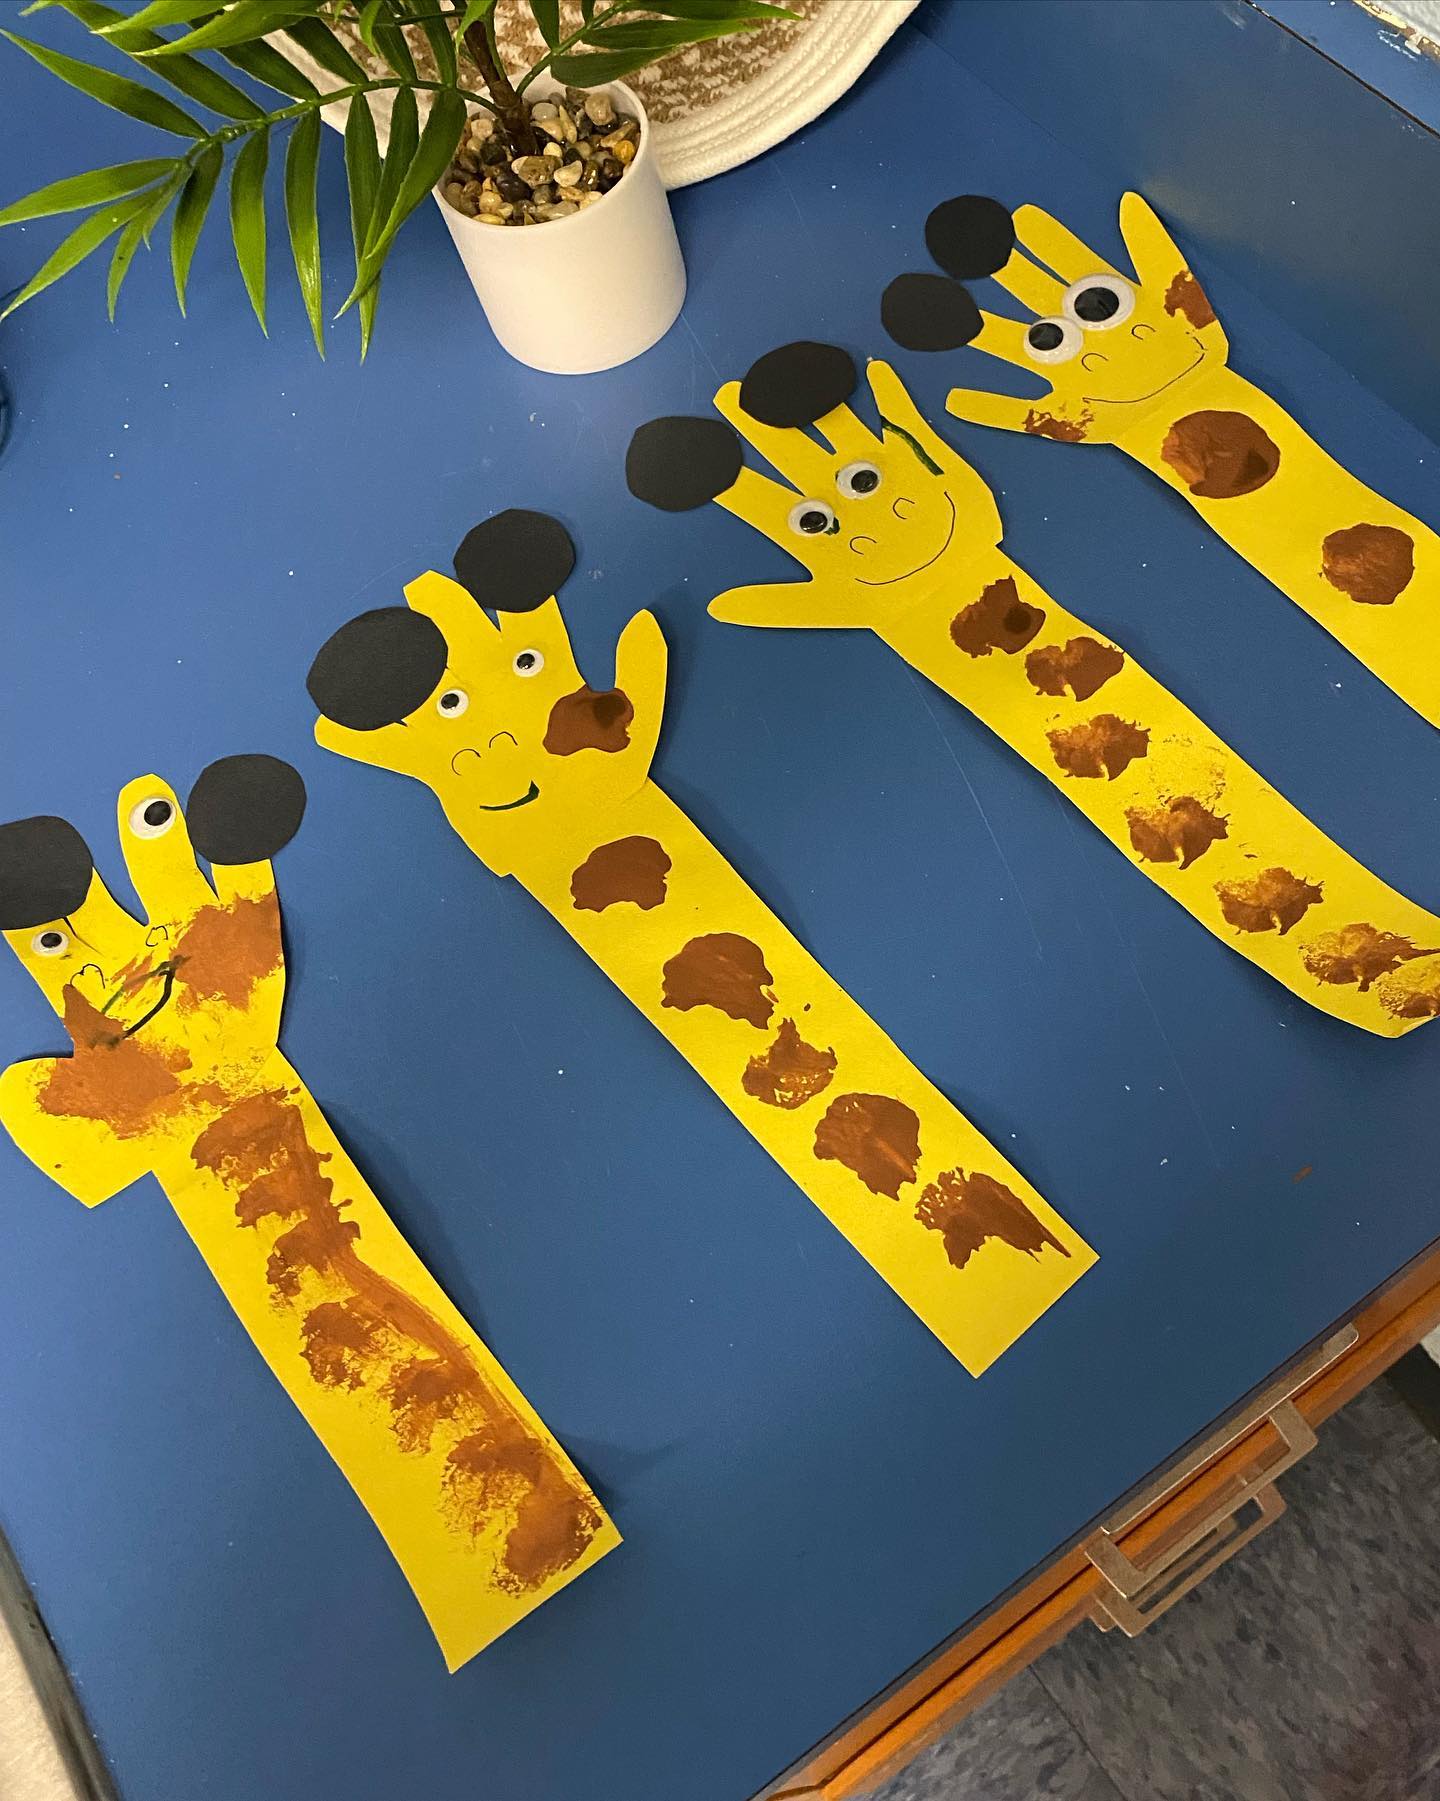
18. Giraffe
To make these fun handprint giraffe crafts, start by tracing your hand on yellow construction paper and cutting it out—this will form the giraffe’s head and ossicones (horns). Then, cut a long rectangular strip from the same yellow paper to create the giraffe’s neck and glue it to the bottom of the handprint. Use brown paint or markers to add spots along the neck to mimic a giraffe’s pattern. Glue black or brown paper circles to the tops of the “fingers” to represent the ossicones. Add googly eyes to the face area and draw a smile and nostrils with a black marker. Once everything is dry, your adorable handprint giraffe is ready to be displayed! This is a great craft for preschoolers learning about animals.
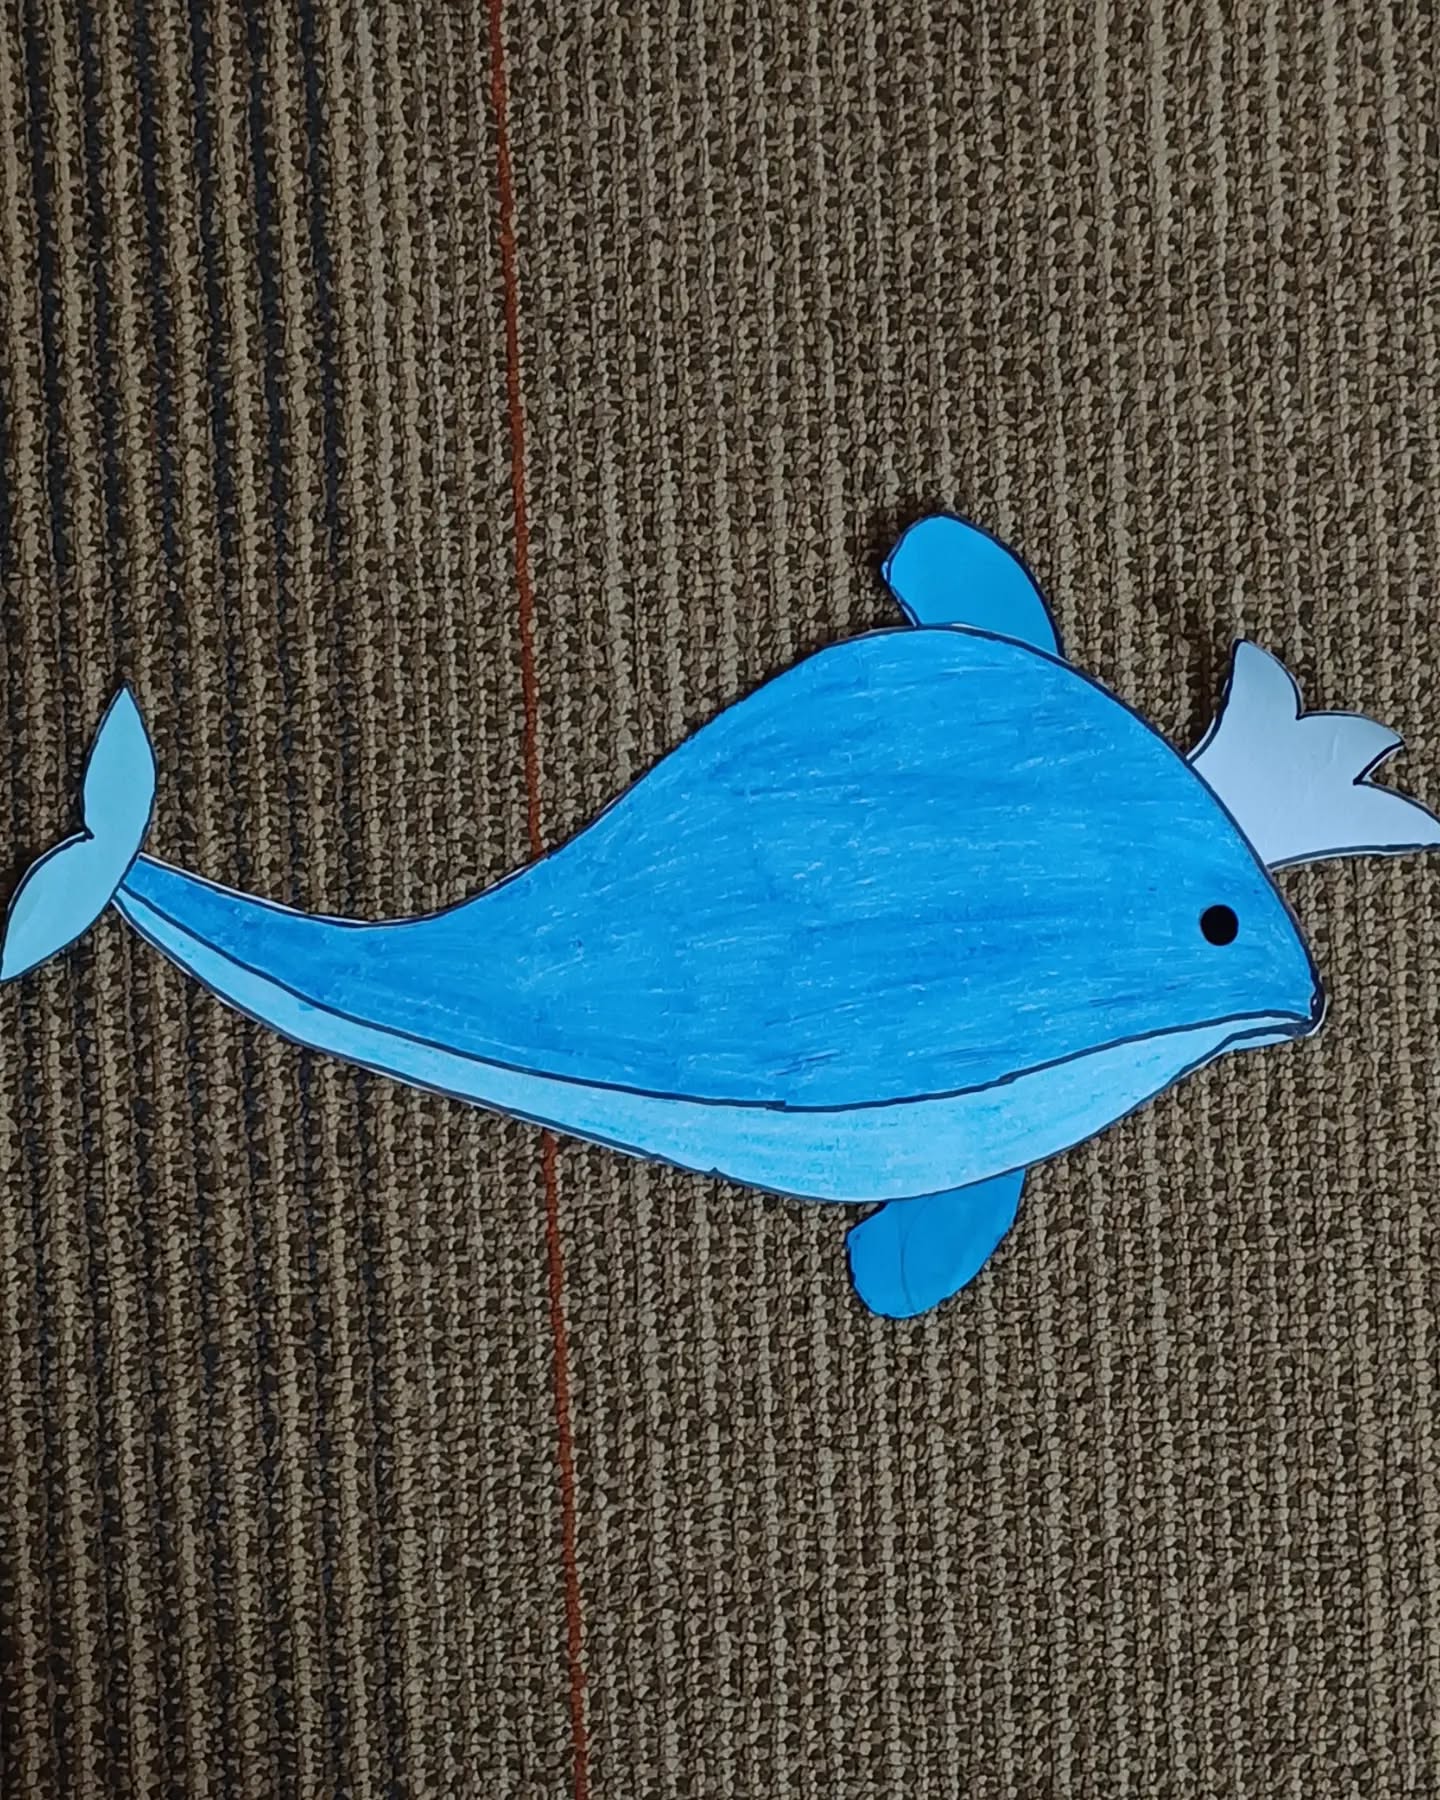
19. Whale
To make this whale draw a whale with pencil and colour it with wax crayons.

20. Honey Bee
To make this adorable butterfly or bug headband, start by cutting a long strip of white cardstock or construction paper to fit around the child’s head and tape or staple it into a circle. Cut out two large yellow ovals for the eyes, then glue smaller white circles and tiny yellow dots in the center to complete the eyes. Attach these eyes to the front of the headband. For the antennae, twist two gold pipe cleaners into spiral shapes and secure them to the inside of the headband using tape or glue. Let the child wear their fun buggy headband and enjoy imaginative play!
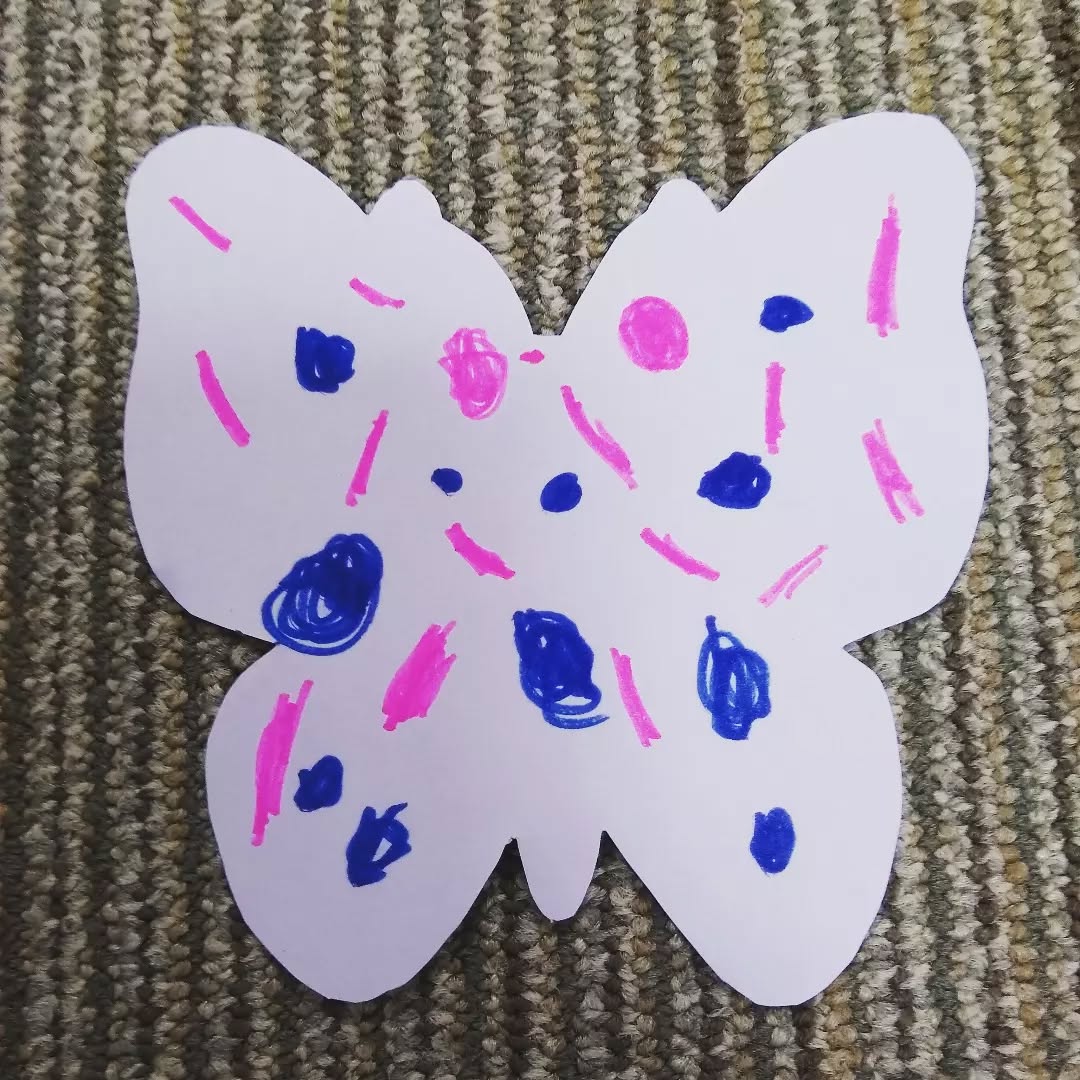
21. Butterfly
This is a simple butterfly paper cut out with touch of wax crayon colour.

22. Collage Cactus
To make this adorable cactus craft, start by cutting a large cactus shape from green construction paper. Then, tear or cut small pieces of green paper to create the “spikes” and texture of the cactus, and glue them all over the cactus shape for a layered effect. Next, cut out a pot shape from brown or orange construction paper and glue it to the bottom of the cactus to complete the potted look. You can mount the whole craft on a larger sheet or leave it as-is for a cute classroom decoration. This simple and tactile activity is great for practicing scissor skills and fine motor coordination.
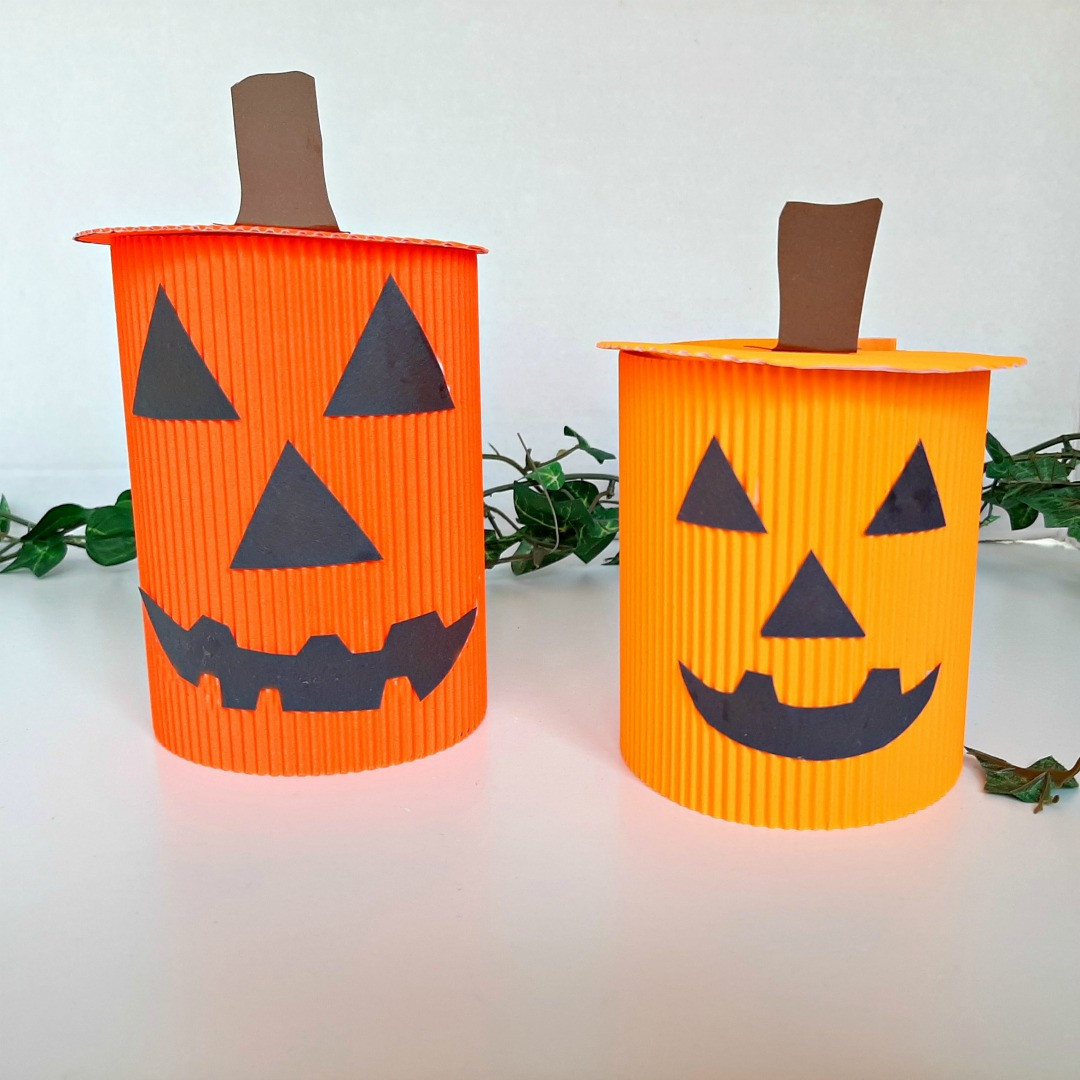
23. Halloween Pumpkin
To create these adorable pumpkin crafts, start with two empty cups or small containers that have a ribbed texture, such as a disposable drink cup. Paint the entire surface orange to give the cup a pumpkin-like appearance. Next, cut out shapes from black construction paper to create the pumpkin’s face—triangular eyes, a triangular nose, and a jagged mouth. Carefully glue these pieces onto the front of the cup to form the spooky jack-o’-lantern face. For the stem, cut a small rectangle from brown paper and glue it to the top of the cup, making it look like the pumpkin’s stem. Once everything is dry, you can add decorative elements like green vines or leaves to complete the look. This simple craft is a great way to celebrate Halloween!
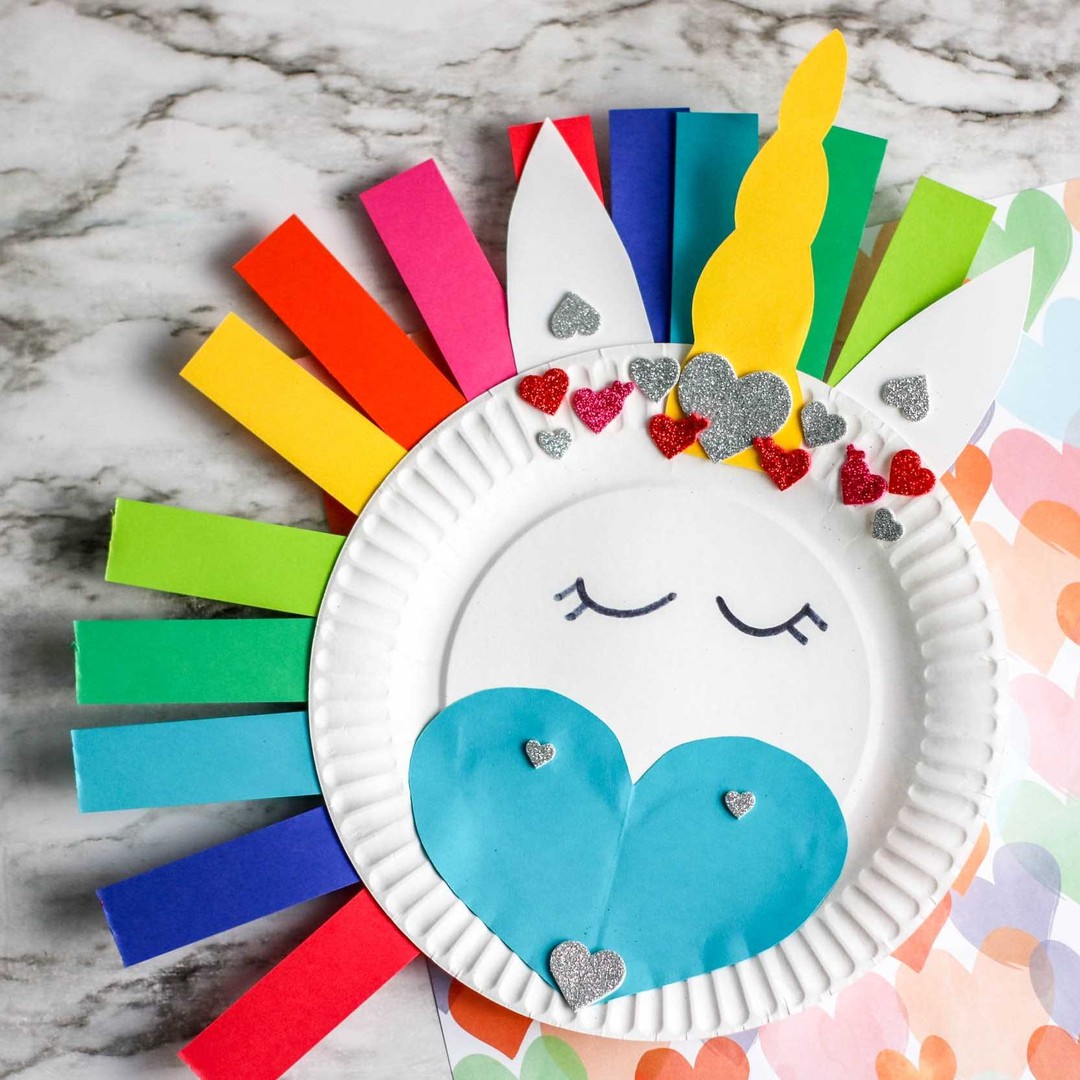
24. Pretty Craft
To make this colorful unicorn craft, start with a white paper plate as the base. Cut out strips of colored construction paper in rainbow colors and glue them around the top half of the plate to form the unicorn’s mane. Next, cut out a large yellow horn and two white ears with pink inner parts, then glue them above the plate. Cut a large blue heart and glue it at the bottom center of the plate to act as the unicorn’s nose and cheeks. Use a marker to draw closed eyes with lashes in the center of the plate. Finally, decorate the top with glittery heart stickers or foam shapes for extra sparkle. This fun and magical project is perfect for young kids and great for practicing color recognition and gluing skills.
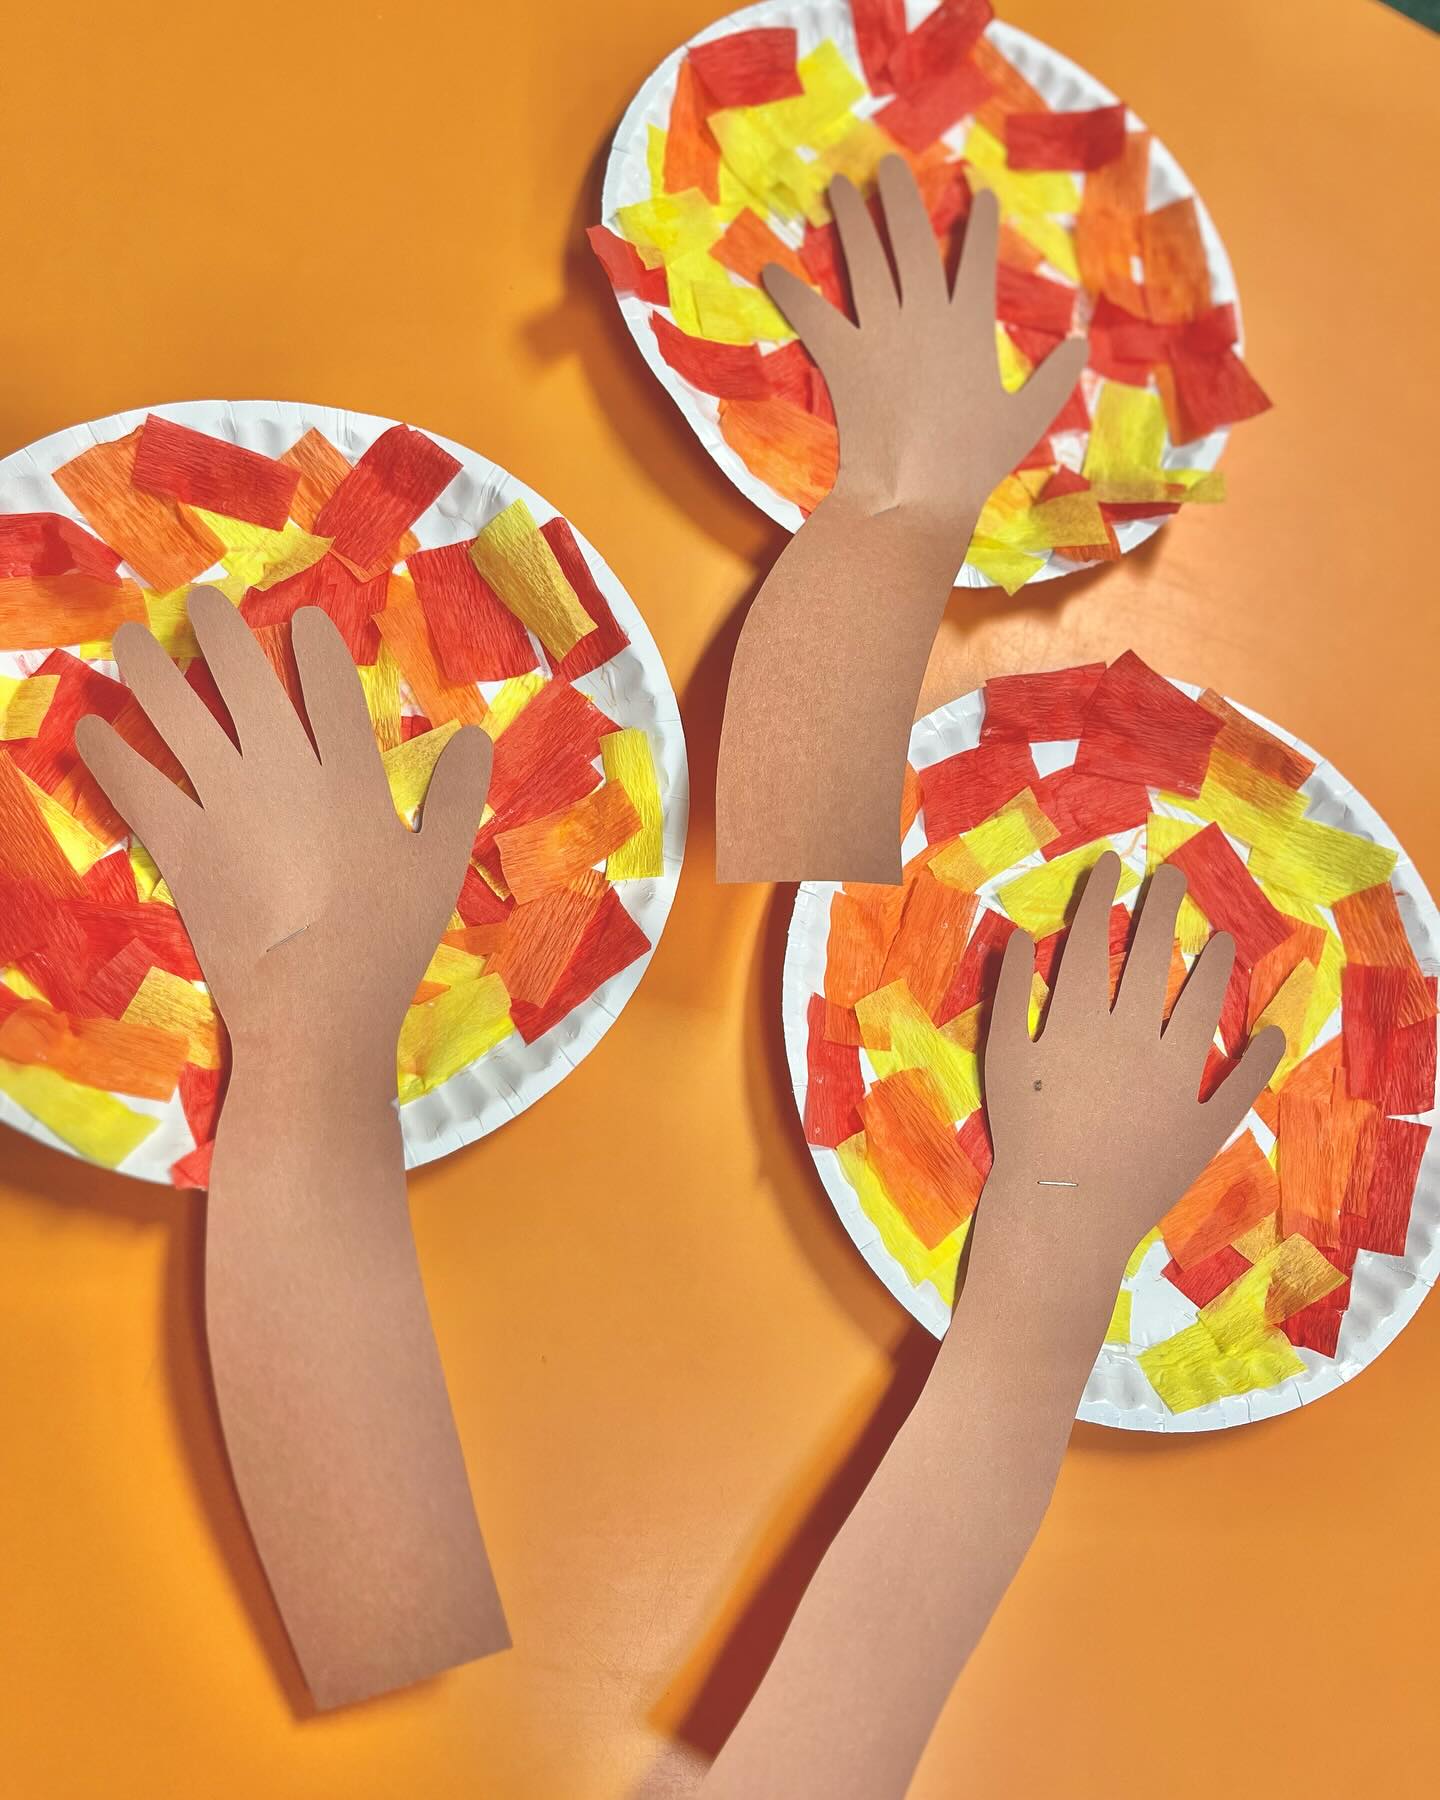
25. Aesthetic Craft
To make this fun and festive autumn craft, start with a white paper plate and cover the center with small pieces of red, orange, and yellow tissue or crepe paper to mimic fall leaves—glue them down randomly to create a colorful, leafy texture. Next, trace a child’s hand and forearm on a sheet of brown construction paper and cut it out. Glue the hand cutout onto the center of the paper plate so it looks like it’s reaching into the leaves. This project is great for celebrating the fall season, and it also helps young kids practice cutting, gluing, and fine motor skills.

26. Clay Shell Stamping
To make this fun seashell impression craft, start by rolling out a ball of air-dry clay or homemade salt dough into a flat, round disc about 1/2 inch thick. Gather a variety of small plastic sea creatures or shells, like starfish, conch shells, and scallops. Gently press each item into the clay to make a clear impression, then carefully lift them off. Once you’re happy with the pattern, let the clay dry completely according to the package instructions (or air-dry overnight if using salt dough). This creates a beautiful fossil-like beach-themed artwork perfect for summer activities or ocean-themed lessons!
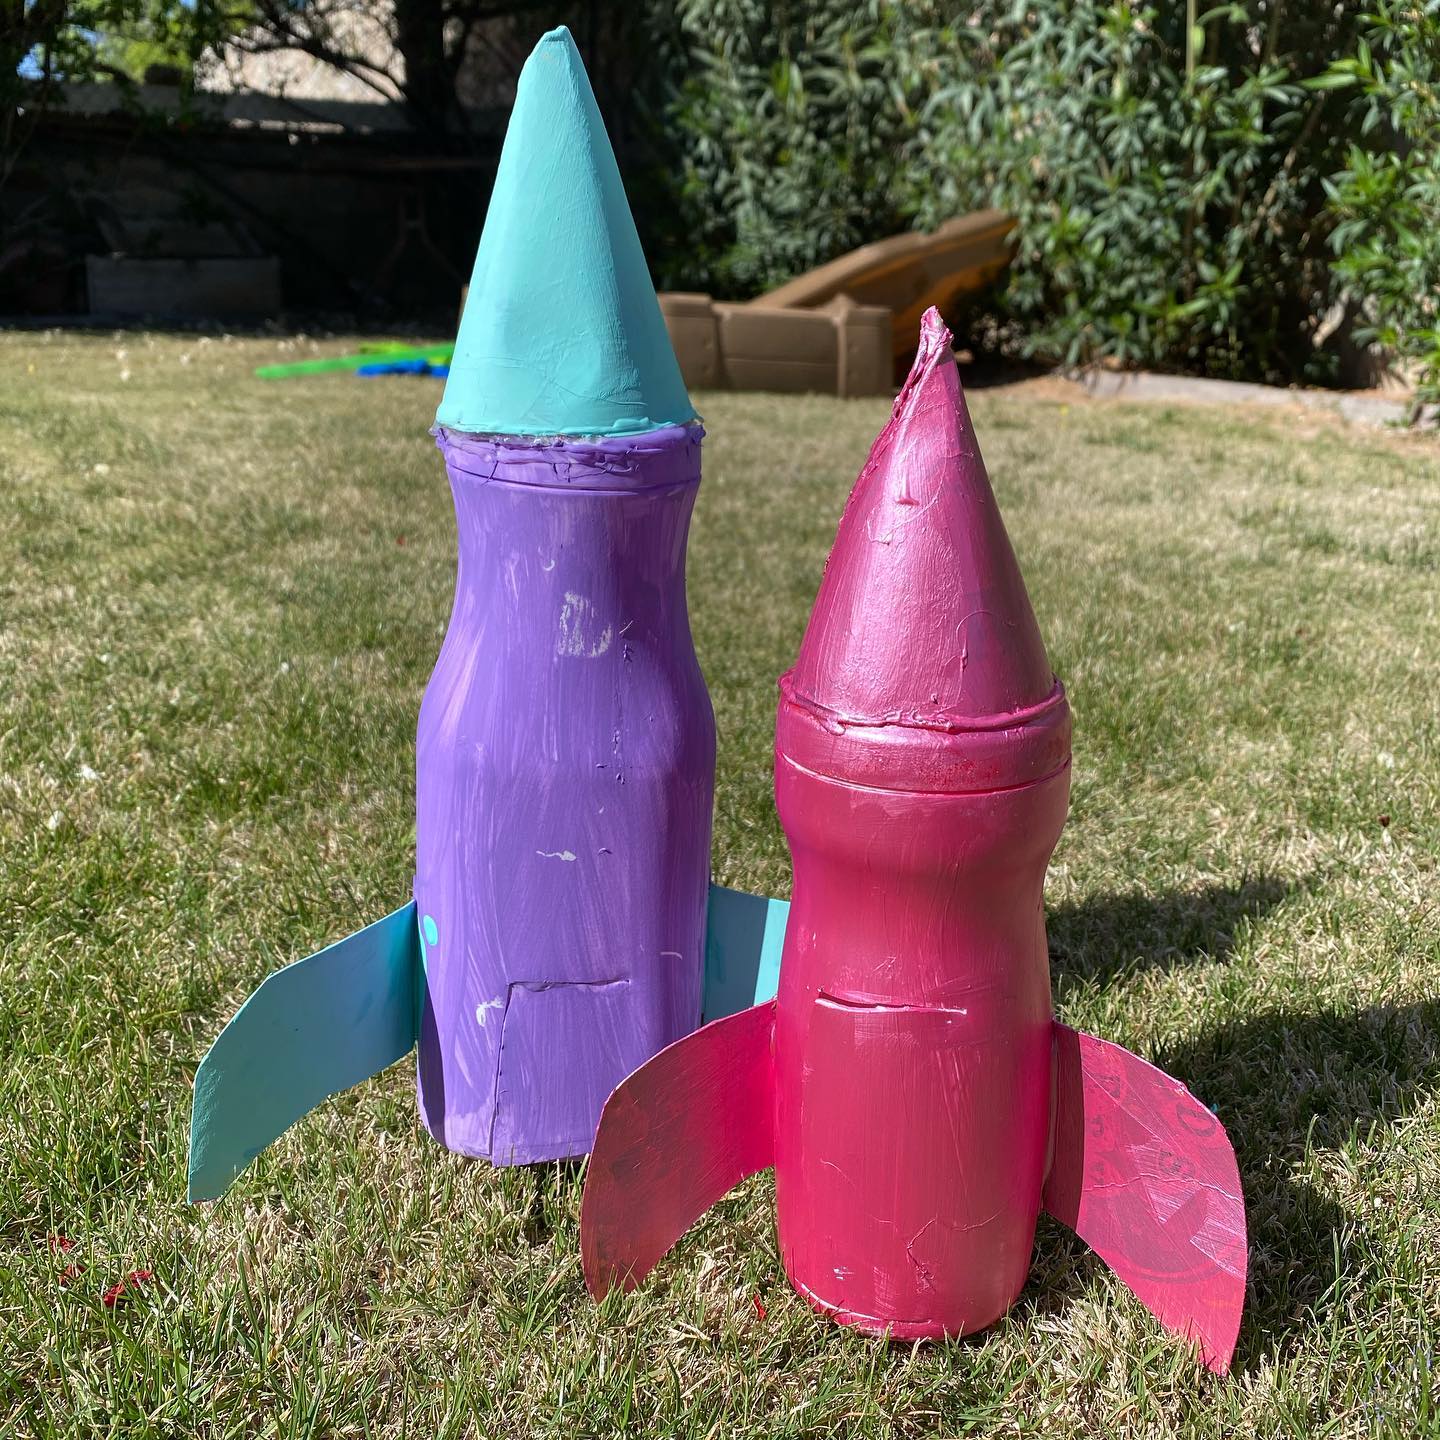
27. Beautiful Rocket
To make these fun rocket-shaped crafts, start by collecting some empty plastic bottles. You’ll need two bottles, one for each rocket. Begin by painting the bottles with bright colors like purple and pink, covering the whole surface to give them a solid, vibrant look. For the rocket’s nose, take a piece of cardboard or thick paper and cut it into a cone shape, then paint it in a complementary color, like turquoise, and attach it to the top of the bottle with glue. Next, create the rocket fins using cardboard or thick paper; cut them into a triangular shape and paint them. Attach the fins to the bottom of the bottle, spacing them evenly. Once the paint is dry, you can add any extra touches, such as stars or dots, to give your rocket a more personal and decorative feel.