
Clay crafts are something we all enjoy—who wouldn’t? Whether you’re a pro or just starting out, weekends are the perfect time to get creative with clay. Here are some fantastic clay craft ideas you should definitely try! Here we have collected 25 trending clay craft ideas that are perfect starting from both amateurs to experts.
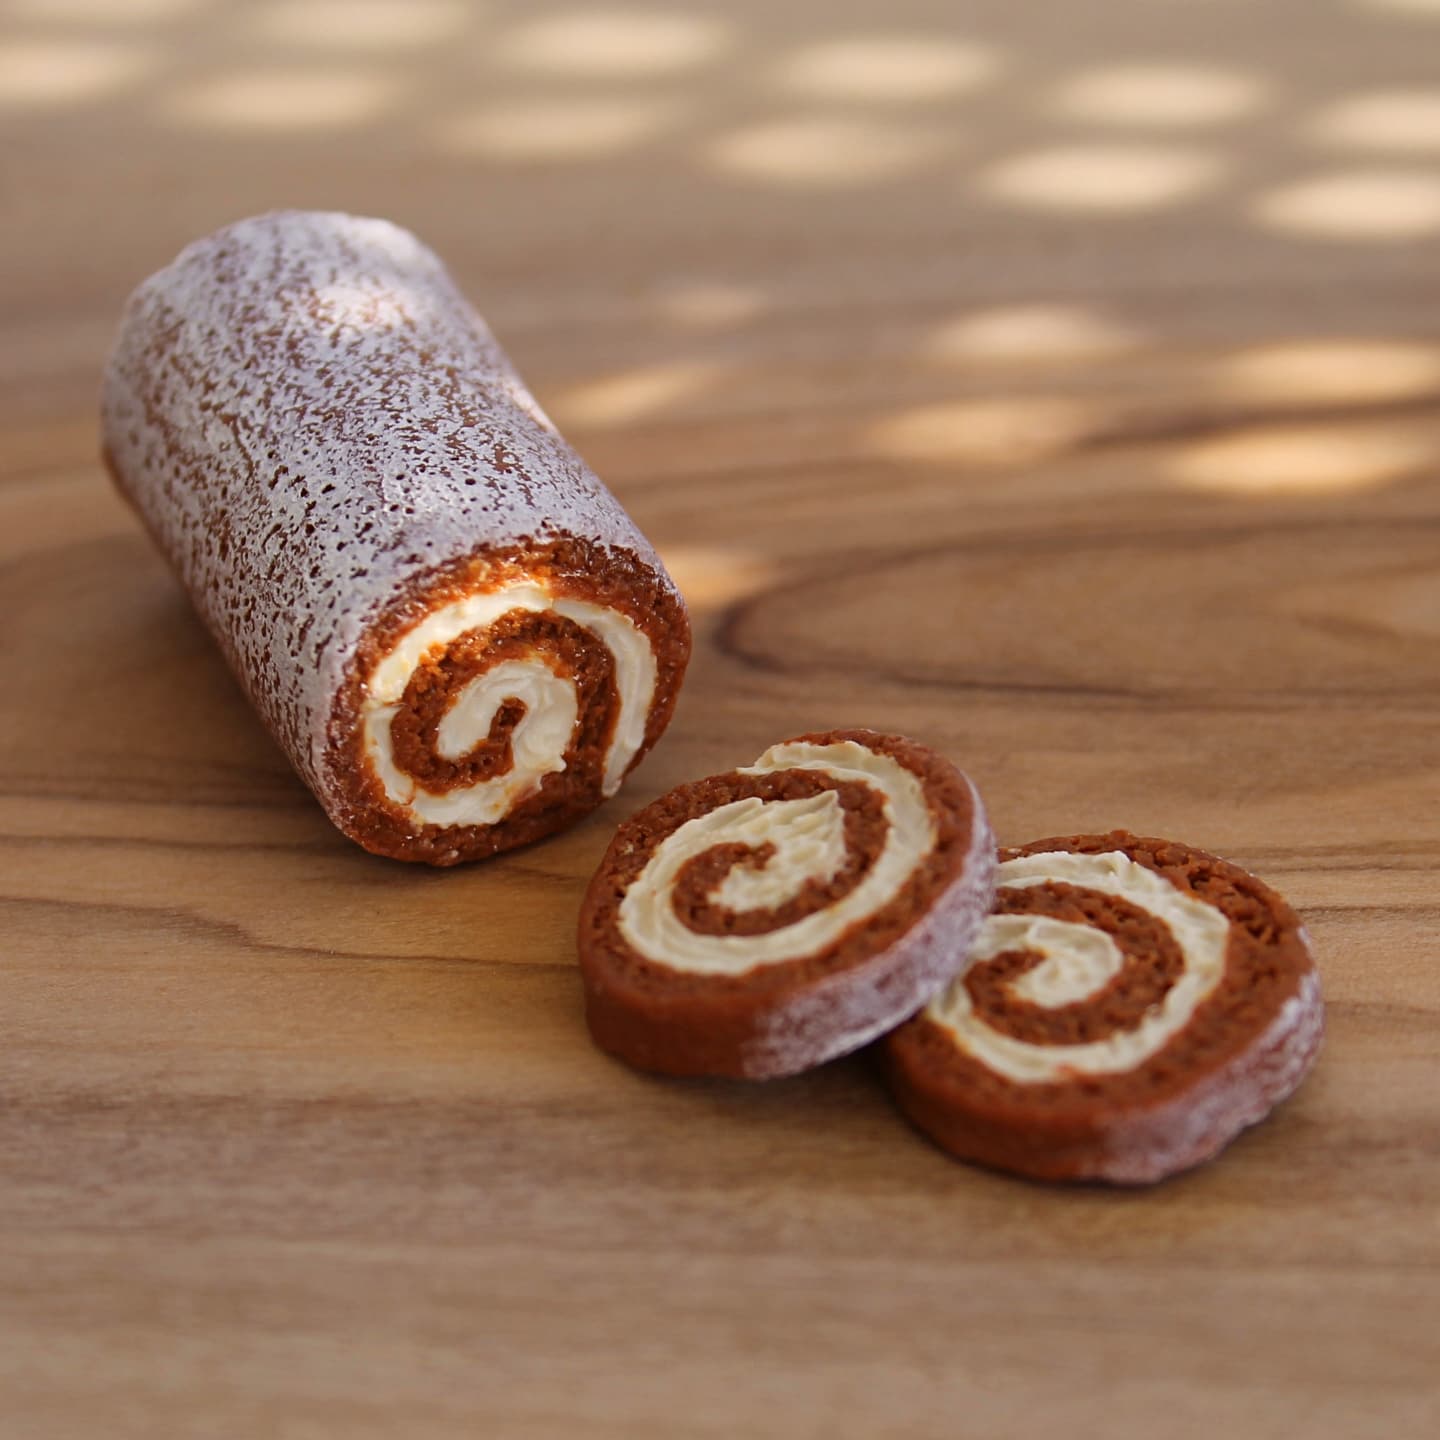
1. Swiss Roll
Crafting foods with polymer clay is a cute idea. Here you can create a Swiss roll using polymer clay craft. To make this, you have to simply roll a white colour clay into a brown coloured clay and roll into a cylinder. Then cut the cake into pieces and microwave them, and then colour them.
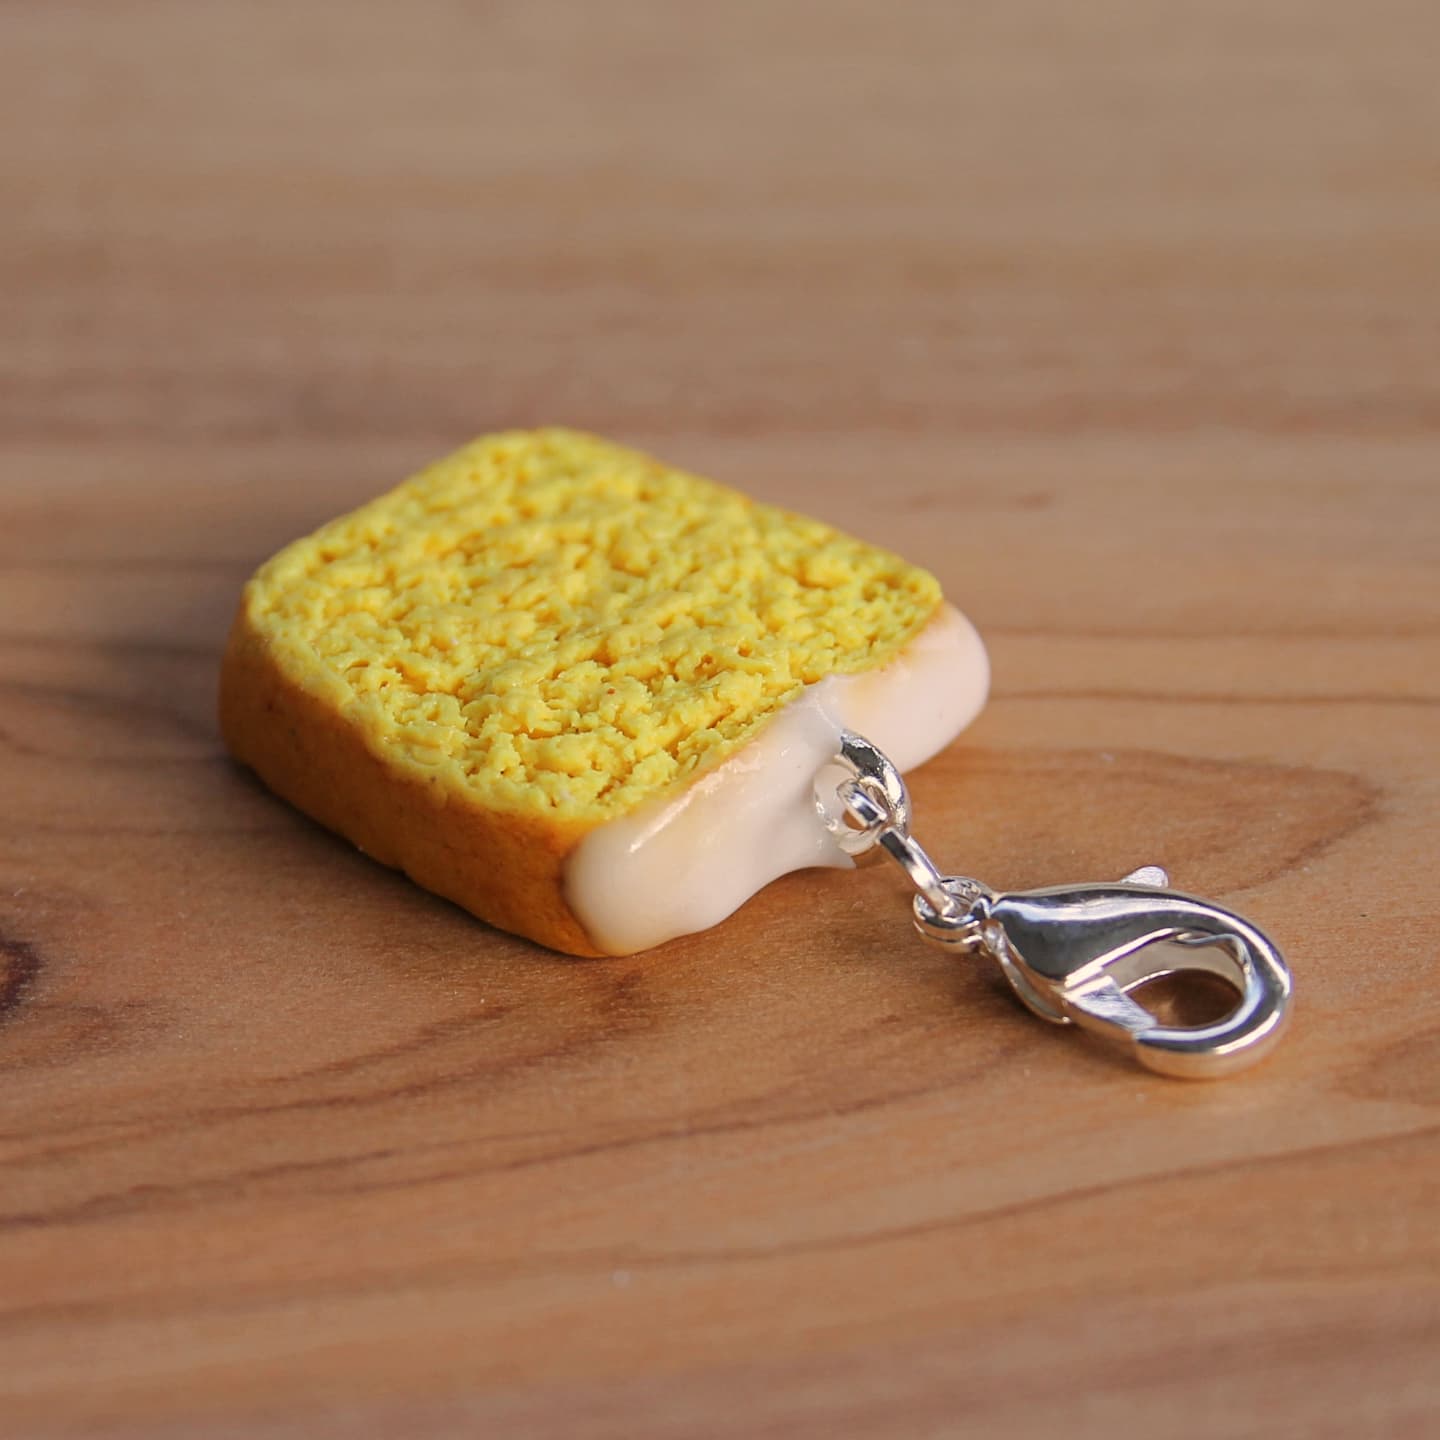
2. Butter Bread
To make this butter bread, take a piece of clay and give it the shape of a bread. Give the appearance of porous bread and butter with the help of a toothpick.
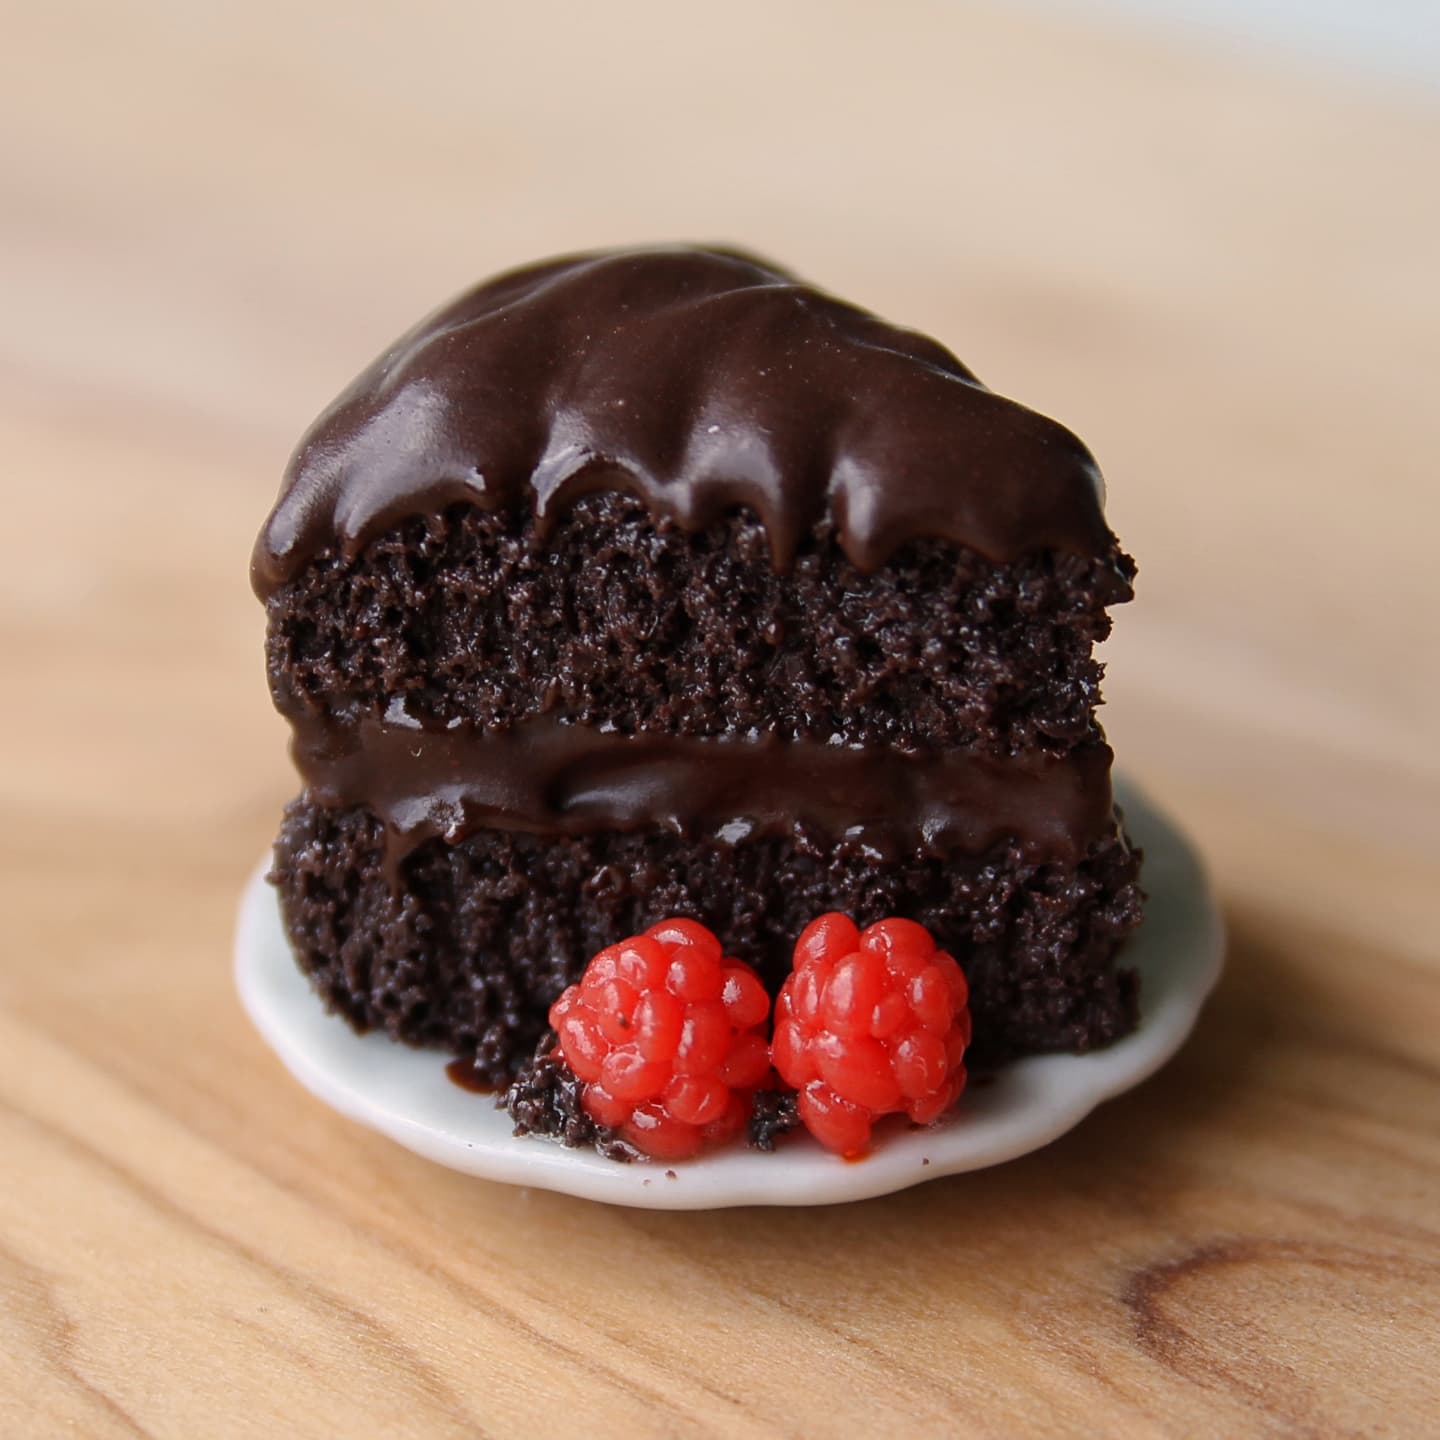
3. Chocolate Cake
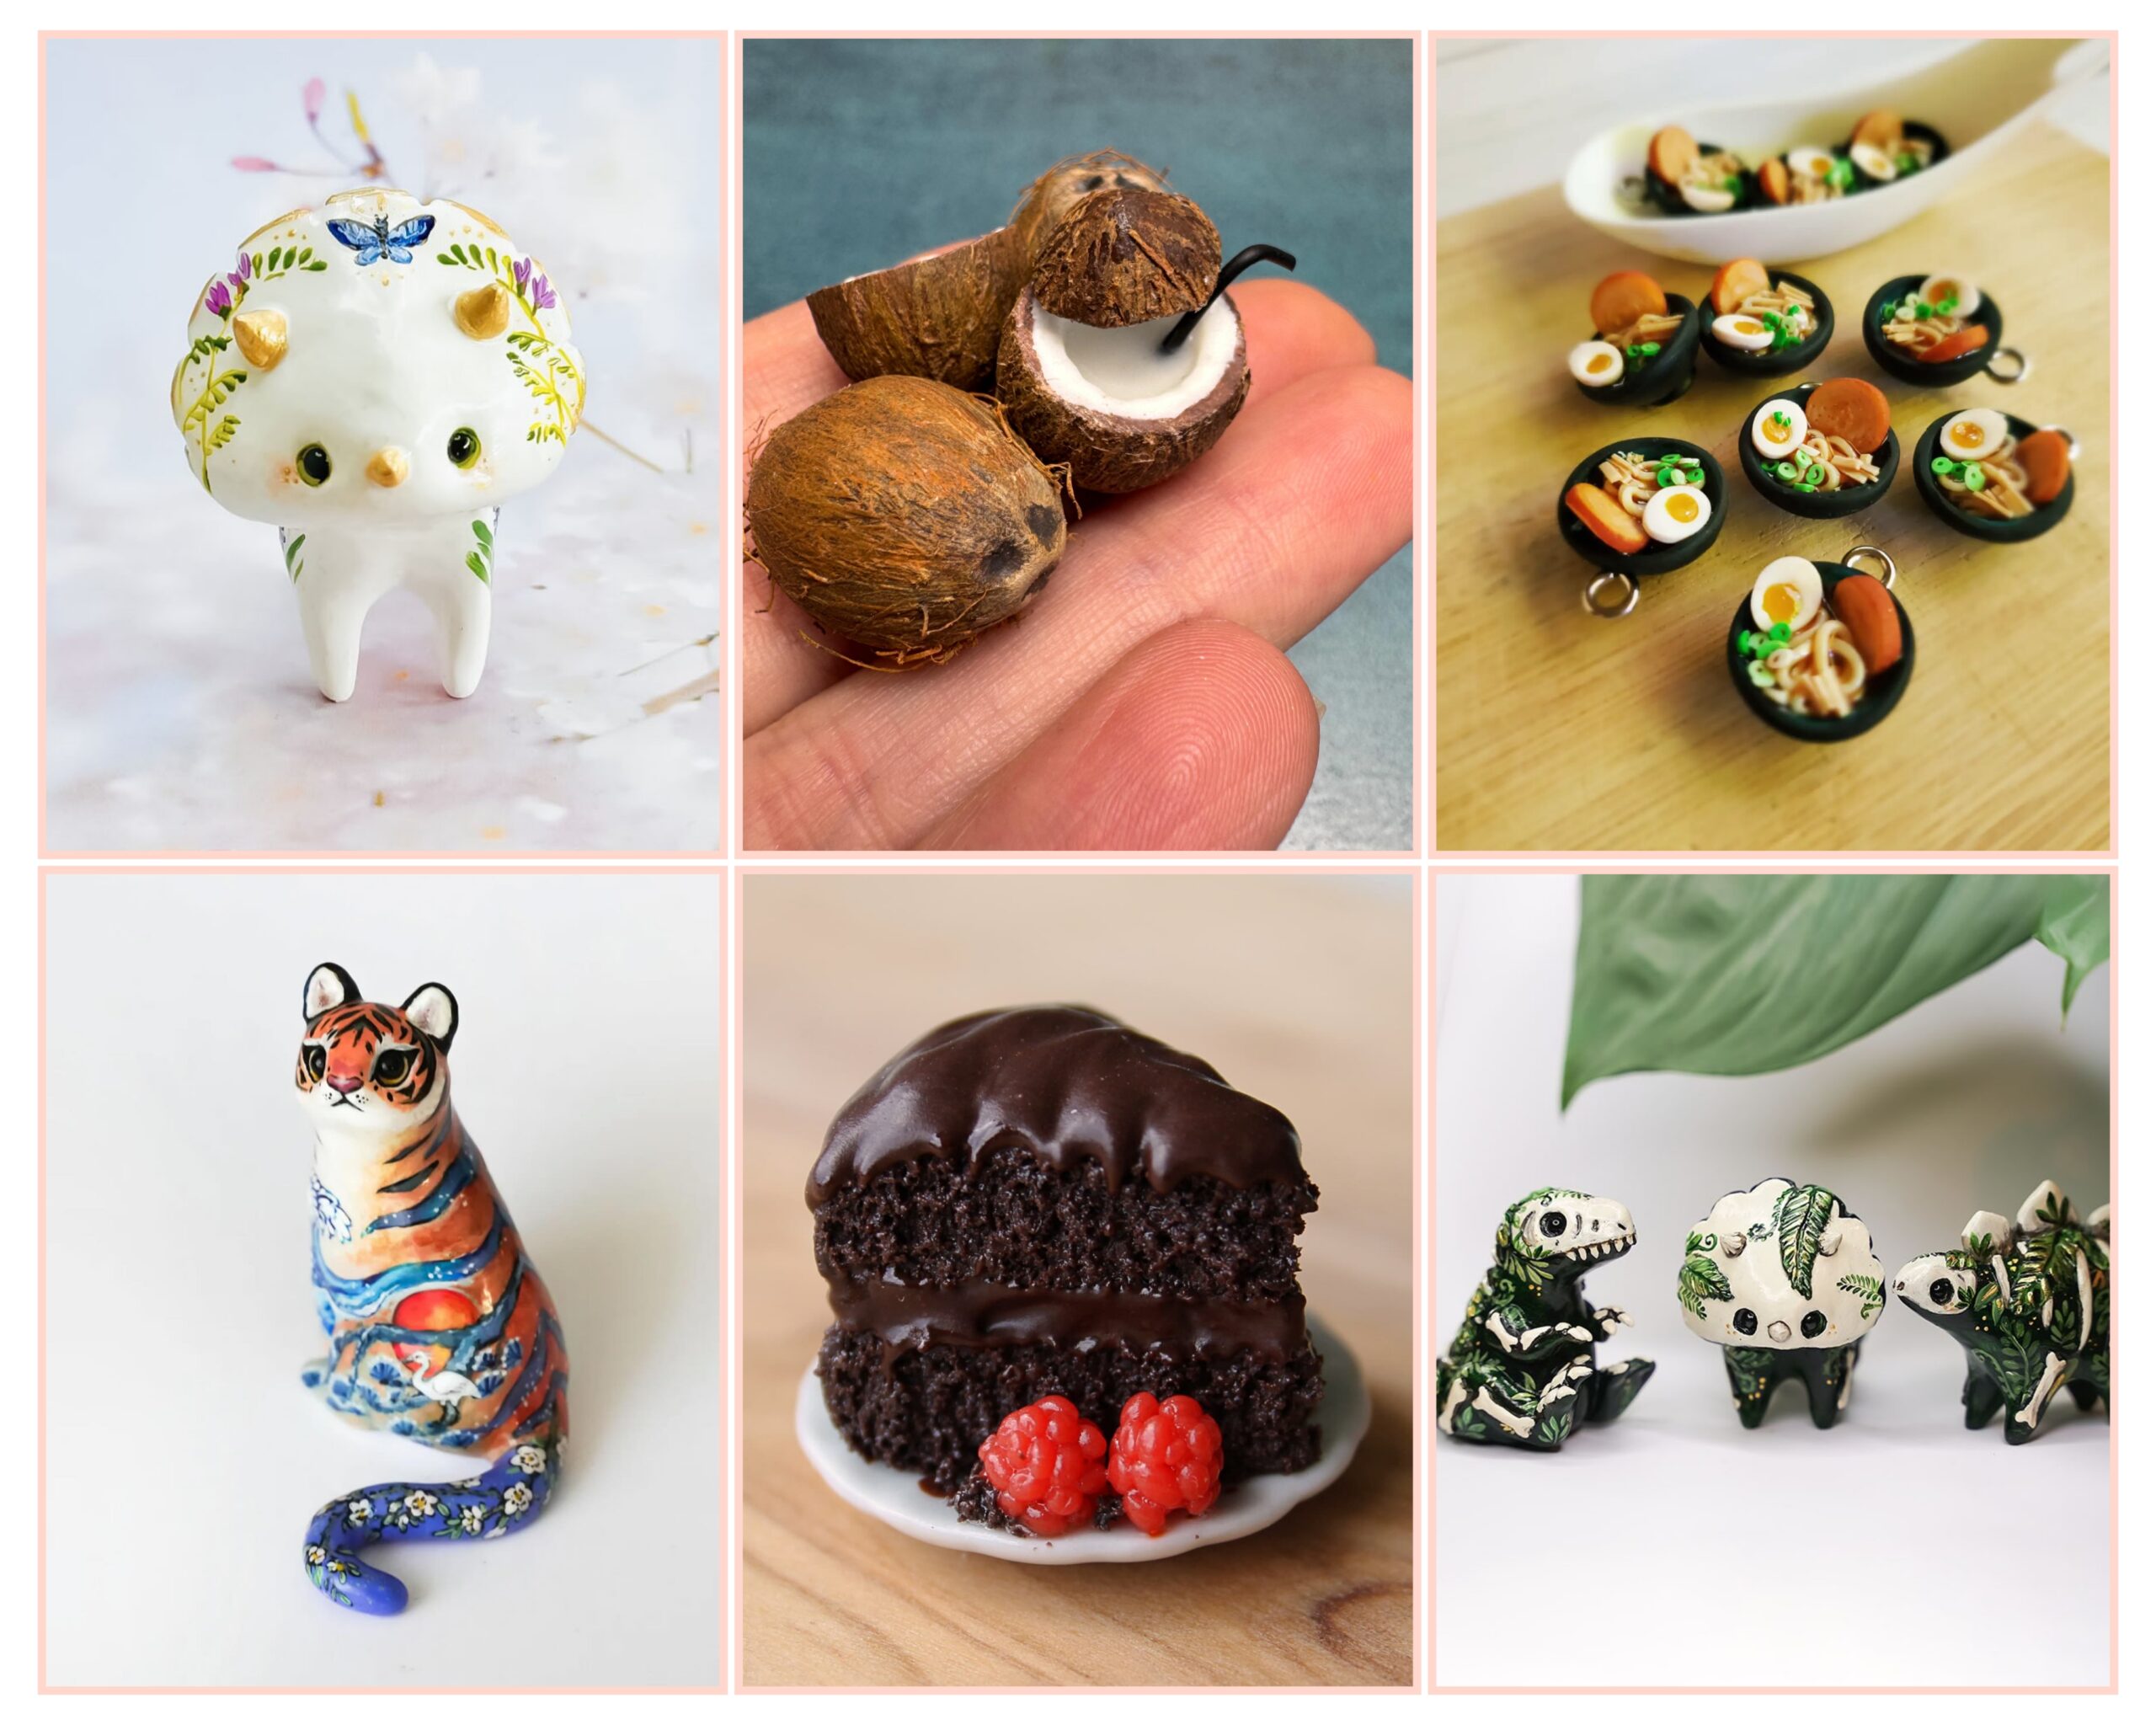
This is a delicious-looking chocolate pastry. To make a polymer clay chocolate cake, start by choosing a rich brown clay to mimic the look of chocolate. Roll the clay into a thick, even cylinder to form the cake base. Slice it neatly to create individual cake layers, then flatten some lighter brown or white clay to resemble frosting and place it between the layers. For added detail, use a toothpick or needle tool to texture the surface and create a realistic crumb effect. You can also add tiny decorations like clay cherries, whipped cream, or sprinkles on top. Once you’re happy with the design, bake the piece according to the clay package instructions to harden it. After cooling, you can varnish it for a glossy, realistic finish.

4. Cute Birds
To make polymer clay white birds, start by softening a piece of white clay and shaping it into a smooth teardrop form for the body. Use a smaller piece of clay to form the head and gently attach it to the narrower end of the body. Shape tiny wings and a tail using flat, thin pieces of clay, then attach them carefully to the sides and back. For the beak, use a small triangle of orange or yellow clay, and add tiny black dots for the eyes. You can texture the wings and tail with a toothpick to create a feathered look. Once assembled, bake the bird according to the polymer clay package instructions. After it cools, you can leave it as is for a clean, elegant look or add small painted details for extra charm.
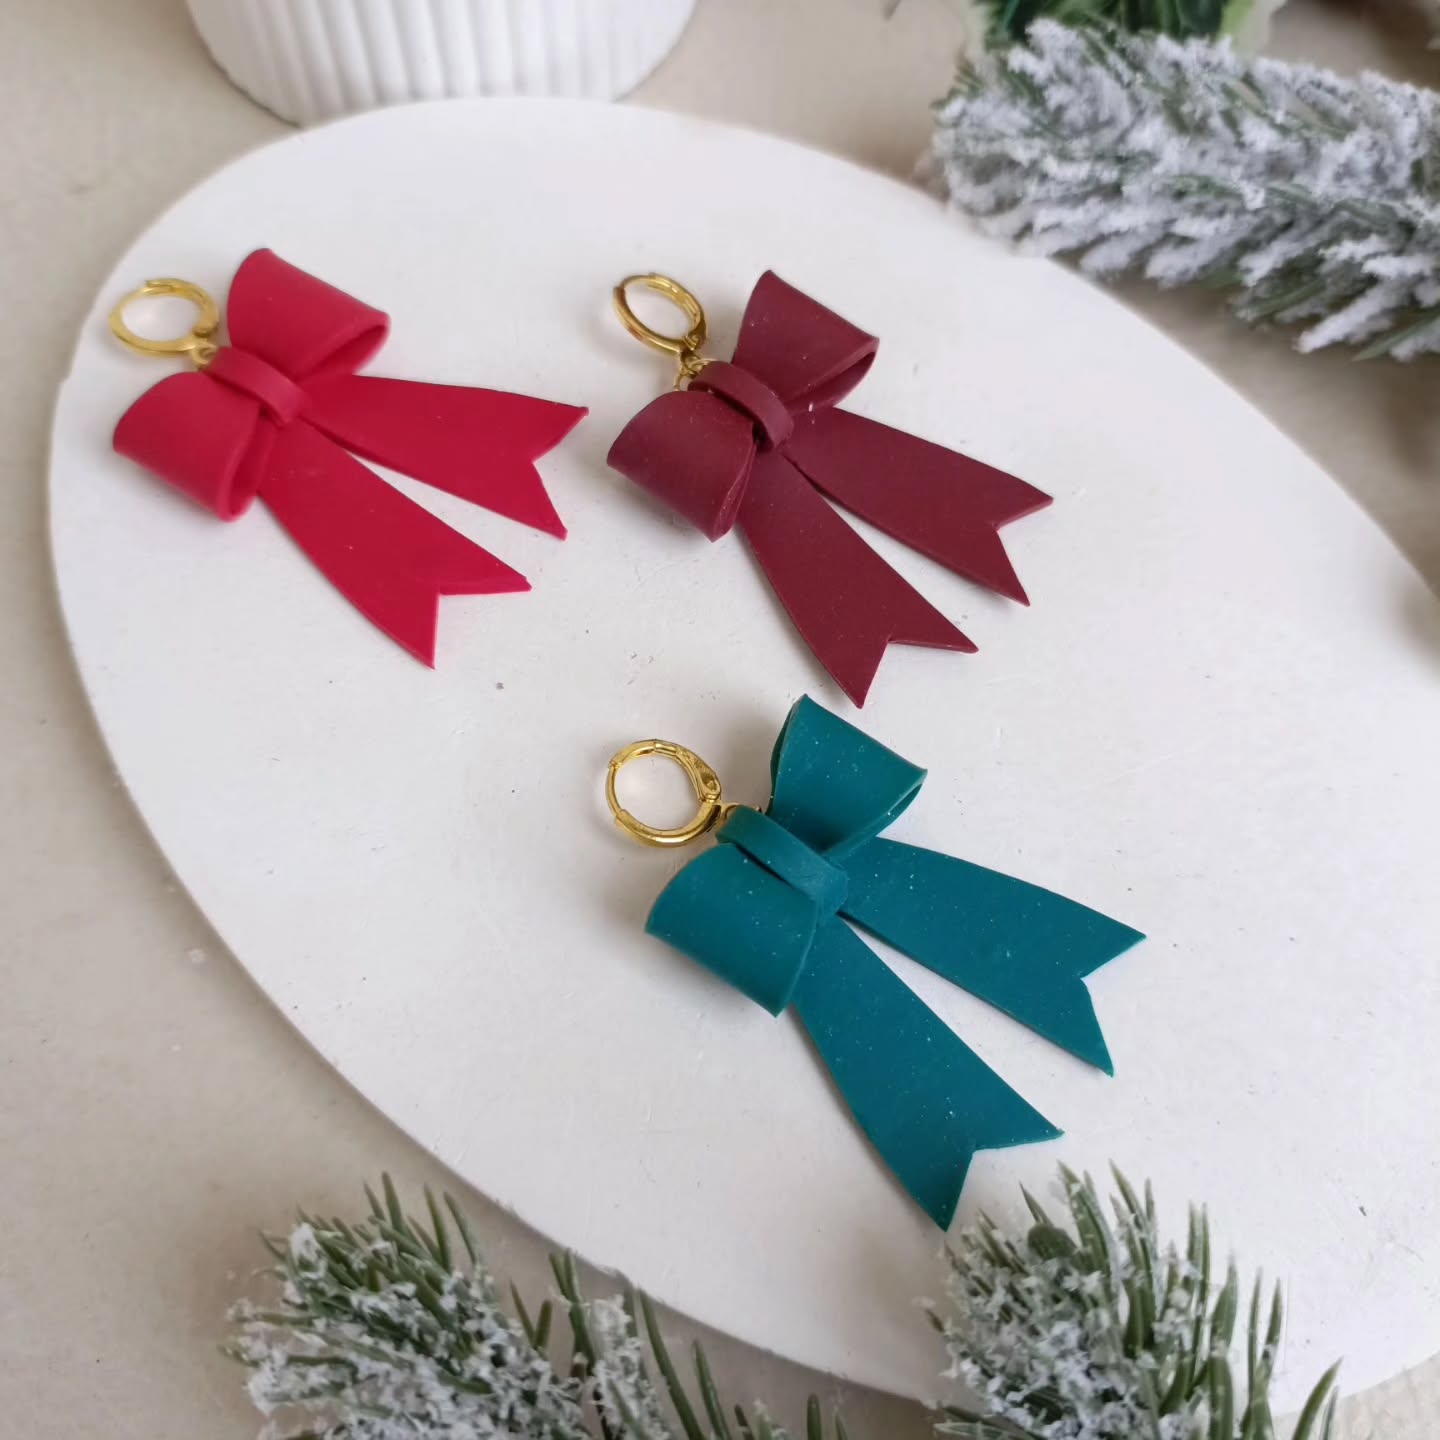
5. Ribbons
To make polymer clay ribbons, start by conditioning and rolling out your desired colour of clay into a thin, even sheet. Use a blade or craft knife to cut long, narrow strips resembling real ribbons. To give them a realistic flow, gently fold or curve the strips, pinching or twisting parts to create natural-looking folds and loops. You can also trim the ends into V-shapes or angle them for added detail. Use a small tool to add slight texture or creases, mimicking the look of fabric. Once you’re satisfied with the shape, carefully bake the ribbons following the clay package instructions. After baking and cooling, you can leave them as-is or add a light gloss for a satin-like finish.
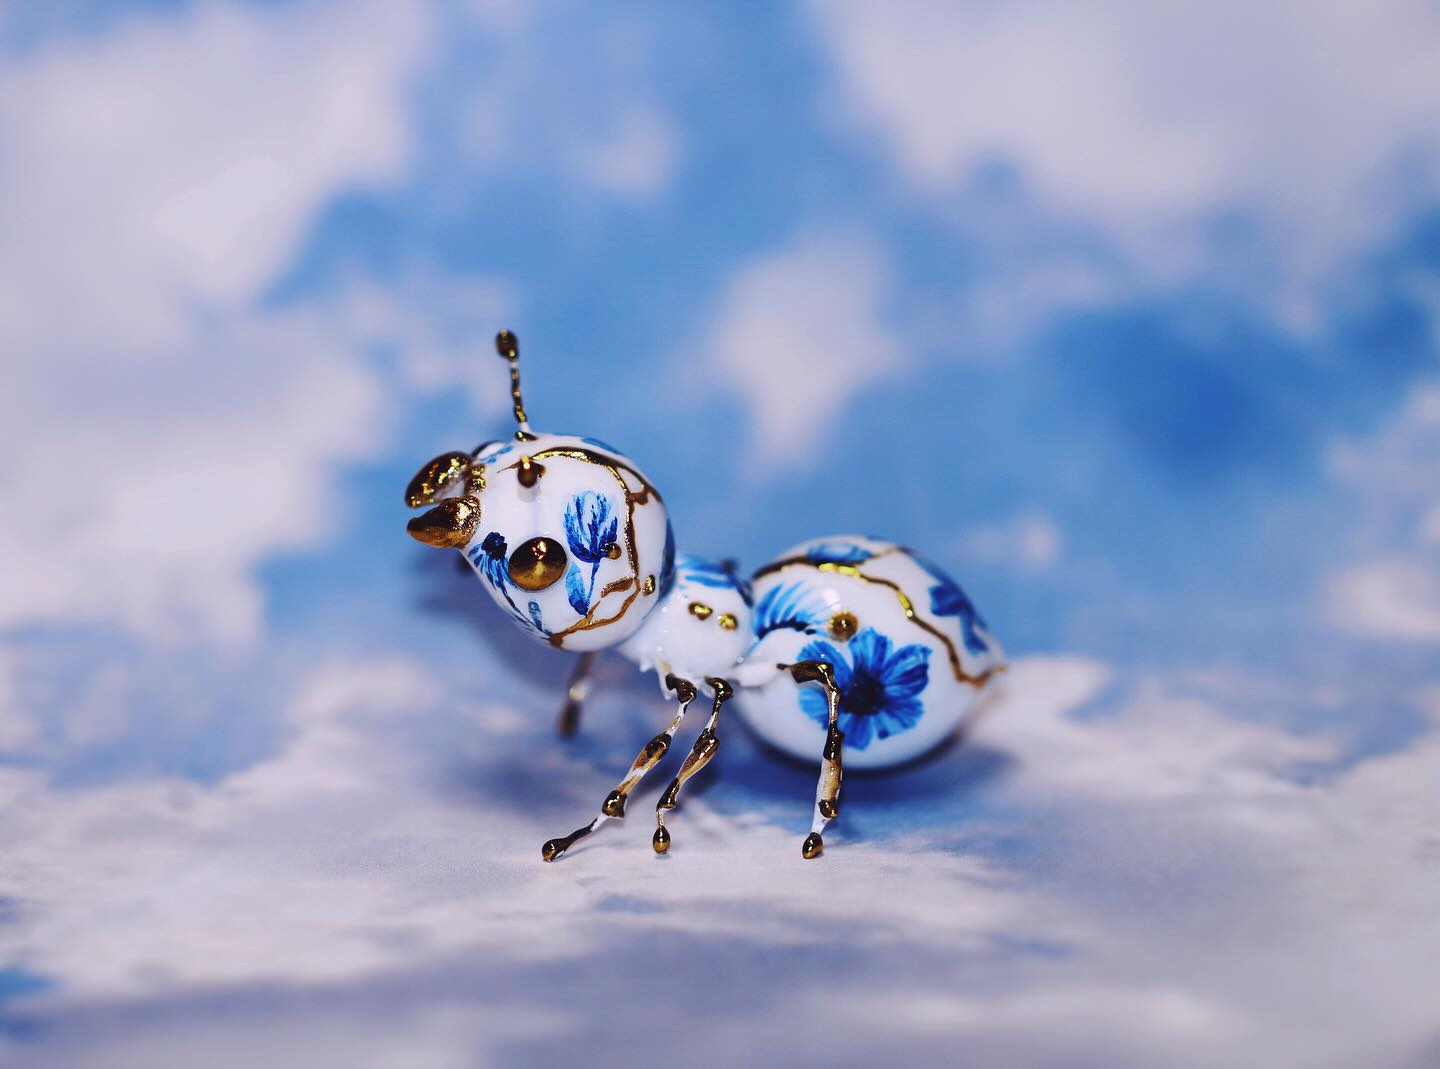
6. Queen Ant
To make this cute ant, you need three white balls and some extra clay for legs, eyes and antennas. After heating it up add beautiful colours and draw blue hibiscus flowers on it to give the ant a queen-like appearance. Keep eyes, legs and antenna and its mouth glossy golden coloured.
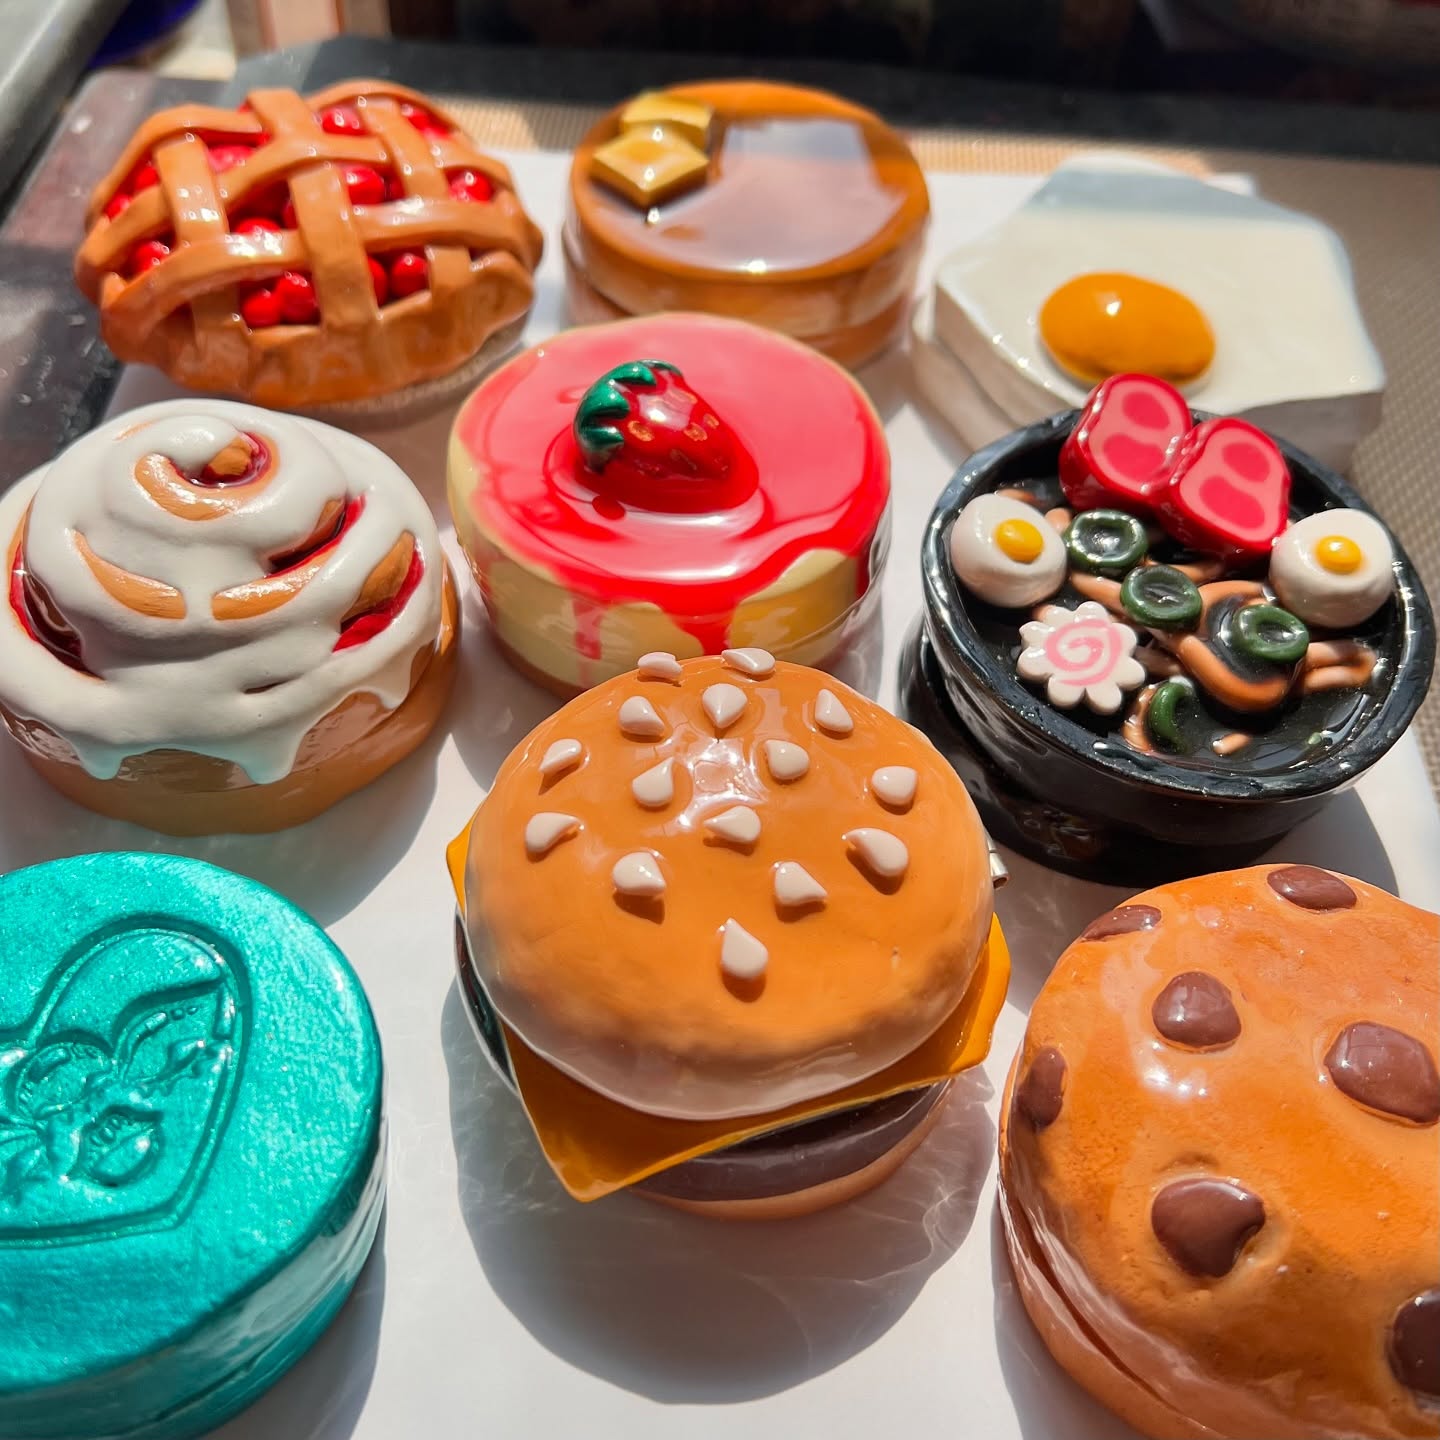
7. Delicious Dishes
We all love delicious dishes. So, do you want to make delicious-looking dishes with clay? Ball up clay pieces and give them the appearance of a burger and ramen bowl with the help of a toothpick, colour it, and you are done!

8. Christmas Tree
To make a cute polymer clay Christmas tree, start by choosing green clay and shaping it into a cone for the tree base. To give it a layered look, flatten small pieces of green clay and cut them into scalloped or teardrop shapes, then layer them from the bottom up to mimic tree branches. Add a brown cylinder at the base for the trunk. Decorate the tree with tiny balls of red, yellow, and white clay to represent ornaments, and add a star on top using yellow clay shaped into a small star. You can also add garlands by rolling out thin ropes of clay in metallic or bright colours and wrapping them around the tree. Once your design is complete, bake it according to the polymer clay instructions. After it cools, add a touch of glitter or gloss for a festive sparkle.
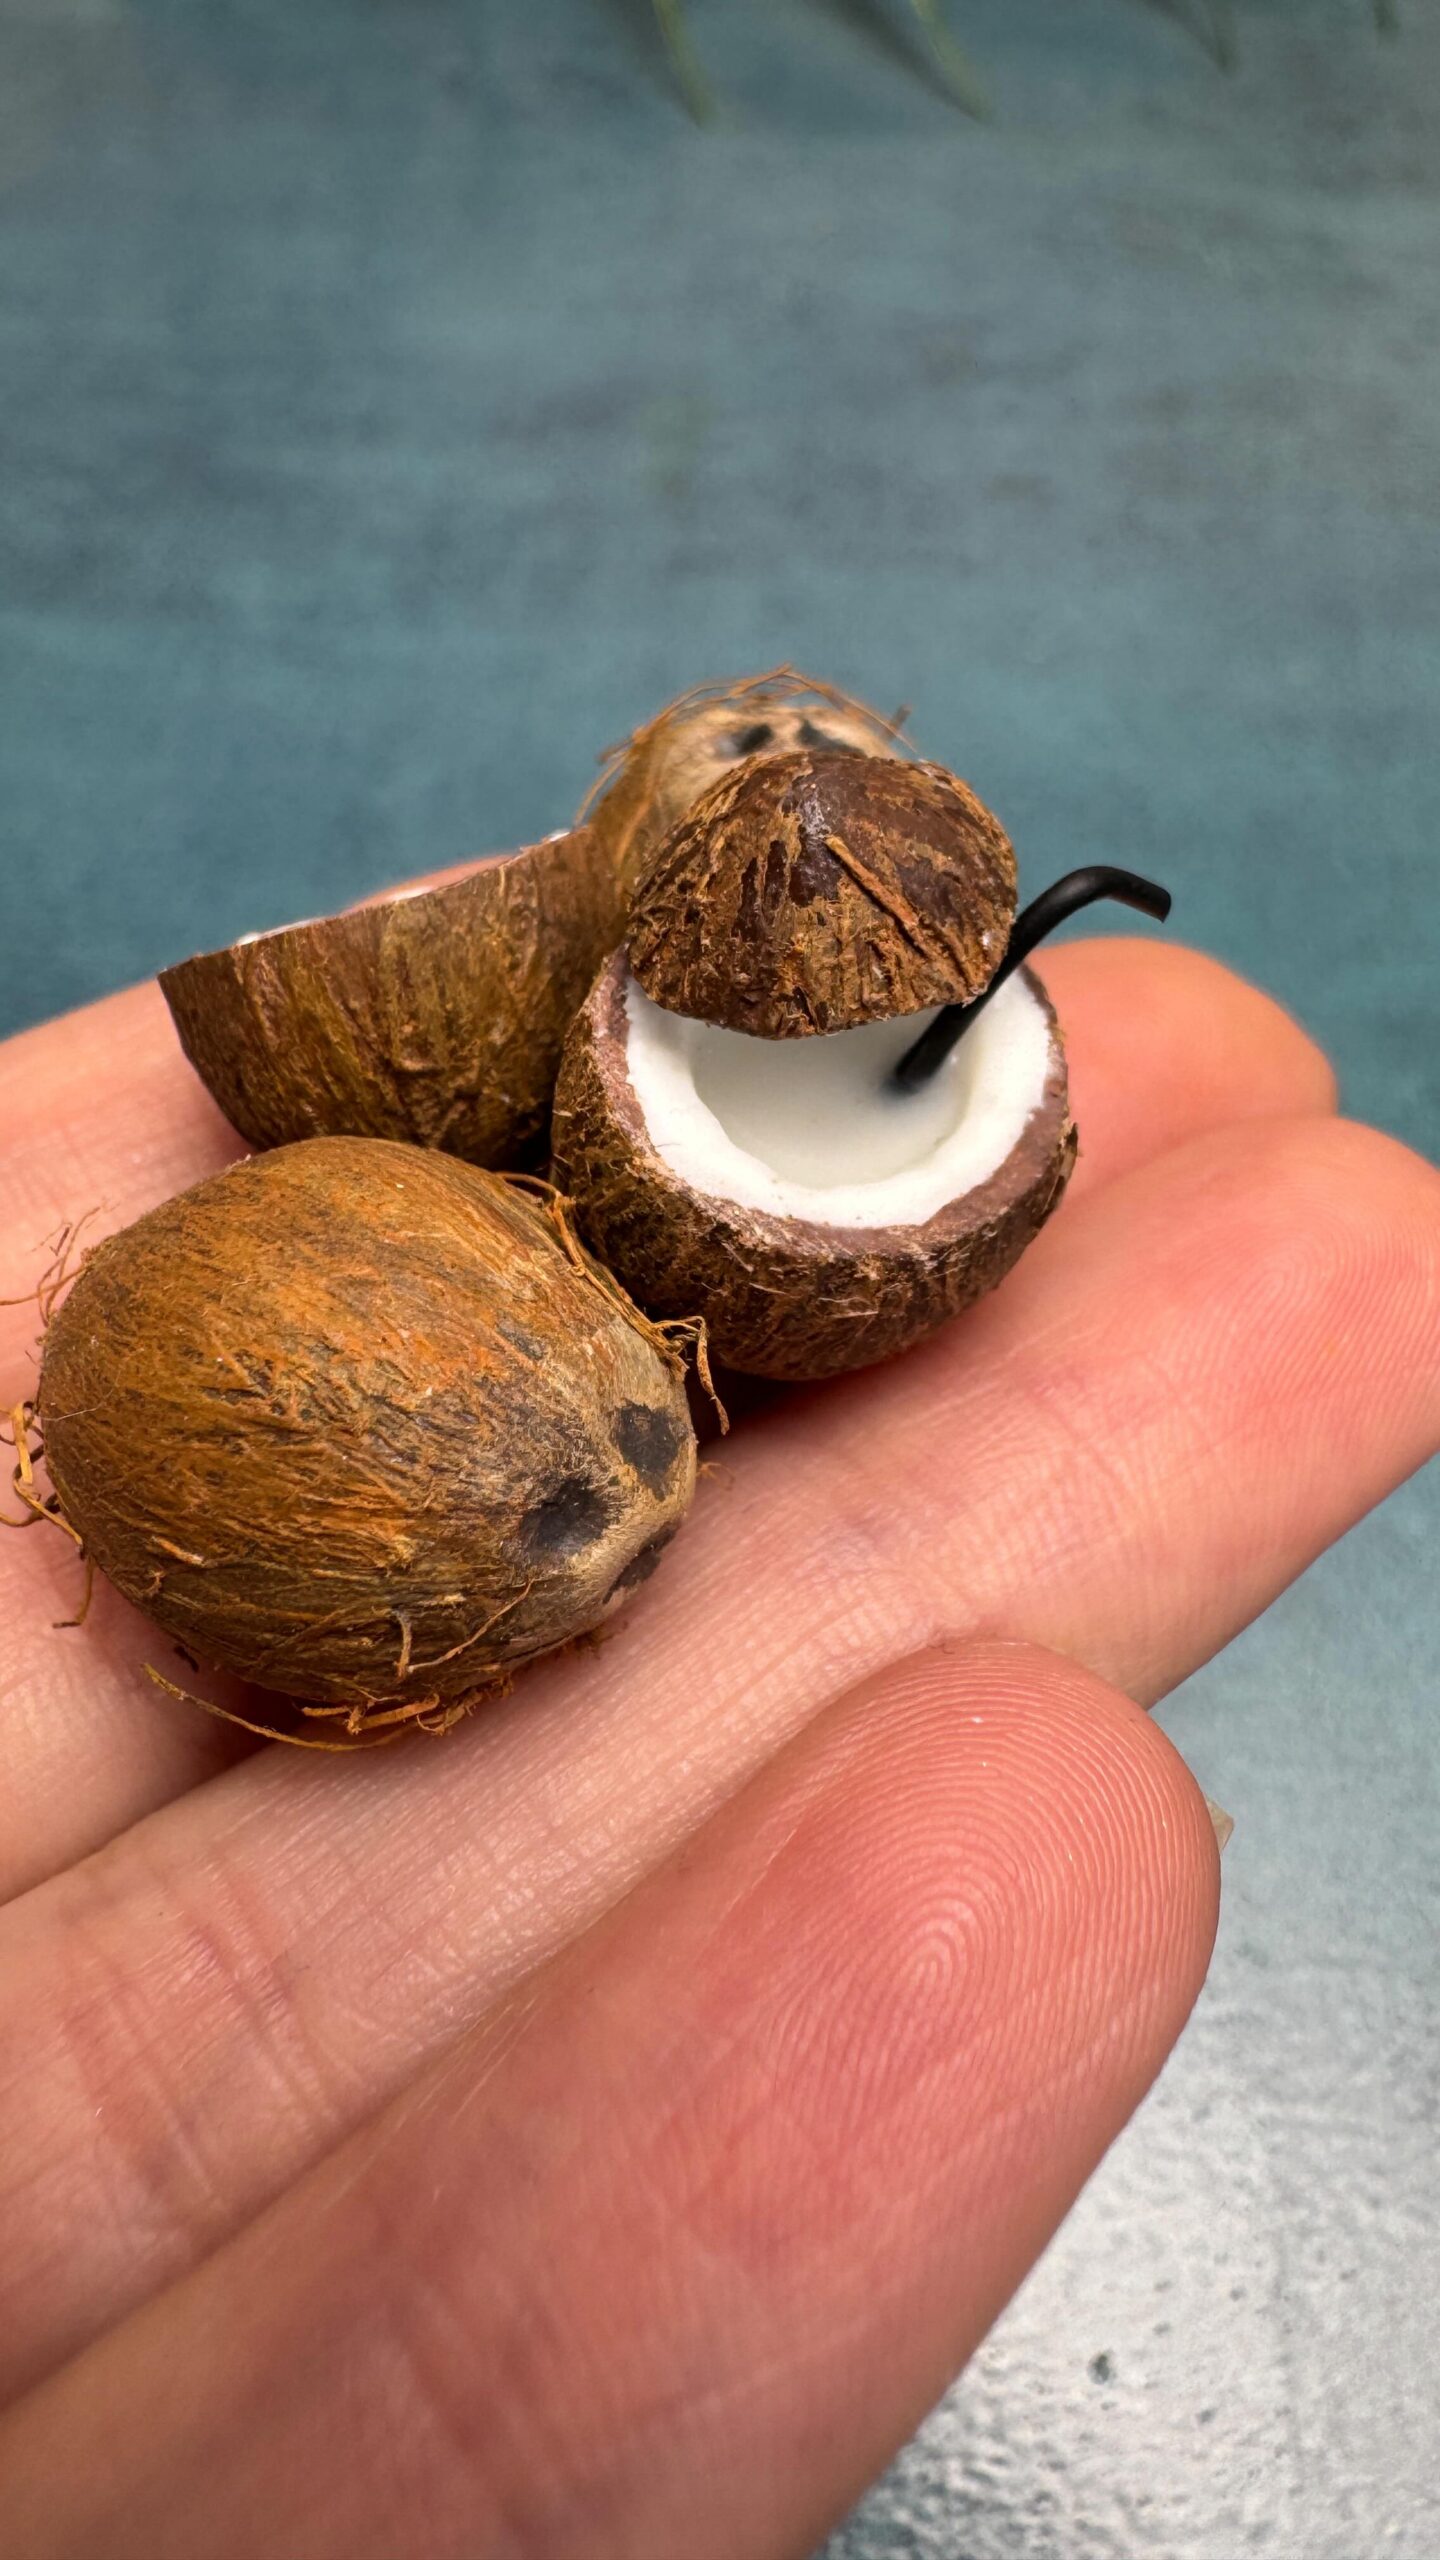
9. Clay Coconut
To make a polymer clay coconut, start by shaping a ball of brown clay to form the outer shell. Slightly flatten the bottom to help it sit upright. For a realistic texture, gently press a toothbrush or rough sponge against the surface to mimic the fibrous outer husk. To create a halved coconut, cut the ball in half and hollow out the center slightly. Line the inside with a thin layer of white clay to represent the coconut flesh, smoothing it out evenly. You can add three small dots on one end of the whole coconut to mimic the natural markings. Once finished, bake the coconut according to the polymer clay instructions. After it cools, you can paint or gloss it for added detail and shine.
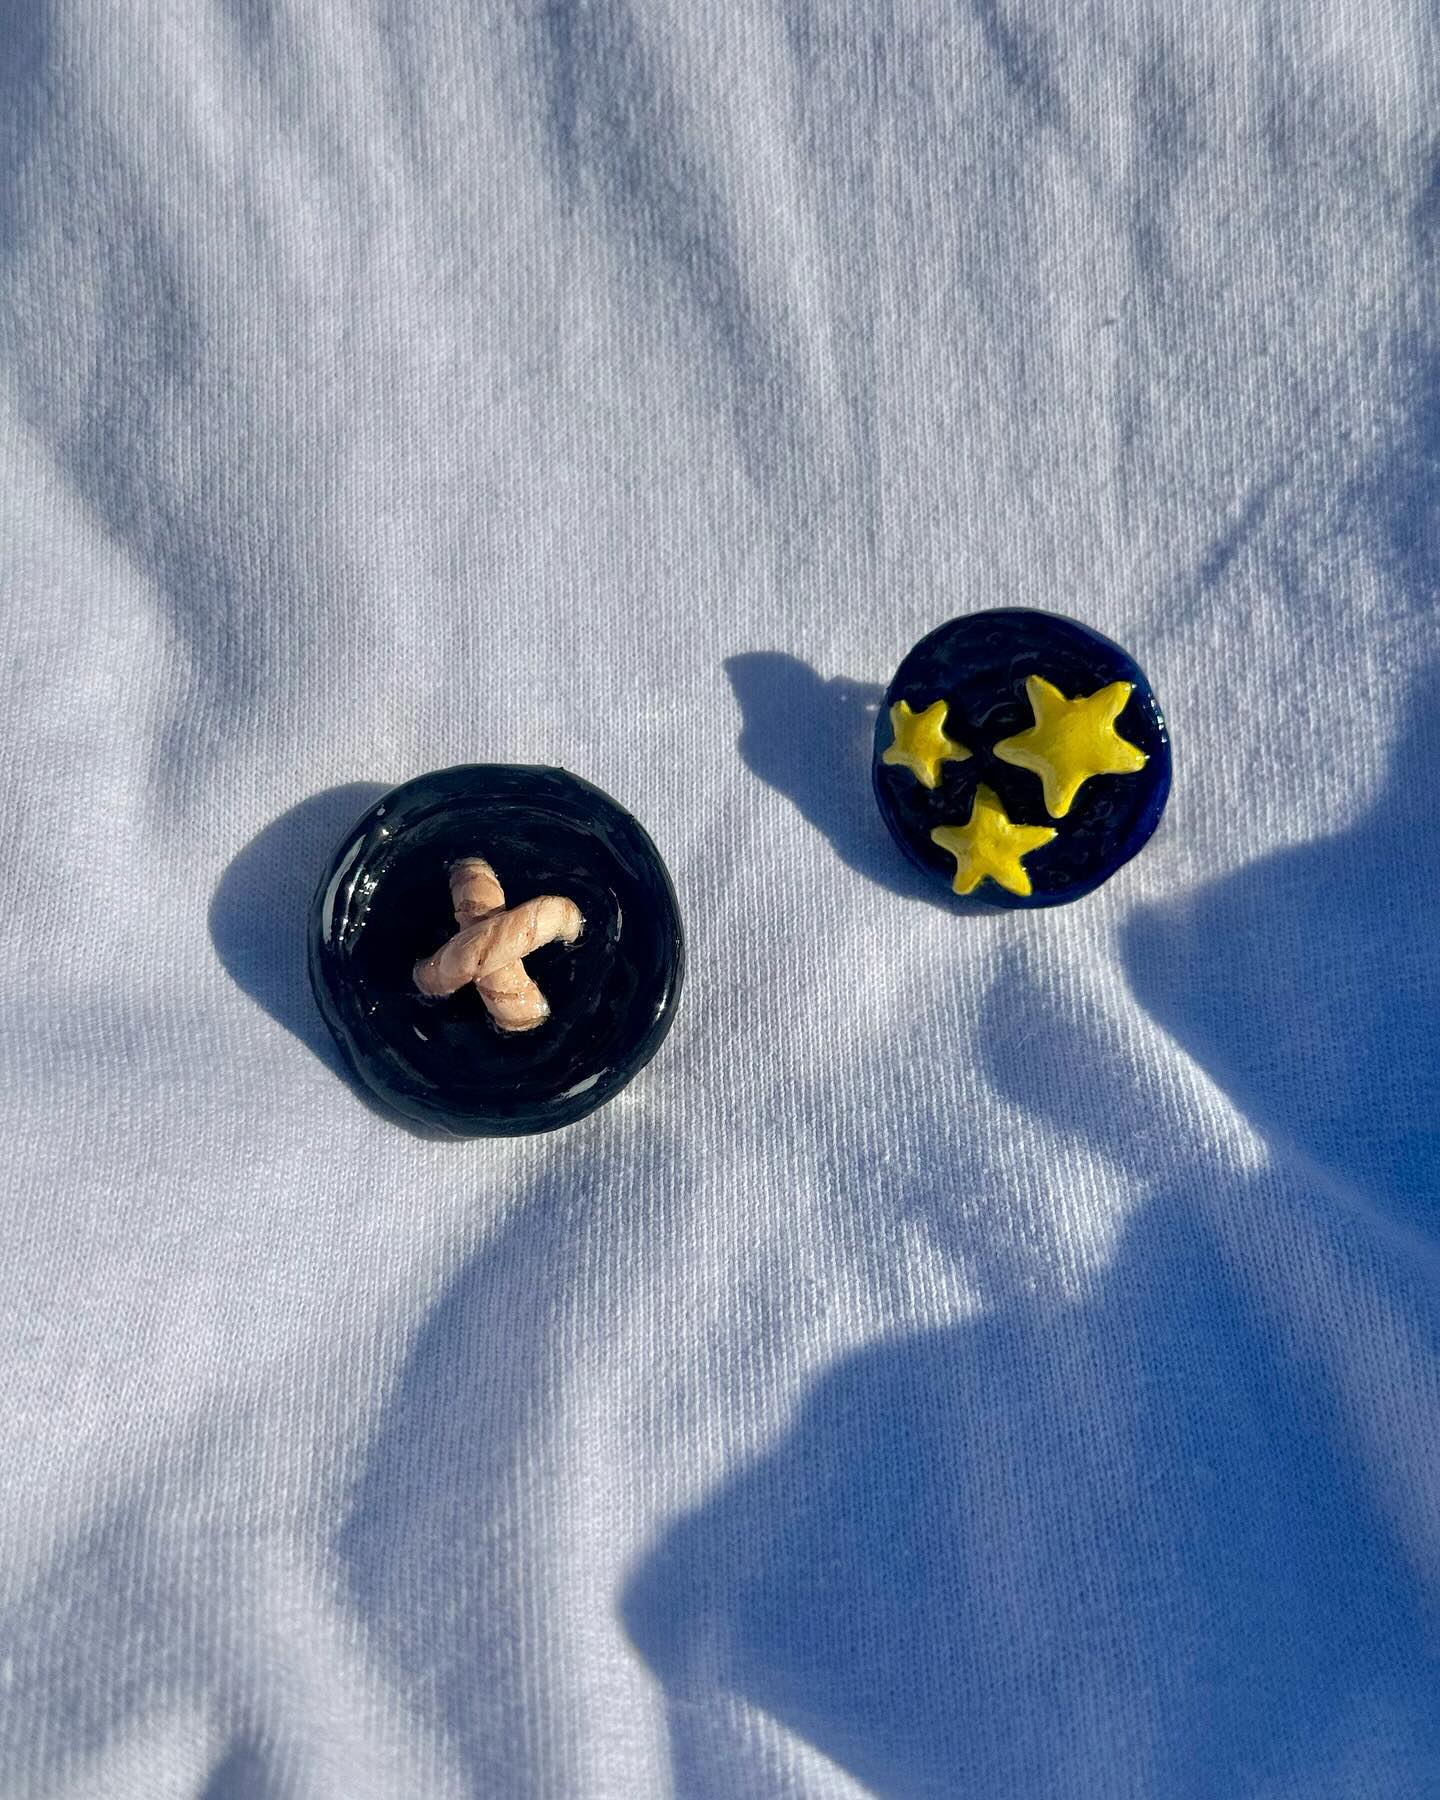
10. Clay Buttons
To make polymer clay buttons, begin by conditioning your clay and rolling it out into an even sheet about 1/8 inch thick. Use a small round cutter or the cap of a pen to cut out circles for the button shapes. Smooth the edges with your fingers, then use a toothpick or needle tool to poke two or four holes in the centre of each button, depending on the style you want. For added creativity, you can imprint textures, patterns, or even blend different clay colours for a marbled effect. Once you’re happy with the design, bake the buttons according to the polymer clay package instructions. After cooling, you can sand and varnish them for a smooth, polished finish.
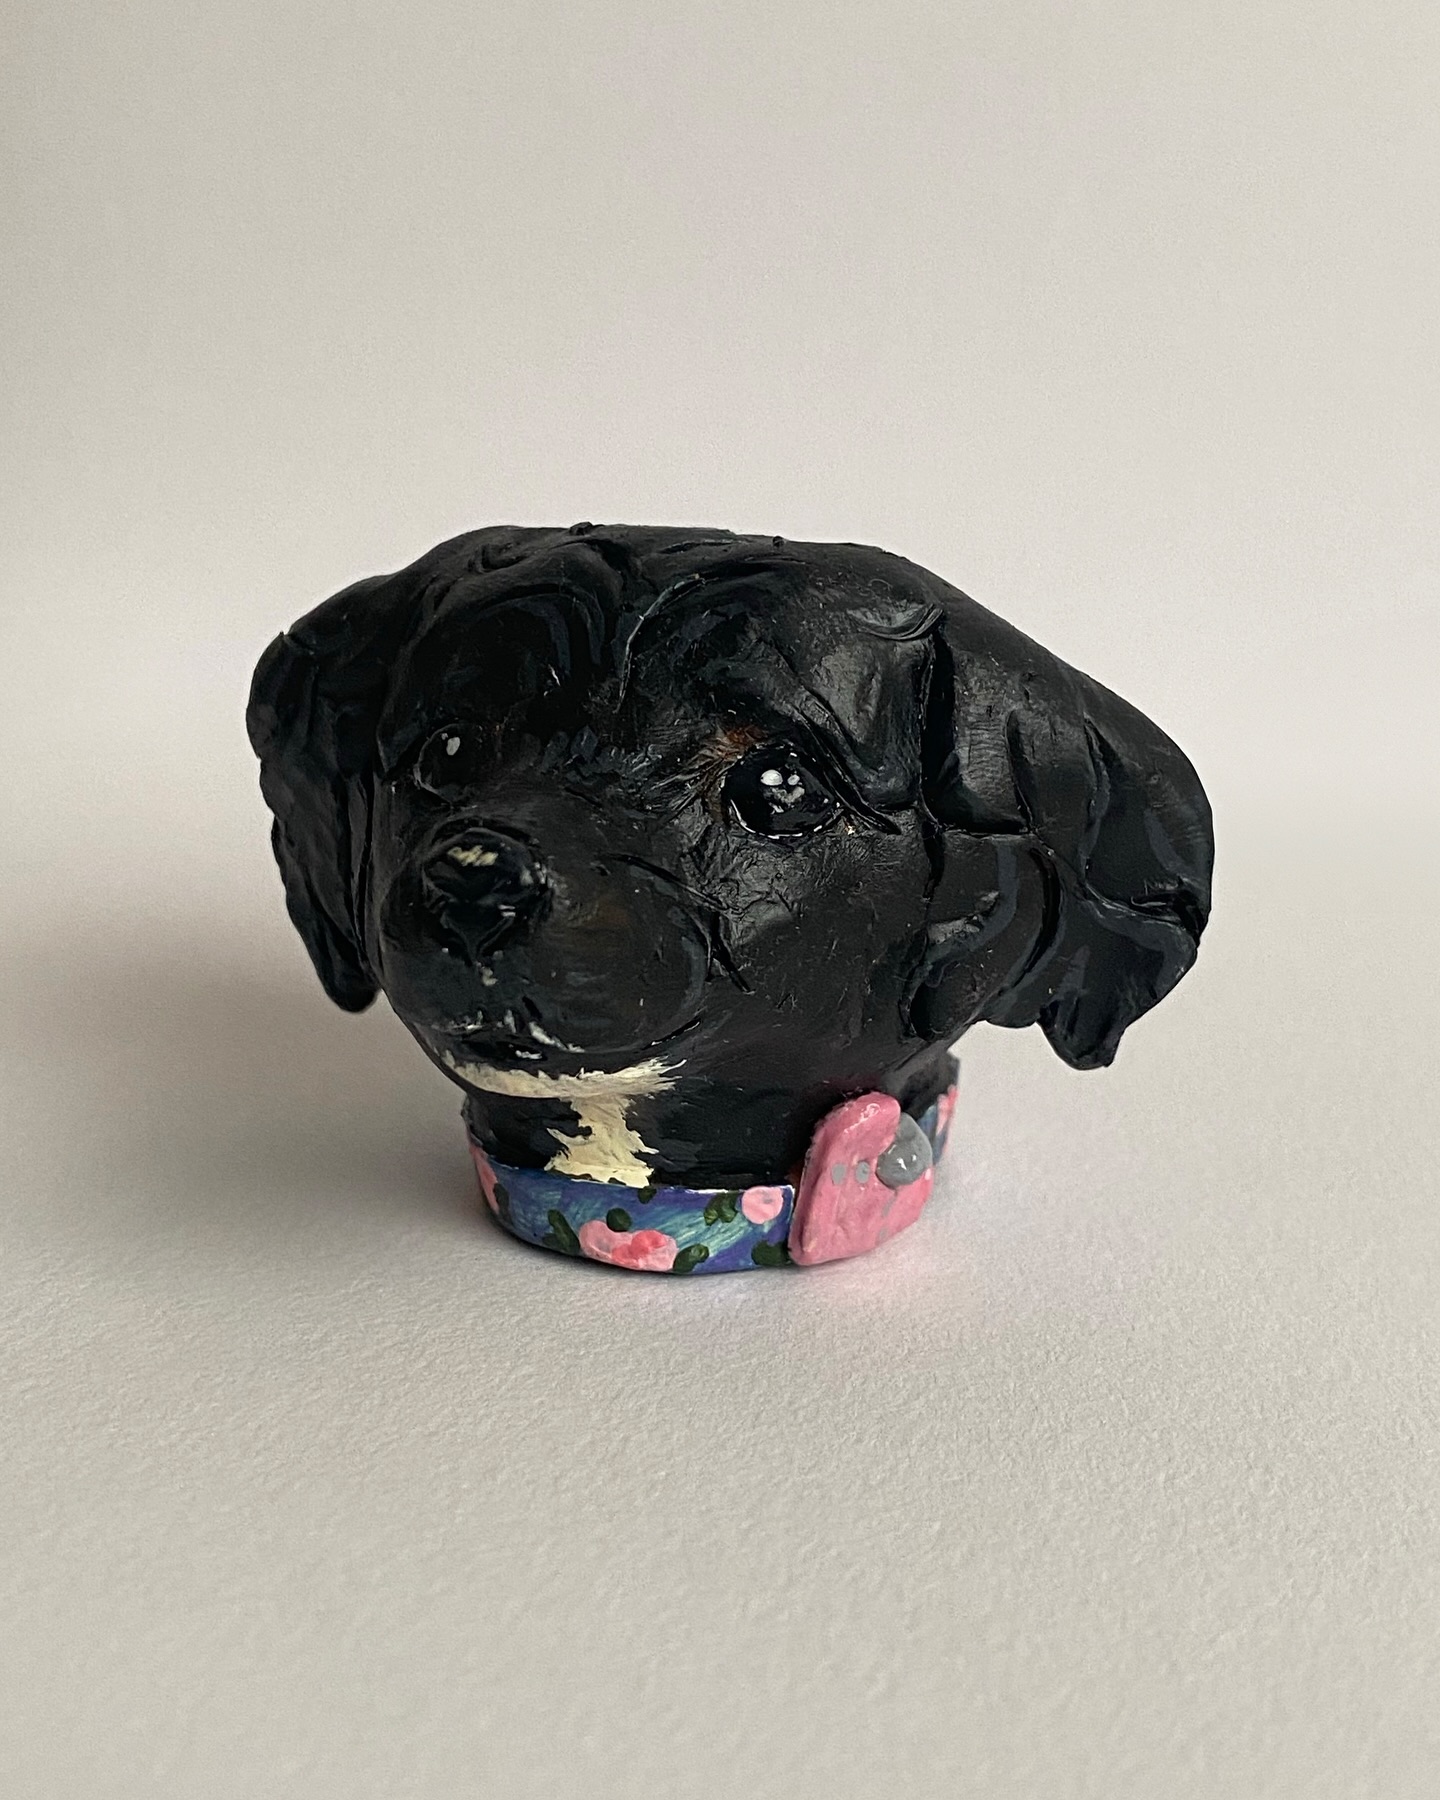
11. Dog Head
To make a polymer clay dog head, start by softening a piece of clay in your desired color and shaping it into an oval or rounded shape for the head. Add a small, slightly elongated piece to the front to form the snout, blending it gently into the main shape. Use tiny balls of clay for the eyes and nose, pressing them into place, and shape the ears according to the breed—floppy, pointy, or rounded—then attach them to the sides of the head. You can add details like a tongue, eyebrows, or fur texture using a needle tool or toothpick. Once the dog head is shaped and detailed to your liking, bake it according to the polymer clay instructions. After cooling, you can paint on any final touches and add a gloss finish if desired.
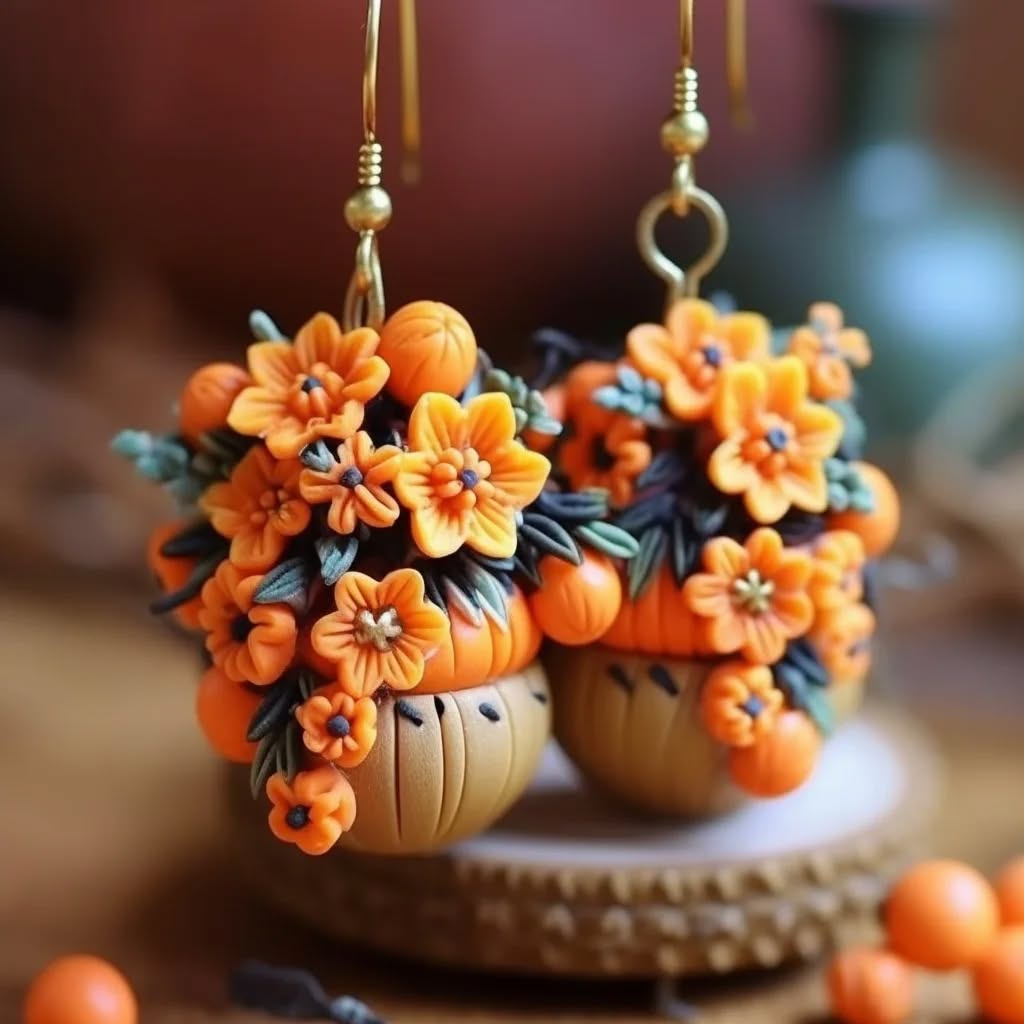
12. Clay Flower
Making a clay flower is easy, but to make this polymer clay flower, you will need a bit of patience. This flower looks natural and extremely delicate. You have to make the textures of the petals of the flower.
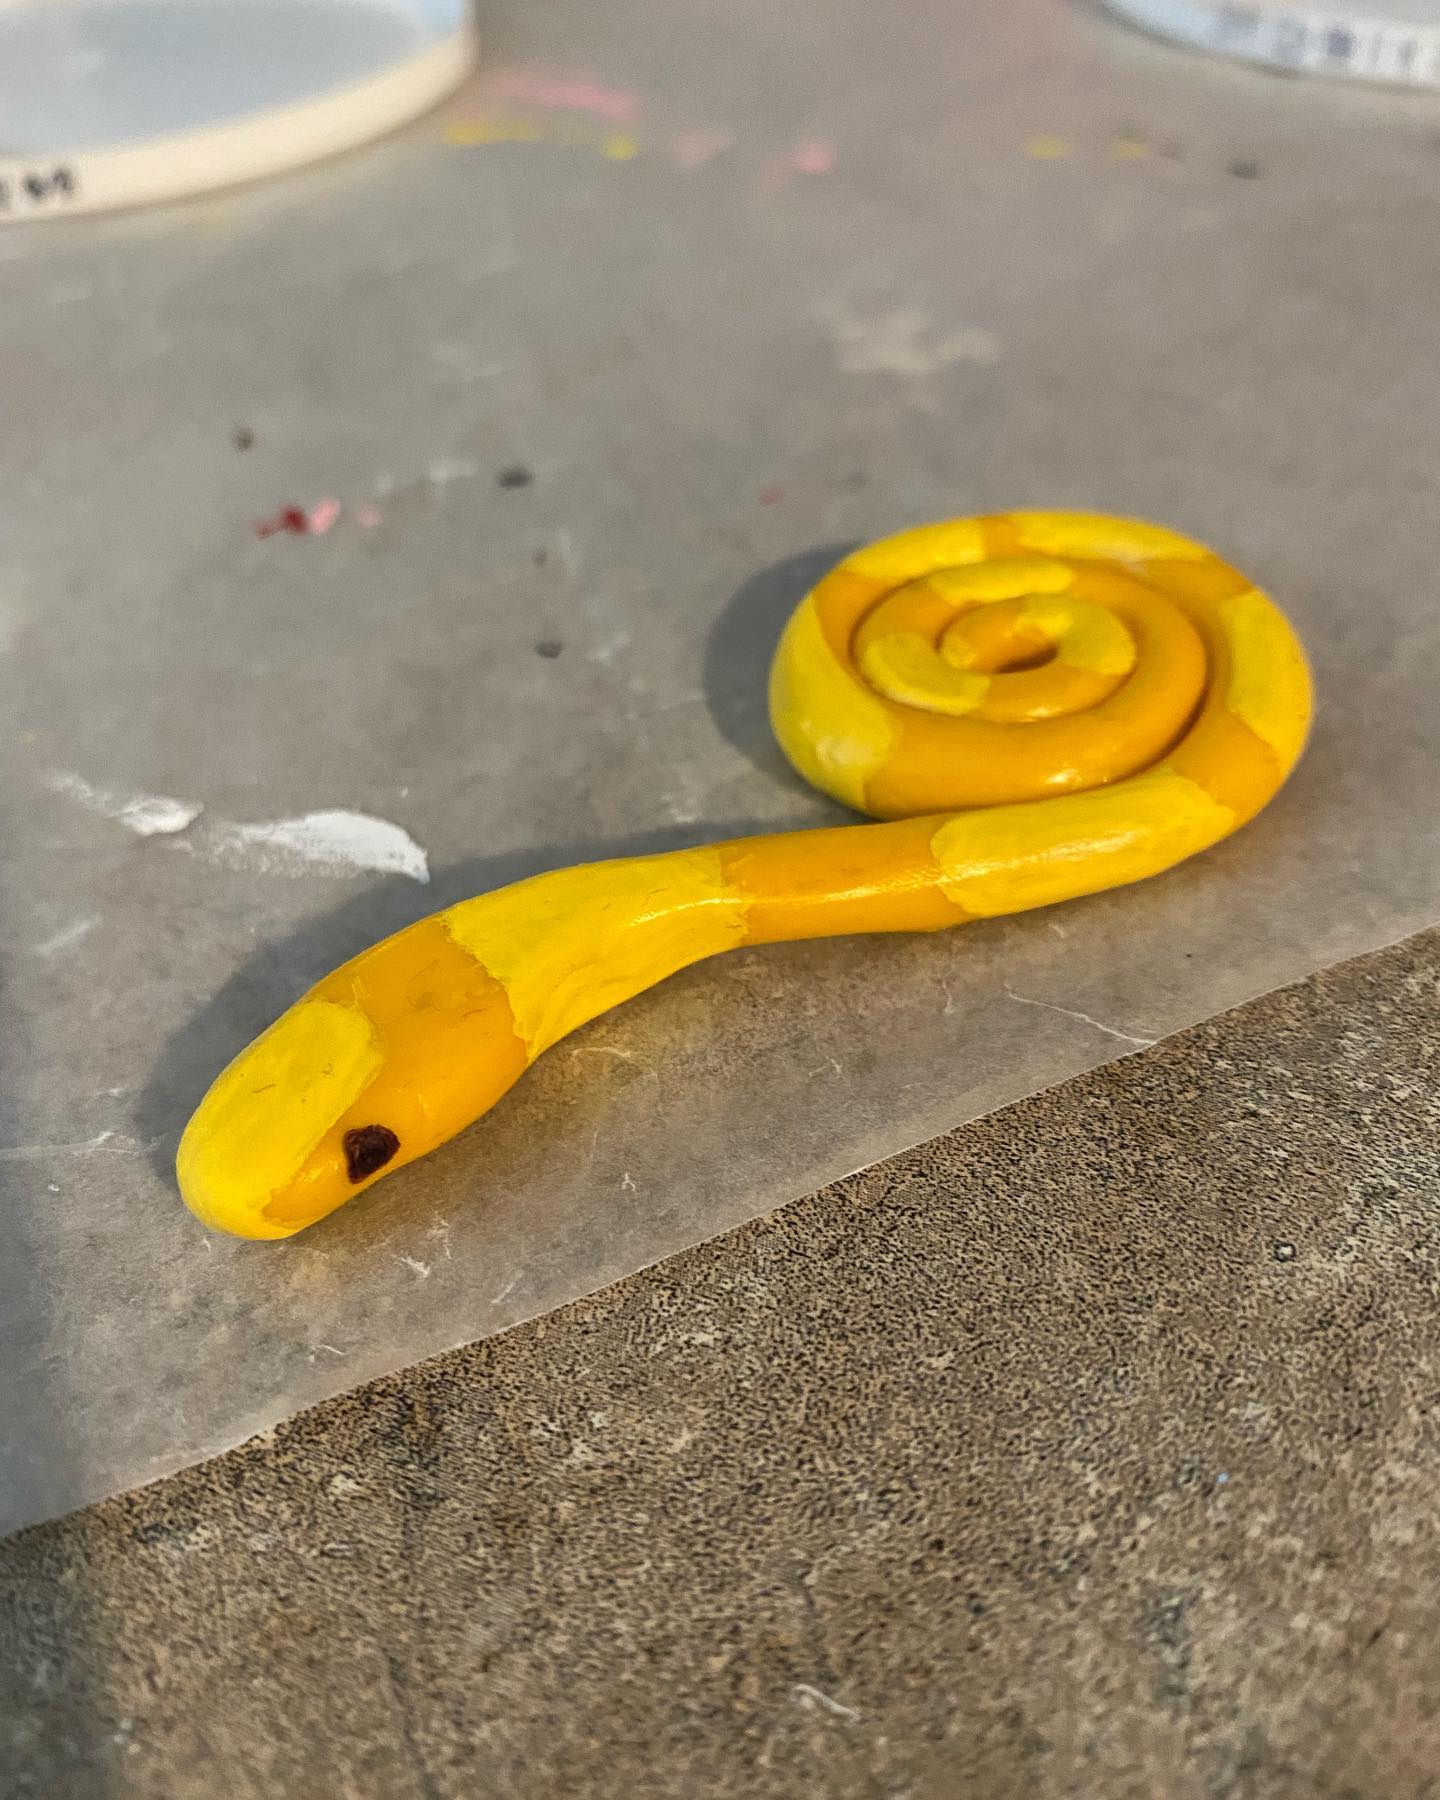
13. Snake
To make a polymer clay snake, start by rolling a piece of clay into a long, smooth coil to form the snake’s body. You can taper one end to create the tail and slightly flatten or round the other end to shape the head. Gently curve the body into a natural, slithering pose. Use a toothpick or sculpting tool to add texture, like scales or patterns, and press in small beads or balls of clay for the eyes. Add a tiny forked tongue with a thin strip of red clay if desired. Once you’re happy with the design, bake the snake according to the instructions on the clay package. After it cools, you can paint or varnish it to enhance the details and give it a polished look.
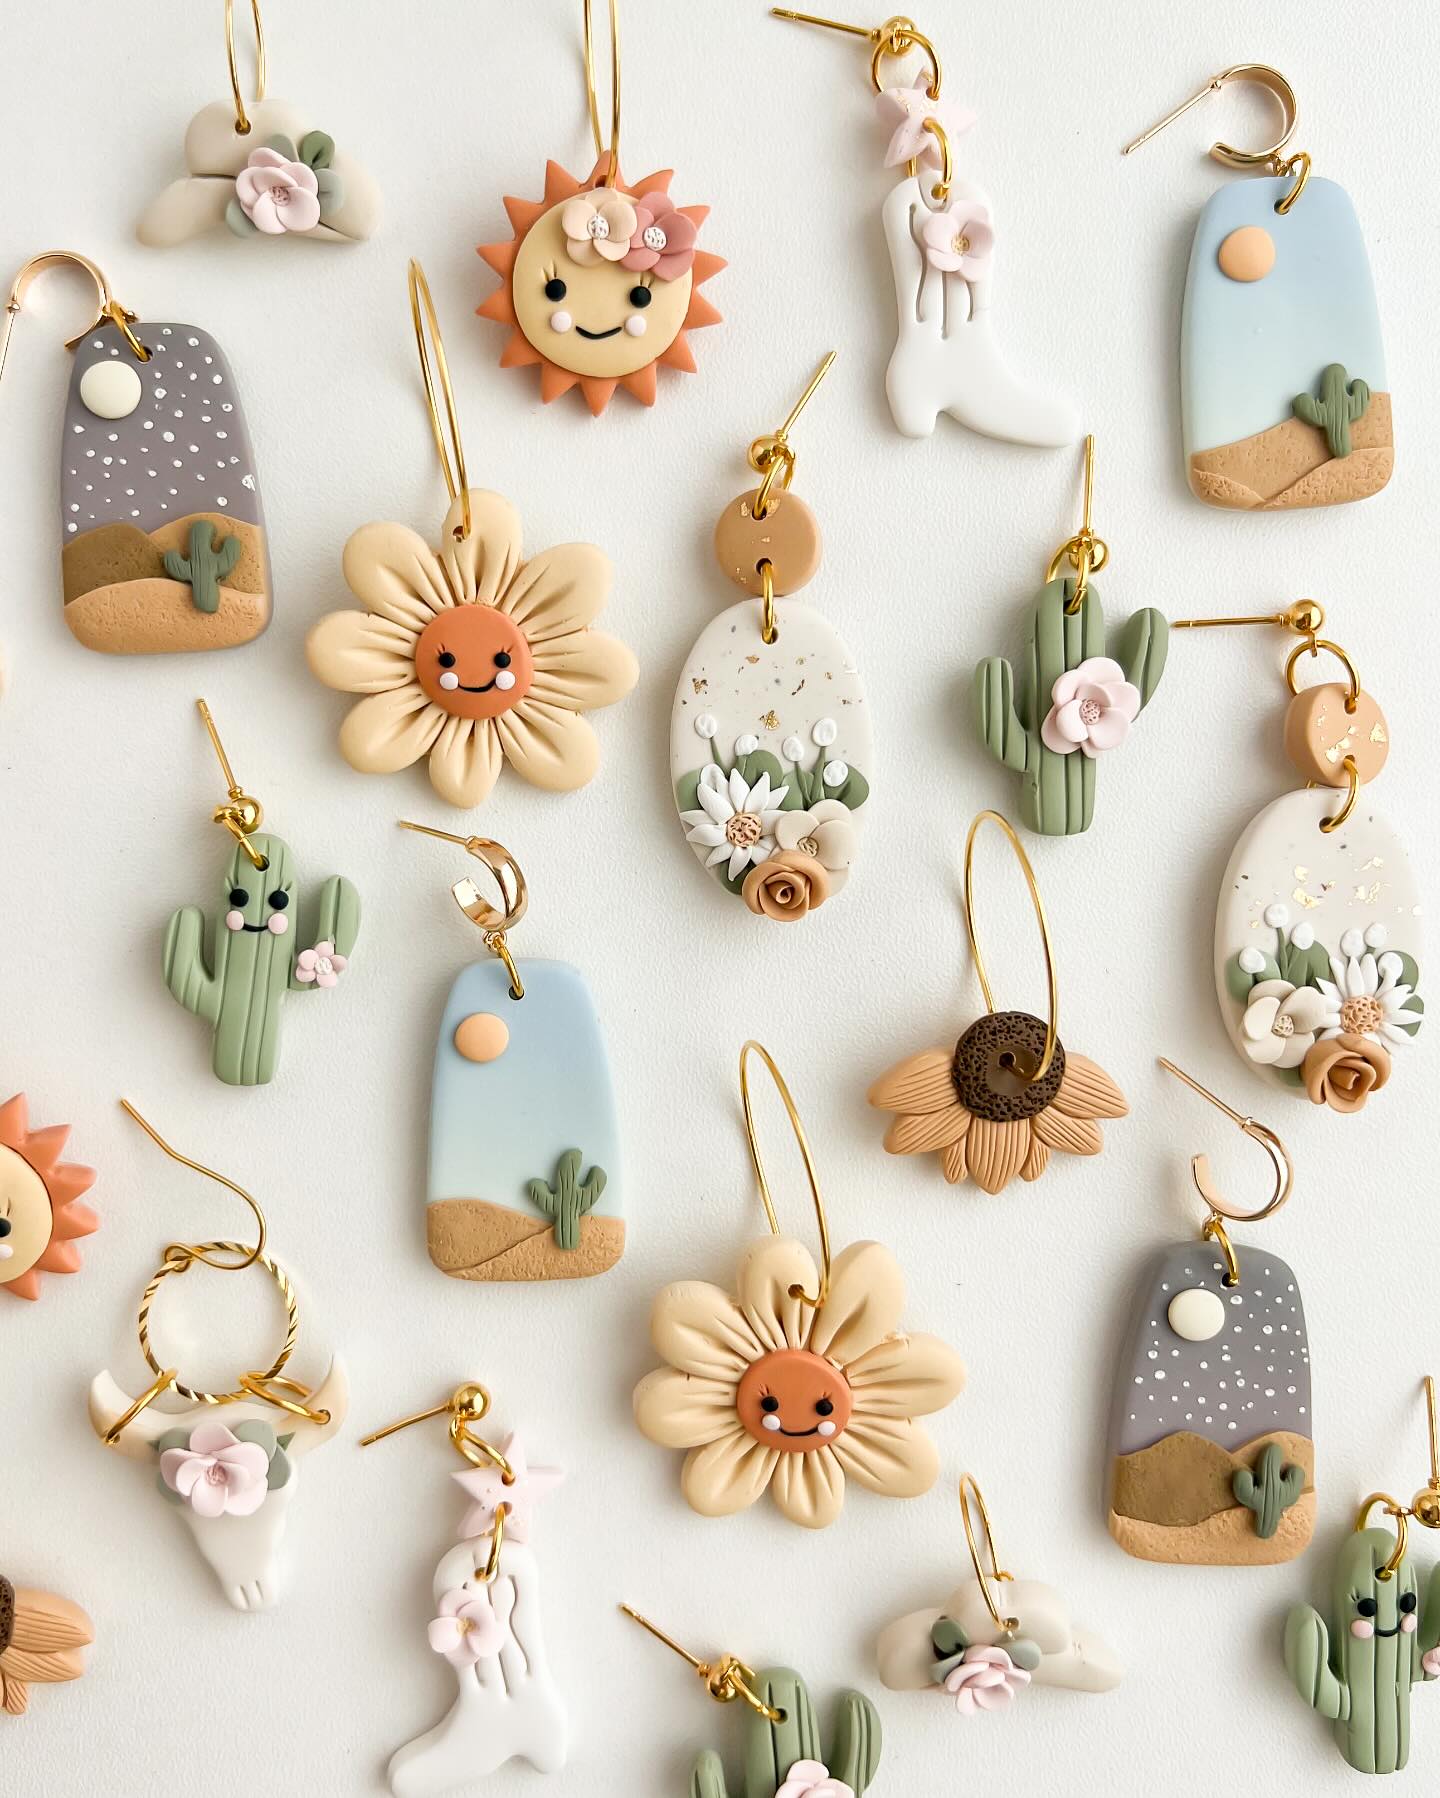
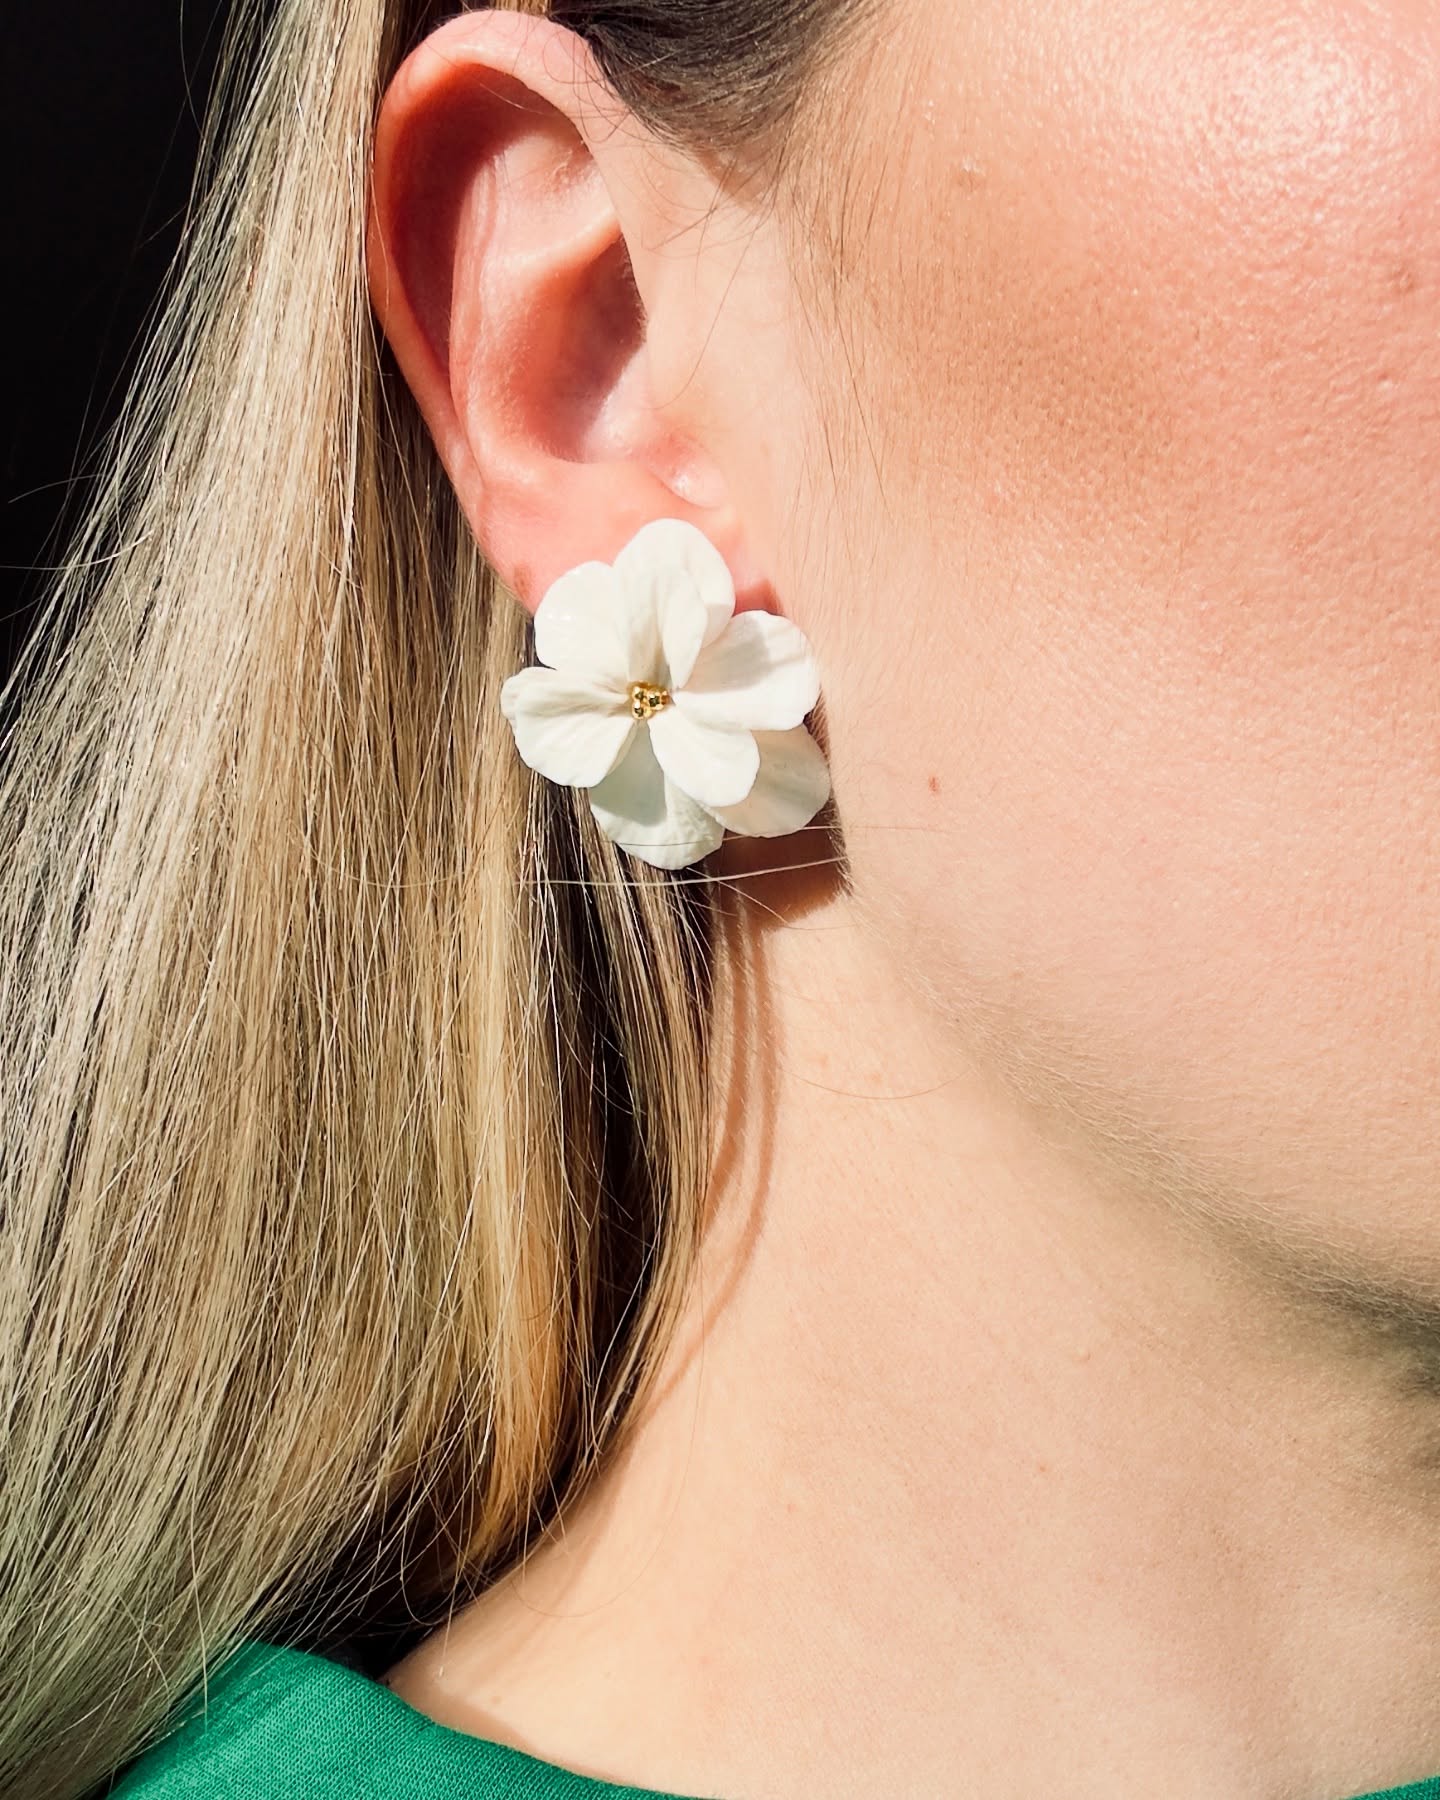
14. Earrings and Charms
Polymer clay earrings are both stylish and fun! Begin by softening the clay, then mould it into any shape you like. Simply attach the finished pieces to ear hoops to create your own unique eardrops.
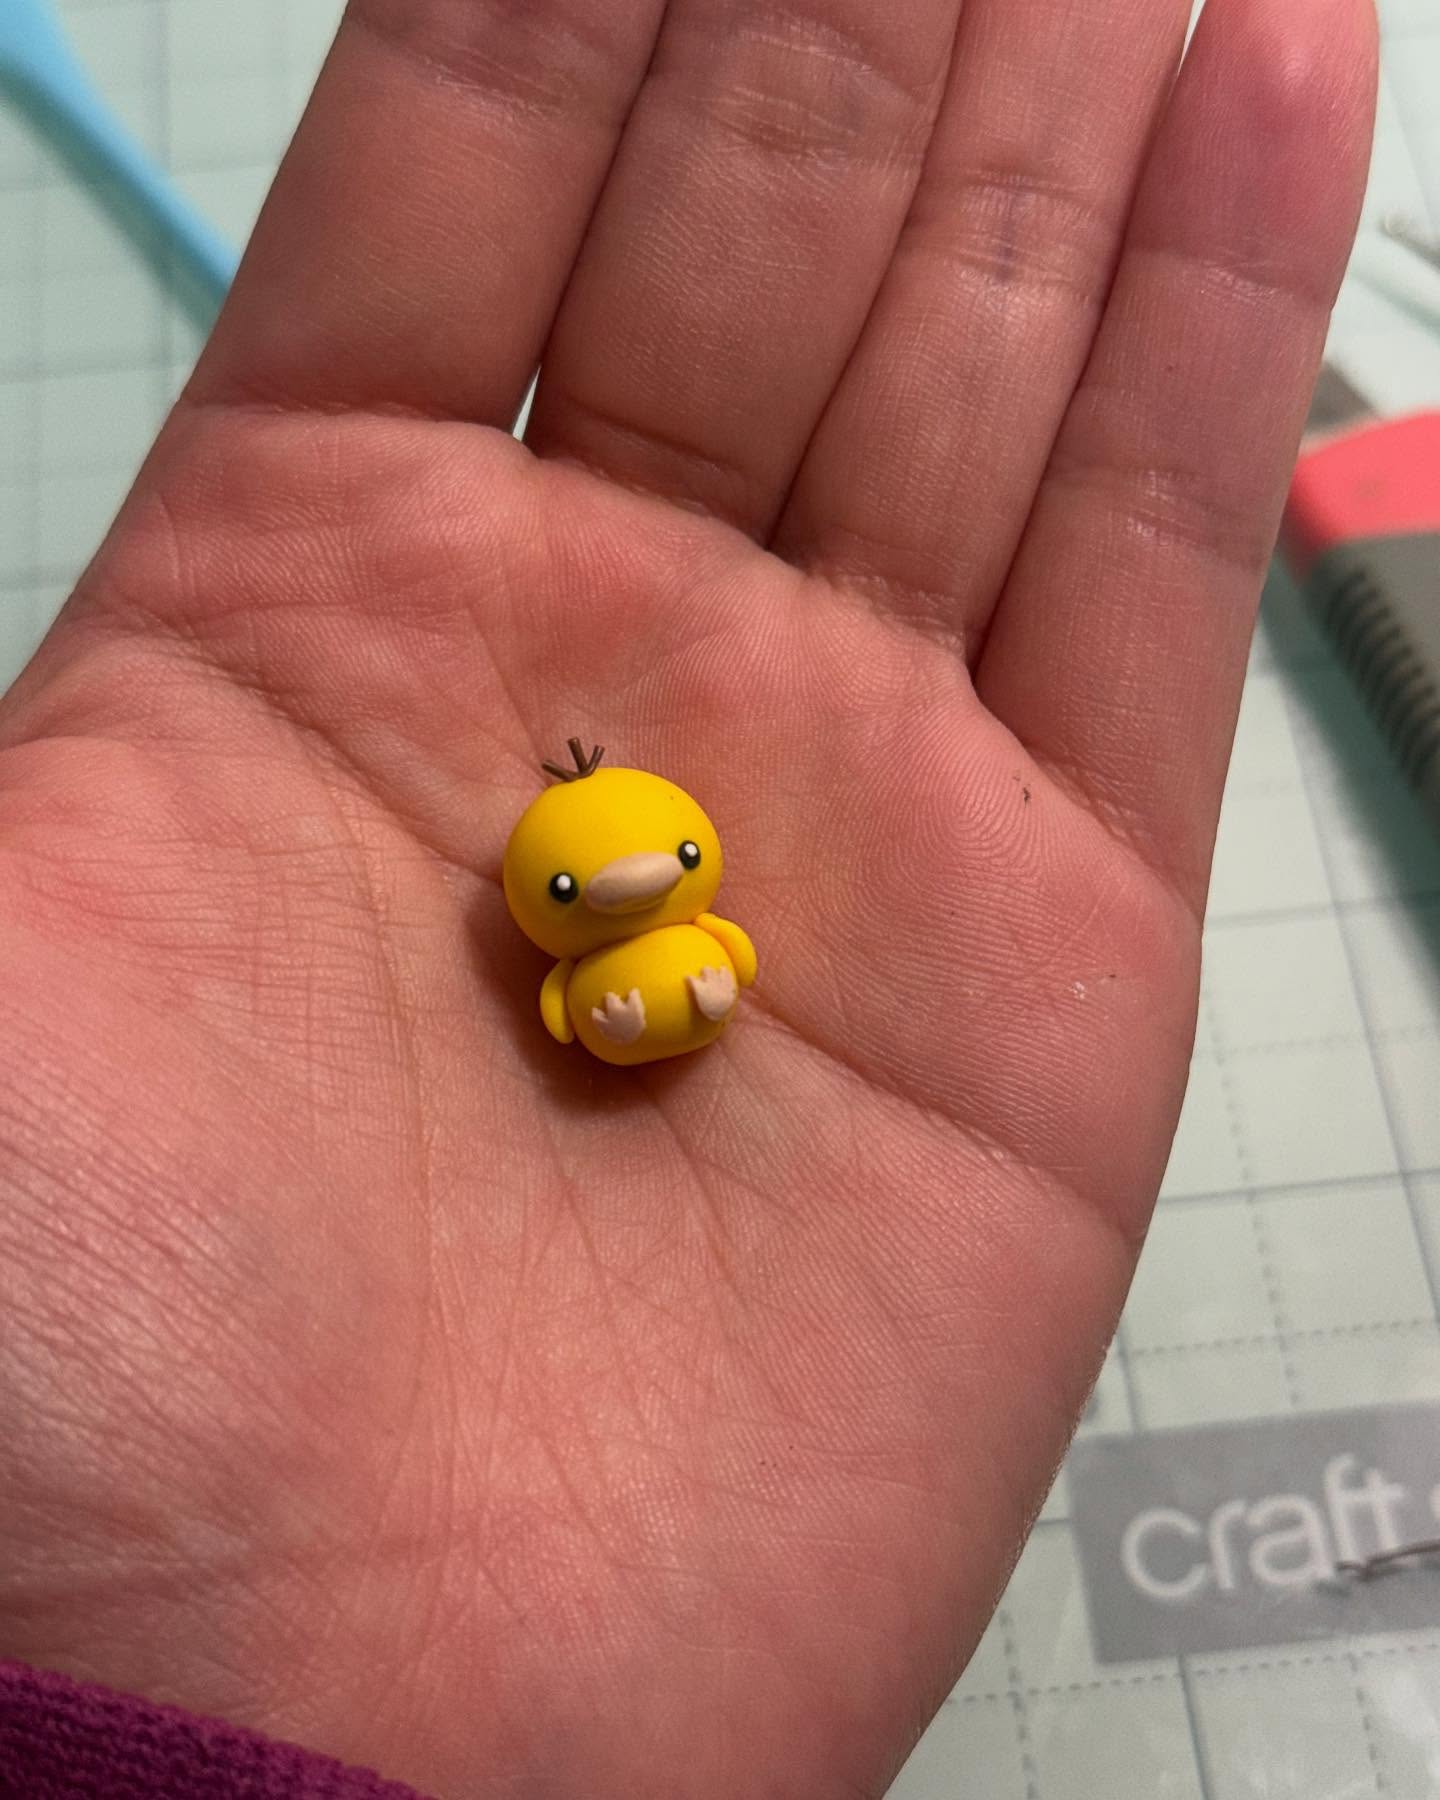
15. Cute Duck
To create adorable mini clay ducks, begin with a small ball for the body and gently flatten one side to shape it. Add texture by drawing wings on each side. Then, place a smaller ball on top for the head, attach a tiny cone for the beak, and draw on the eyes. Your cute little duck is all set!

16. Cute Character
Why not create this adorable little creature for your kids? Start by rolling two clay balls and shaping them into dolls with eyes, ears, arms, and a charming body. Next, craft a small pond around them and place the dolls inside. Once you’re done, bake the piece to harden it, then paint it to bring it to life!
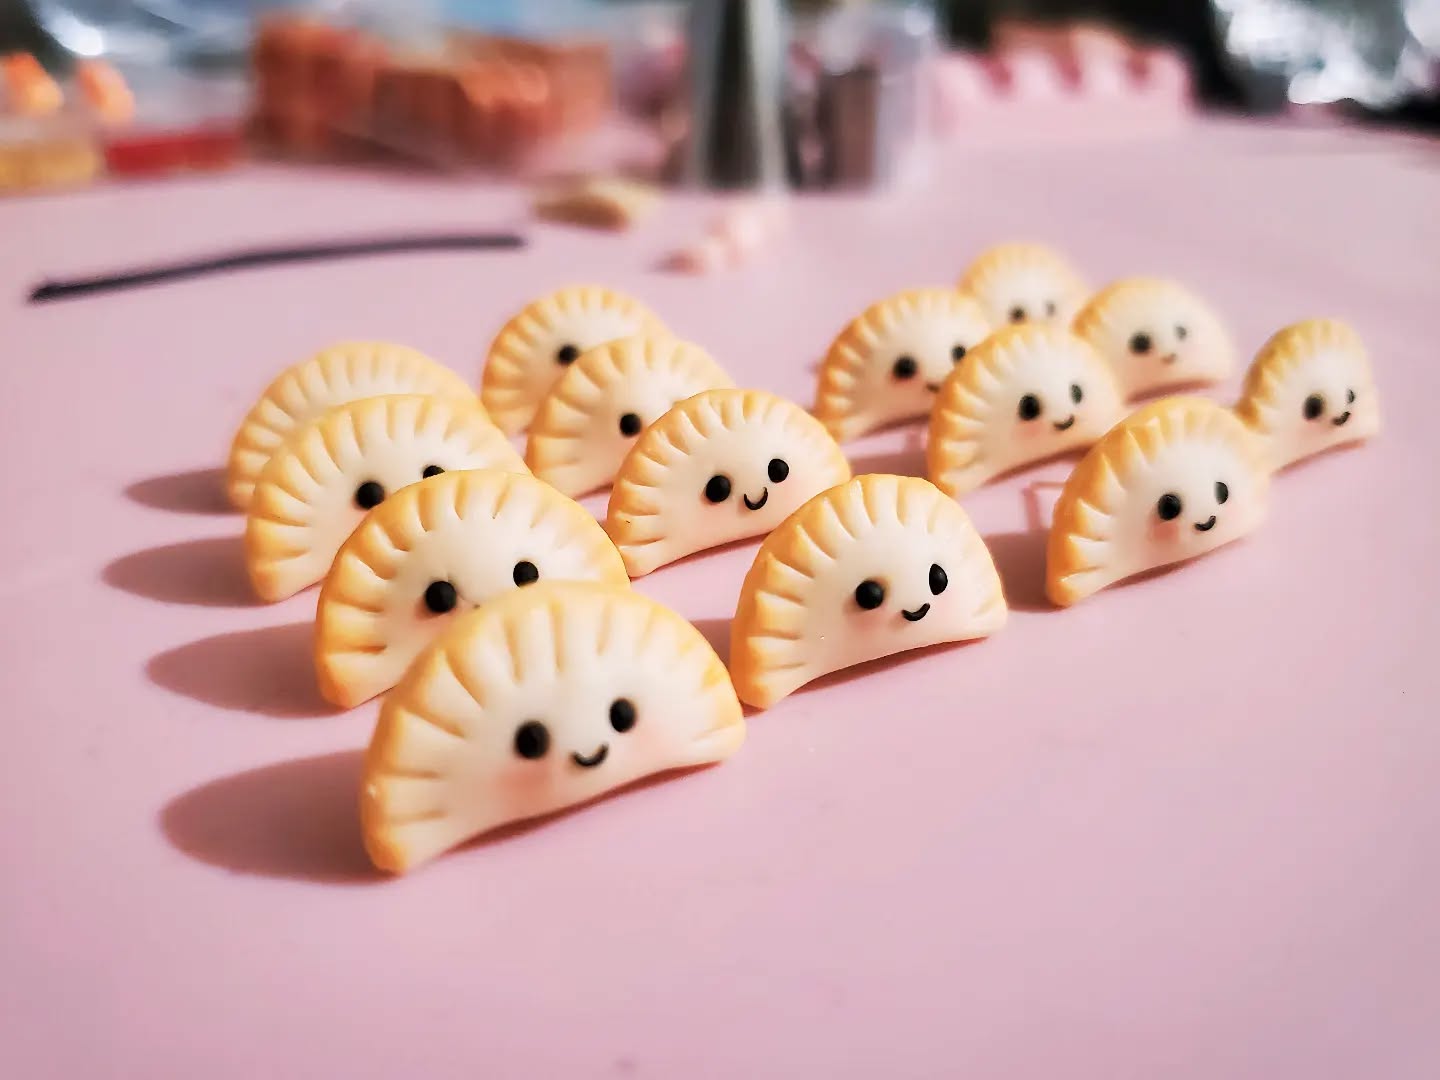
17. Dumplings
We all love dumplings. So, do you want to make delicious-looking dumplings with polymer clay? Ball up clay pieces and give them the appearance of dumplings with the help of a toothpick, and you are done!
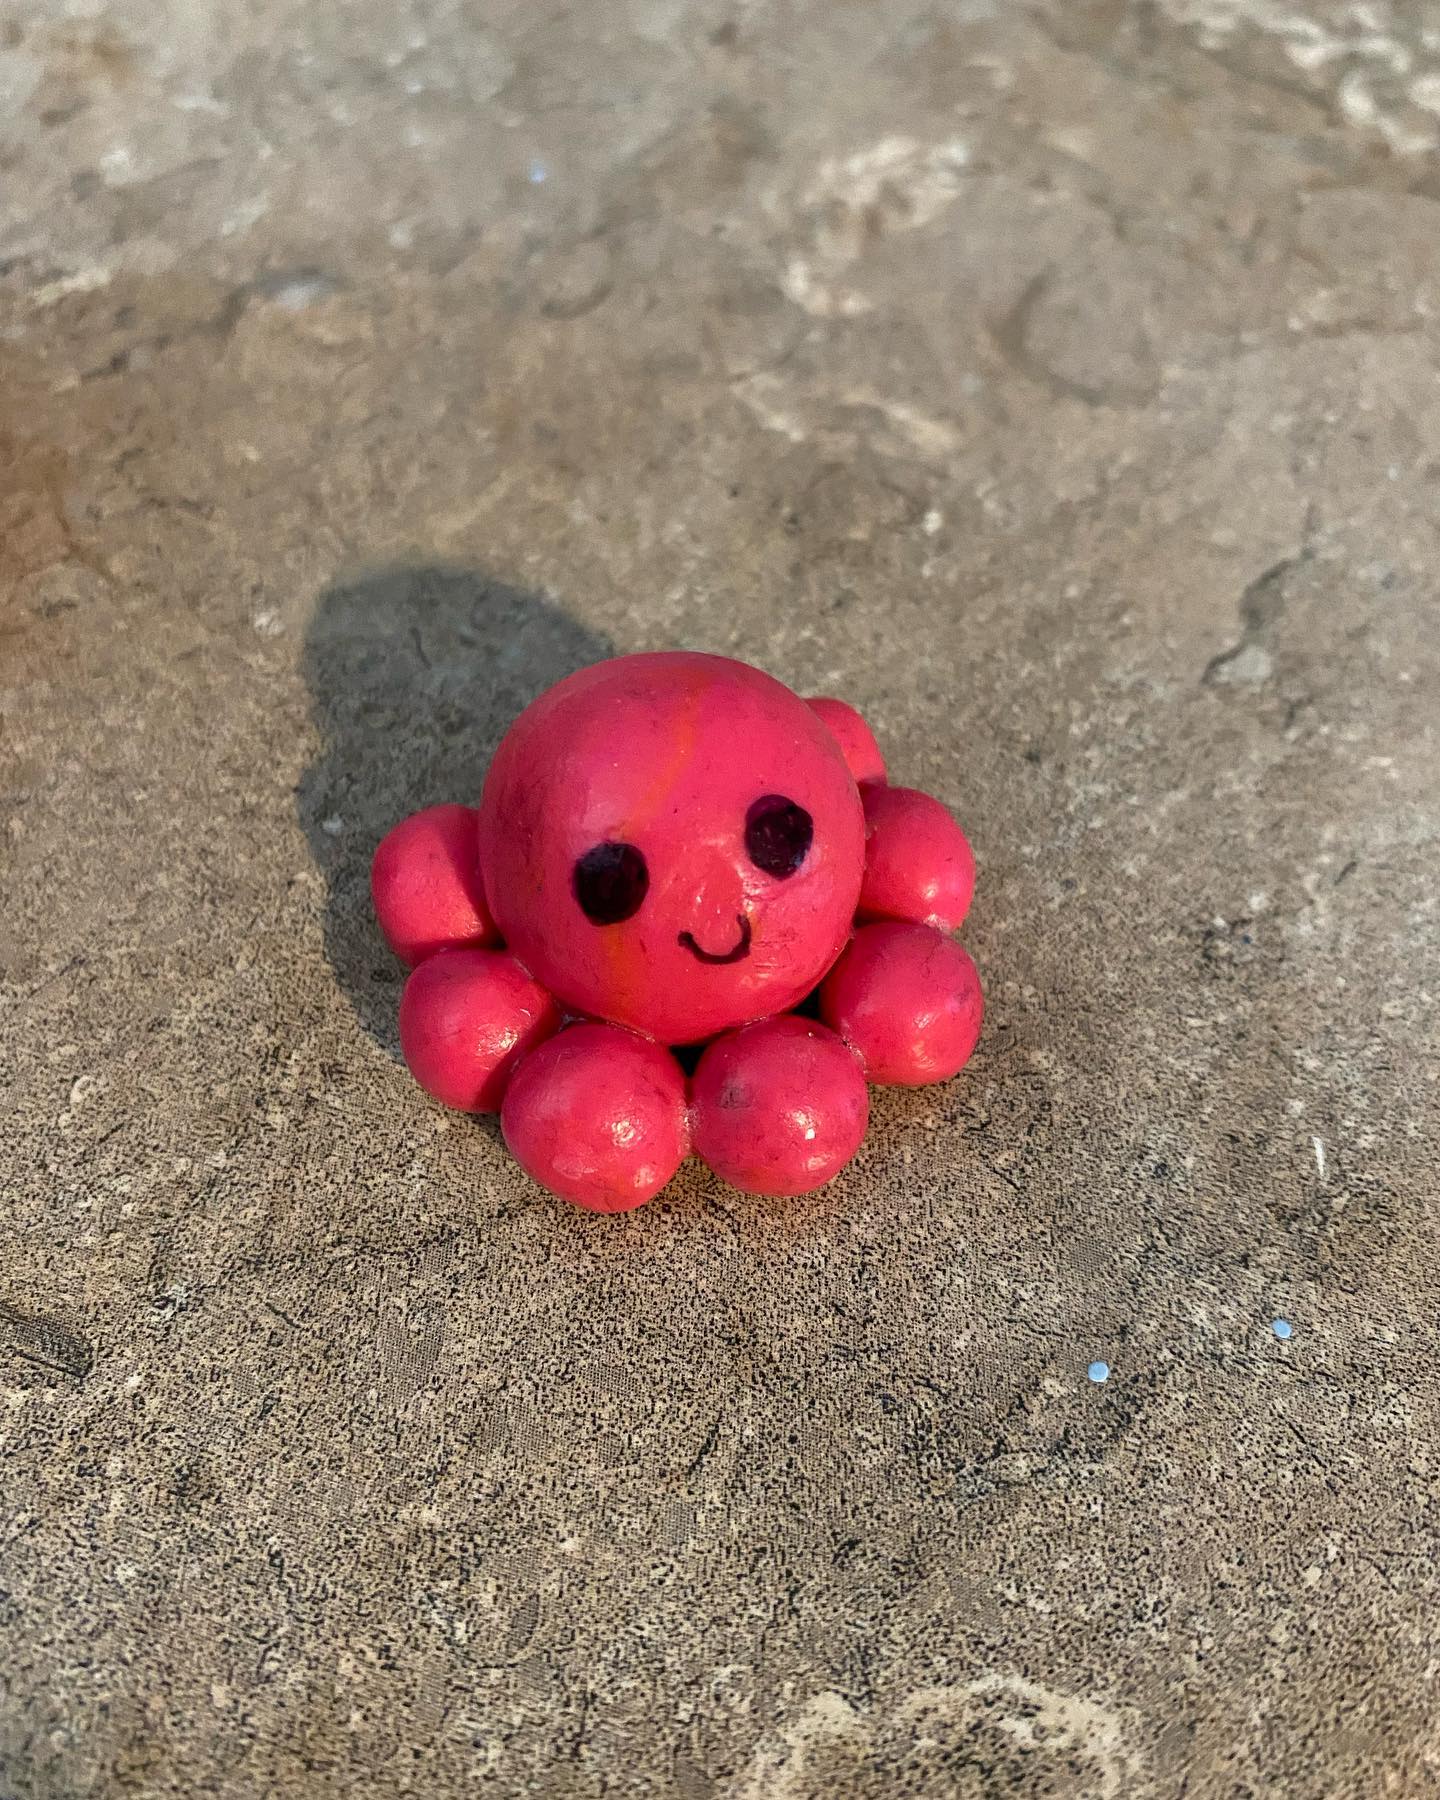
18.Octopus
To create this cute octopus, you have to ball up polymer clay. Make 9 small balls and 1 big ball for the head. Draw the eye and mouth. your octopus is ready.
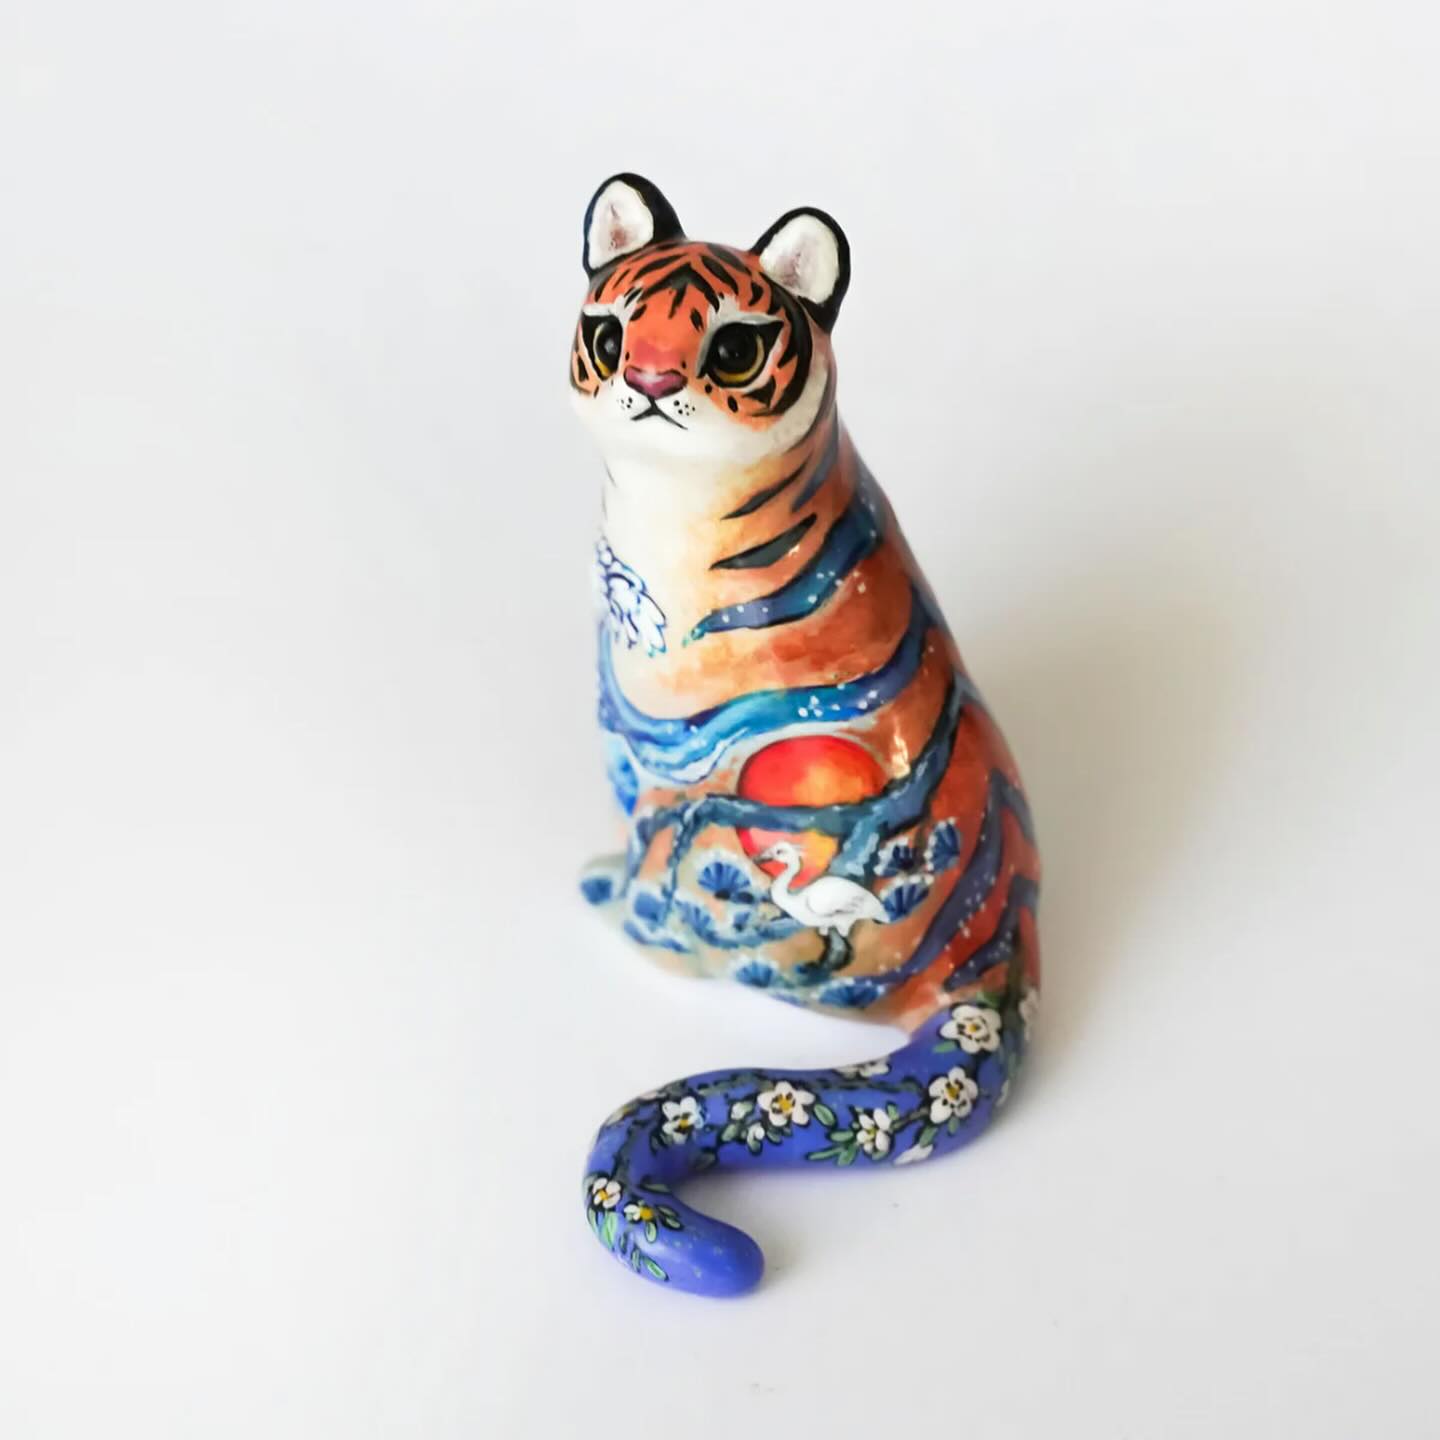
19. Designful Cat
To make a polymer clay designer-style cat, start by choosing a base color—like white, gray, or black—and soften the clay. Shape the body into an oval or teardrop form, then create a round head and attach it to the body. Add small triangles for ears and tiny oval shapes for the legs and paws. For the tail, roll a thin coil and curve it playfully around the body. To give it a designer look, use contrasting clay colors or metallic accents to add stylish patterns like stripes, spots, or even a little scarf or bowtie. Use small black or glassy beads for the eyes, and a tiny pink dot for the nose. Add whiskers by inserting thin wire or fishing line. Once your cat is fully detailed, bake it according to the polymer clay instructions. After cooling, apply a glossy finish for a sleek, polished look.
20. Flower Basket Eardrops
To make this cute flower basket earring, you have to make two similar-looking flower baskets using polymer clay crafts and then attach hoops to them- your flower basket earring is ready.
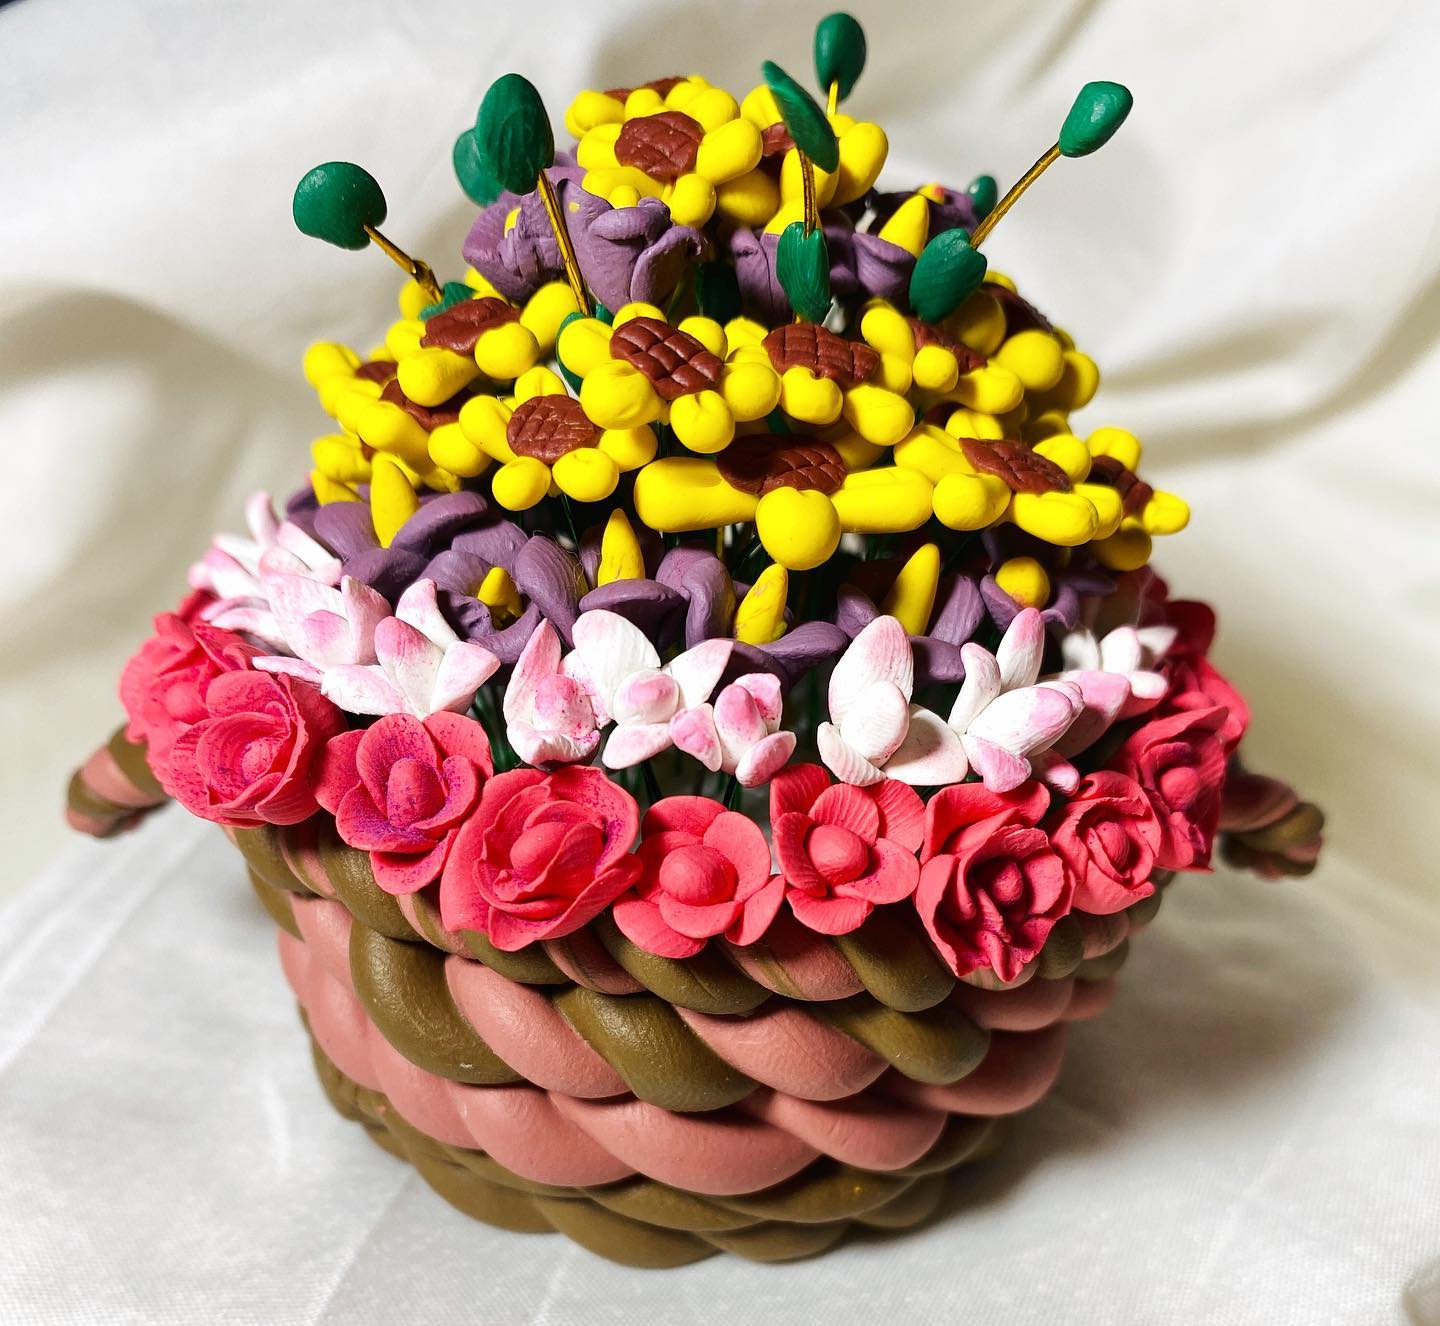
21. Flower Basket
When crafting flowers—whether it’s a sunflower or a rose—start by building some bulk into your design. It may seem tricky, but it’s actually quite easy: roll out the clay and shape the petals as you go. Remember, polymer clay shouldn’t be baked alone, as it can melt. After it hardens, you can paint your creation and proudly display it!
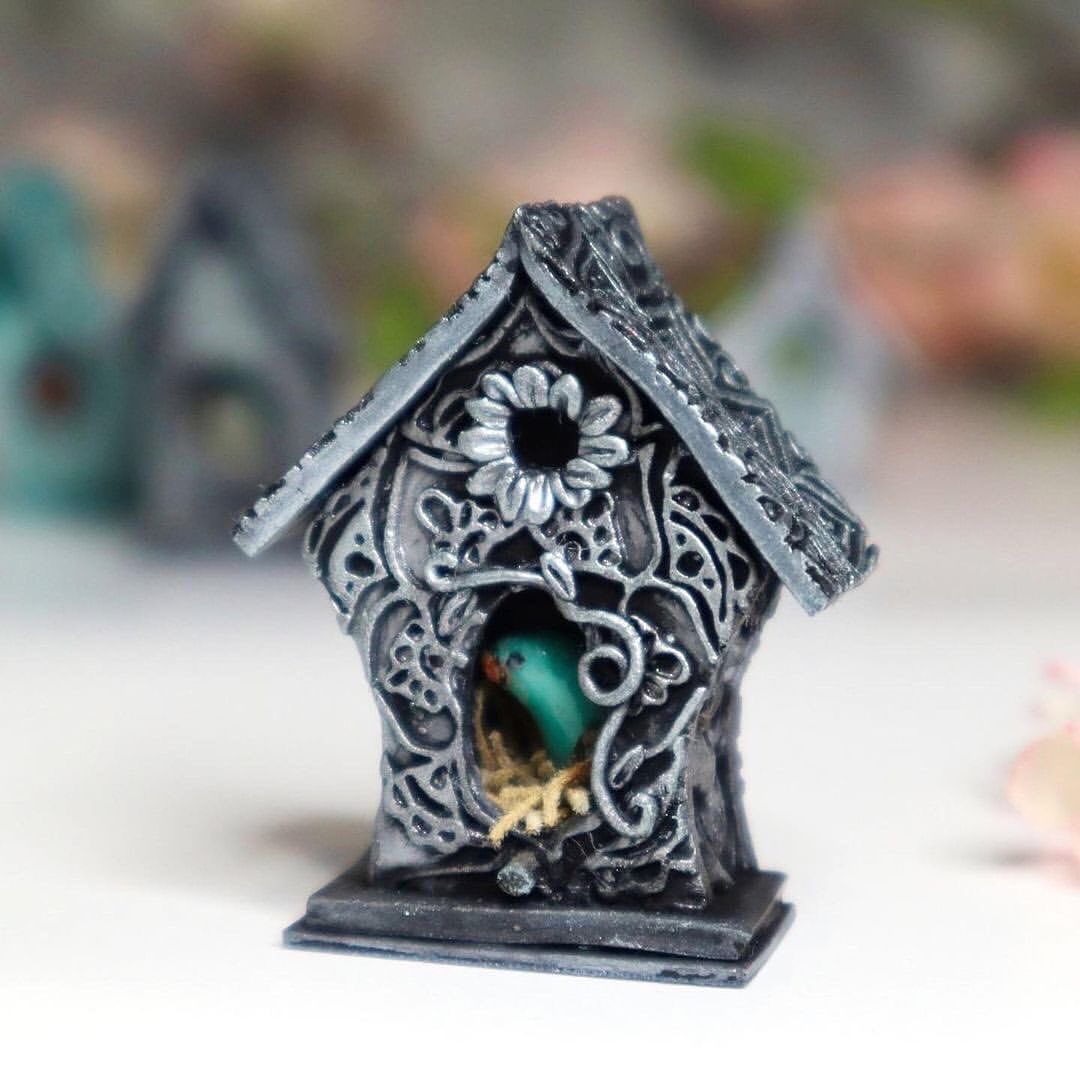
22. Polymer Clay House
To make a polymer clay house, begin by softening your clay and choosing colors for the walls, roof, and details. Shape the main structure into a rectangular or square block for the house base. Roll out a separate piece of clay to form the roof—this can be a simple triangle or sloped shape, depending on your design. Attach the roof securely to the base. Use small pieces of clay to add windows, doors, chimneys, or decorative elements like flower boxes or bricks. For added texture, use a toothpick or sculpting tool to draw lines for wood panels or roof shingles. Once the house is fully assembled and detailed, bake it according to the polymer clay instructions. After it cools, you can paint additional features and finish with a varnish for a lasting shine.
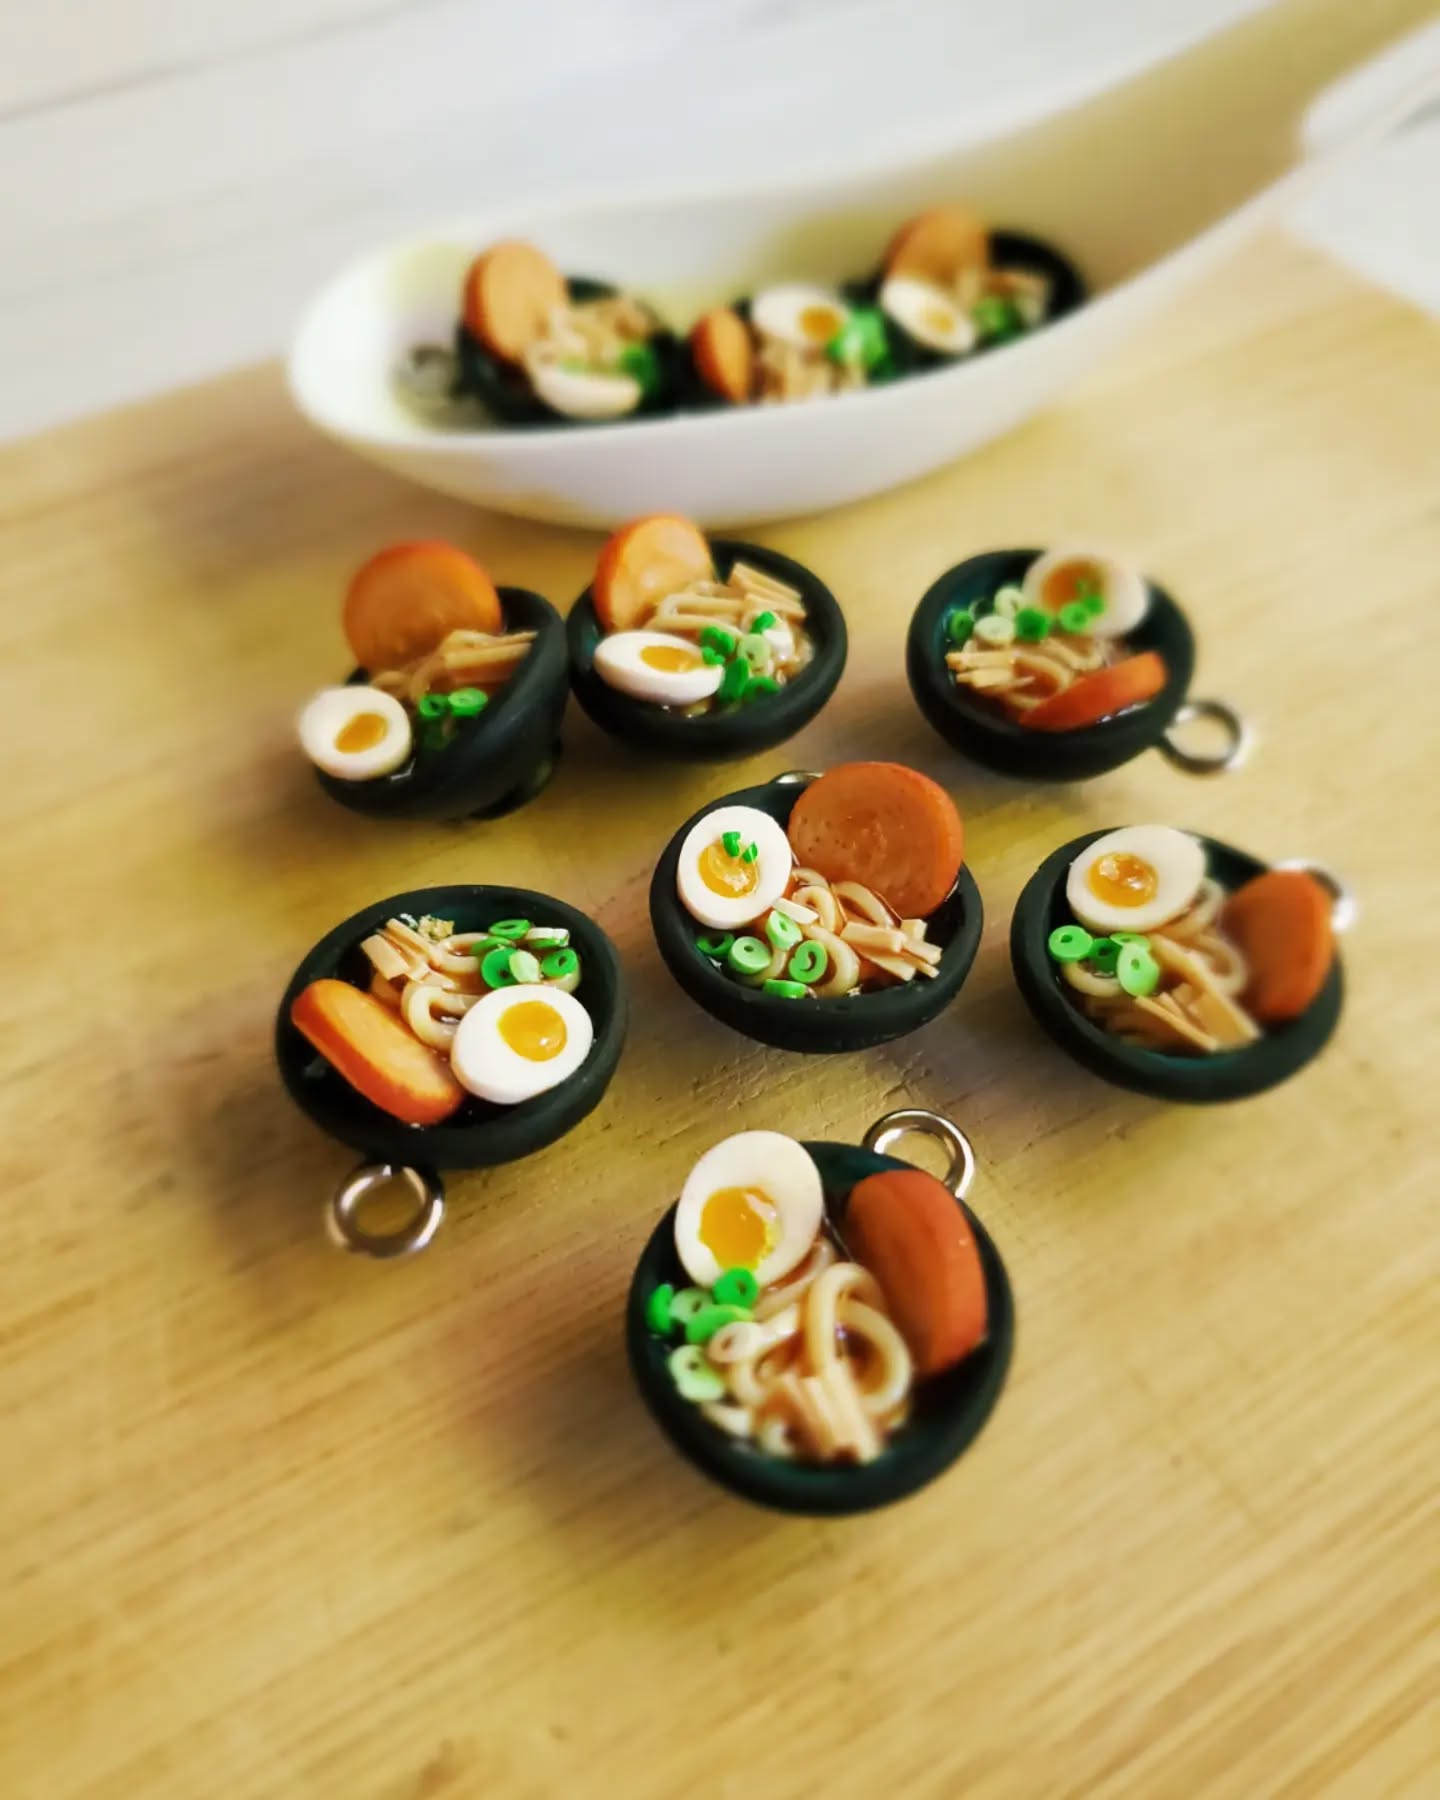
23. Ramen Bowl
To make a polymer clay ramen bowl, start by choosing a colour for the bowl and shaping a small, rounded dish with slightly raised edges. Smooth the surface and hollow out the centre using your fingers or a sculpting tool. For the noodles, roll thin strands of beige or yellow clay and coil them loosely to fill the bowl. Add details like slices of clay to represent boiled eggs, swirls of pink and white for narutomaki, small green bits for scallions, and brown pieces for meat or mushrooms. Carefully arrange all the toppings on top of the noodles. Once your design is complete, bake the entire piece according to the polymer clay instructions. After it cools, apply a gloss finish to give it a realistic, appetising look.
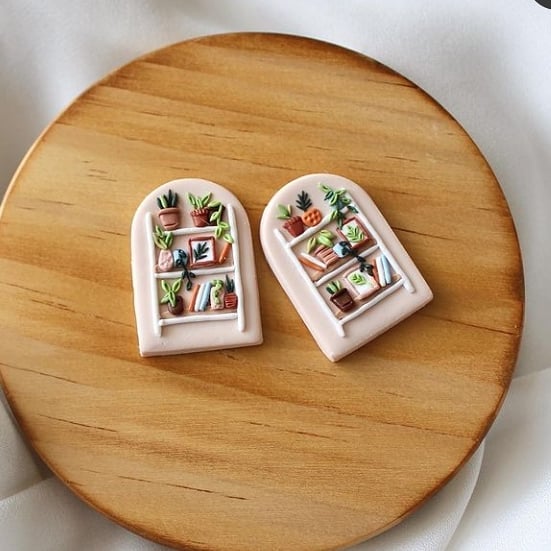
24. Fridge Magnet
This is a bookshelf fridge magnet. To make this create a base with polymer slab and then take bits and pieces of clay for books , plants and shelf boards.
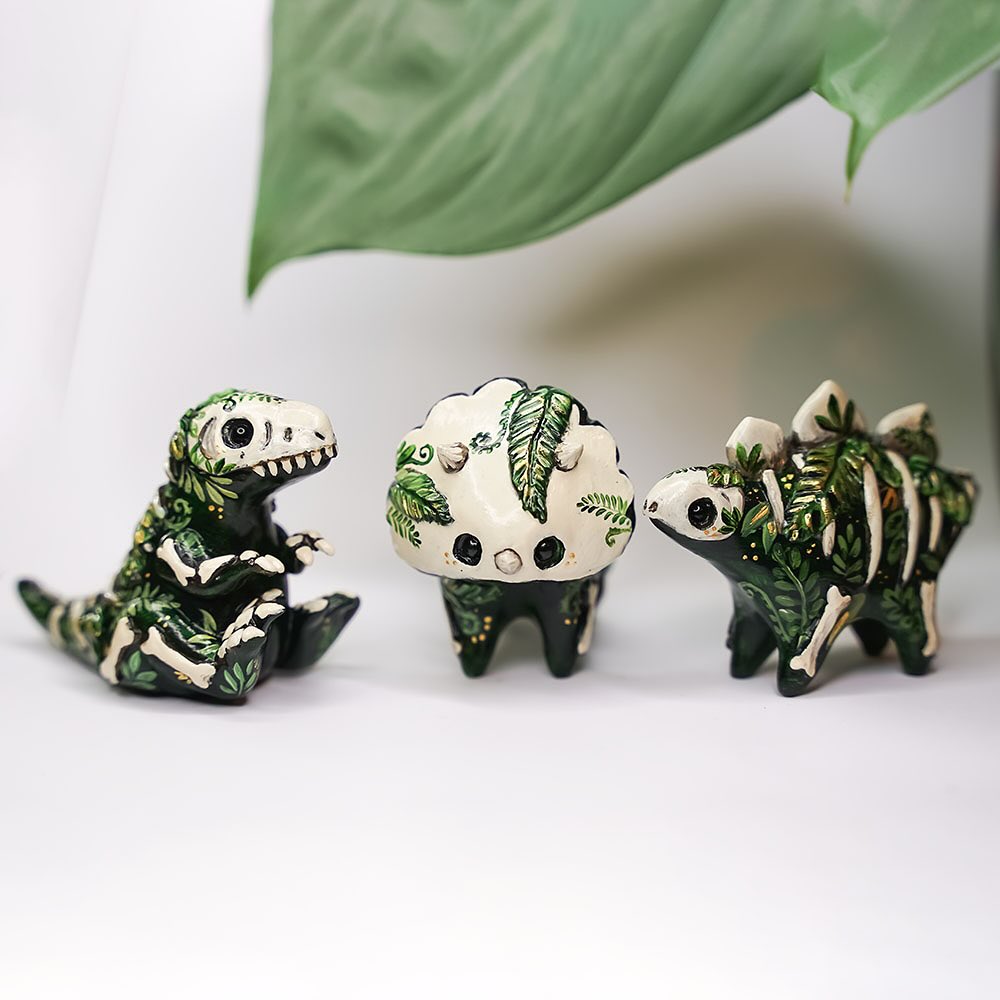
25. Cute Dinosaurs
To make cute polymer clay dinosaurs, start by picking a bright or pastel-colored clay to give them a playful look. Shape a chubby oval for the body and a smaller round ball for the head, attaching them gently together. Roll out four short cylinders for the legs and a long, tapered piece for the tail, then attach them securely. Use small triangles or rounded bumps along the back for spikes or plates, depending on the dinosaur style you want, like a stegosaurus or a cartoon-style T-rex. Add tiny arms, eyes made from small black beads or clay dots, and sculpt a smiling mouth for extra charm. Once assembled, bake your dinosaur according to the polymer clay instructions. After cooling, you can paint on little details like blush cheeks or patterns and seal it with a gloss finish for added cuteness.


