Paper crafting isn’t only a fun activity for kids—it also comes with plenty of great benefits! It sparks creativity, boosts confidence, and helps strengthen fine motor skills. Plus, it’s a fantastic way for families to spend quality time and make lasting memories together. Want to explore some simple and exciting craft ideas for your child? Keep reading for more ideas.
1. Paper Air Balloon
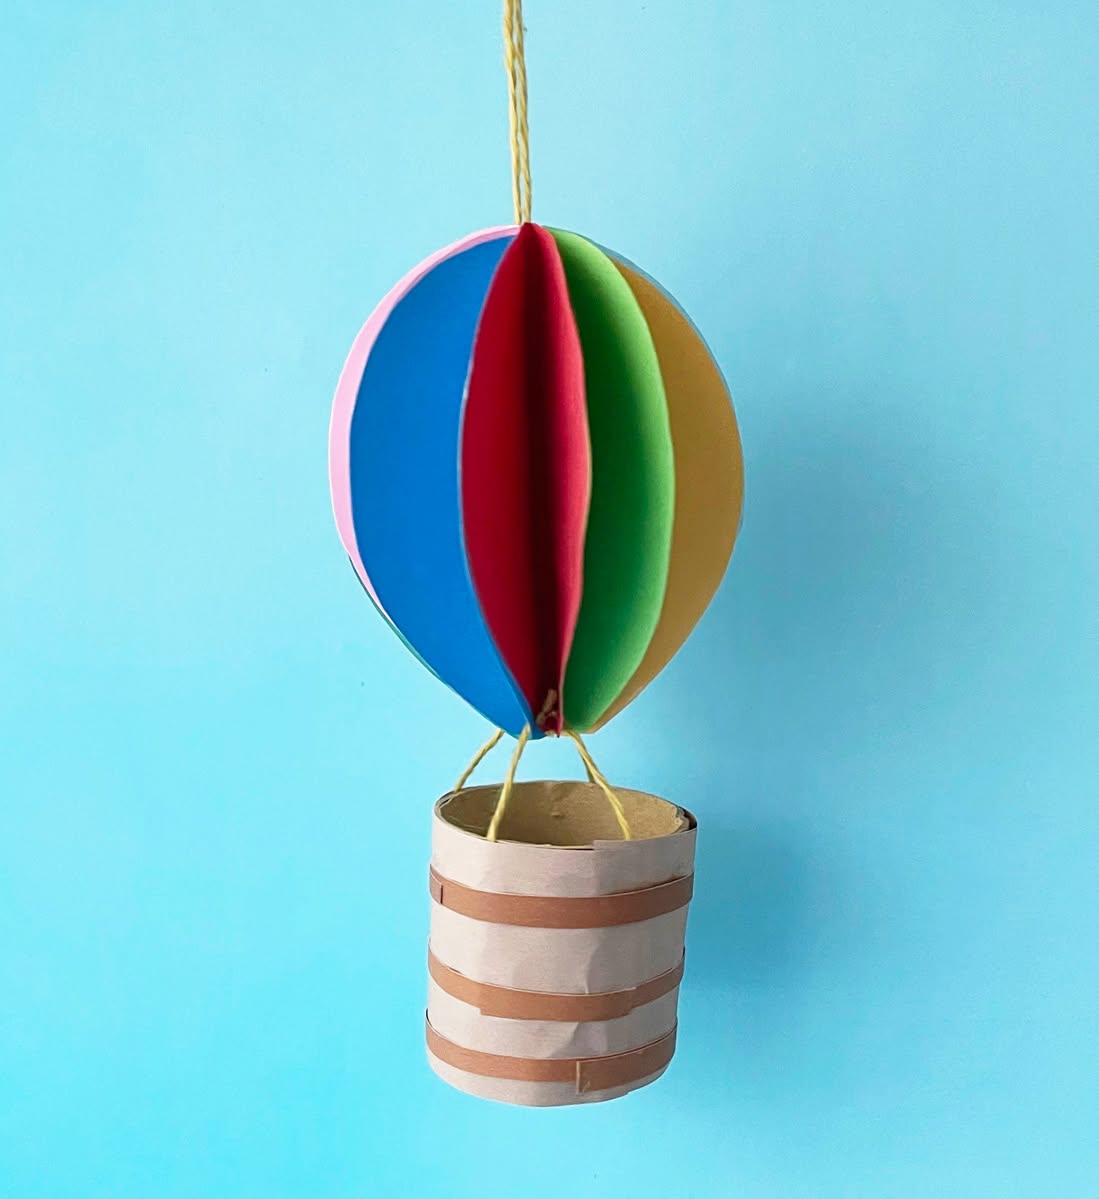
To make a paper air balloon, take a square piece of paper. First, fold it in half diagonally both ways to make an “X” crease. Then fold it in half vertically and horizontally to make a “+” crease. Next, use the creases to fold the paper into a triangle shape. Fold the corners of the triangle up to the top point, and then fold the edges to the center line. Do this on both sides. Finally, blow gently into the small hole at the bottom, and your paper balloon will puff up like a ball!
2. Lady Bug
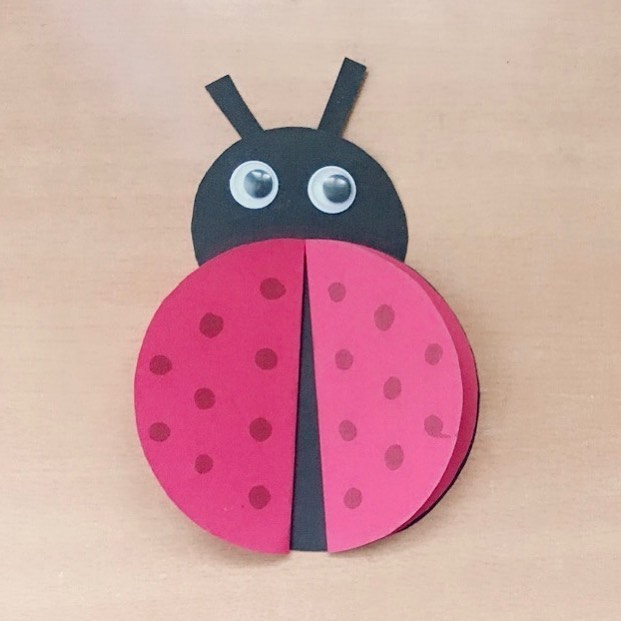
To make a paper ladybug, start with a red circle cut out of paper. Fold it in half so it looks like the wings of a ladybug. Then cut a small black circle for the head and glue it to the top of the folded red circle. Add small black dots on the red wings using paper cutouts or by coloring with a marker. Finally, draw little eyes and antennae on the head. Your cute paper ladybug is ready!
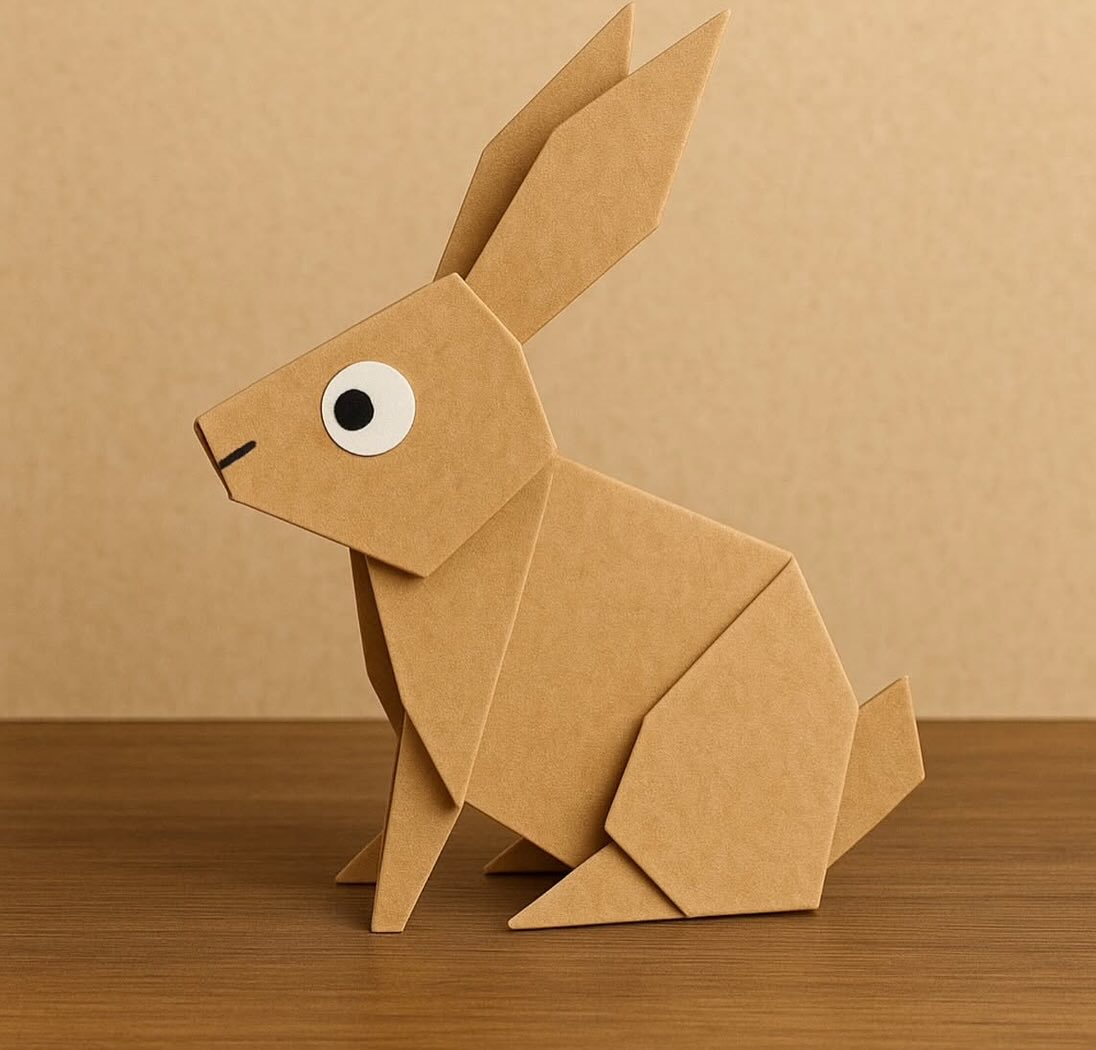
3. Rabbit
To make a paper rabbit, take a square piece of paper. Fold it in half diagonally to make a triangle. Fold the two top corners of the triangle upward to form the rabbit’s long ears. Then fold the bottom corner up a little to make the face. You can draw eyes, a nose, and a mouth with a pen or marker. Now your simple paper rabbit is ready!
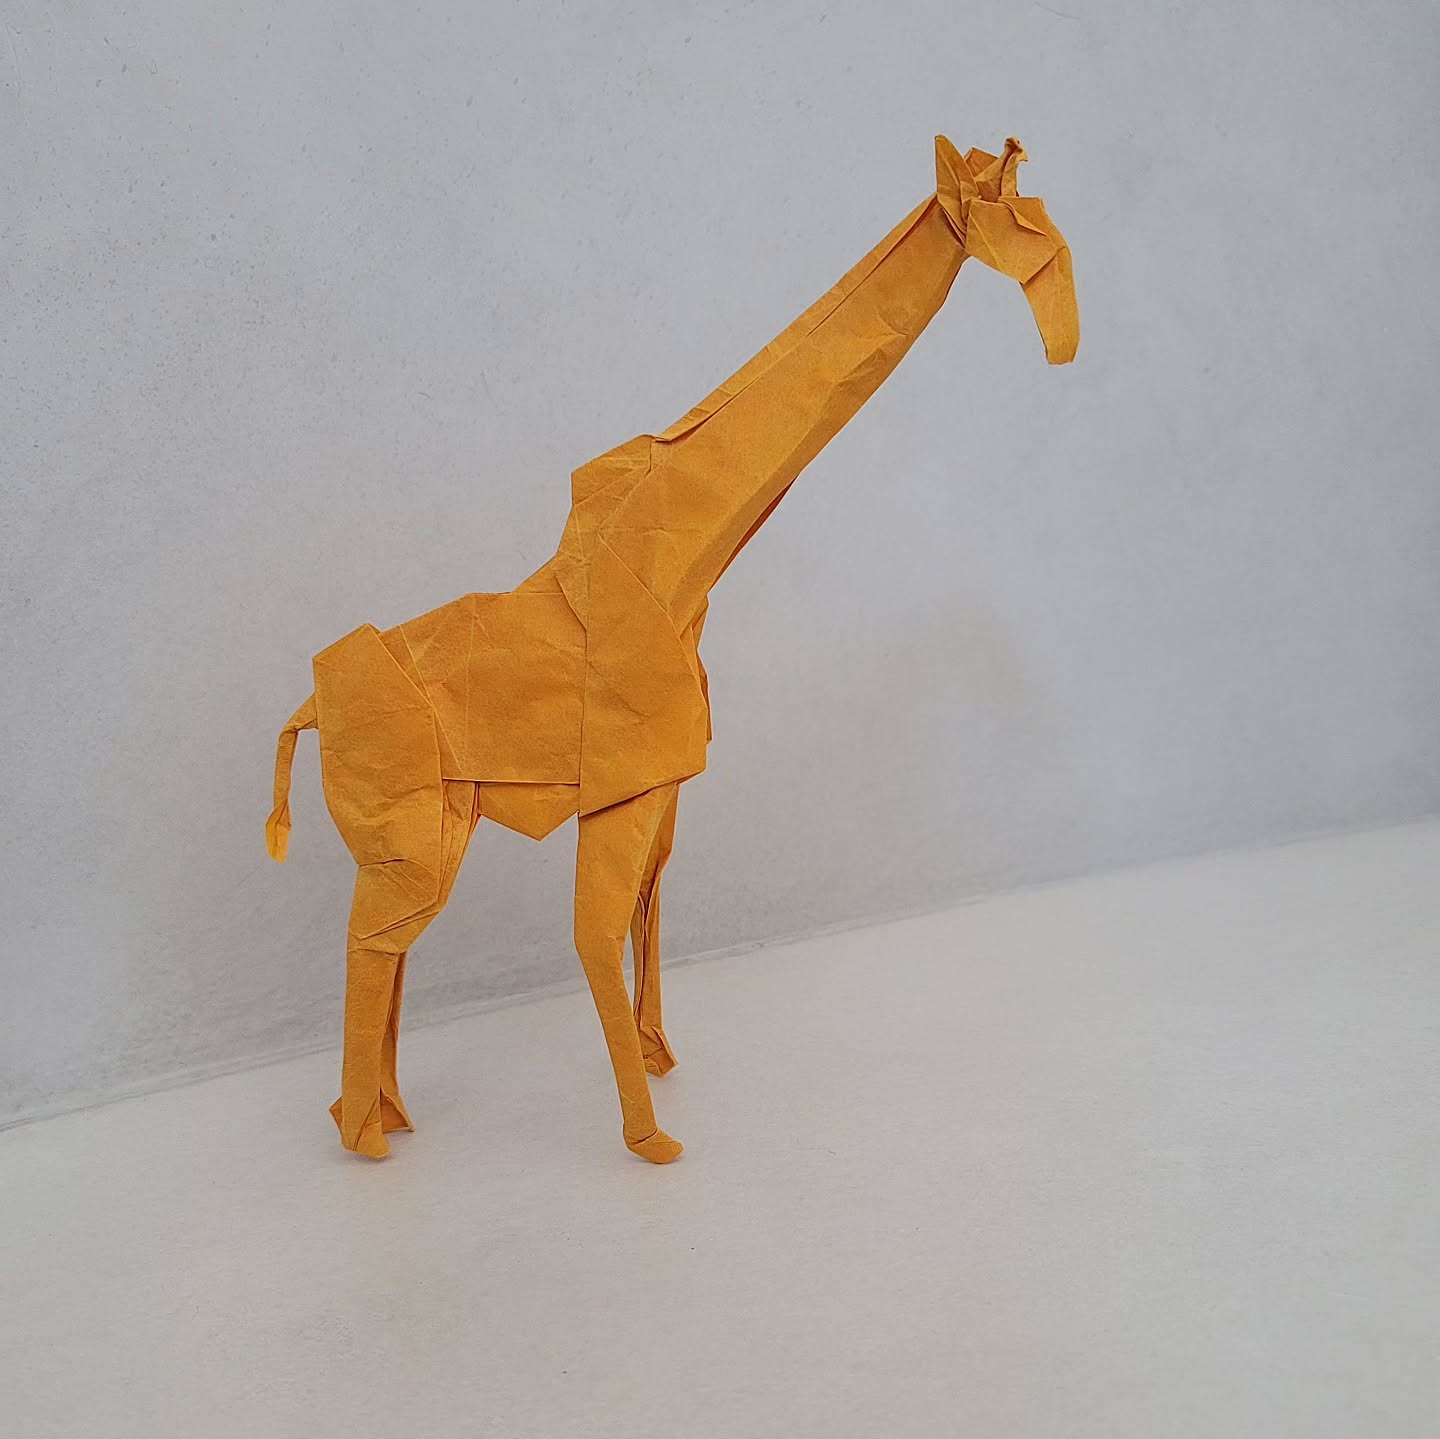
4. Giraffe
To make a paper giraffe, start with a yellow sheet of paper. Cut out a long rectangle for the neck and a small oval for the head. Then cut out a bigger oval for the body and four thin rectangles for the legs. Glue the neck to the body, and then attach the head on top of the neck. Add two tiny horns and a tail using small paper strips. Finally, draw brown spots, eyes, and a smile with a marker. Your paper giraffe is ready!
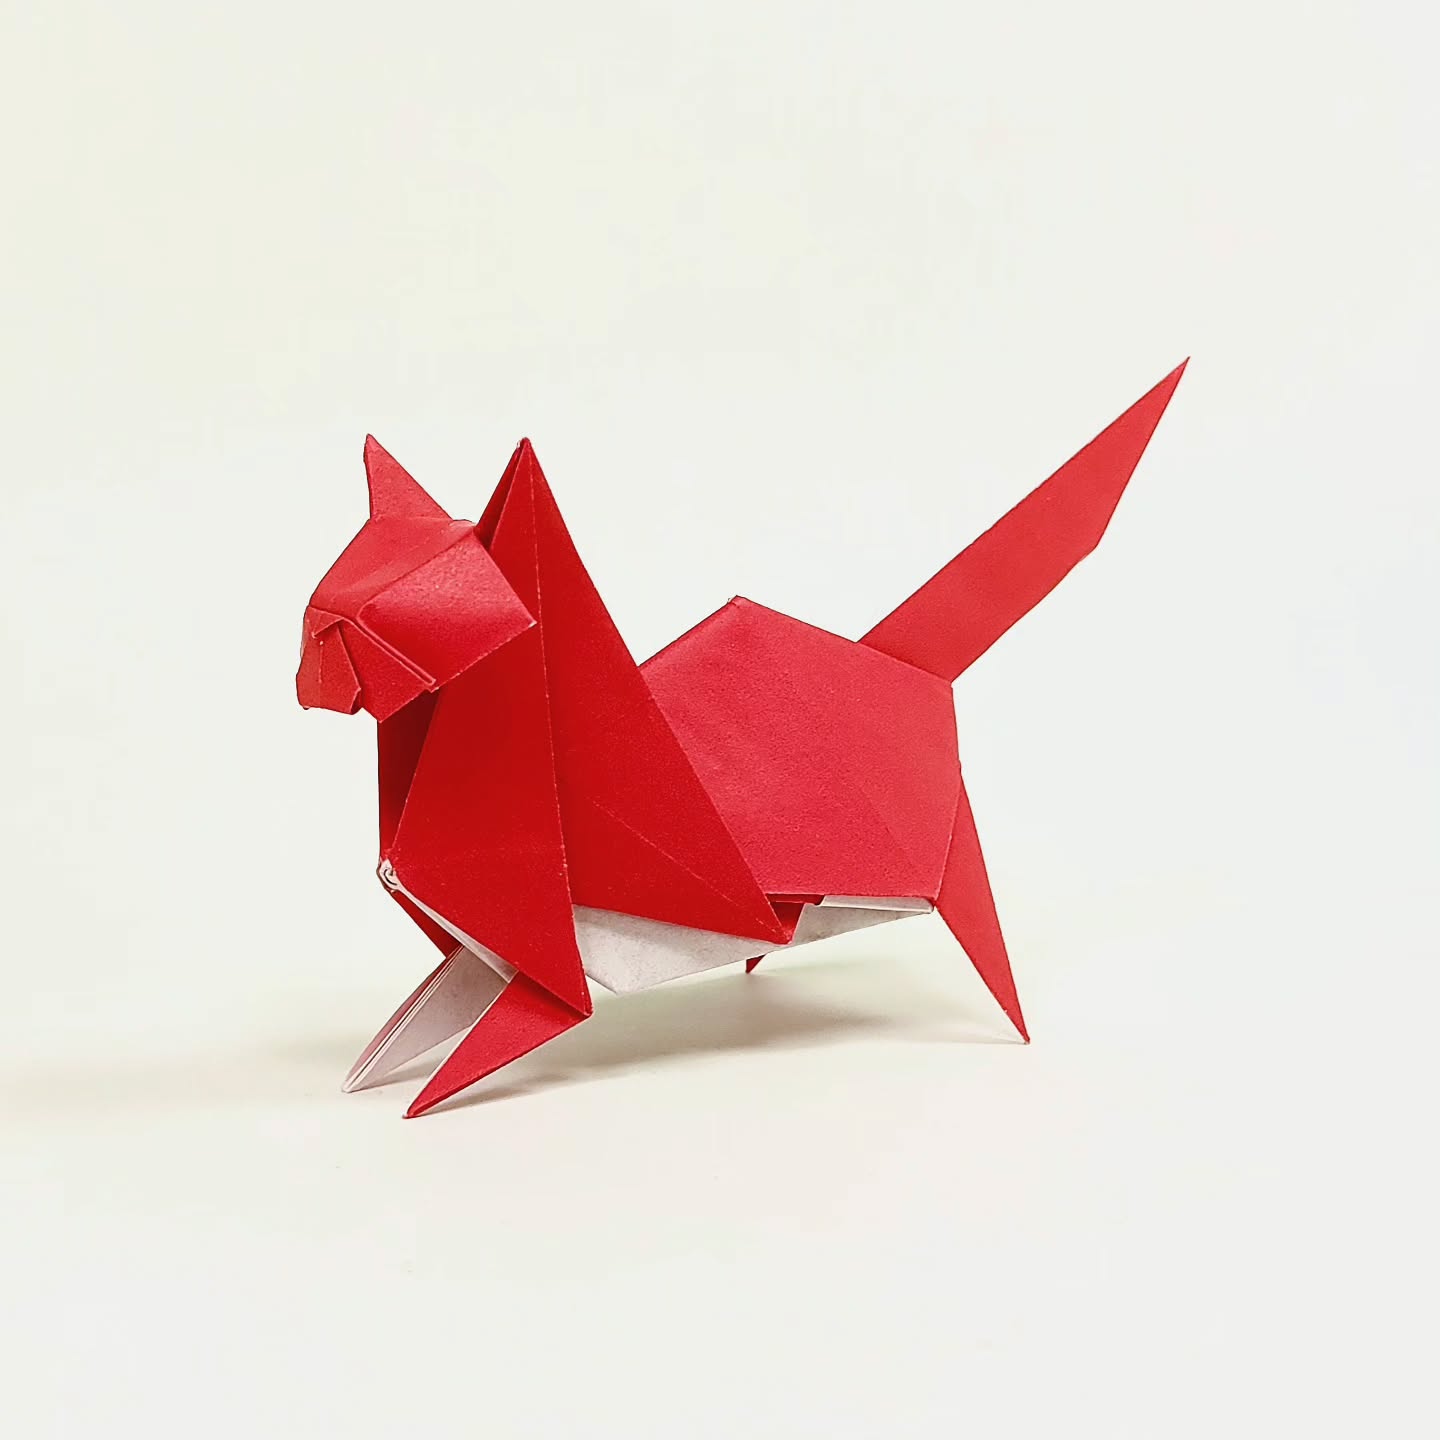
5. Cute Animal
To make a paper cat, take a square piece of paper. Fold it in half to make a triangle, then fold the two top corners down to form the ears. Fold the bottom point up a little to make the face shape. Use a marker to draw the eyes, nose, mouth, and whiskers. You can also color the ears or add patterns to make it look cute. Your paper cat is ready!
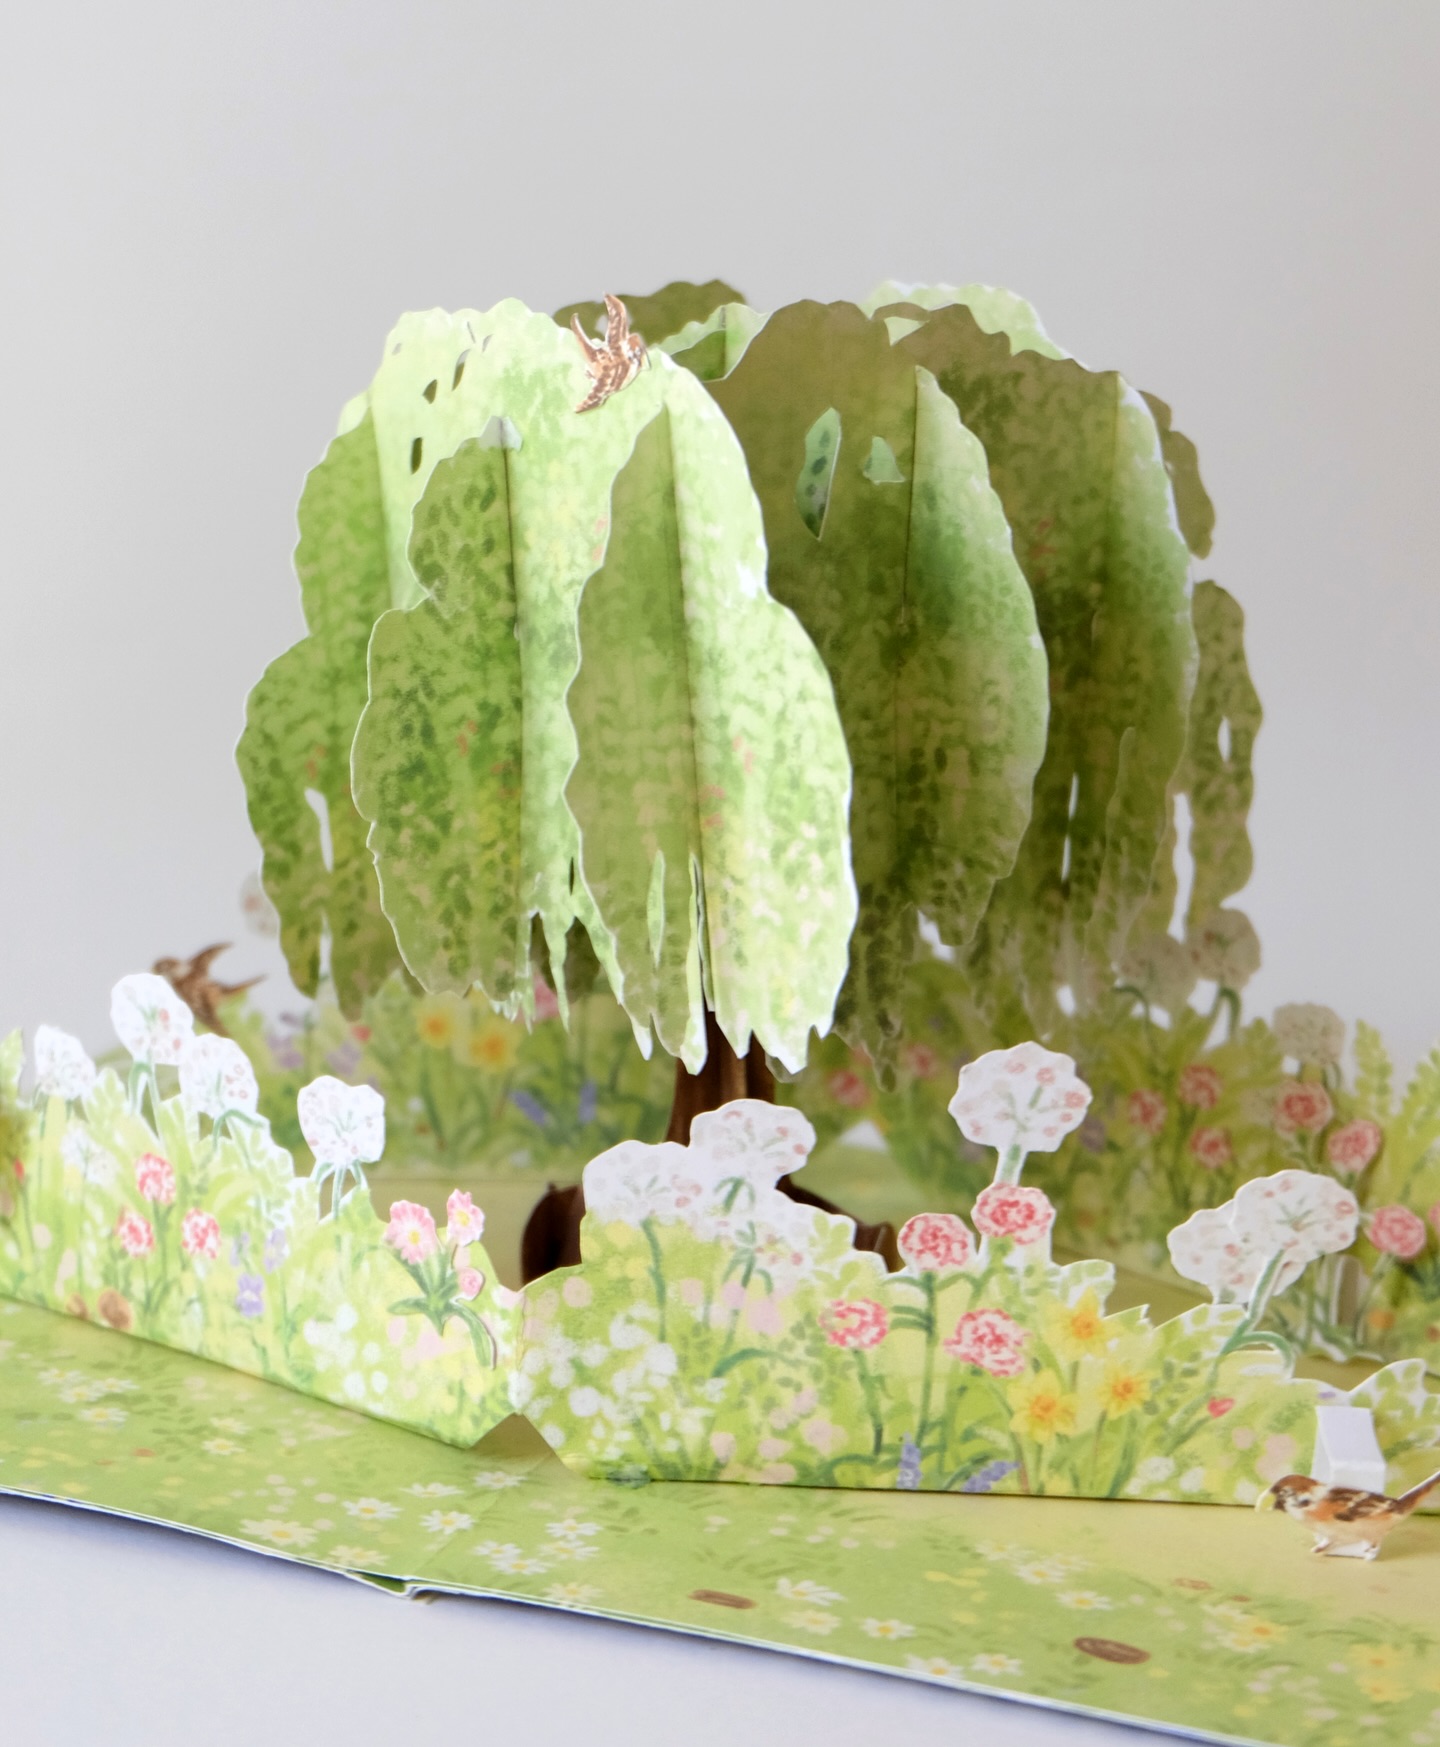
6. Cute Scenery
To make this beautiful paper pop-up tree scene, start by cutting out different pieces of green paper in leafy shapes for the tree canopy and a brown trunk for the base. Fold the leaves accordion-style to give them a layered, 3D look. Attach the leaves carefully around the trunk so they spread out like a real tree. Next, create a flat base using cardboard or thick paper, and decorate it with cut-out flowers, grass, and small animals. Arrange the flowers around the bottom of the tree to make it look like a garden. When everything is glued in place, you’ll have a lovely pop-up paper tree surrounded by colorful flowers!
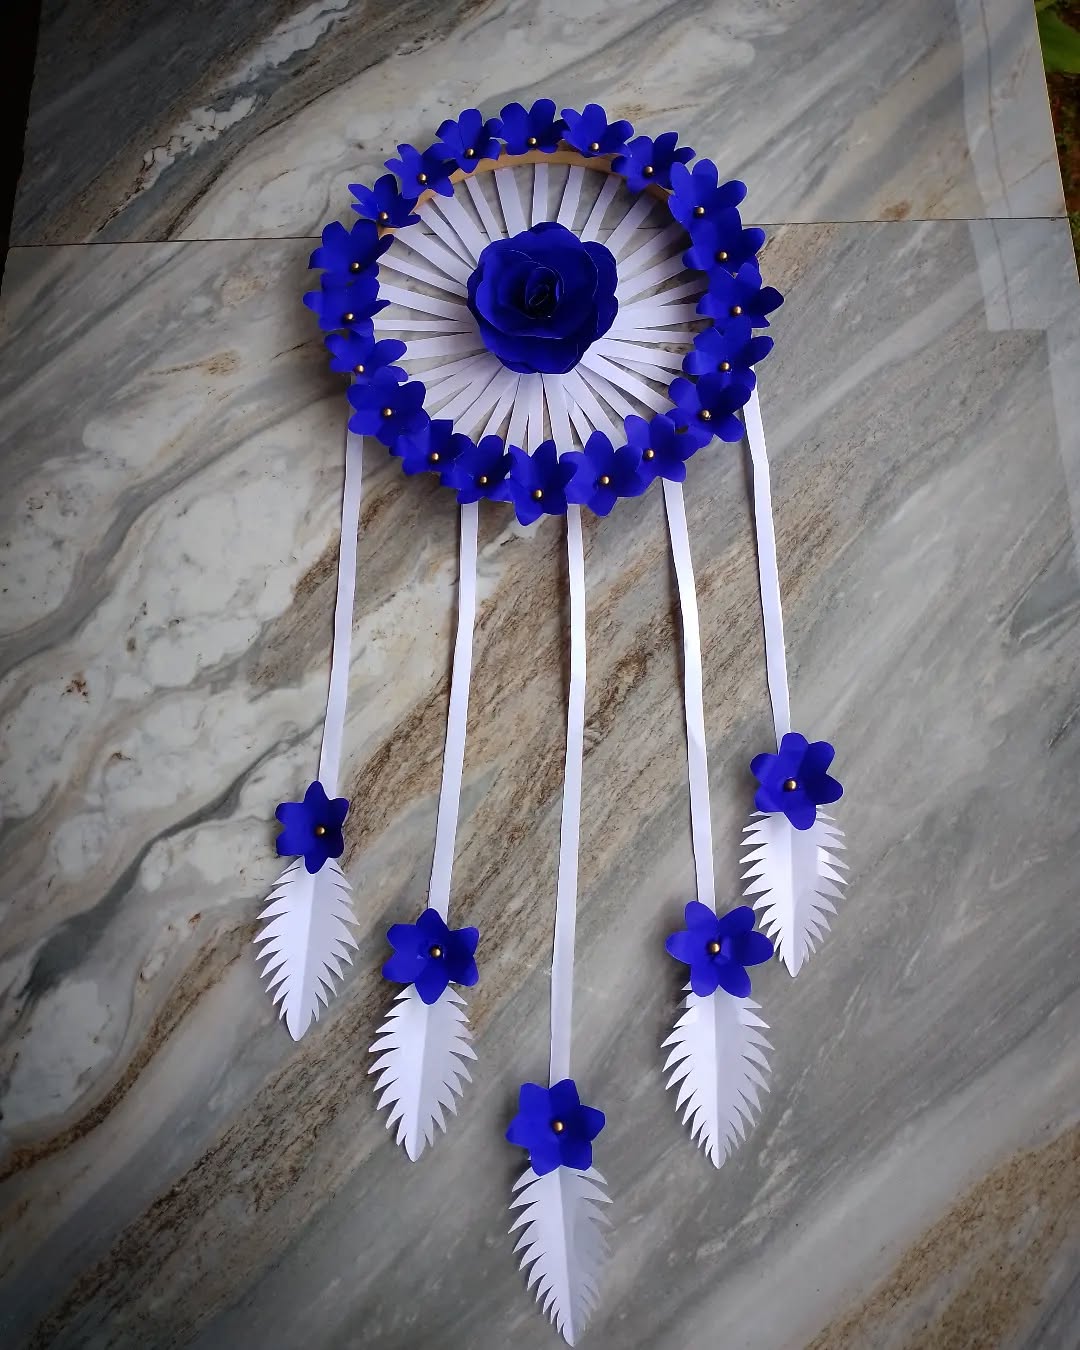
7. Dream Catcher
To make a paper dream catcher, start by cutting a big circle from thick paper or cardboard. Cut out the inside to make it look like a ring. Then, use yarn, string, or strips of paper to weave across the ring like a net. Cut small paper feathers and decorate them with colors or patterns. Attach the feathers to the bottom of the ring with string. You can also add beads or small paper shapes for decoration. Your simple paper dream catcher is ready!
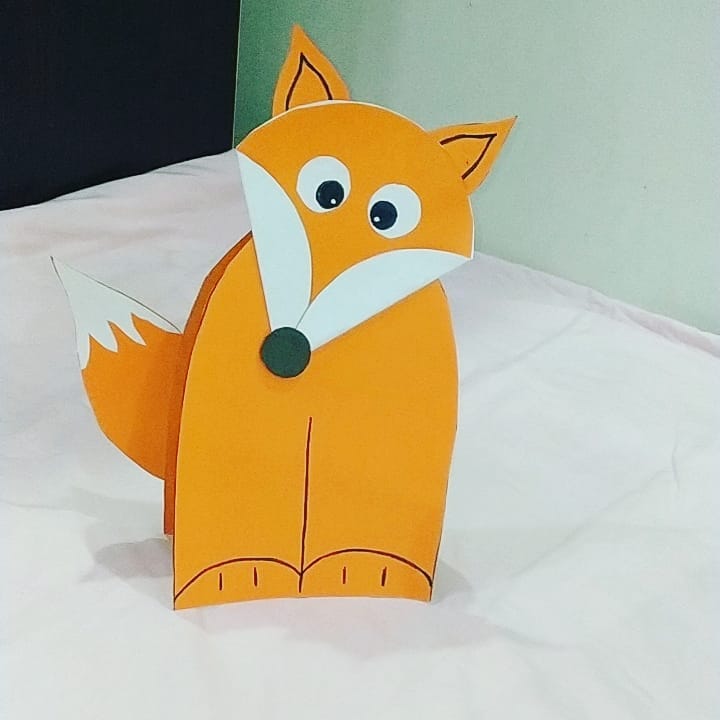
8. Cute Fox
To make a cute paper fox, take an orange square piece of paper. Fold it in half diagonally to make a triangle. Fold the two top corners down to form pointy ears. Then fold the bottom tip up a little to make the fox’s face. Use a black marker to draw the eyes, nose, and mouth. You can also color the inside of the ears white or pink. Your adorable paper fox is ready!
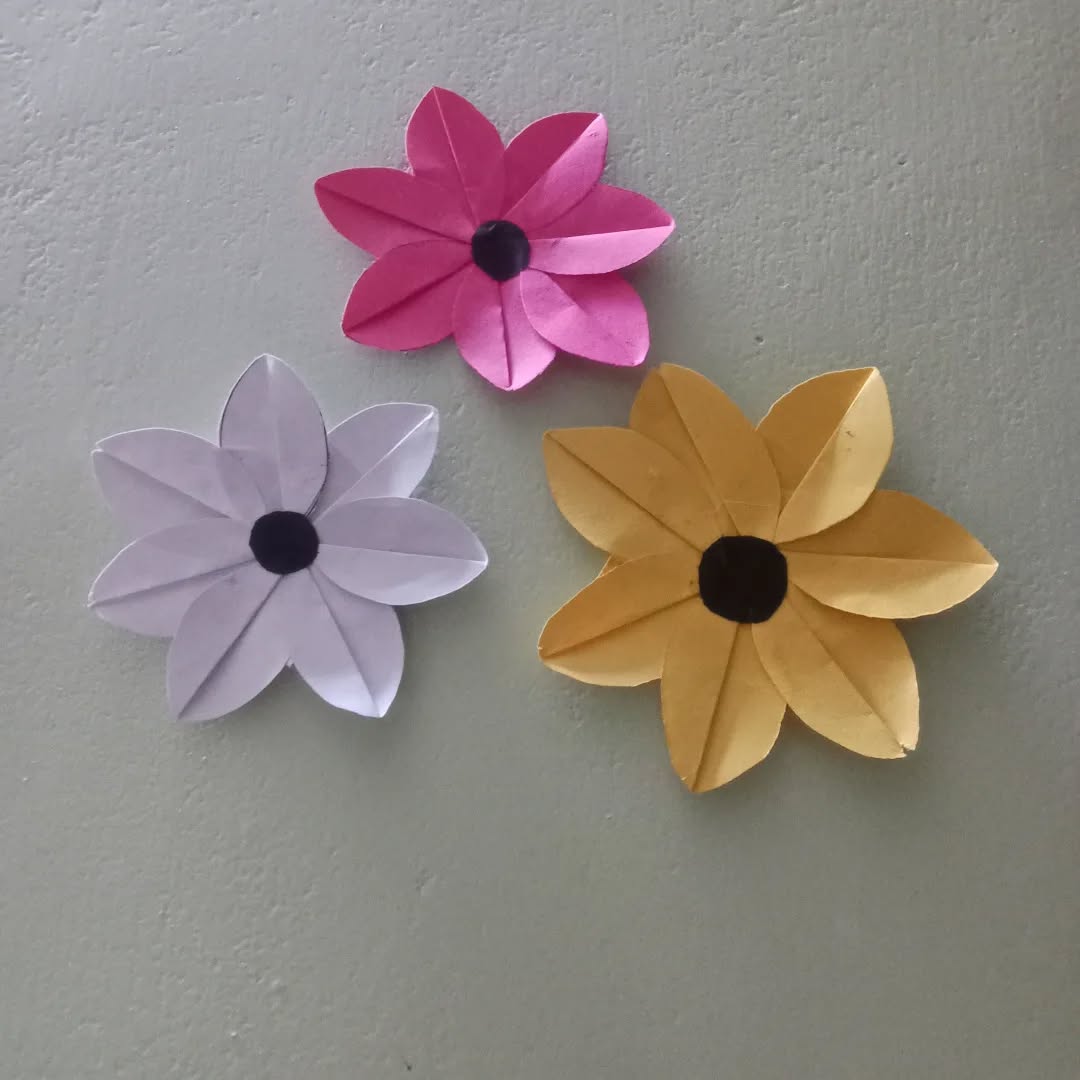
9. Cute Flower
To make a cute paper flower, start with a colored square paper. Fold it in half diagonally to make a triangle, then fold it again into a smaller triangle. Fold once more so it looks like a narrow cone shape. Cut a rounded edge at the top, then open it up to see a flower shape. Make a few of these and layer them together for a fuller flower. Add a small yellow circle in the middle for the center. Your pretty paper flower is ready!
10. Little Planter
To make a cute paper planter, take a square sheet of thick paper. Fold it in half diagonally to make a triangle, then fold the two bottom corners up to meet at the top point. Next, fold the top flaps down on each side to create an open pocket shape. This pocket will be your planter. Decorate it with colors, patterns, or stickers to make it look fun. You can place small paper flowers or paper plants inside. Your cute paper planter is ready!
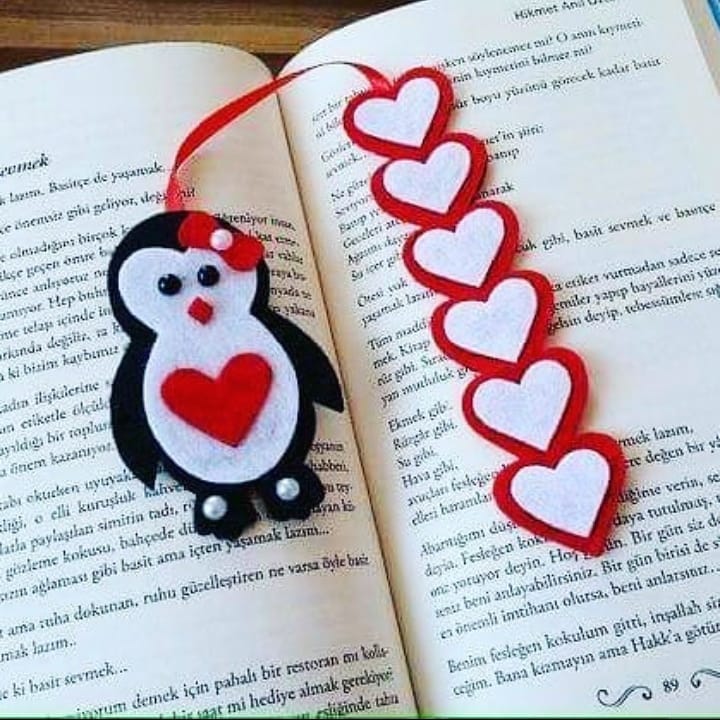
11. Cute Bookmark
To make a cute penguin bookmark with paper, start with a square piece of black paper. Fold it in half diagonally to make a triangle. Fold the two top corners down to the bottom point, then tuck them inside the pocket to form the bookmark shape. Cut a small white triangle and glue it on the front for the penguin’s tummy. Add two small wings from black paper, a yellow beak, and tiny feet. Finally, draw or stick on two eyes. Your adorable penguin bookmark is ready to use!
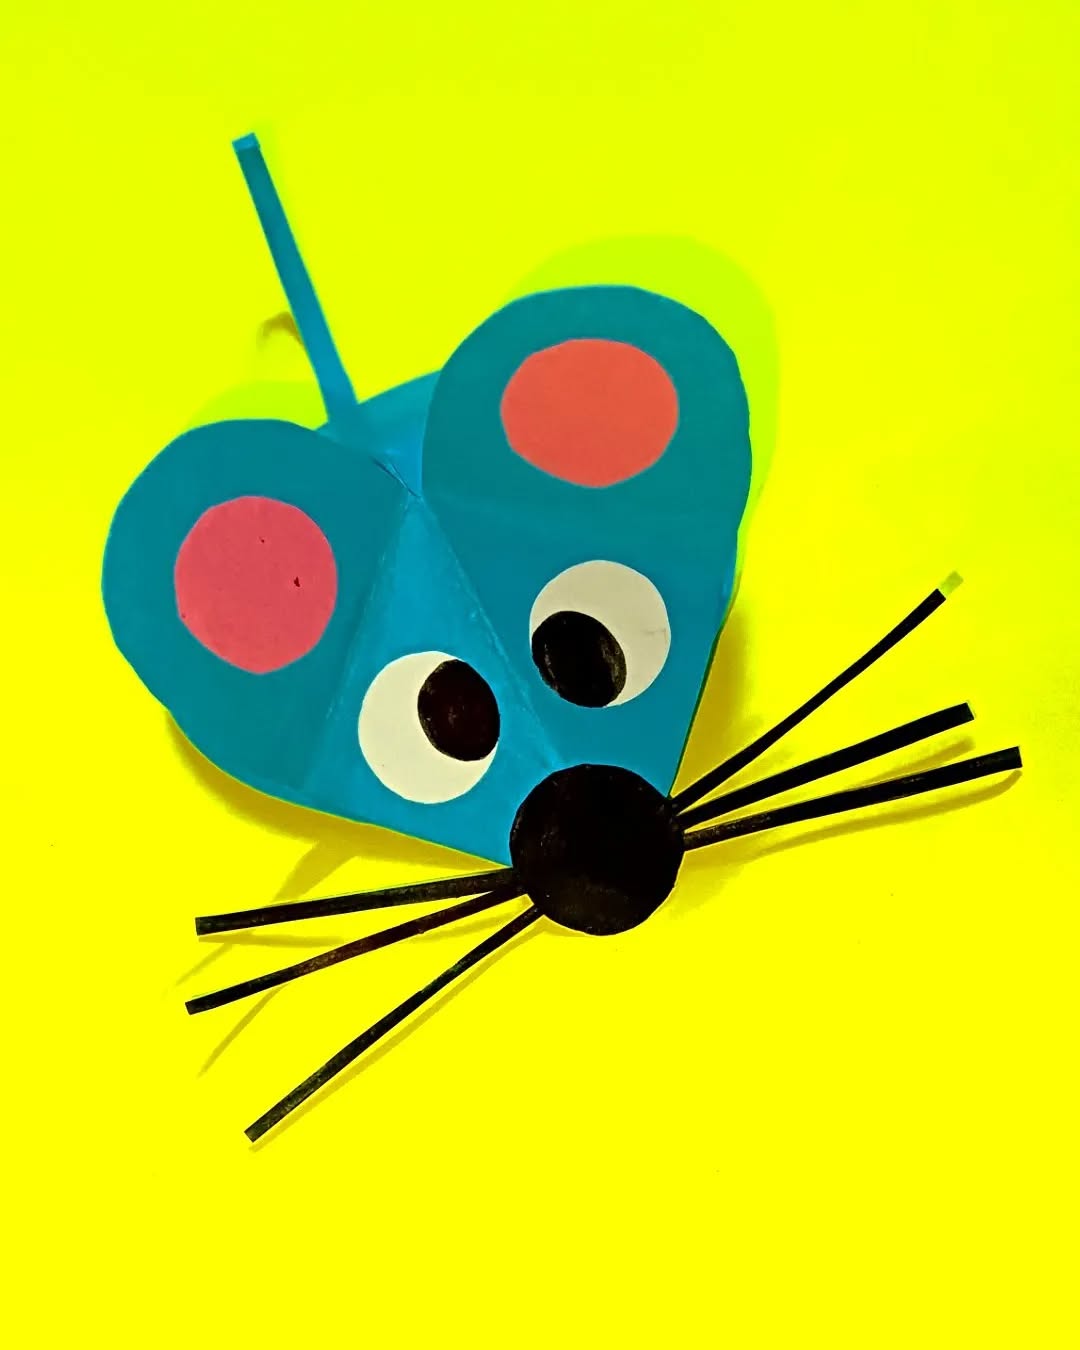
12. Cute Mouse
To make a cute paper mouse, start with a gray square piece of paper. Fold it in half diagonally to make a triangle. Fold the two side corners slightly inward to form the ears. Then fold the bottom point up to make the nose. Draw two small eyes, a nose, and whiskers with a black pen or marker. You can also add a thin strip of paper at the back for the tail. Your cute paper mouse is ready!
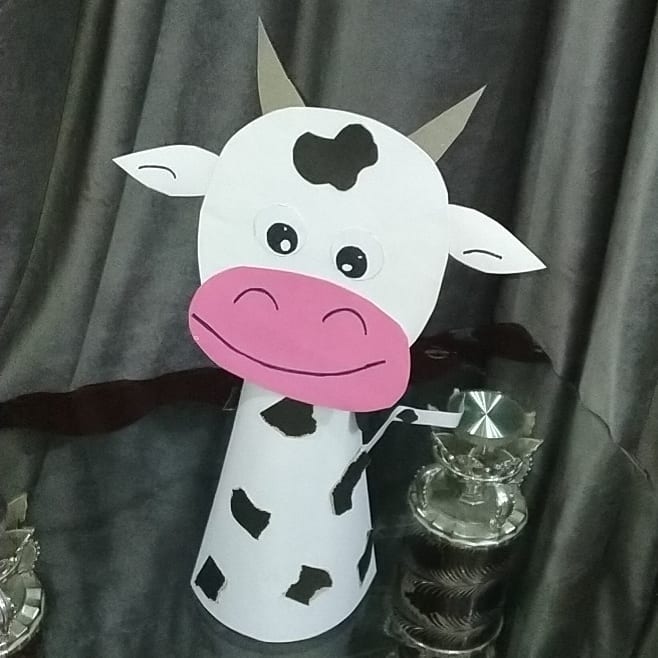
13. Paper Cow
To make a cute paper cow, take a white sheet of paper and cut out a big oval for the body and a smaller oval for the head. Glue the head on top of the body. Cut out four small rectangles for legs and attach them at the bottom. Add two small ears and little horns on the head. Then, cut black paper spots and stick them on the body to look like a cow’s pattern. Finally, draw eyes, a nose, and a smile. Your cute paper cow is ready!
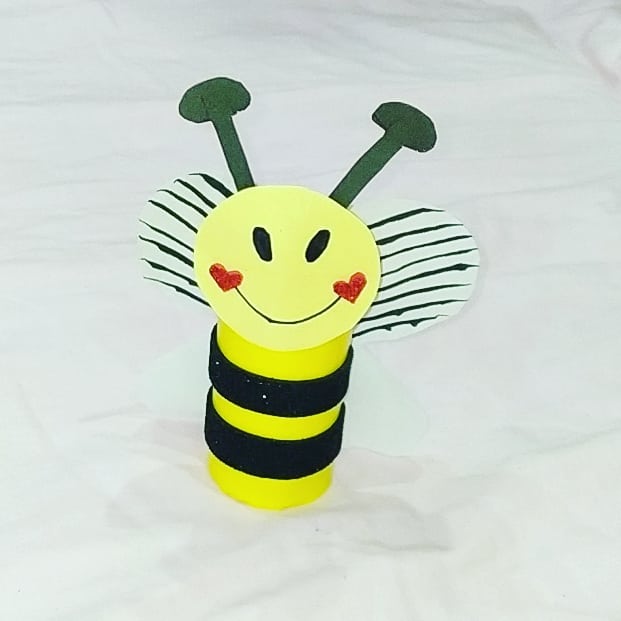
14. Cute Bee
To make a cute paper bee, start by cutting a yellow oval for the body. Then cut out a few thin black strips and glue them across the yellow oval to make stripes. Add a small black circle on top for the head. Cut two white paper ovals for wings and glue them on the back. Finally, draw eyes, a smile, and tiny antennae with a marker. Your cute paper bee is ready!
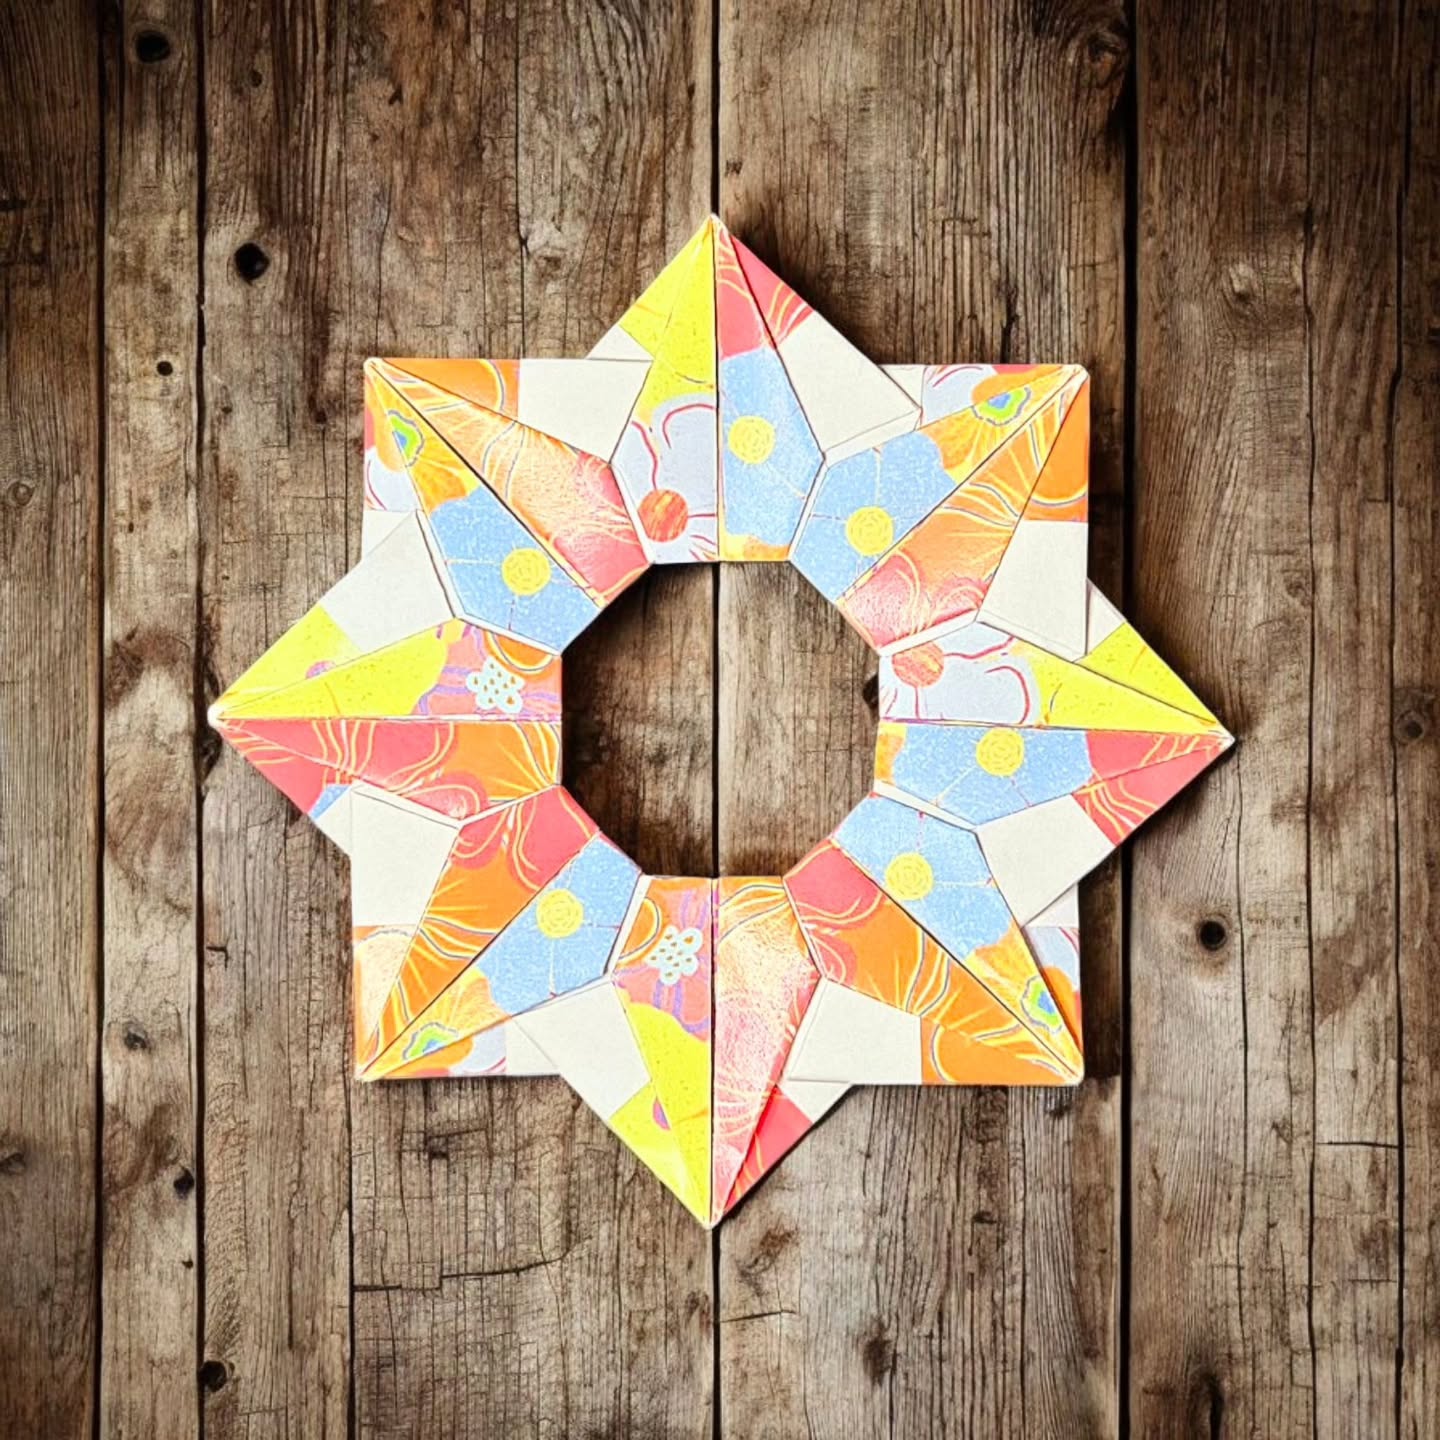
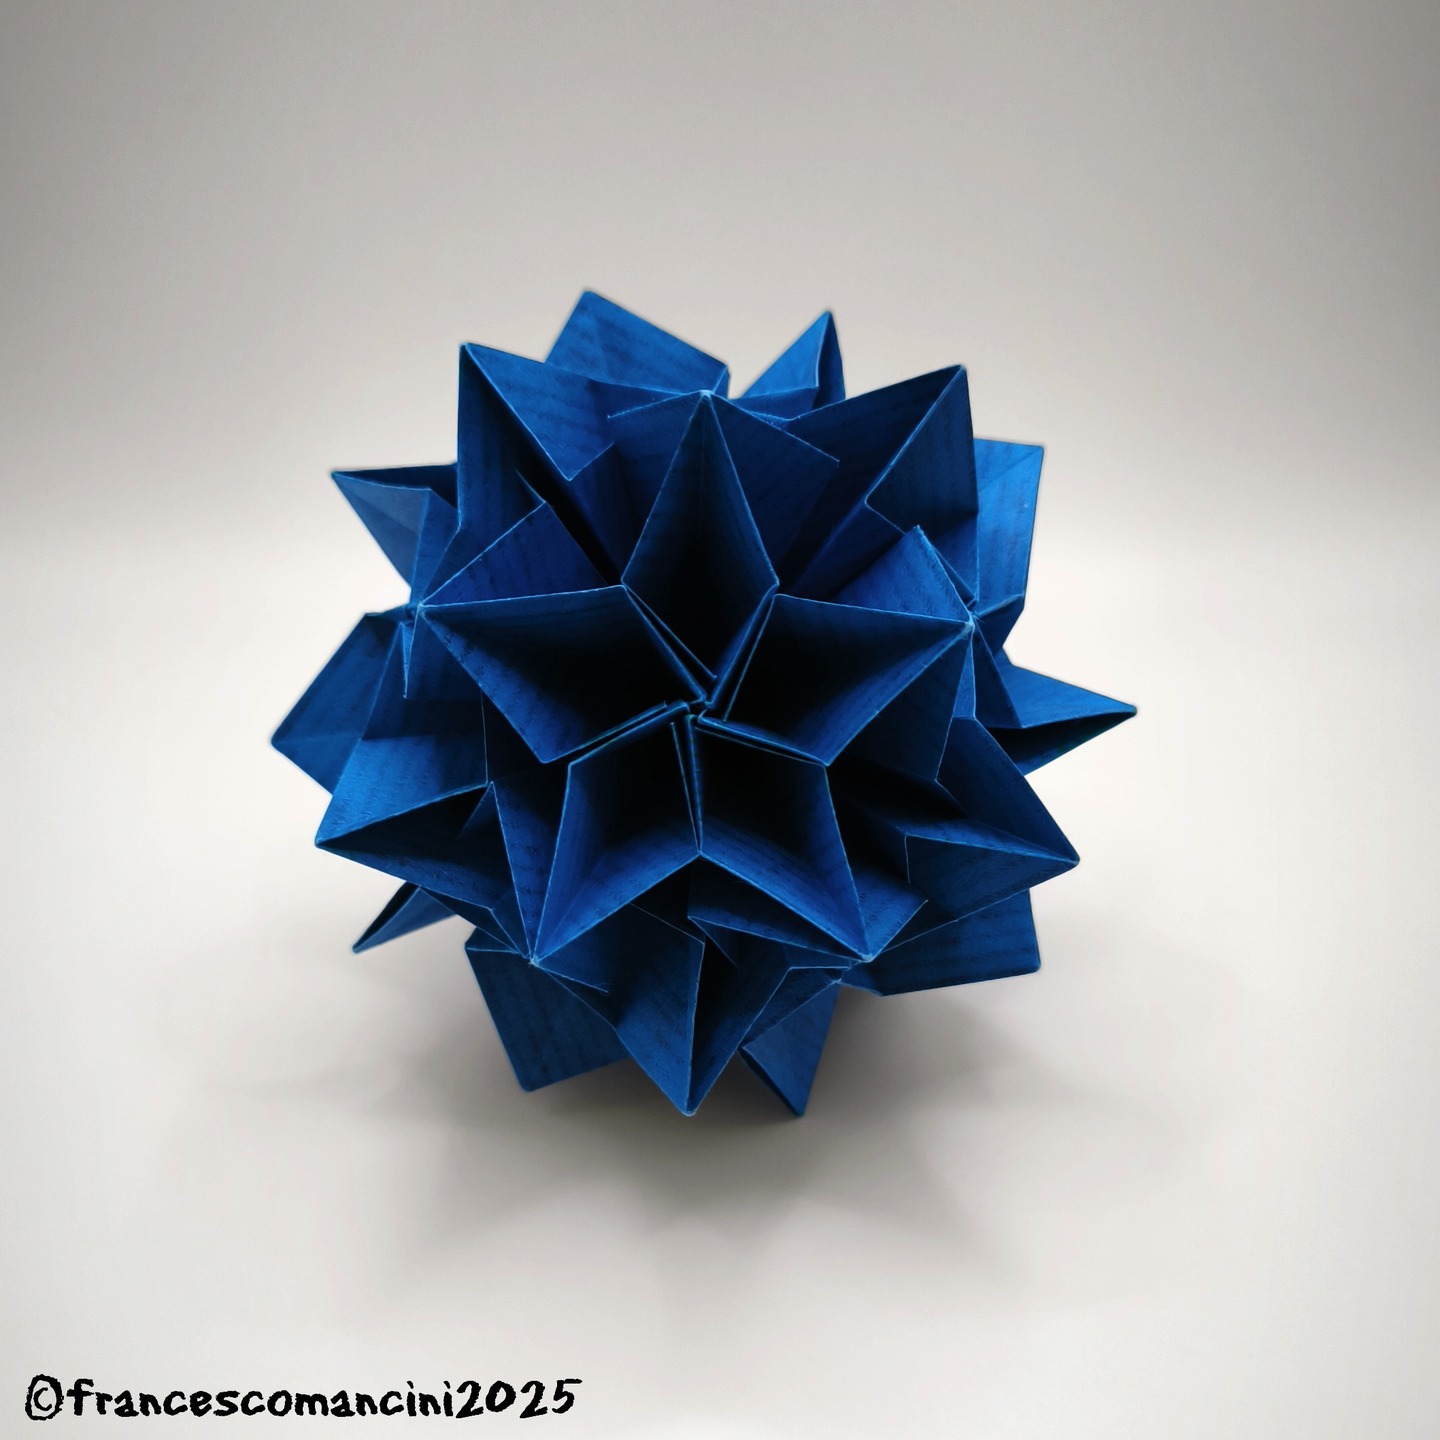
15. Paper Pattern
To make this colorful origami star wreath, start by cutting 8 square pieces of patterned or colored paper. Fold each square into a triangular unit by folding it diagonally, then fold the edges inward to create a pointed shape. Each folded unit will act as one part of the star. Once all 8 units are ready, carefully slide the flaps of one unit into the pockets of the next, joining them together like a puzzle. Continue connecting all the units in a circle until the star is complete. Press the folds firmly to hold the shape. Your beautiful paper star wreath is ready to decorate!
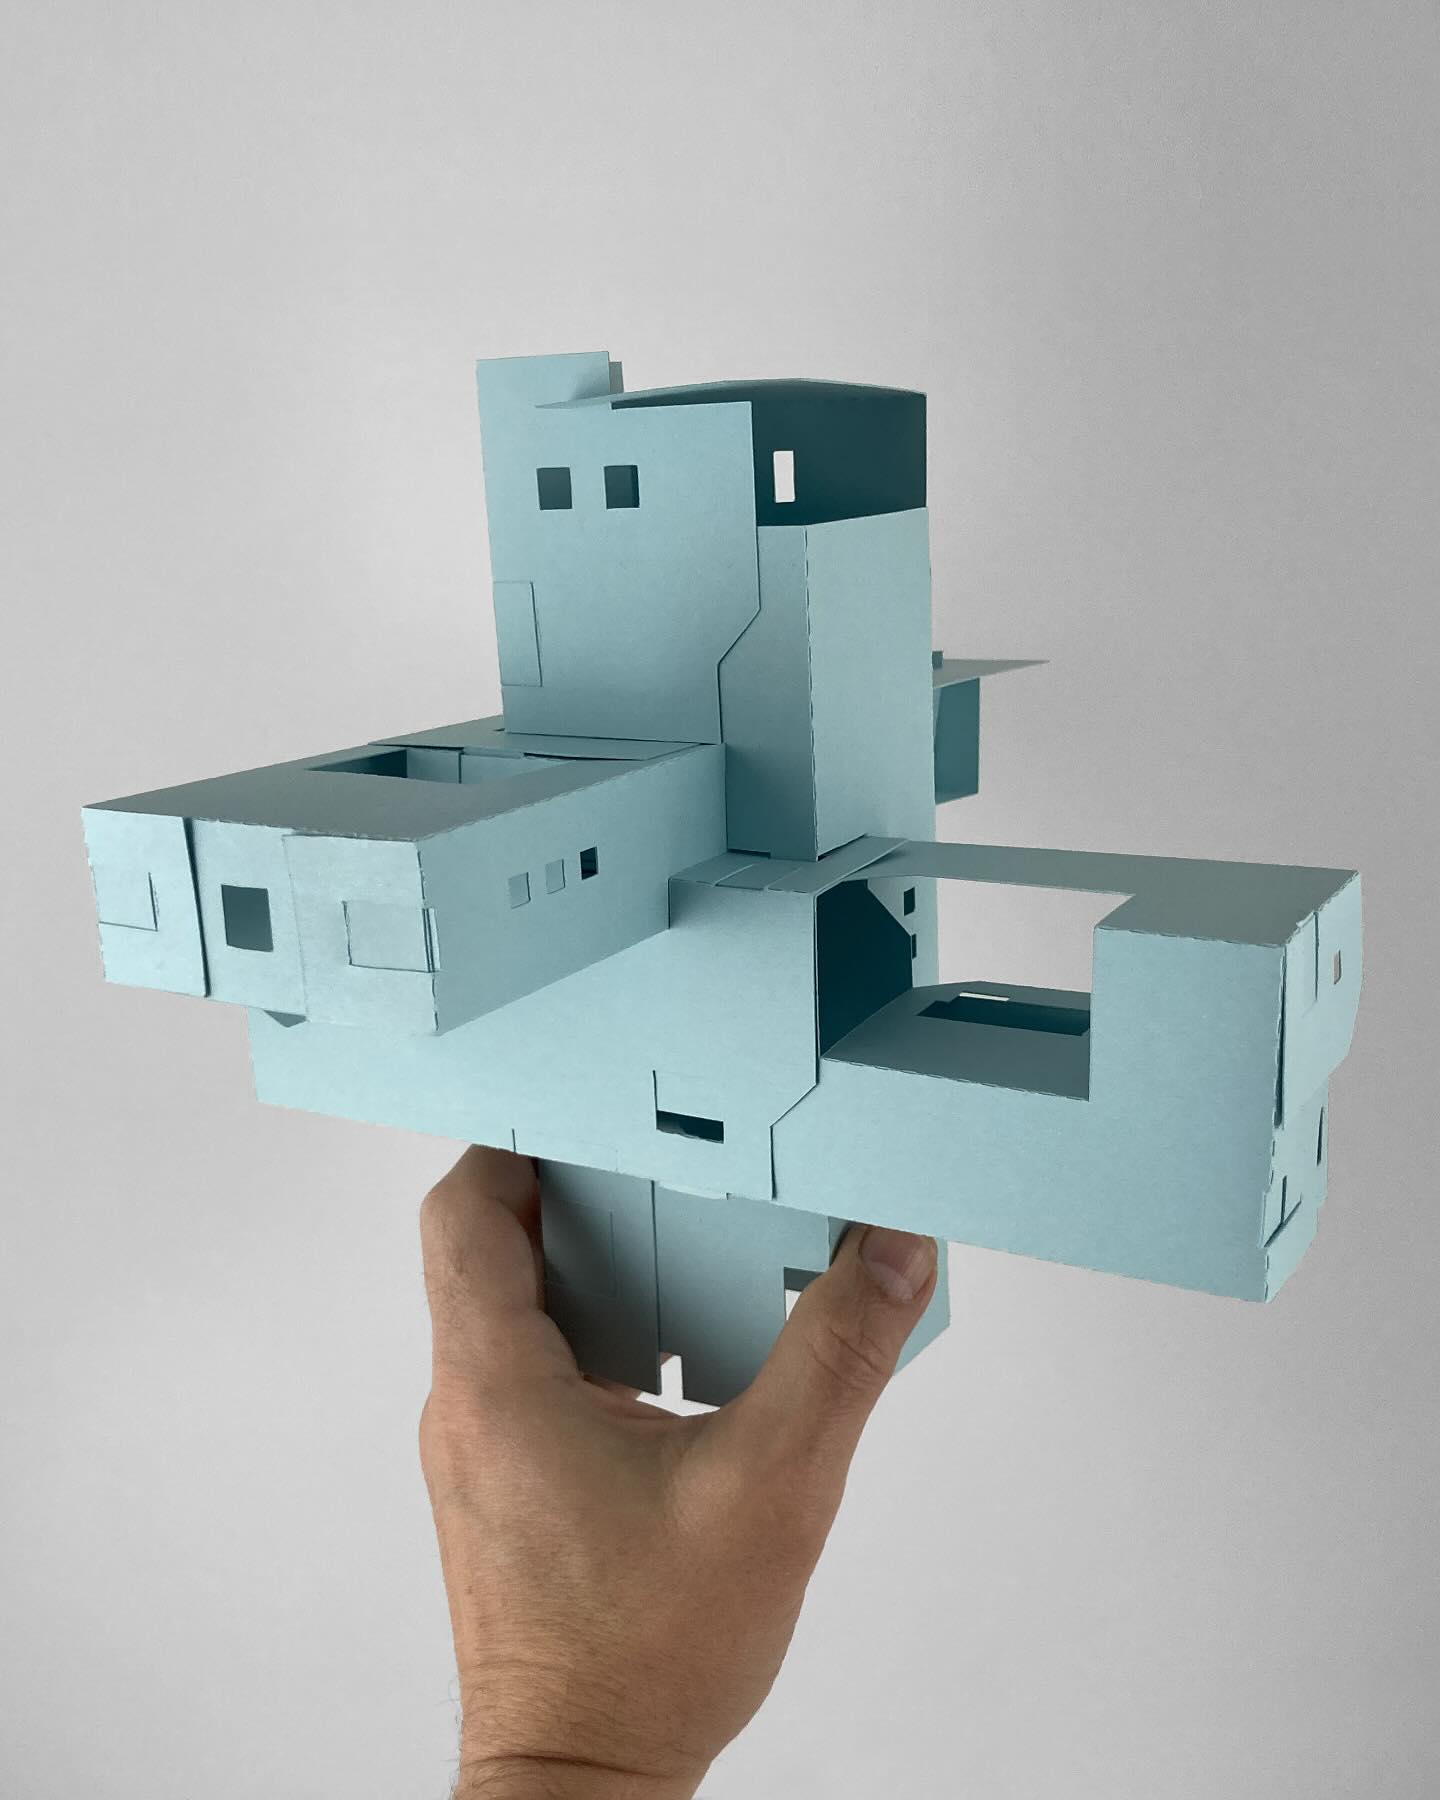
16. Paper House
To make this geometric paper structure, start with sturdy cardstock or construction paper. Cut out several rectangular and square pieces with tabs along the edges so they can be folded and slotted together. Carefully fold along the marked lines to form box-like shapes, making sure to keep the edges crisp. Cut small square and rectangular windows into some sections to give the model an architectural look. Assemble the pieces by sliding the tabs into the slits, stacking and connecting them in different directions to create a layered 3D design. Keep adjusting and reinforcing until the structure is stable. Your modern paper building model is ready!
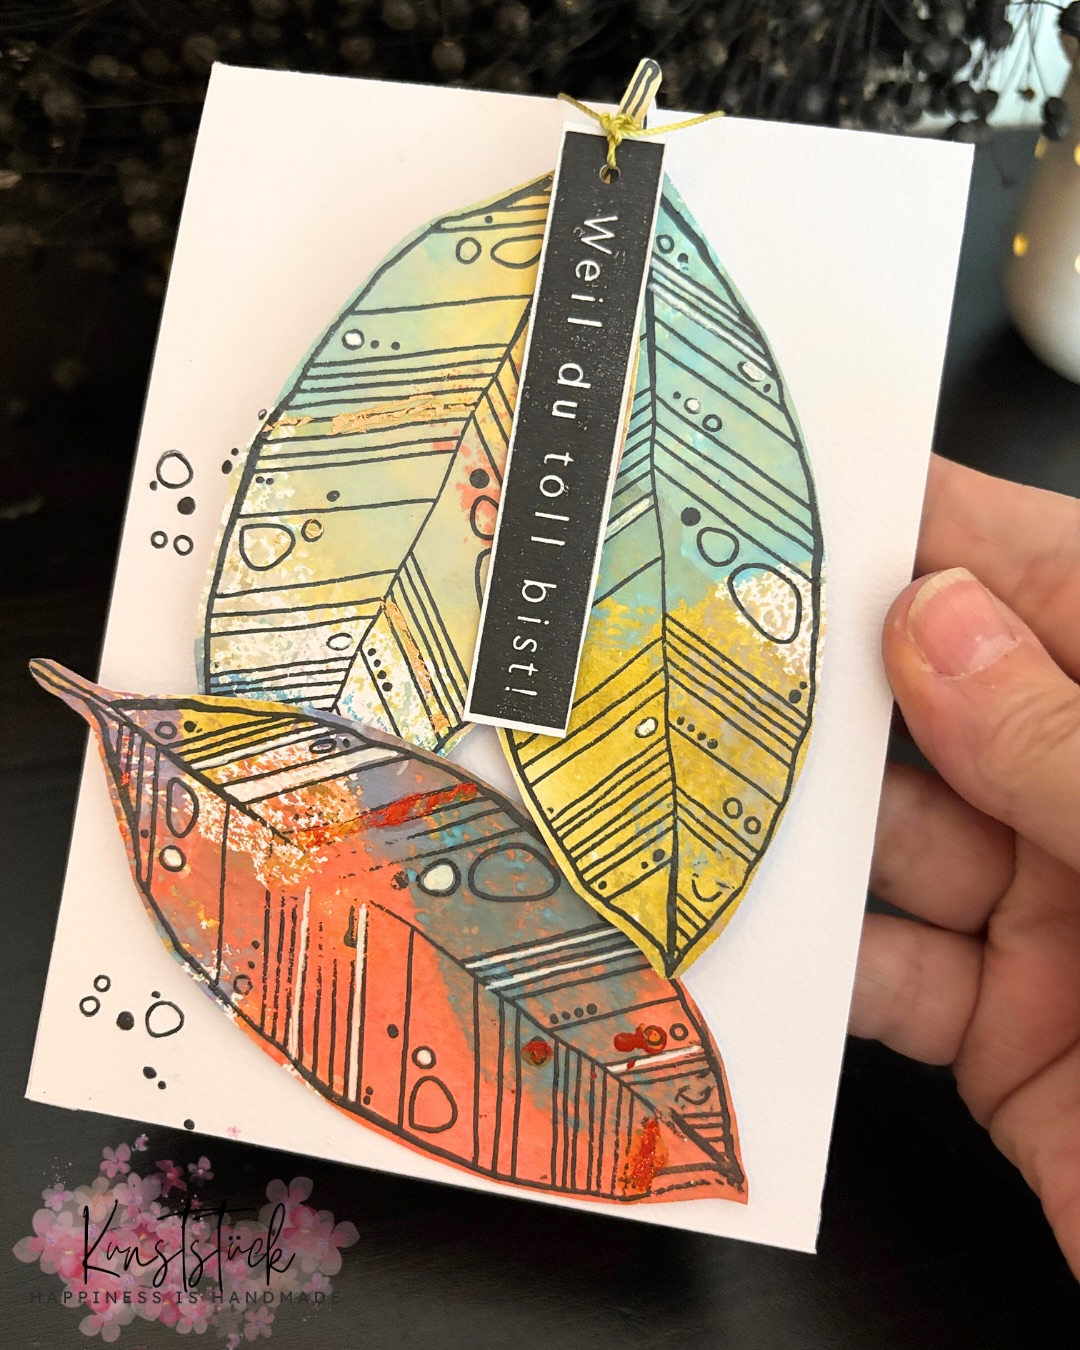
17. Journal Leaf
To make this leaf journal, draw some leaves, colour it and cut out and attach it one over the other with a quote.
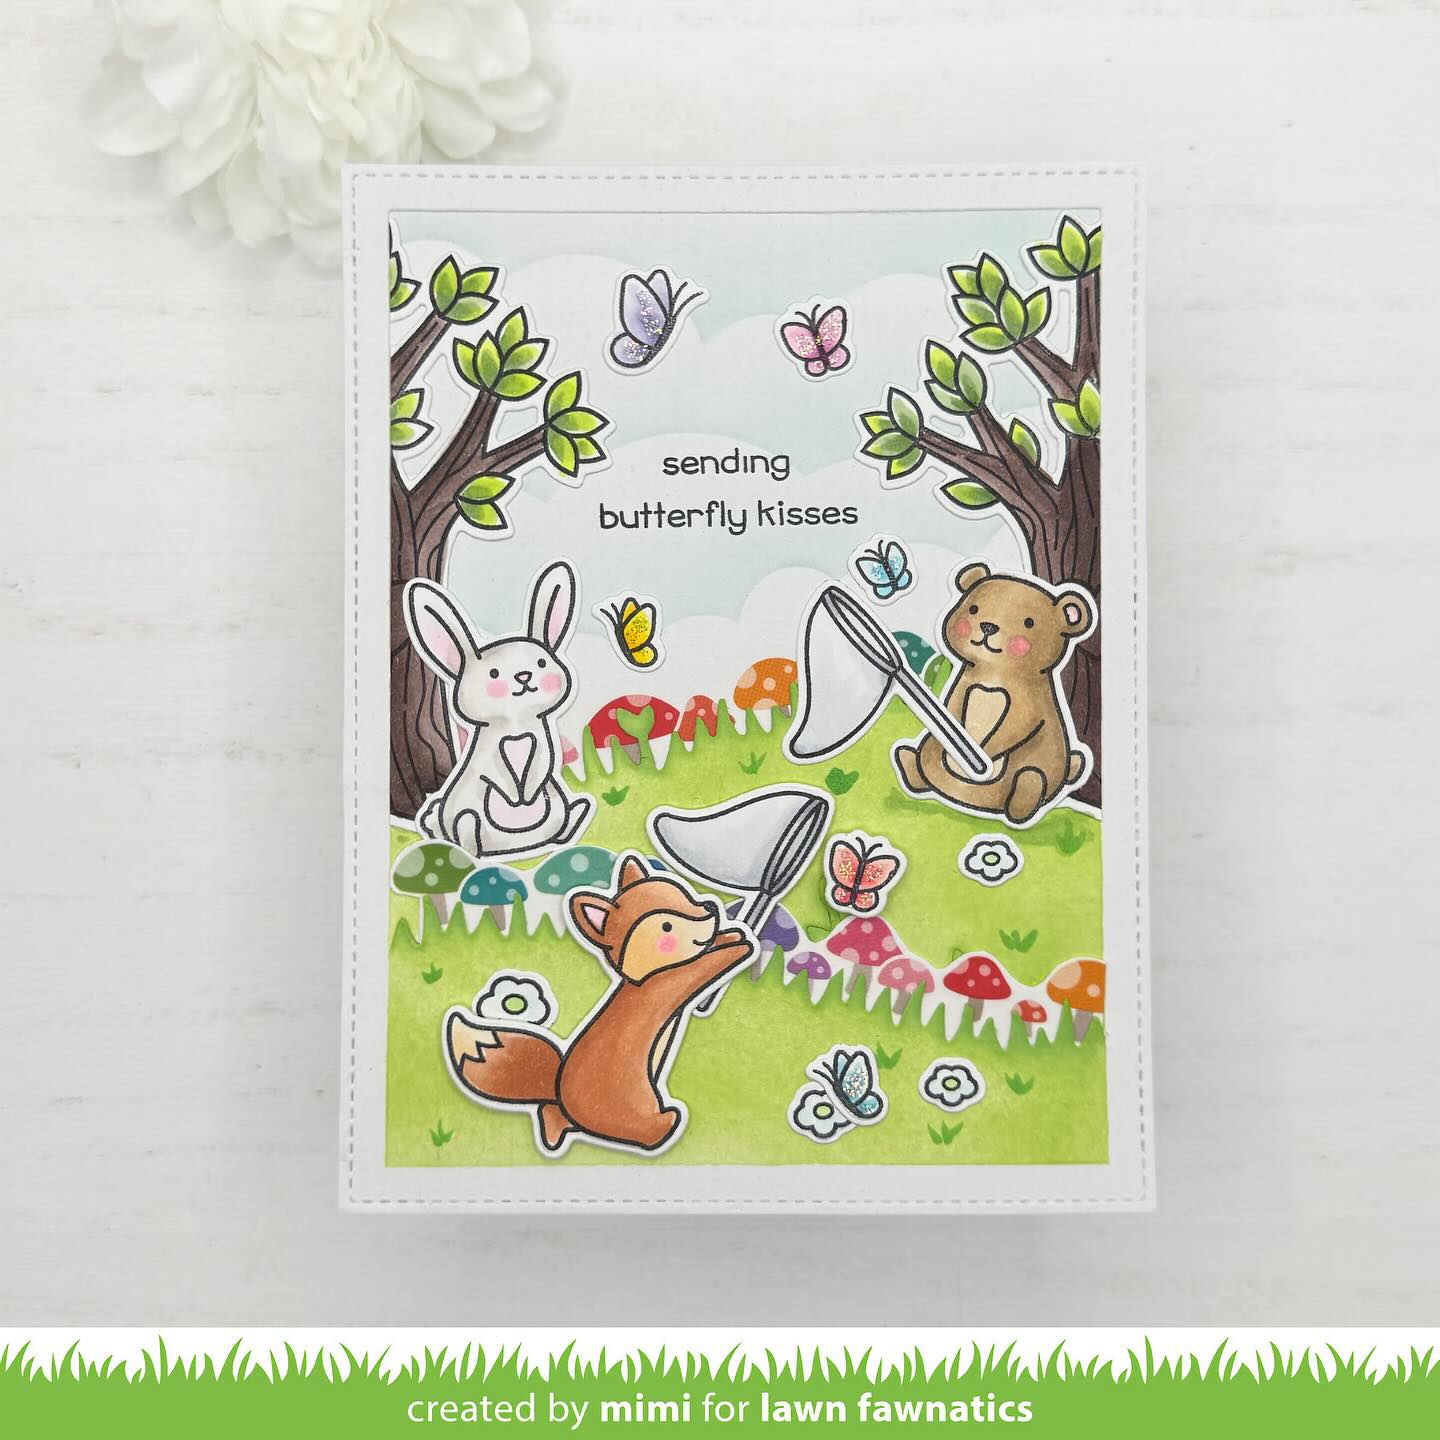
18. Paper Card
To make this card, draw some cute characters , colour it and place over a card. This can be one of the favourite craft for a child.
19. Paper 4D Star
To make a cute 4D paper star, start with a strip of colored paper. Tie one end into a small knot to make a little pentagon shape, then flatten it gently. Wrap the long strip around the pentagon again and again, keeping the shape neat. When you reach the end, tuck the leftover piece into the folds. Now pinch each side of the pentagon gently with your fingers to puff it up into a 3D star. Your cute paper star is ready!
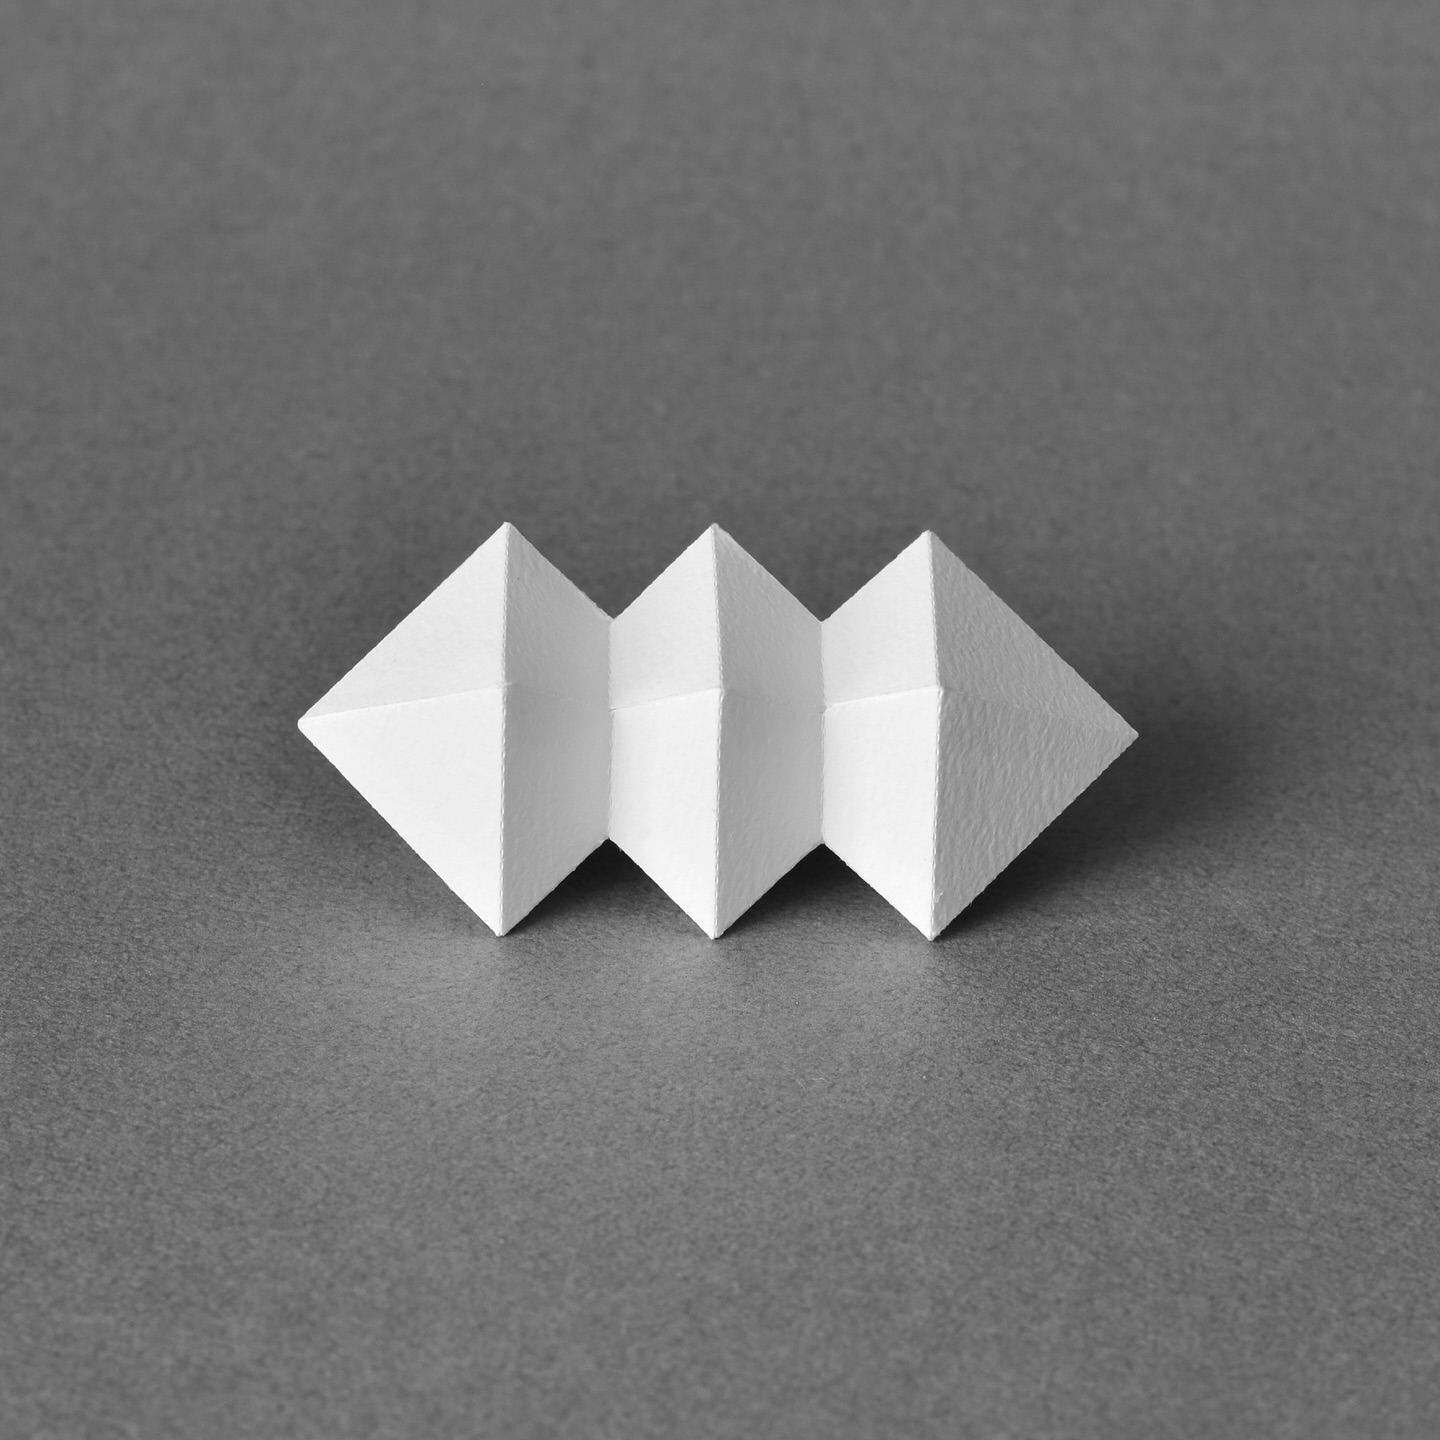
20. Paper Box
To make this cone shaped box, take a piece of hard paper and bend them 6 times. Now repeat this with three other papers. Attach 2 papers for one side and other 2 papers for second side. Remember the lid has to be bigger than the box.