
Stunning crafts are something everyone can enjoy—how could you not? Whether you’re an experienced artist or a total beginner, weekends offer the ideal opportunity to dive into some hands-on creativity. We’ve rounded up 25 trending craft ideas that are perfect for all skill levels, from newbies to seasoned pros!
1. Bottle Craft
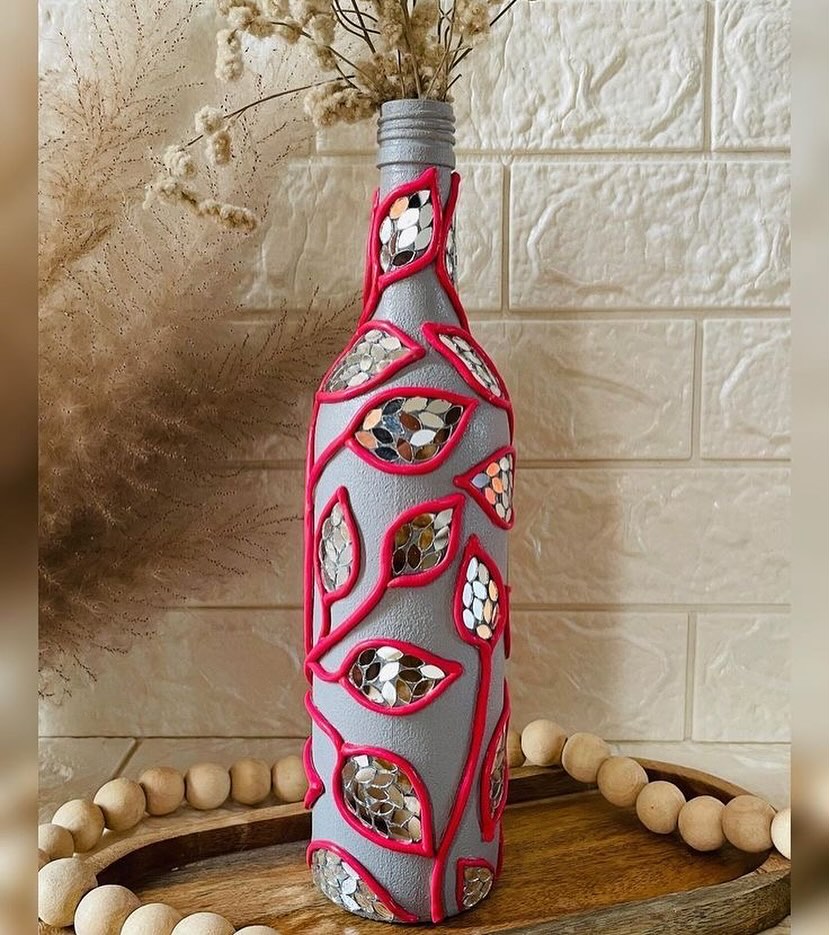
To make this decorative bottle art, start by cleaning and drying an empty glass bottle thoroughly. Apply a coat of primer or chalk paint in a neutral shade like grey, as shown, and let it dry completely. Next, take small pieces of mirror (you can cut them from old CDs or buy craft mirrors) and glue them in a leaf-shaped pattern around the bottle using strong craft adhesive. Once the mirrors are secured and dry, use air-dry clay or 3D fabric paint in a bright color (like red) to outline each leaf and create connecting vine-like designs, giving the piece a raised, textured look. Let the clay or paint dry fully.

2. Resin Clip
This is a hair clip made with resin art. To make resin art special equipment is needed like resin, dried leaves, mould, drier. Though you can buy it and try to make various items with resin.
3. Cereal Art
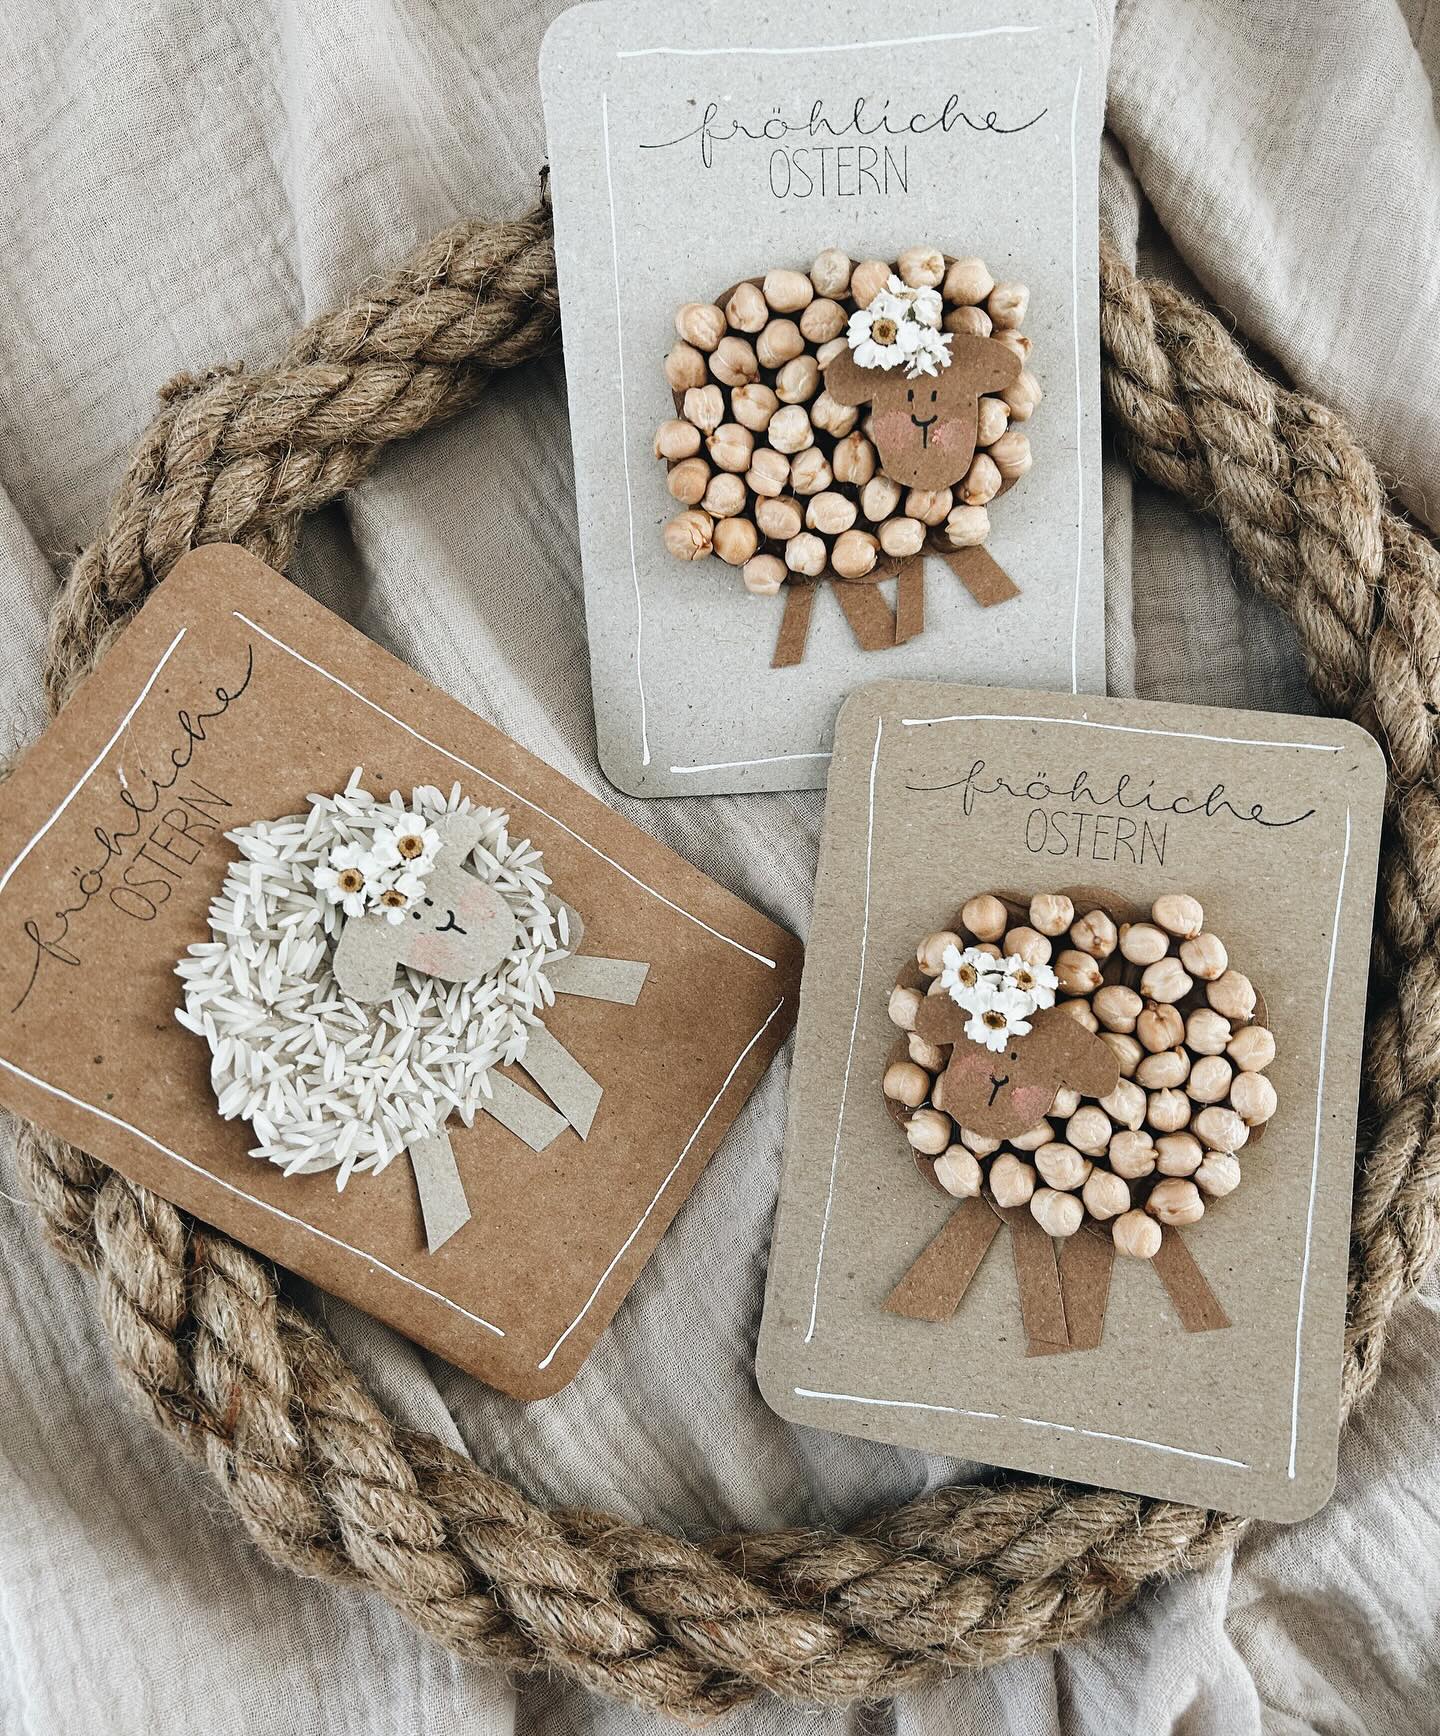
Take few scrapbook papers, some cereal like rice, chickpea and some glue and pencil and marker. Draw a sheep and cover the wool portion i.e the body with cereal as shown above. Stick some paper for face and draw eyes and mouth and stick some flowers. Try to cover the pencil mark for better look.
4. Clay Craft
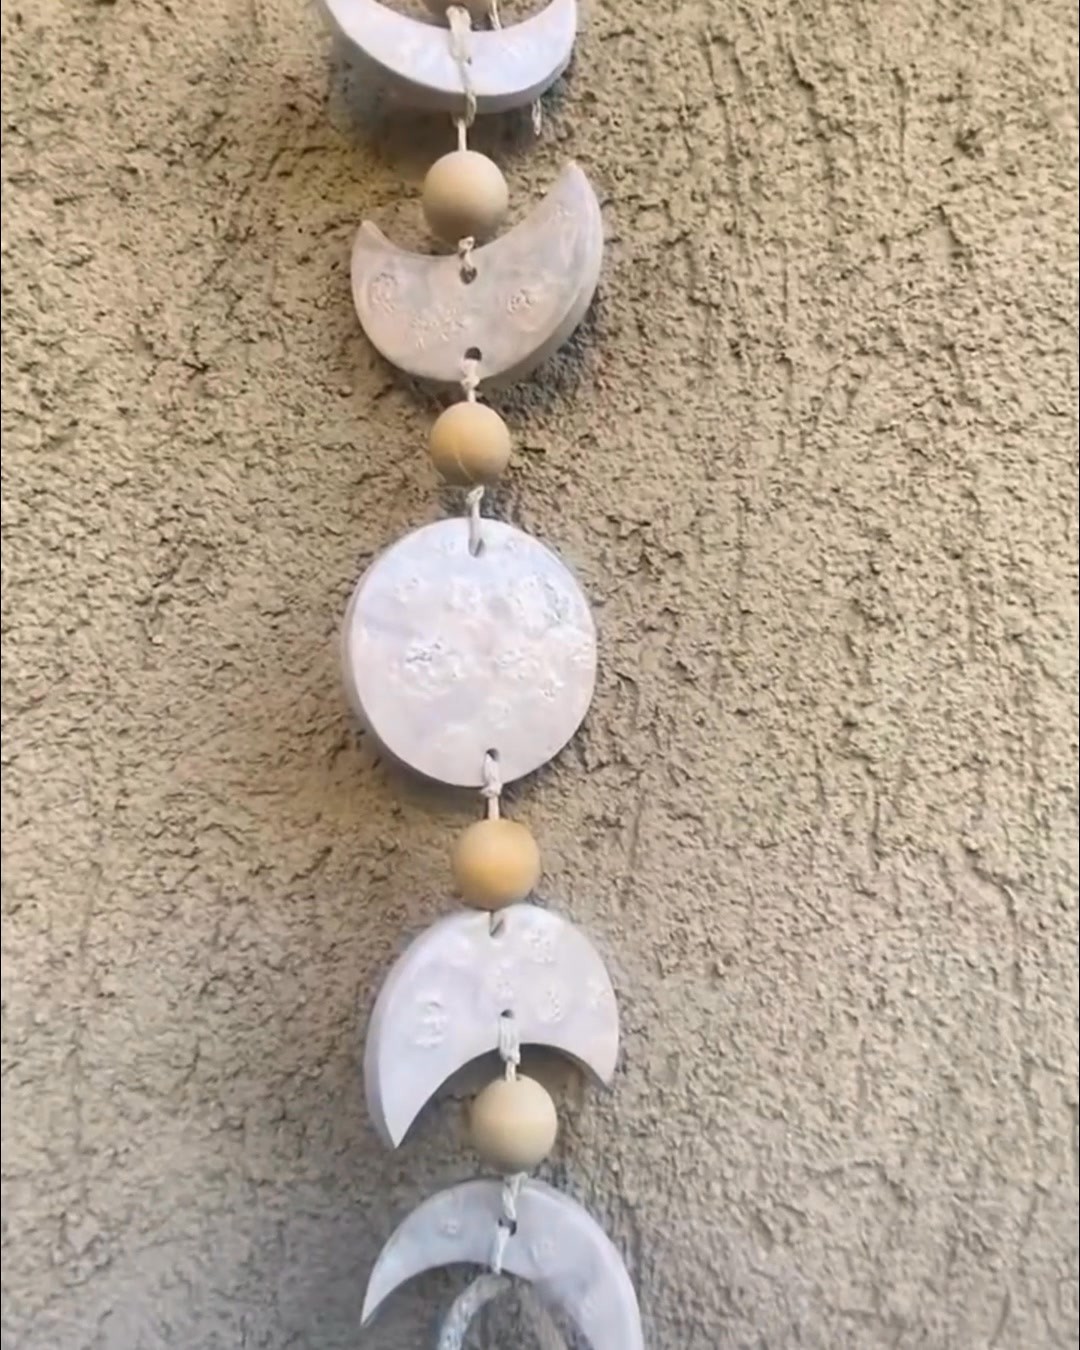
This is a simple clay craft for wall hanging. To make this few half moon shaped clay are needed and some beads. Tied them one above another, let it dry for 24 hours and them colour it in pastel shades.
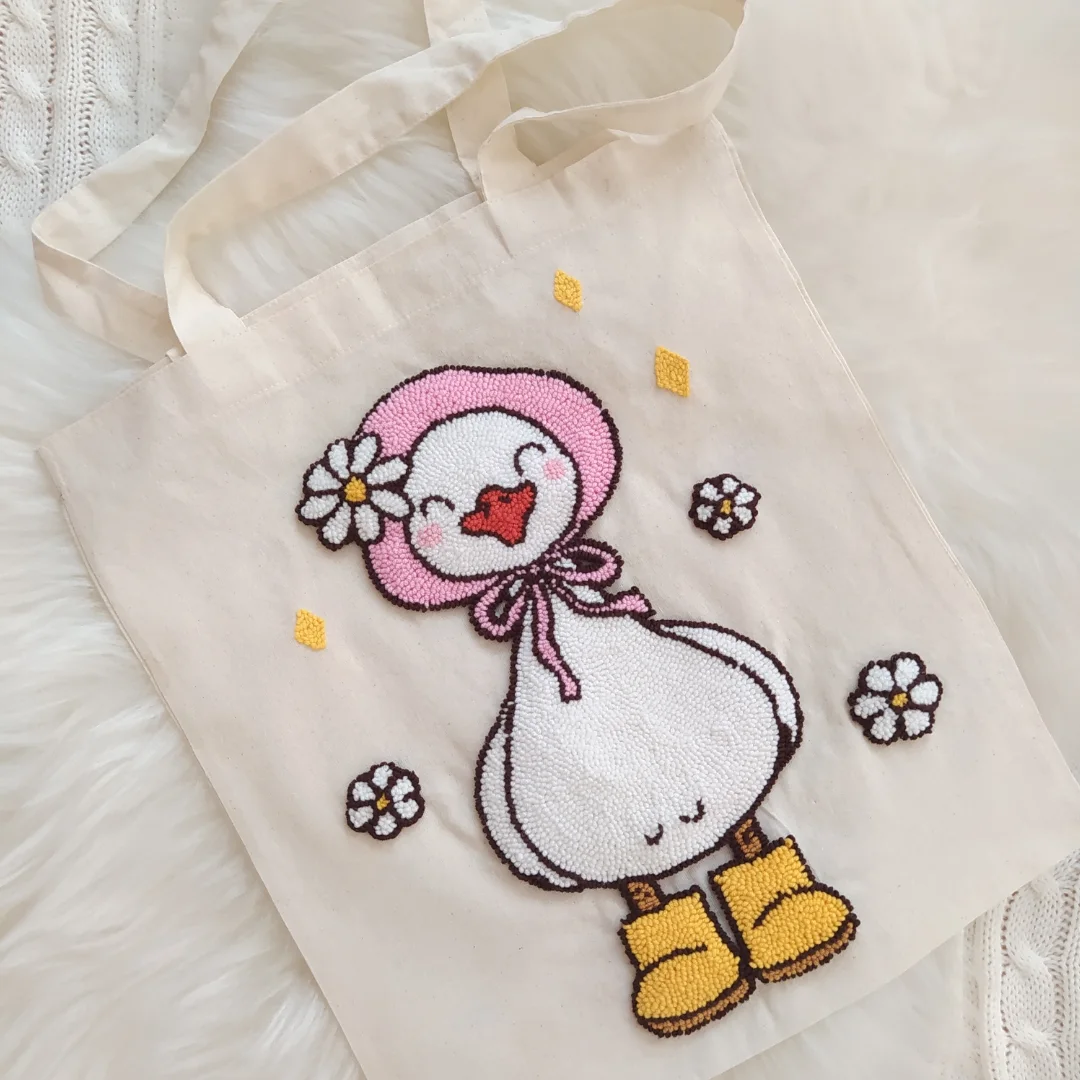
5. Wool Art
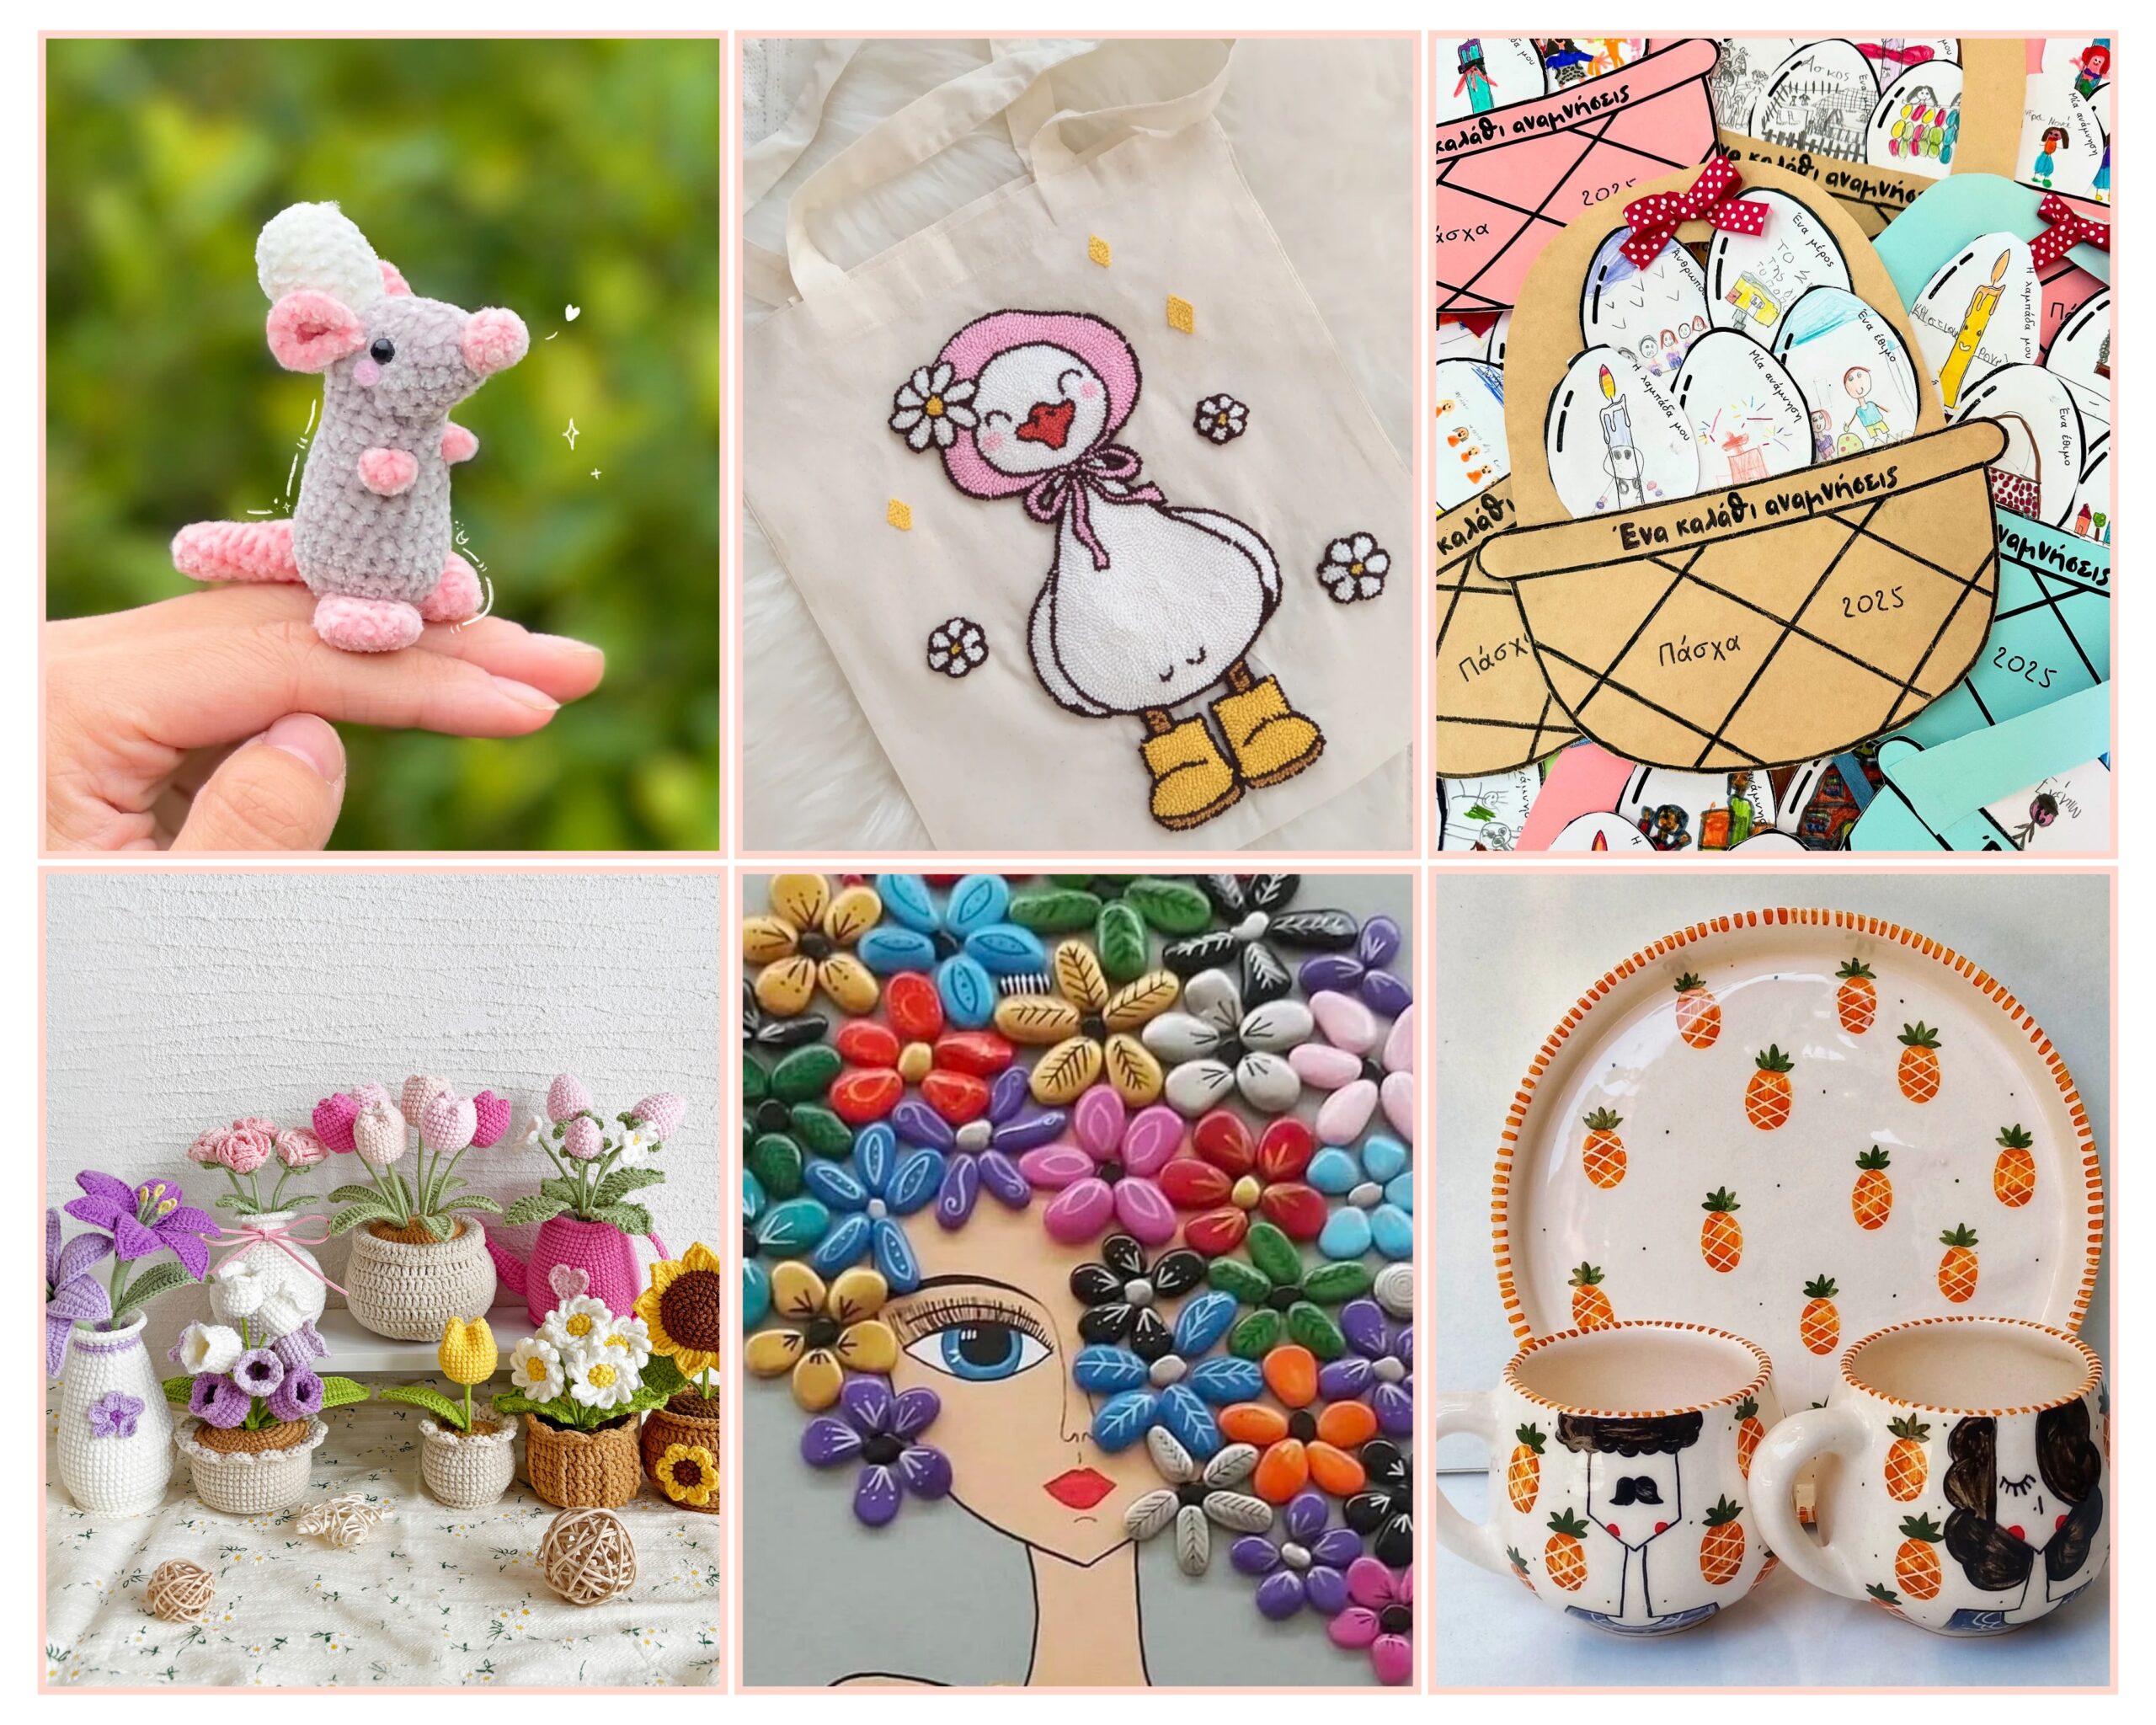
To make this adorable punch needle embroidered tote bag, start with a plain fabric tote and choose a cute design—like the goose in boots shown here. Draw or transfer the design onto the tote using a washable fabric pen. Stretch the section of fabric where you’ll be working using an embroidery hoop to keep it taut. Using a punch needle tool and yarn or embroidery floss, fill in the design by punching through the fabric from the front side, creating tight loops that form a textured, raised surface. Work color by color, outlining details with darker thread to make the design pop. Once complete, gently press the backside with an iron to help set the loops. This fun and cozy project results in a functional and charming personalized accessory.
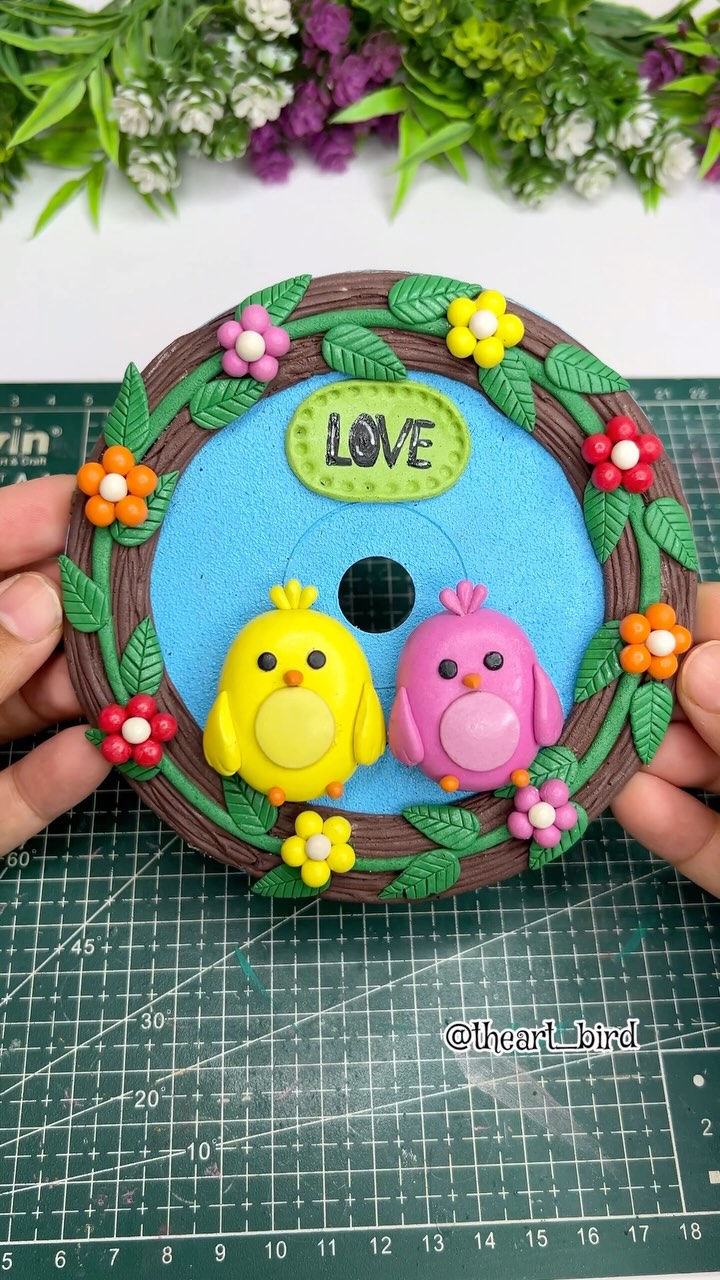
6. Clay Birds
To make this adorable CD craft featuring two lovebirds, start by recycling an old CD as the base. Cover the reflective side with light blue clay or paint to form the sky background. Using colored air-dry clay or polymer clay, sculpt two cute birds and attach them side by side near the center bottom of the CD. Create a wreath-like border by rolling brown clay into thin ropes and arranging them in a circular pattern around the edge, then add green clay leaves and colorful clay flowers for decoration. Form a small plaque from clay and stamp or write the word “LOVE” on it before placing it above the birds. Once everything is in place, allow it to dry completely (or bake if using polymer clay). This project is perfect as a cheerful wall hanging or a handmade gift full of charm and creativity.
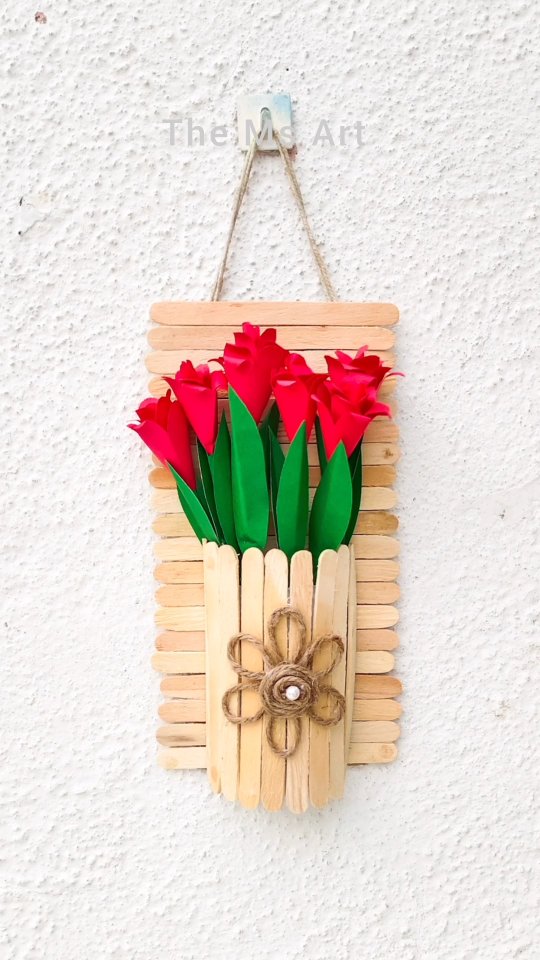
7. Ice-cream stick Craft
This is a simple craft made with ice cream sticks and paper flowers. Take some sticks and glue it to one another in a cylinder and plane board shape and then make some paper flowers and leaves. Thus, a cute wall hanging is ready.
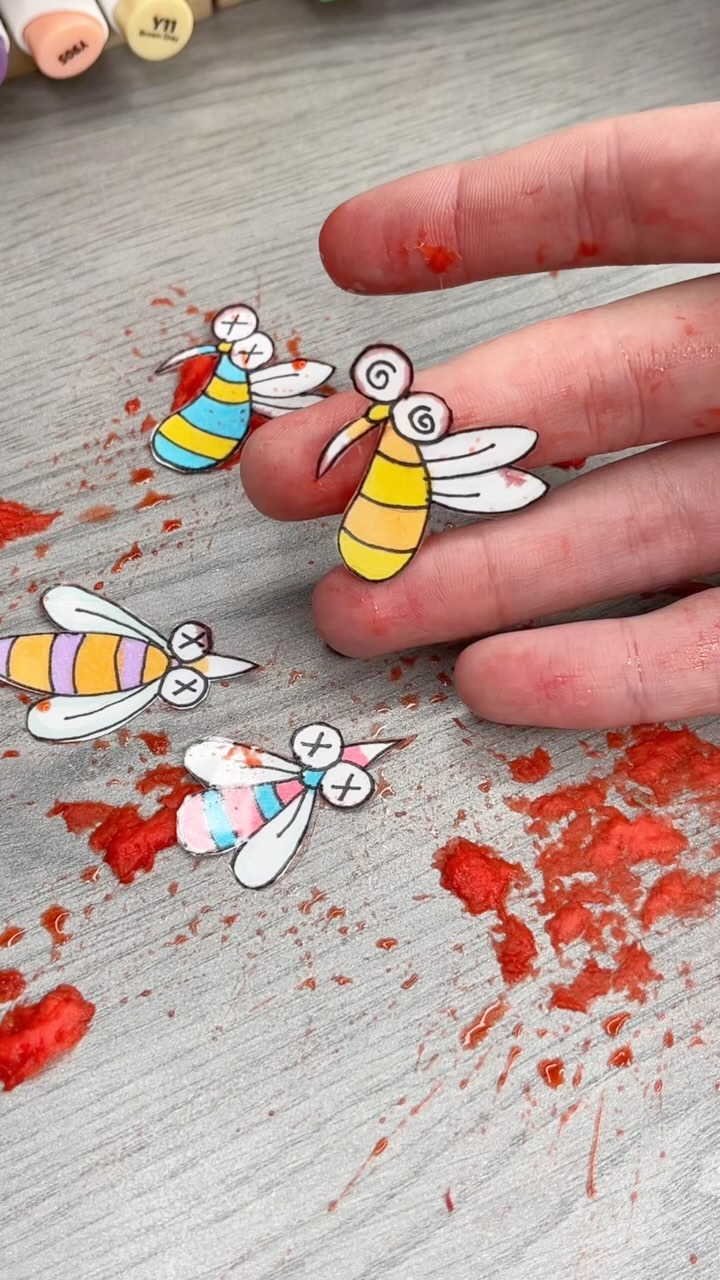
8. Mosquito Art
To make these quirky cartoon-style paper mosquitoes with a humorous “squished” effect, start by drawing simple bee characters on a sheet of cardstock or thick paper. Use markers or colored pencils to give them fun striped patterns, wings, and exaggerated facial expressions—crossed-out eyes and swirly details add to the comedic effect. Cut out the bees carefully with scissors. For the dramatic squished look, use red paint, marker, or even soft clay to simulate the mess, smearing it lightly under and around the paper mosquitoes on a table surface. You can also dab some of the red color onto your fingers to complete the playful illusion, making it appear like the bees were squashed by hand. This project is perfect for a humorous, cartoon-style craft or creative stop-motion idea.
9. Paper Craft
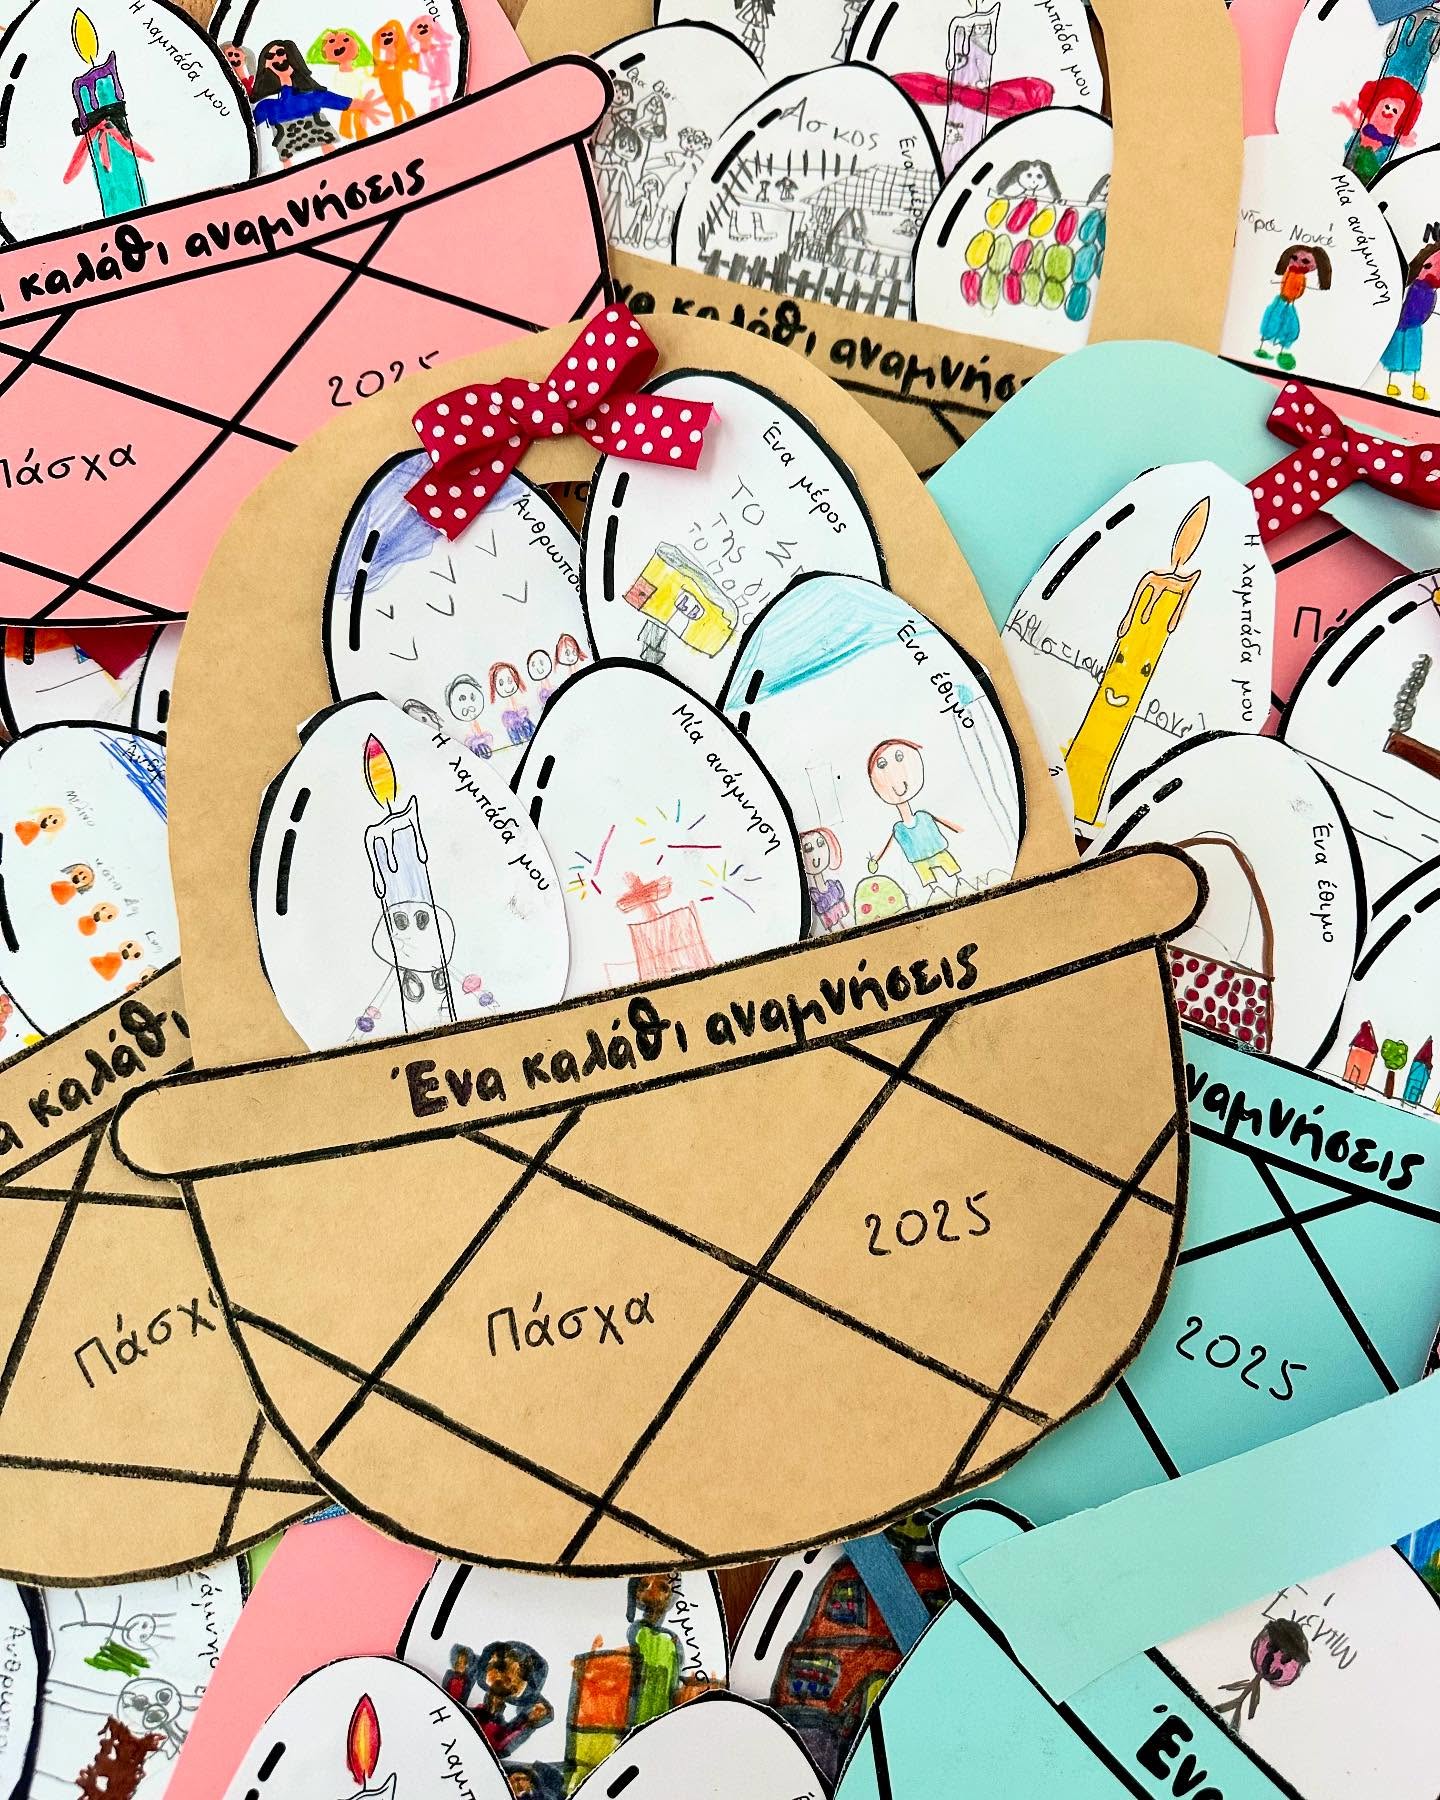
To make this colorful Easter-themed memory craft titled as A Basket of Memories start by cutting out basket shapes from colored cardstock paper. Cut several egg shapes from white paper and have children draw or write a special Easter memory on each egg, such as lighting a candle, family gatherings, or festive traditions. Insert the eggs into a slit in the basket, so they appear to be sitting inside it. Add a small ribbon or bow at the top for decoration. This charming and personal craft is perfect for classroom activities or at-home keepsakes to capture and celebrate cherished Easter moments.
10. Nutshell Art
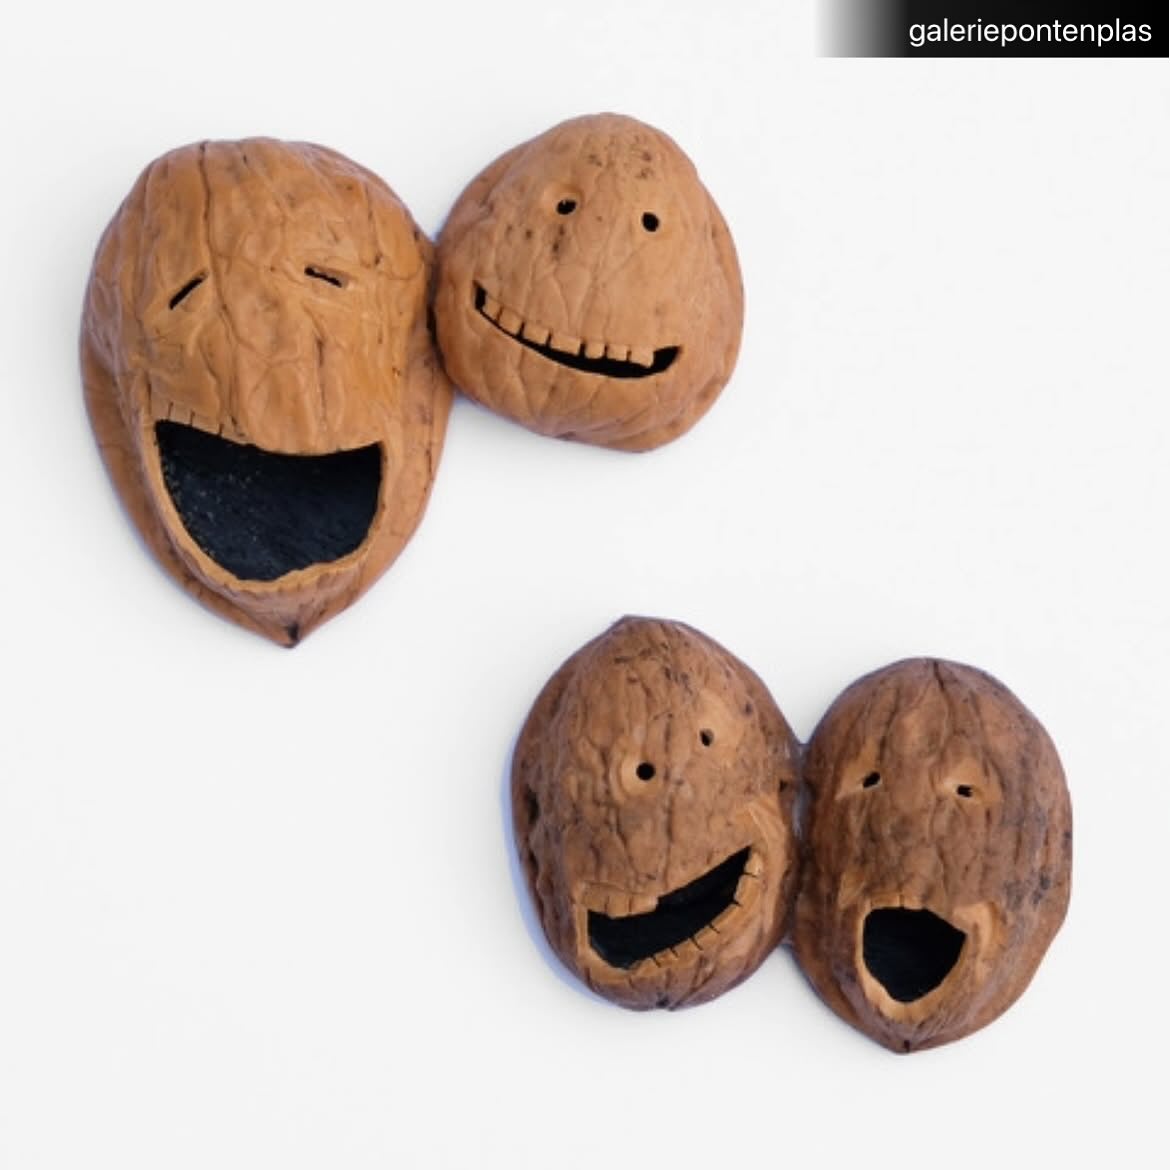
To make these whimsical walnut shell faces, start by carefully cracking open whole walnuts and removing the kernels inside without breaking the shells. Select halves that are intact and roughly symmetrical. Using a small carving tool or craft knife, gently carve facial features into the shell — such as eyes, noses, and wide expressive mouths — being mindful of the shell’s fragility. You can exaggerate features for a humorous or animated effect, as seen in the image. Paint the inside of the mouths black to create depth and emphasize the expressions. Optionally, use a small drill or fine needle to add tiny holes for the eyes. Once finished, these walnut faces can be glued together in pairs or groups and used as quirky decorations, ornaments, or part of a mixed media art project.
11. Journal Idea
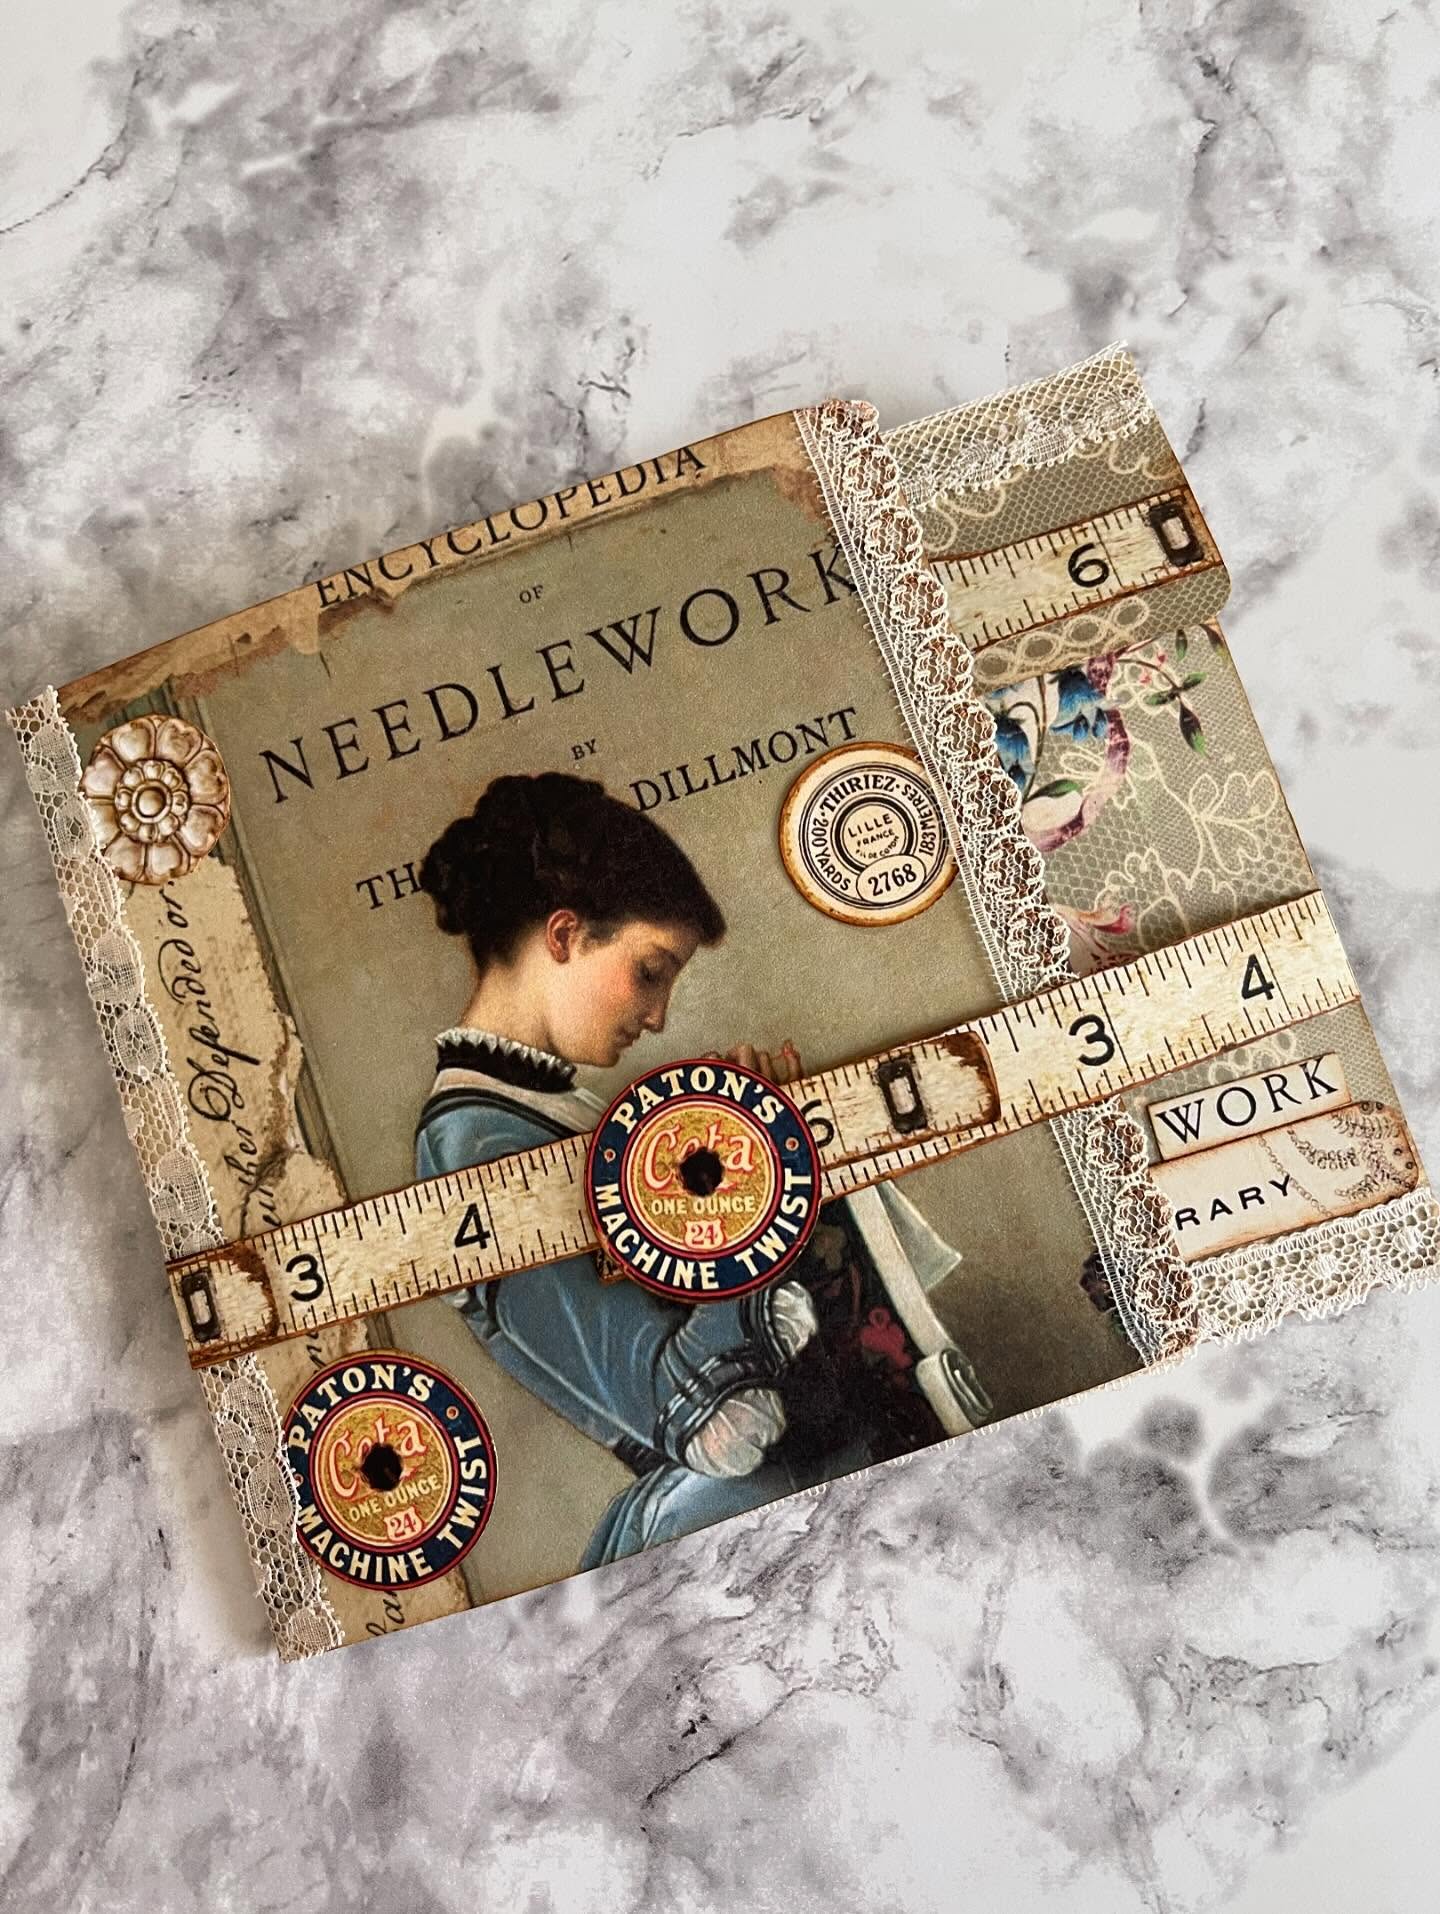
To make this vintage-style needlework-themed collage, begin with a sturdy cardboard or journal cover as your base. Choose a focal image—like a vintage illustration of a woman sewing or an old book cover page—and glue it onto the center using decoupage glue or a strong adhesive. Add decorative paper or fabric pieces around the edges, such as floral patterns or aged paper textures. Enhance the vintage look by attaching a printed or real measuring tape across the width and layering lace trims along the sides. Use vintage-style buttons or old thread labels (like “Paton’s Machine Twist”) for embellishments and dimension, gluing them securely in place. You can also include faux stamps, old typography cutouts, or library card snippets for added detail. Finish by distressing the edges with ink or light sanding for an aged effect. This project is perfect for a DIY junk journal cover or a framed decorative piece for sewing enthusiasts.
12. Journal Craft
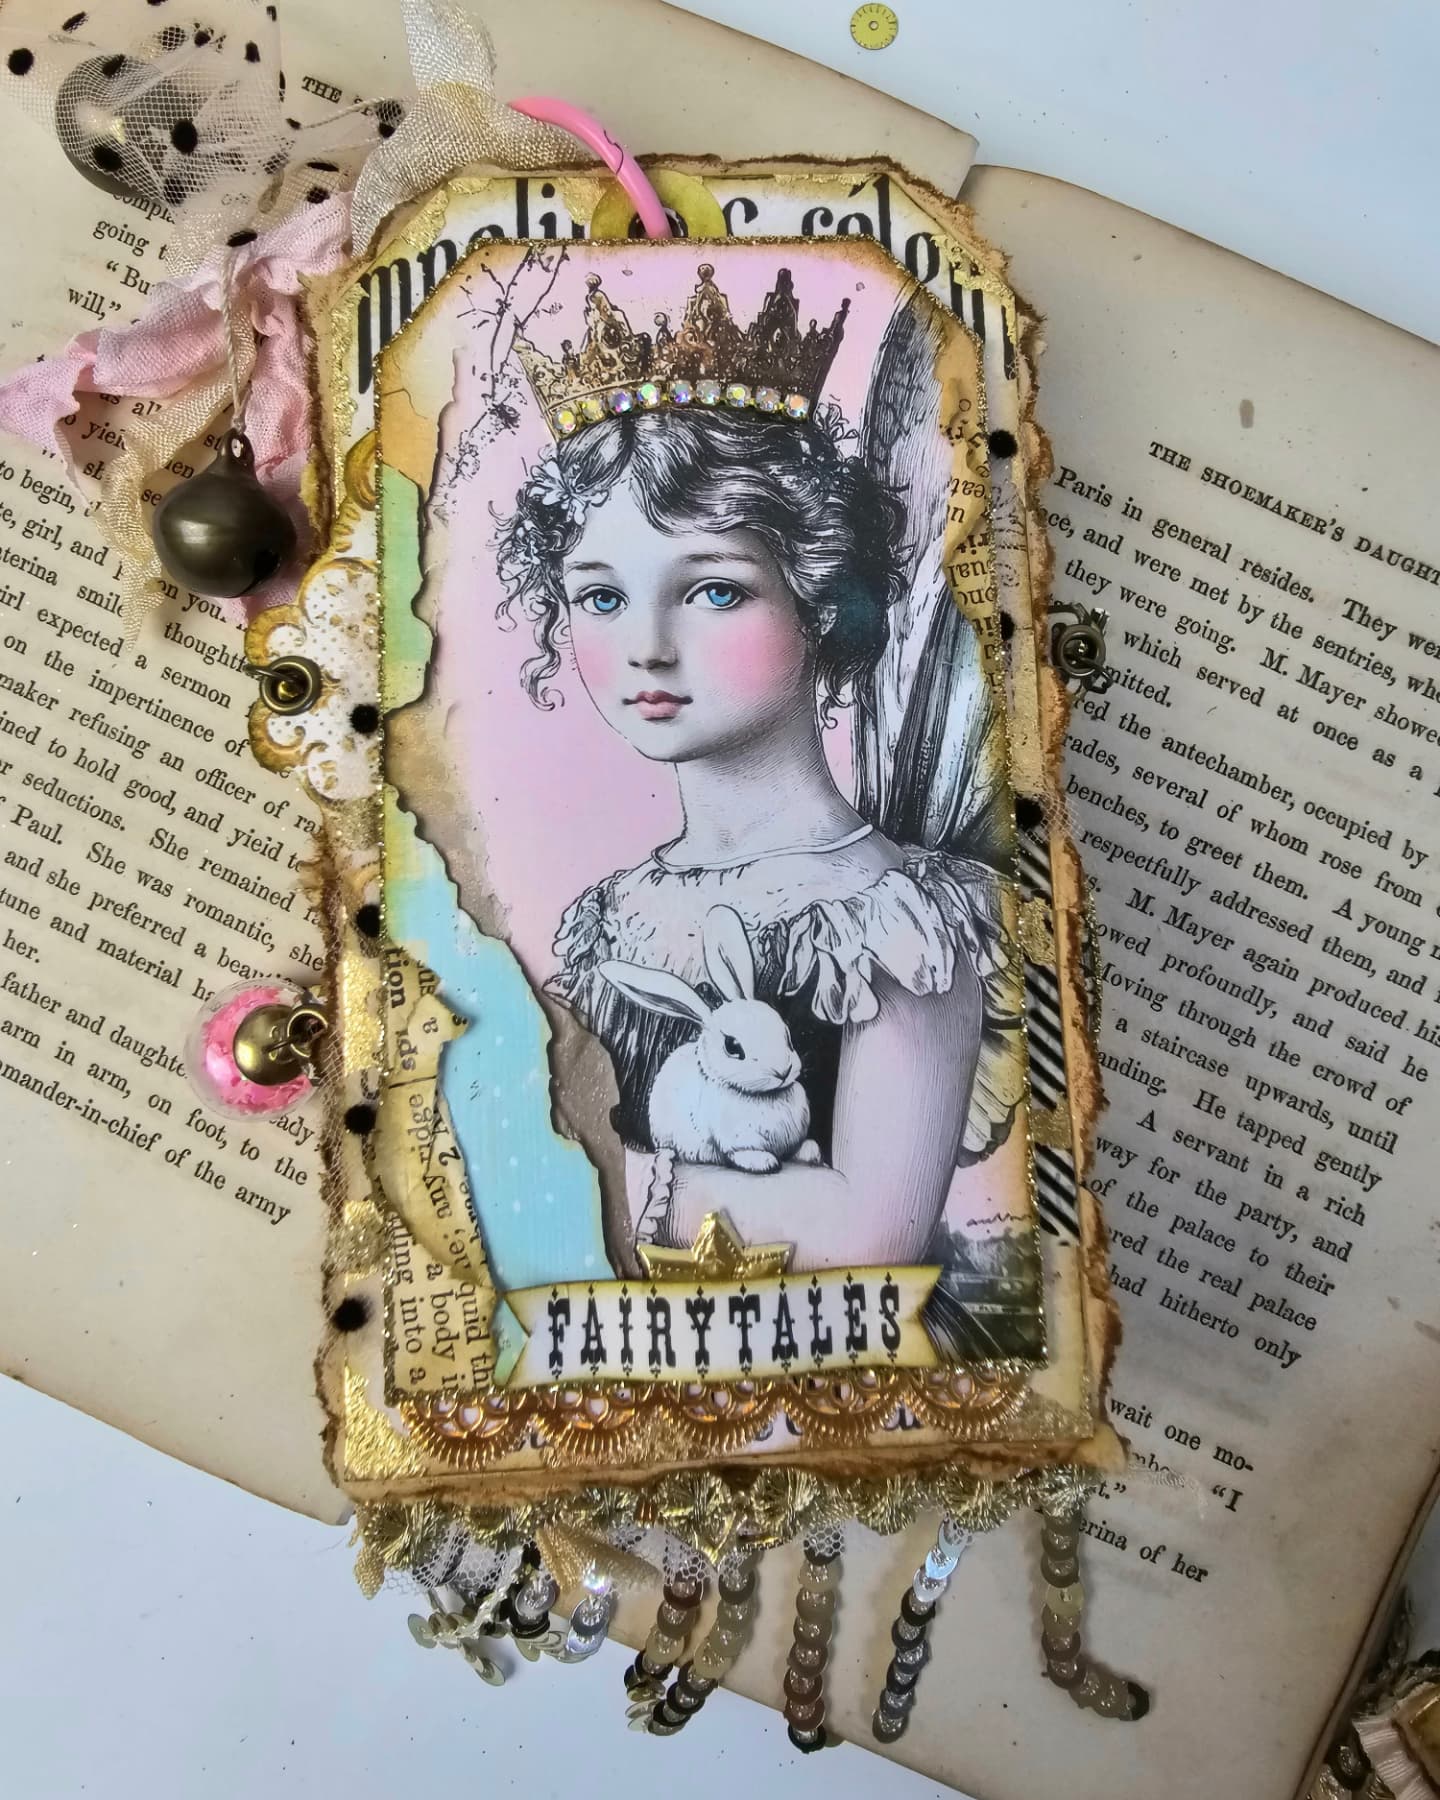
To make this enchanting vintage-style fairy tale journal cover, start with a sturdy tag-shaped base made of chipboard or thick cardstock. Choose a vintage illustration—like the crowned girl with a bunny—and glue it onto the center. Distress the edges of the base and any layered papers using ink pads (like brown or sepia tones) and tear some decorative paper for a textured, aged effect. Add embellishments such as lace, sequins, metallic trims, and a strip of rhinestones for the crown. Attach eyelets or punch holes on the side and thread through ribbons, beads, bells, and fabric scraps to enhance the magical, whimsical look. Finish it with a small label or banner with a title like “FAIRYTALES,” and optionally glue decorative fringe or sequins at the bottom for added drama. This beautiful piece works perfectly as a journal cover, tag insert, or part of a junk journal spread.
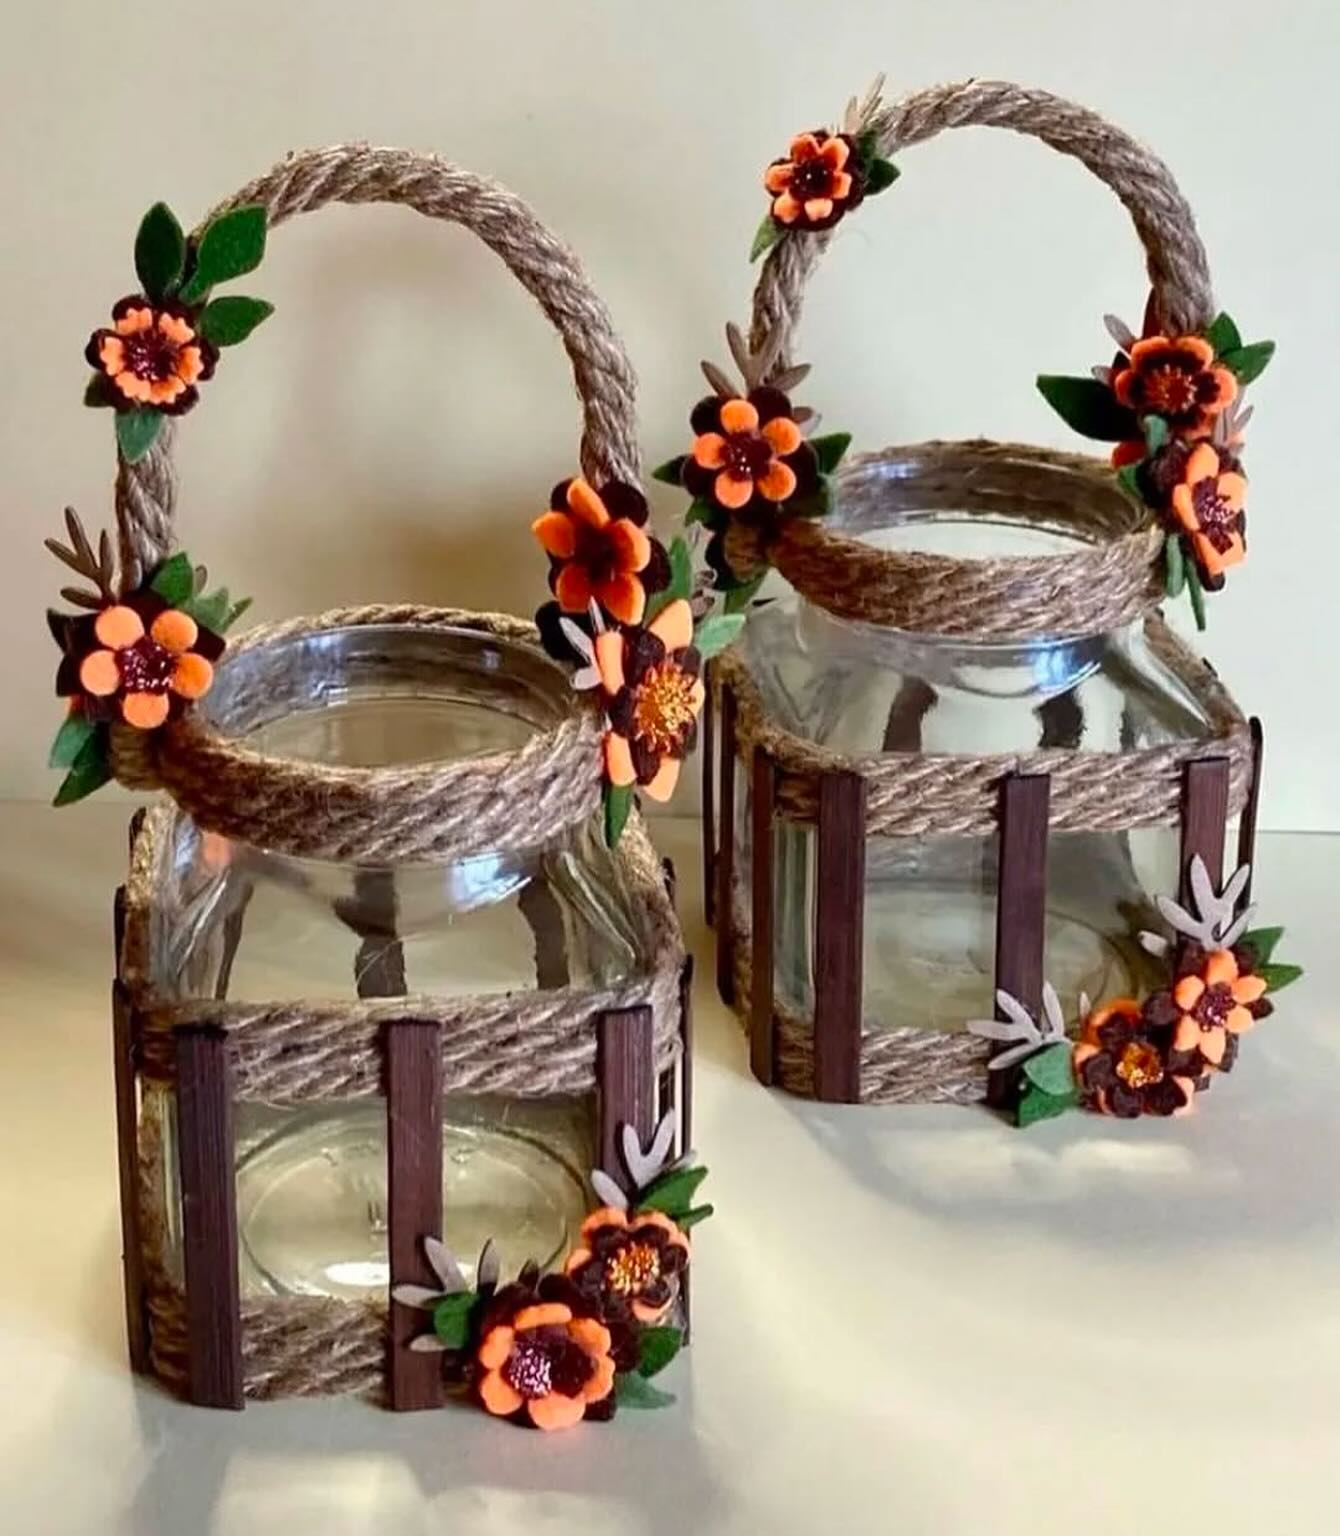
13. Glass Jar Art
To make these charming rustic jar lanterns, start with clean, empty glass jars. Wrap thick jute rope around the top rim of each jar and glue it securely using a hot glue gun. Create a handle by shaping a piece of the same rope into an arch and attaching both ends to the rope-wrapped rim. Next, glue vertical wooden sticks (like popsicle sticks or craft sticks) evenly spaced around the lower part of the jar, alternating with more jute rope to form a basket-like structure. For decoration, cut out felt or foam flowers and leaves in autumn shades—orange, brown, and green work beautifully—and attach them around the handle and base. These DIY jars make lovely lanterns, vases, or rustic table centerpieces for seasonal decor or gifting.
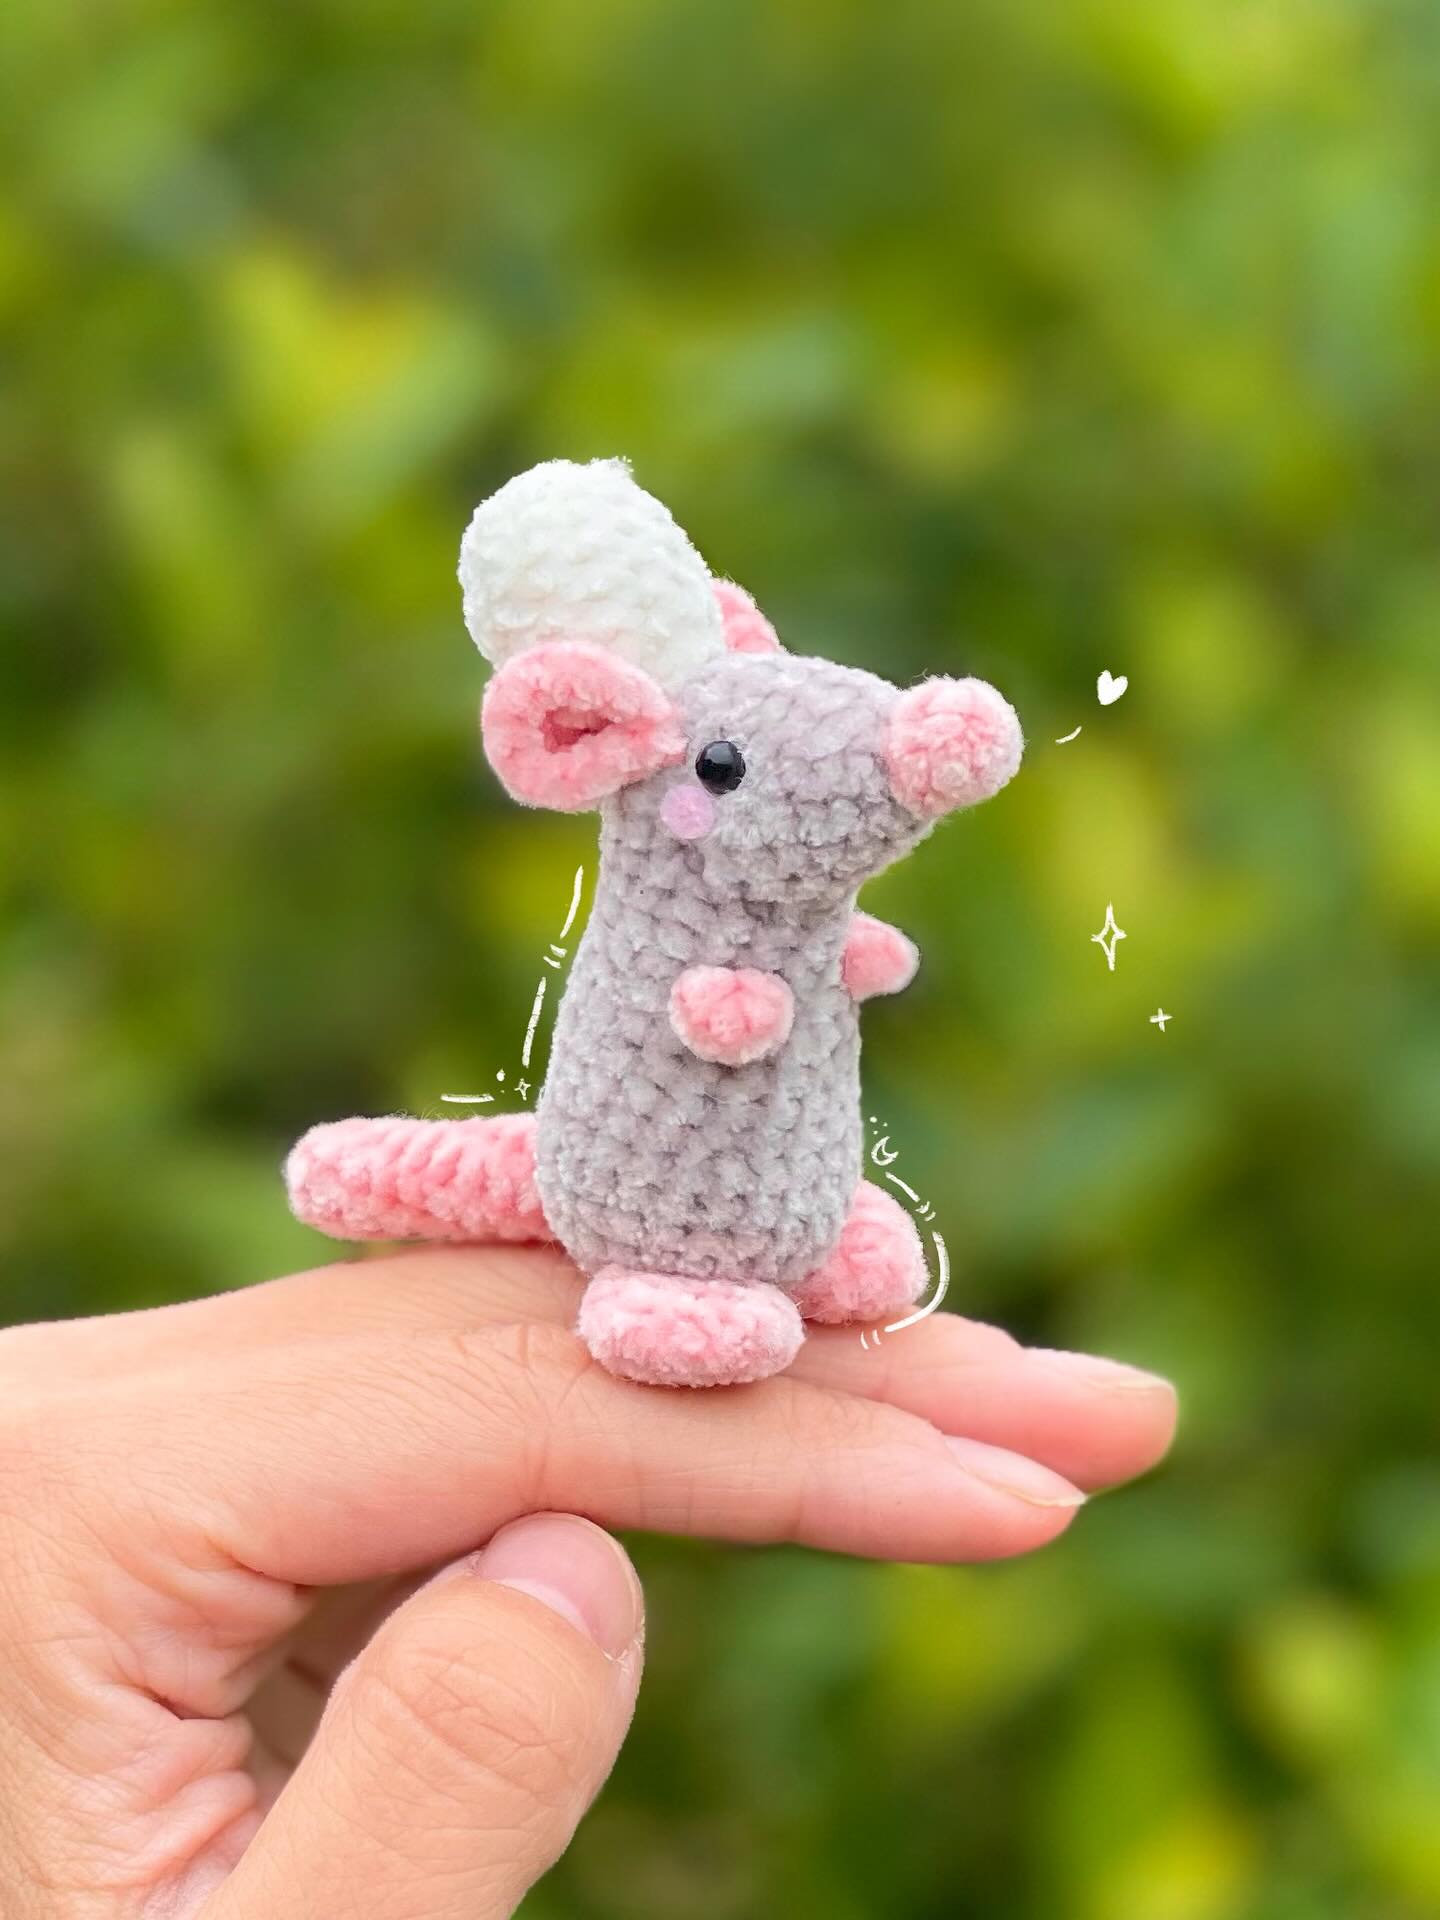
14. Crochet
To make this adorable plush mouse finger puppet, start by choosing soft, chenille or velvet yarn in grey, pink, and white. Using basic amigurumi crochet techniques, first crochet the body with grey yarn, working in a spiral to create a cylindrical shape. Add a rounded head on top, and then stitch on the ears, nose, and tiny arms using pink yarn. Crochet a long pink tail and small round feet and attach them securely. For the ears, make flat circles and sew them to the head, with a pink inner and grey outer layer. Add a white pom-pom or rounded bump for the top detail if desired. Finish by attaching small safety eyes or embroidering them with black thread. Lightly stuff each piece with polyfill for a firm but squishy look. Sew all the parts together, ensuring the bottom opening is snug enough to fit a finger securely. This cute handmade mouse makes a perfect gift or playful finger puppet toy!
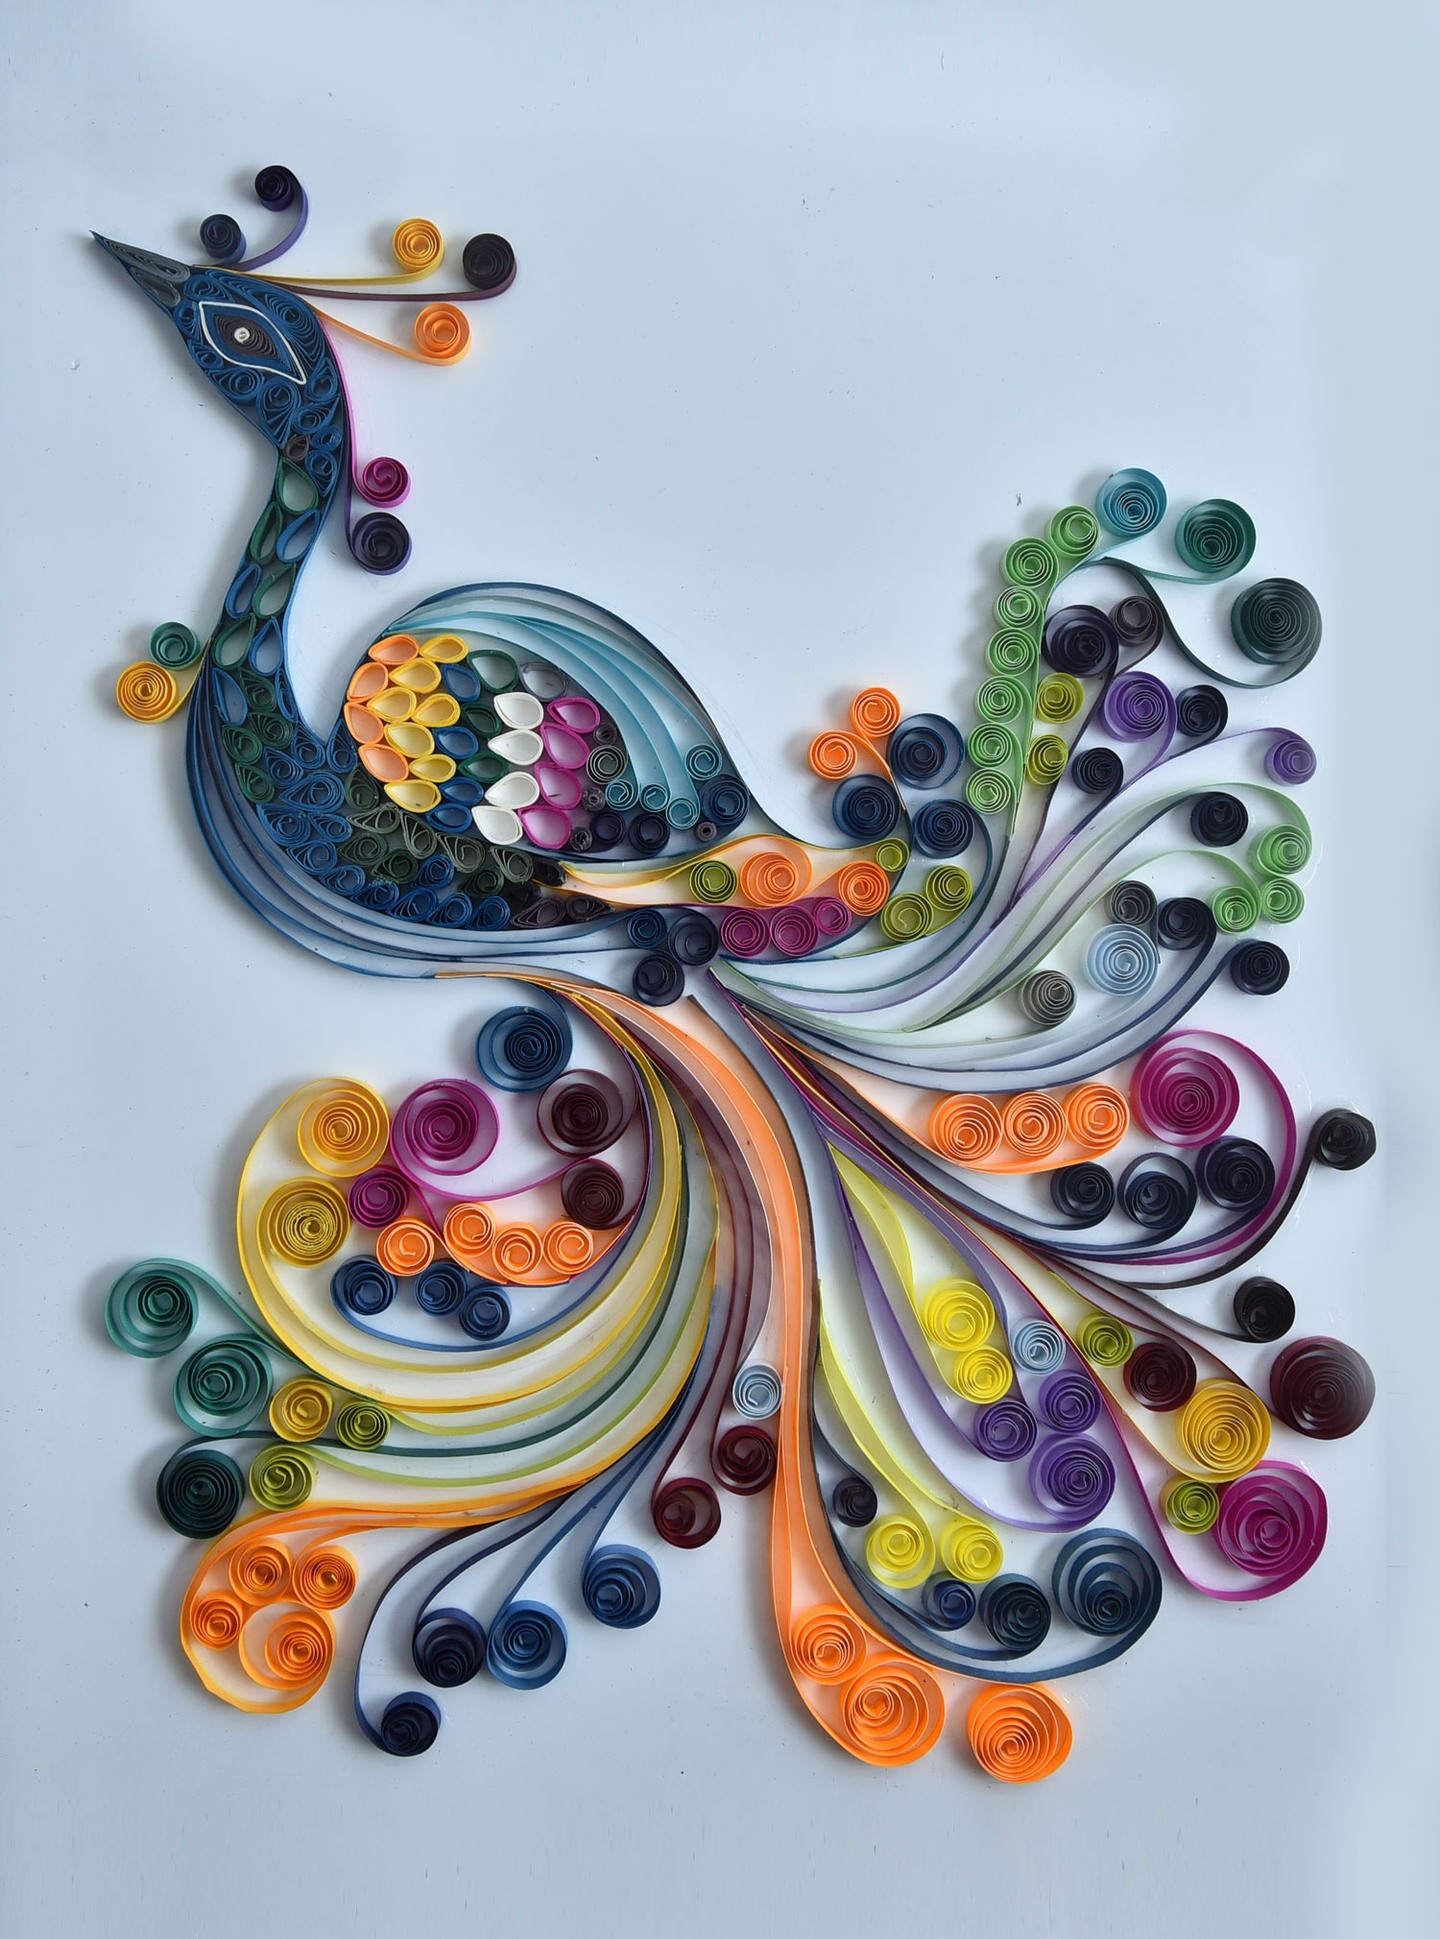
15. Paper Art
To make the beautiful quilled peacock shown in the image, begin by sketching a light outline of the peacock on a sturdy sheet of paper or cardstock as a guide. Next, gather quilling paper strips in a variety of vibrant colors, along with a slotted quilling tool, glue, and tweezers. Start forming basic shapes like tight coils, loose scrolls, teardrops, marquises, and S-scrolls by rolling the paper strips with the tool. Use these shapes to fill in different parts of the peacock — dark tones for the body, contrasting hues for the feathers, and brightly colored scrolls for the tail. Outline the form with uncoiled strips to define the shape. Glue each piece carefully onto the sketch, using tweezers for precision. Let the artwork dry completely before displaying. Patience and attention to color flow and symmetry are key to achieving the intricate and elegant result.
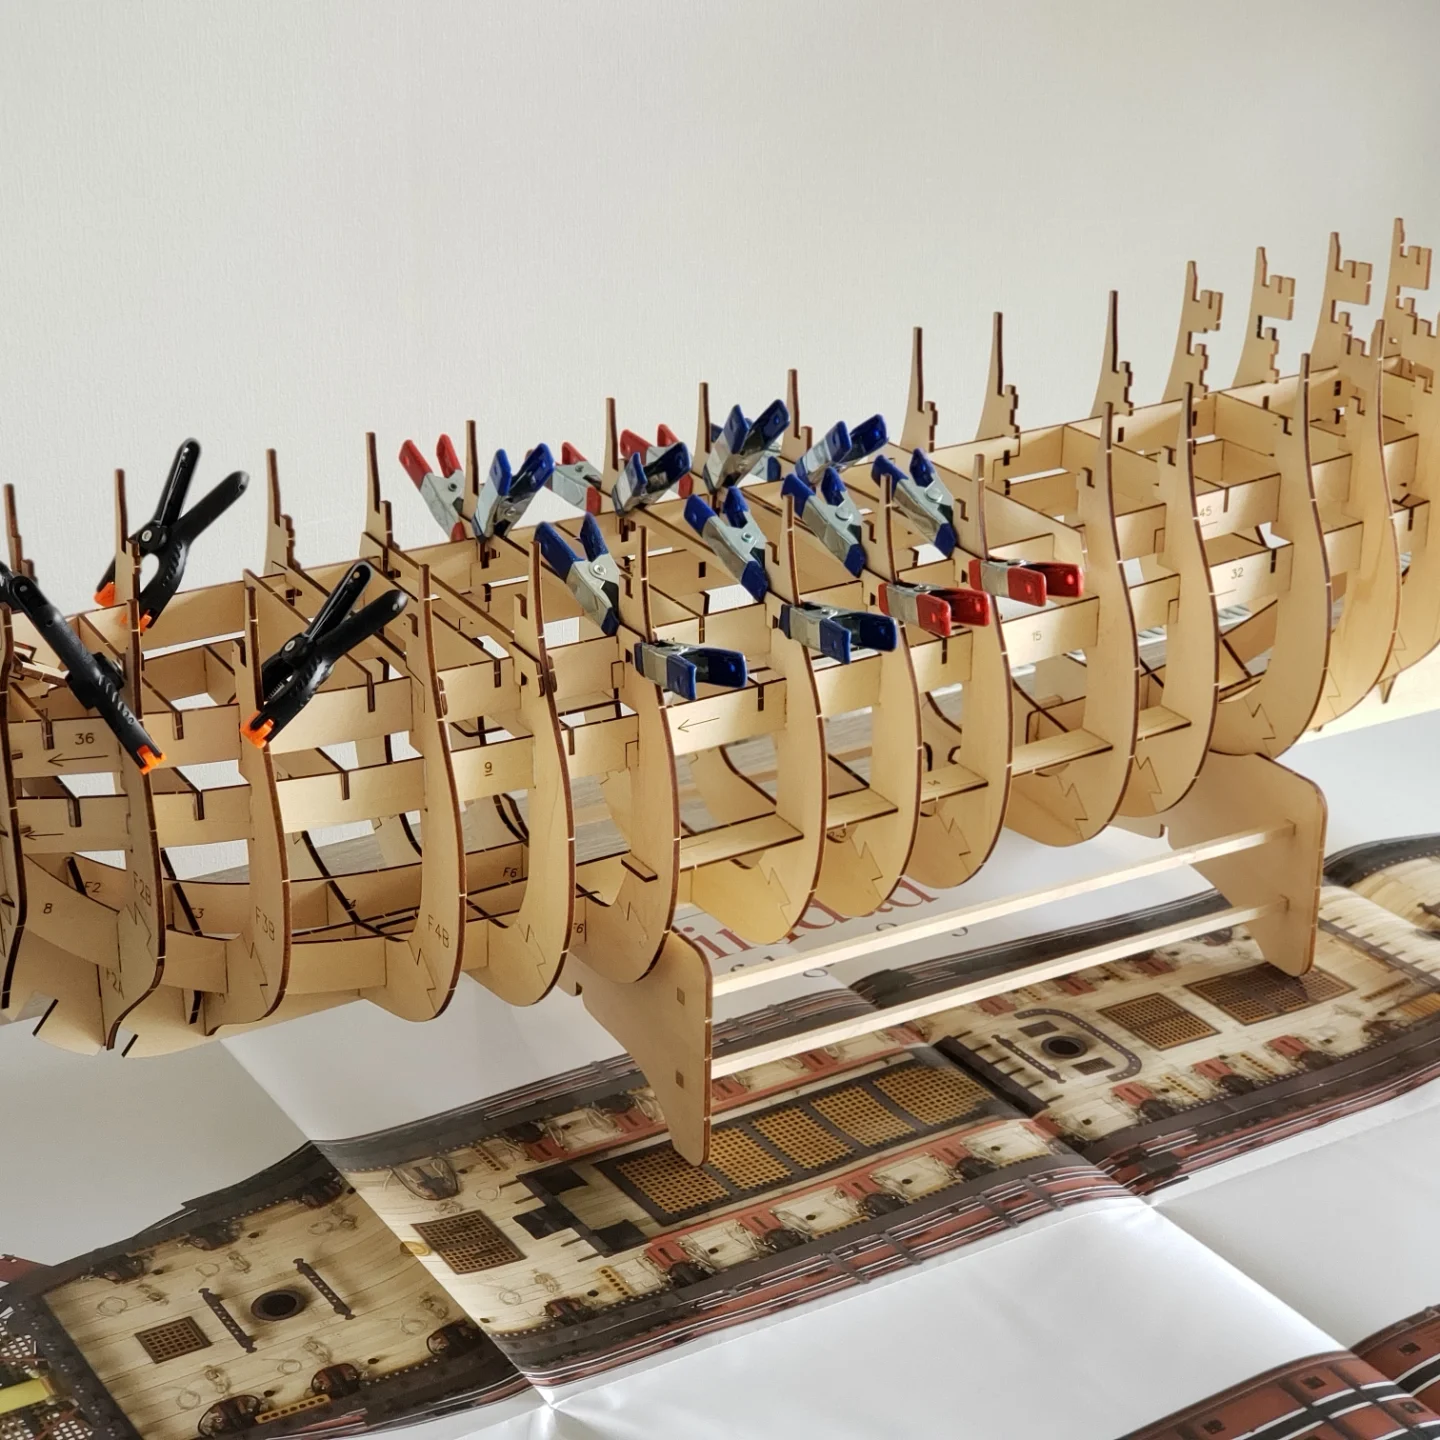
16. Cardboard Art
To make the wooden model ship shown in the image, start by carefully removing all laser-cut parts from their wooden sheets, ensuring not to damage the delicate pieces. Begin with the ship’s skeleton by assembling the keel and bulkhead frames in numerical order as shown in the instructions. Use wood glue to secure the joints, and apply clamps, like the ones seen in the image, to hold the pieces firmly while they dry. It’s important to keep everything aligned properly to avoid warping the structure. The model is likely being built over a reference plan or instruction sheet (visible underneath), so regularly consult the guide to confirm placement accuracy. Once the internal frame is complete and sturdy, you can proceed to planking the hull and adding finer details. Patience and precision are key to achieving a realistic and well-finished model ship.
17. Crochet Mouse
To make this adorable plush mouse finger puppet, start by choosing soft, chenille or velvet yarn in grey, pink, and white. Using basic amigurumi crochet techniques, first crochet the body with grey yarn, working in a spiral to create a cylindrical shape. Add a rounded head on top, and then stitch on the ears, nose, and tiny arms using pink yarn. Crochet a long pink tail and small round feet and attach them securely. For the ears, make flat circles and sew them to the head, with a pink inner and grey outer layer. Add a white pom-pom or rounded bump for the top detail if desired. Finish by attaching small safety eyes or embroidering them with black thread. Lightly stuff each piece with polyfill for a firm but squishy look. Sew all the parts together, ensuring the bottom opening is snug enough to fit a finger securely. This cute handmade mouse makes a perfect gift or playful finger puppet toy!
18. Clay Art
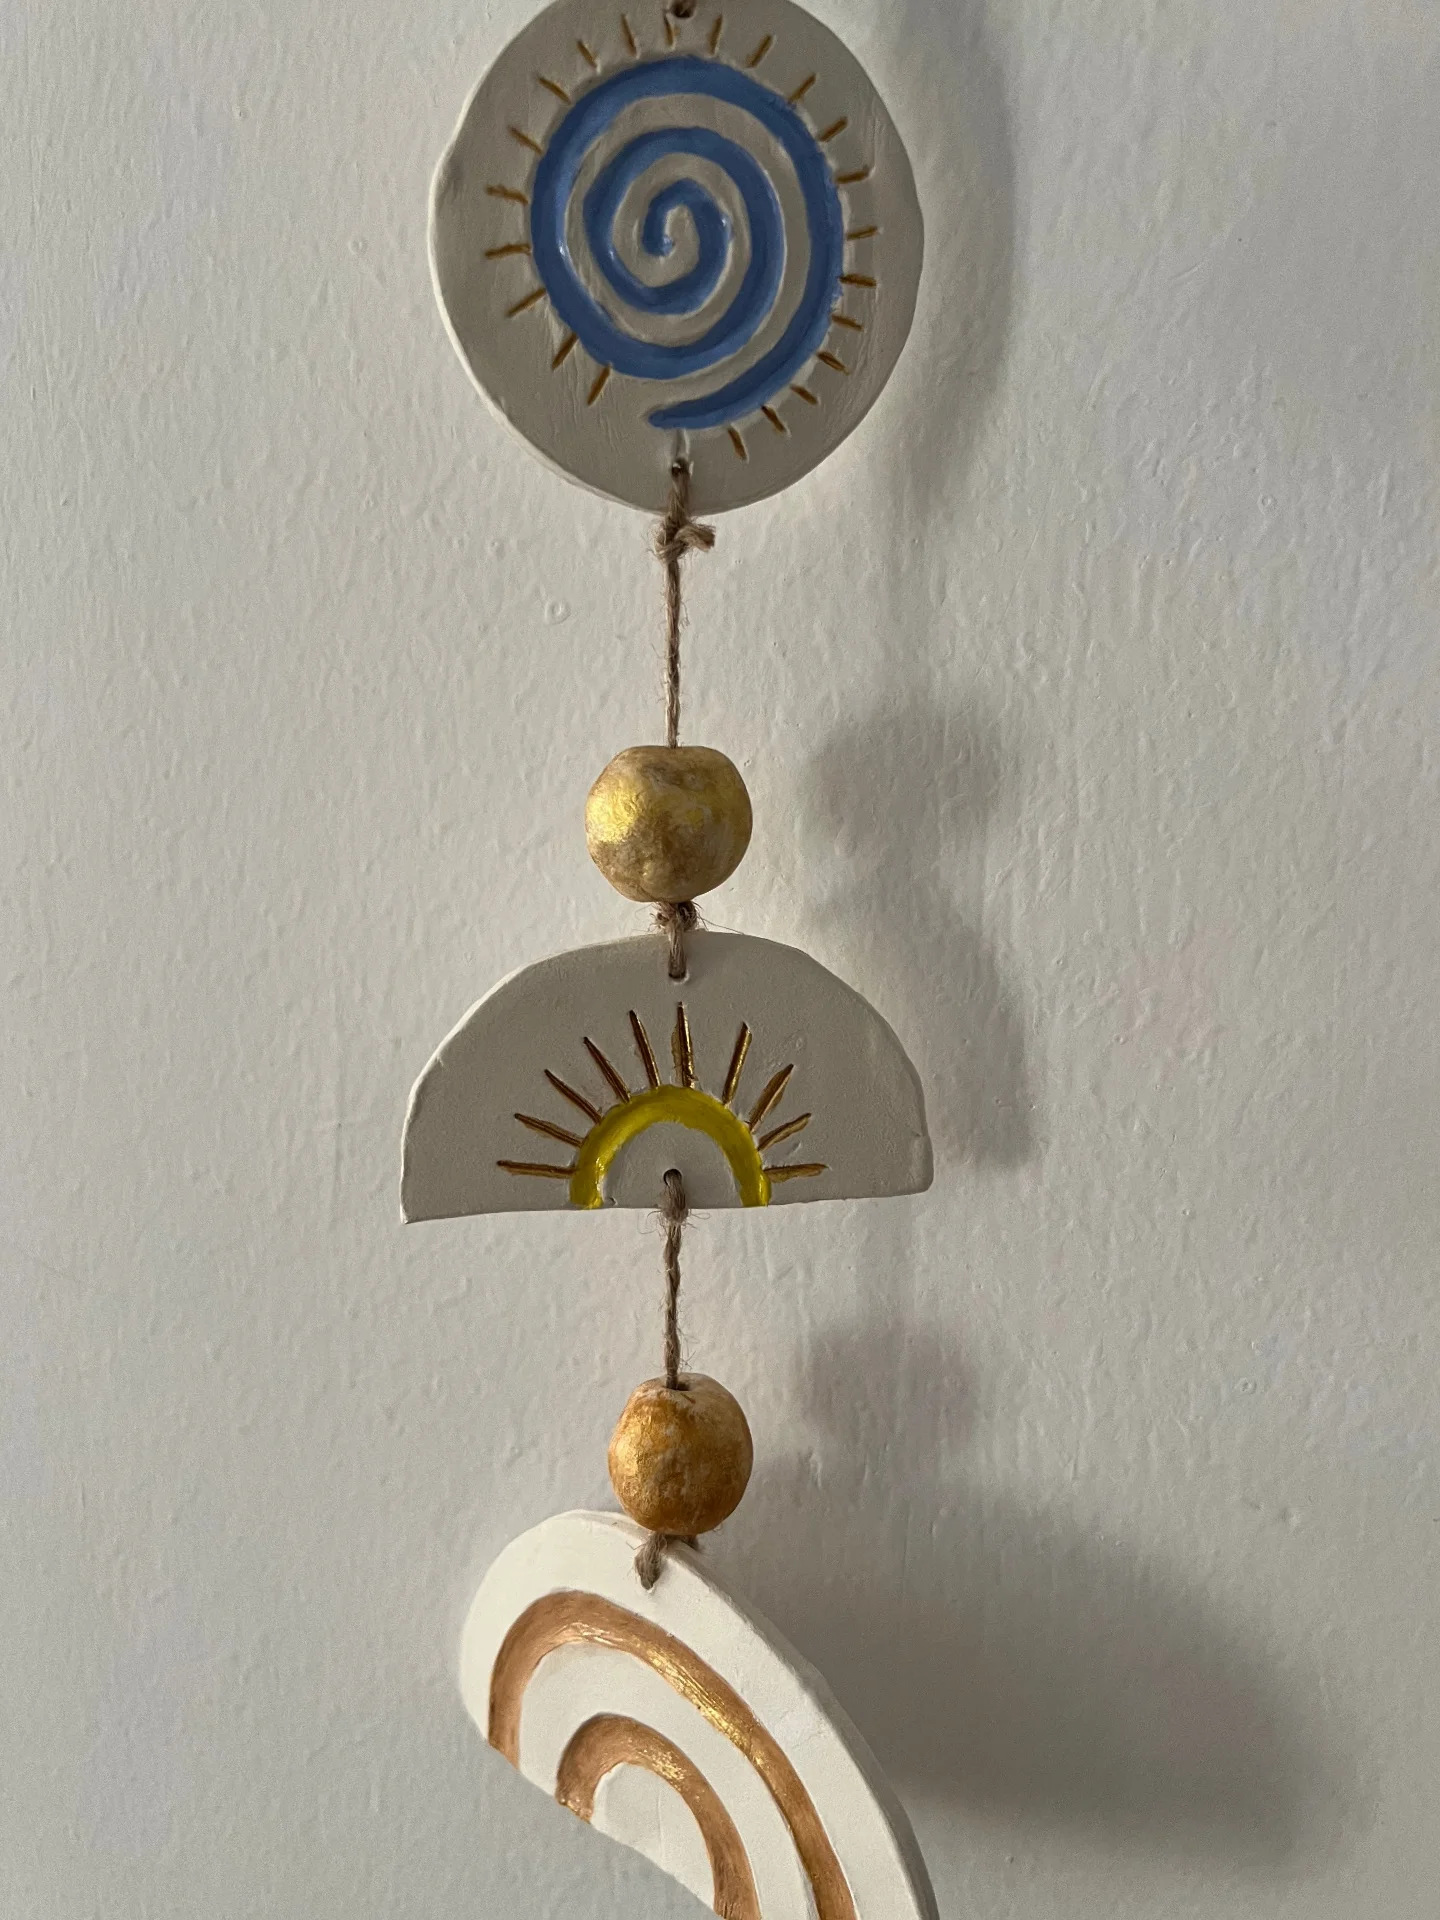
To make this beautiful hanging clay wall décor, start by preparing air-dry clay. Roll it out evenly and cut three different shapes: a circle, a half-circle, and an arched rainbow shape. Use a skewer or straw to poke small holes at the top and bottom of each piece for threading. On the circle, carve a spiral and sun rays; on the half-circle, a rising sun with rays; and on the arch, concentric curves to represent a rainbow. Let the pieces dry completely. Paint each design using acrylic colors—blue for the spiral, yellow for the sun, and metallic copper or bronze for the rainbow. Also, paint two small clay beads in golden tones. Once everything is dry, use strong jute string to connect the shapes and beads in order, tying knots to secure each element. Hang it on a wall for a charming, handmade touch to your space.
19. Clay Design
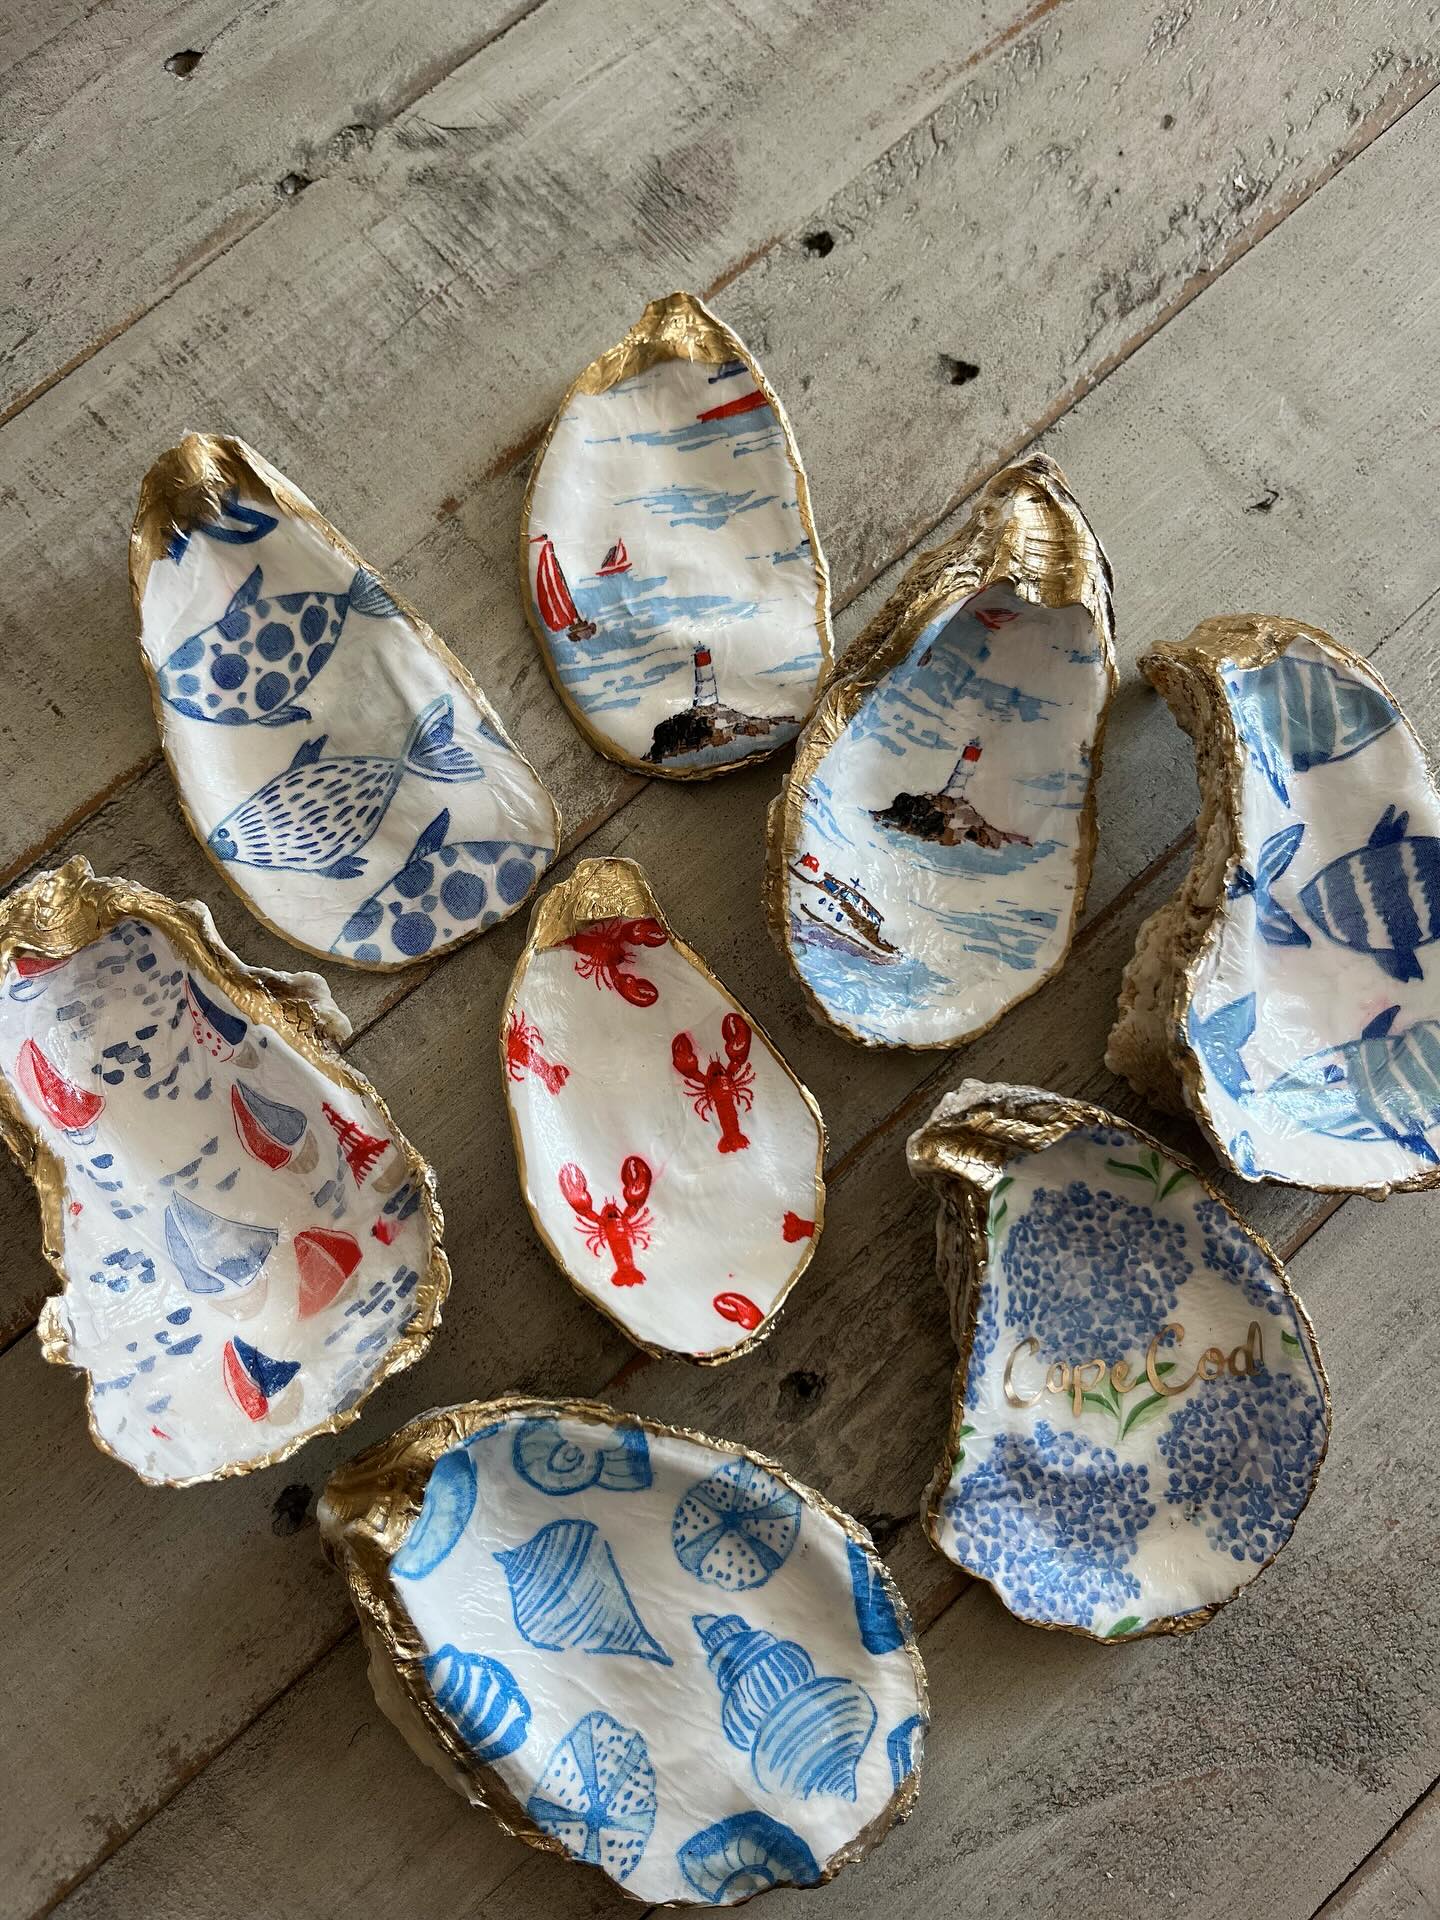
To make these beautiful decoupage oyster shell trinket dishes, start by cleaning and drying empty oyster shells thoroughly. Choose decorative napkins or printed paper with nautical or floral designs, and carefully cut out sections to fit inside each shell. Apply a thin layer of decoupage glue (like Mod Podge) to the inner surface of the shell, then gently press the paper design on top, smoothing out any wrinkles. Once dry, seal with another layer of Mod Podge or clear varnish to protect the surface and give it a glossy finish. For an elegant touch, paint the edges of each shell with gold acrylic paint or liquid gilding. Let everything dry completely before using. These stunning handmade dishes make perfect jewellery holders, gifts, or coastal-themed décor pieces!
20. Stuffed Toy
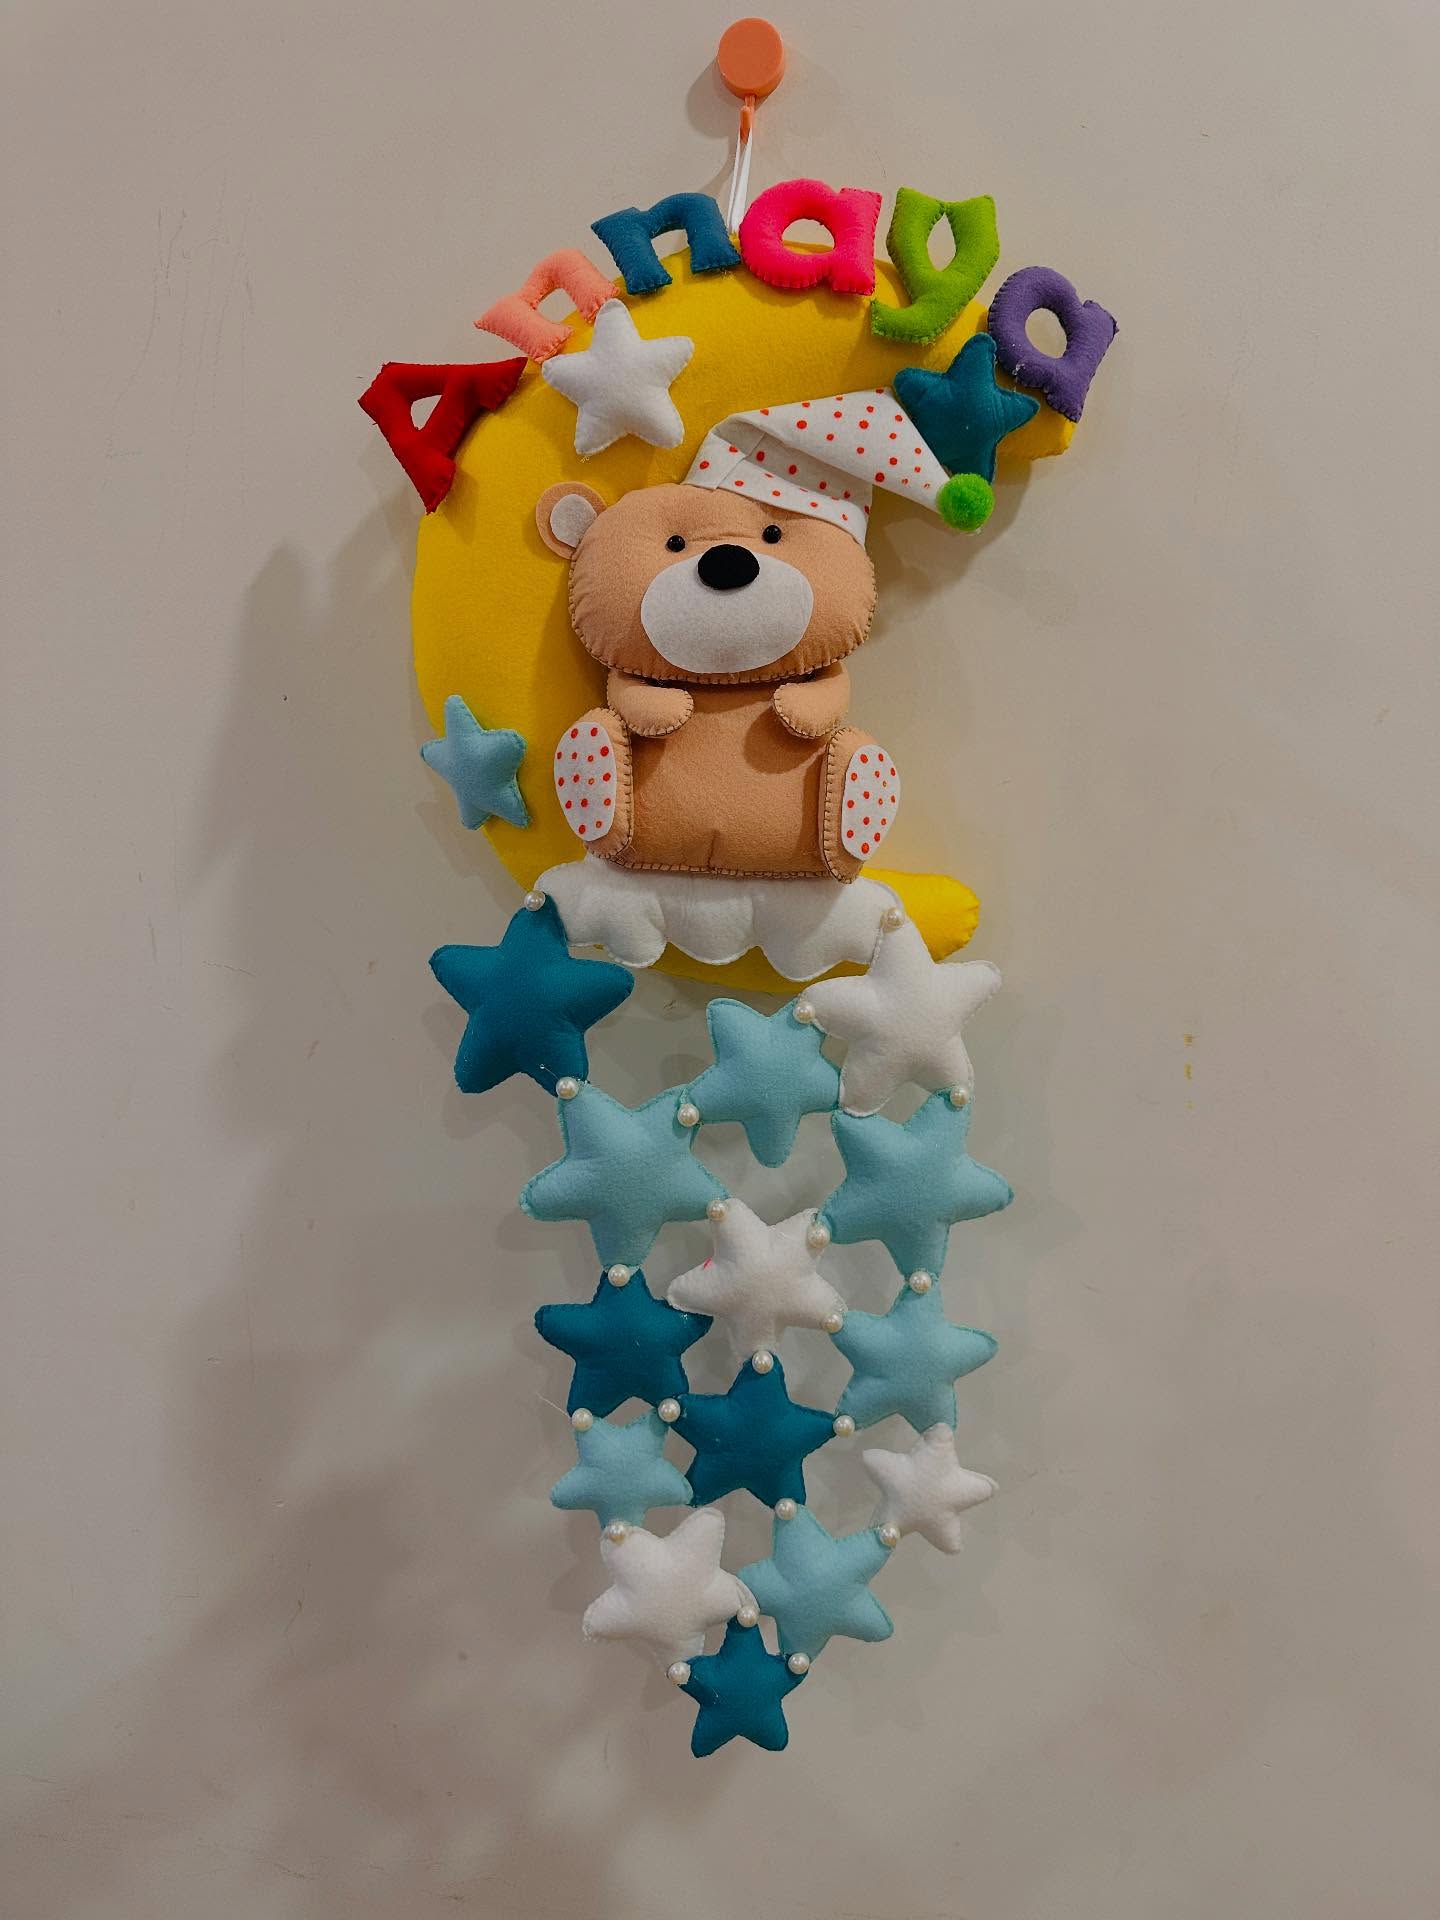
To make this adorable felt name hanger, start by gathering colored felt sheets, stuffing material, thread, a needle, glue, scissors, beads, and a ribbon or string for hanging. First, cut out the crescent moon shape and sew or glue the edges together, leaving a small opening to insert stuffing before sealing it. Repeat this process for the teddy bear, using beige and white felt, and add cute details like polka-dot paws and a sleepy cap. Next, cut out colorful letters to spell a name and stitch or glue them around the top of the moon. Create small felt stars in different shades of blue and white, stuff them lightly, and connect them vertically using thread or string with beads in between for a dangling effect. Finally, assemble all the parts securely and attach a loop at the top for easy hanging. This charming wall décor is perfect for a nursery or as a personalized baby shower gift.
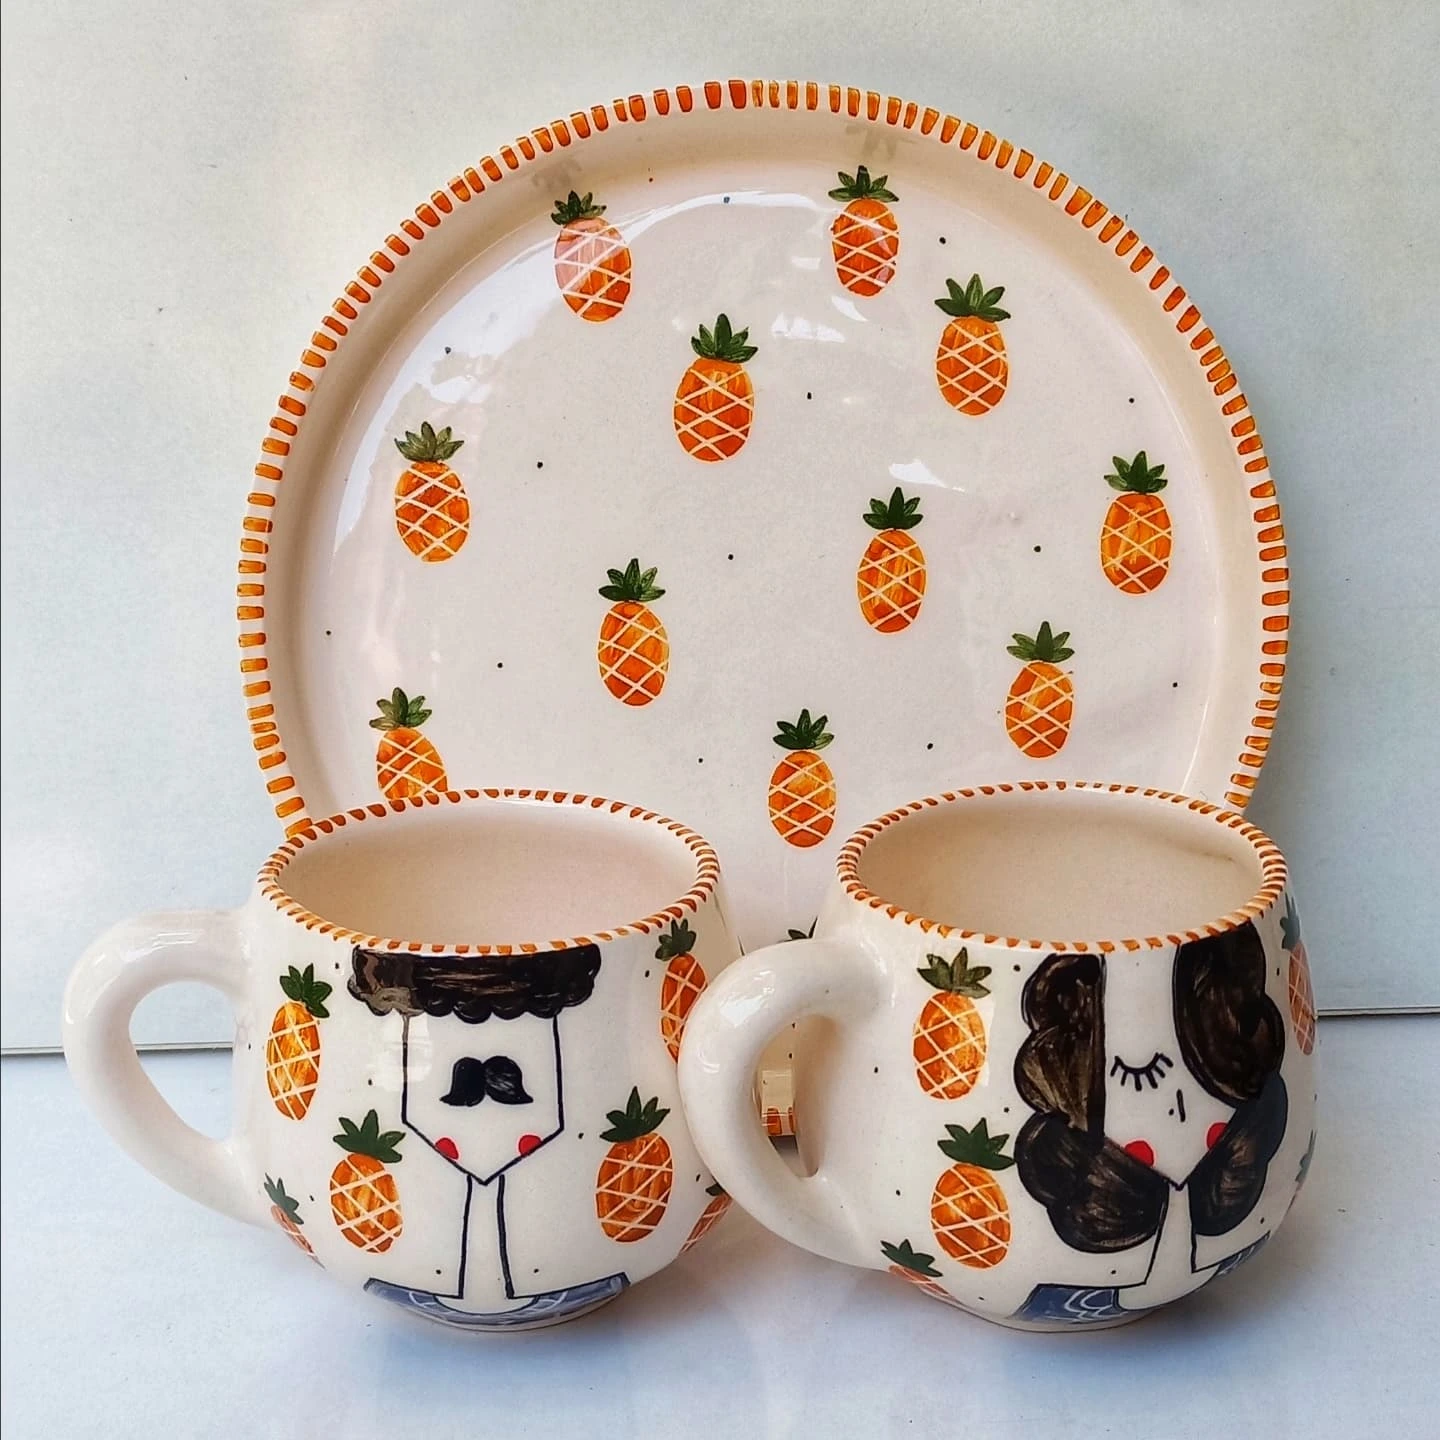
21. Clay Plate and Cup
To make this adorable pineapple-themed ceramic set, start by shaping the cups and plate using clay—either by hand-building or on a pottery wheel. Once shaped, allow the pieces to dry to a leather-hard stage, then smooth the surfaces and refine the edges. After bisque firing them in a kiln, it’s time to decorate. Use ceramic underglazes or overglaze paints to create the cute pineapple motifs, and add the whimsical couple illustrations on the mugs with fine brushes. The pineapples are painted in a bright orange with crisscross details and green leafy tops, while the border features a dotted orange rim. After the artwork is done, apply a clear glaze over the pieces to give them a glossy finish and fire them again in a kiln. The result is a charming, hand-painted ceramic set perfect for serving with personality and flair!
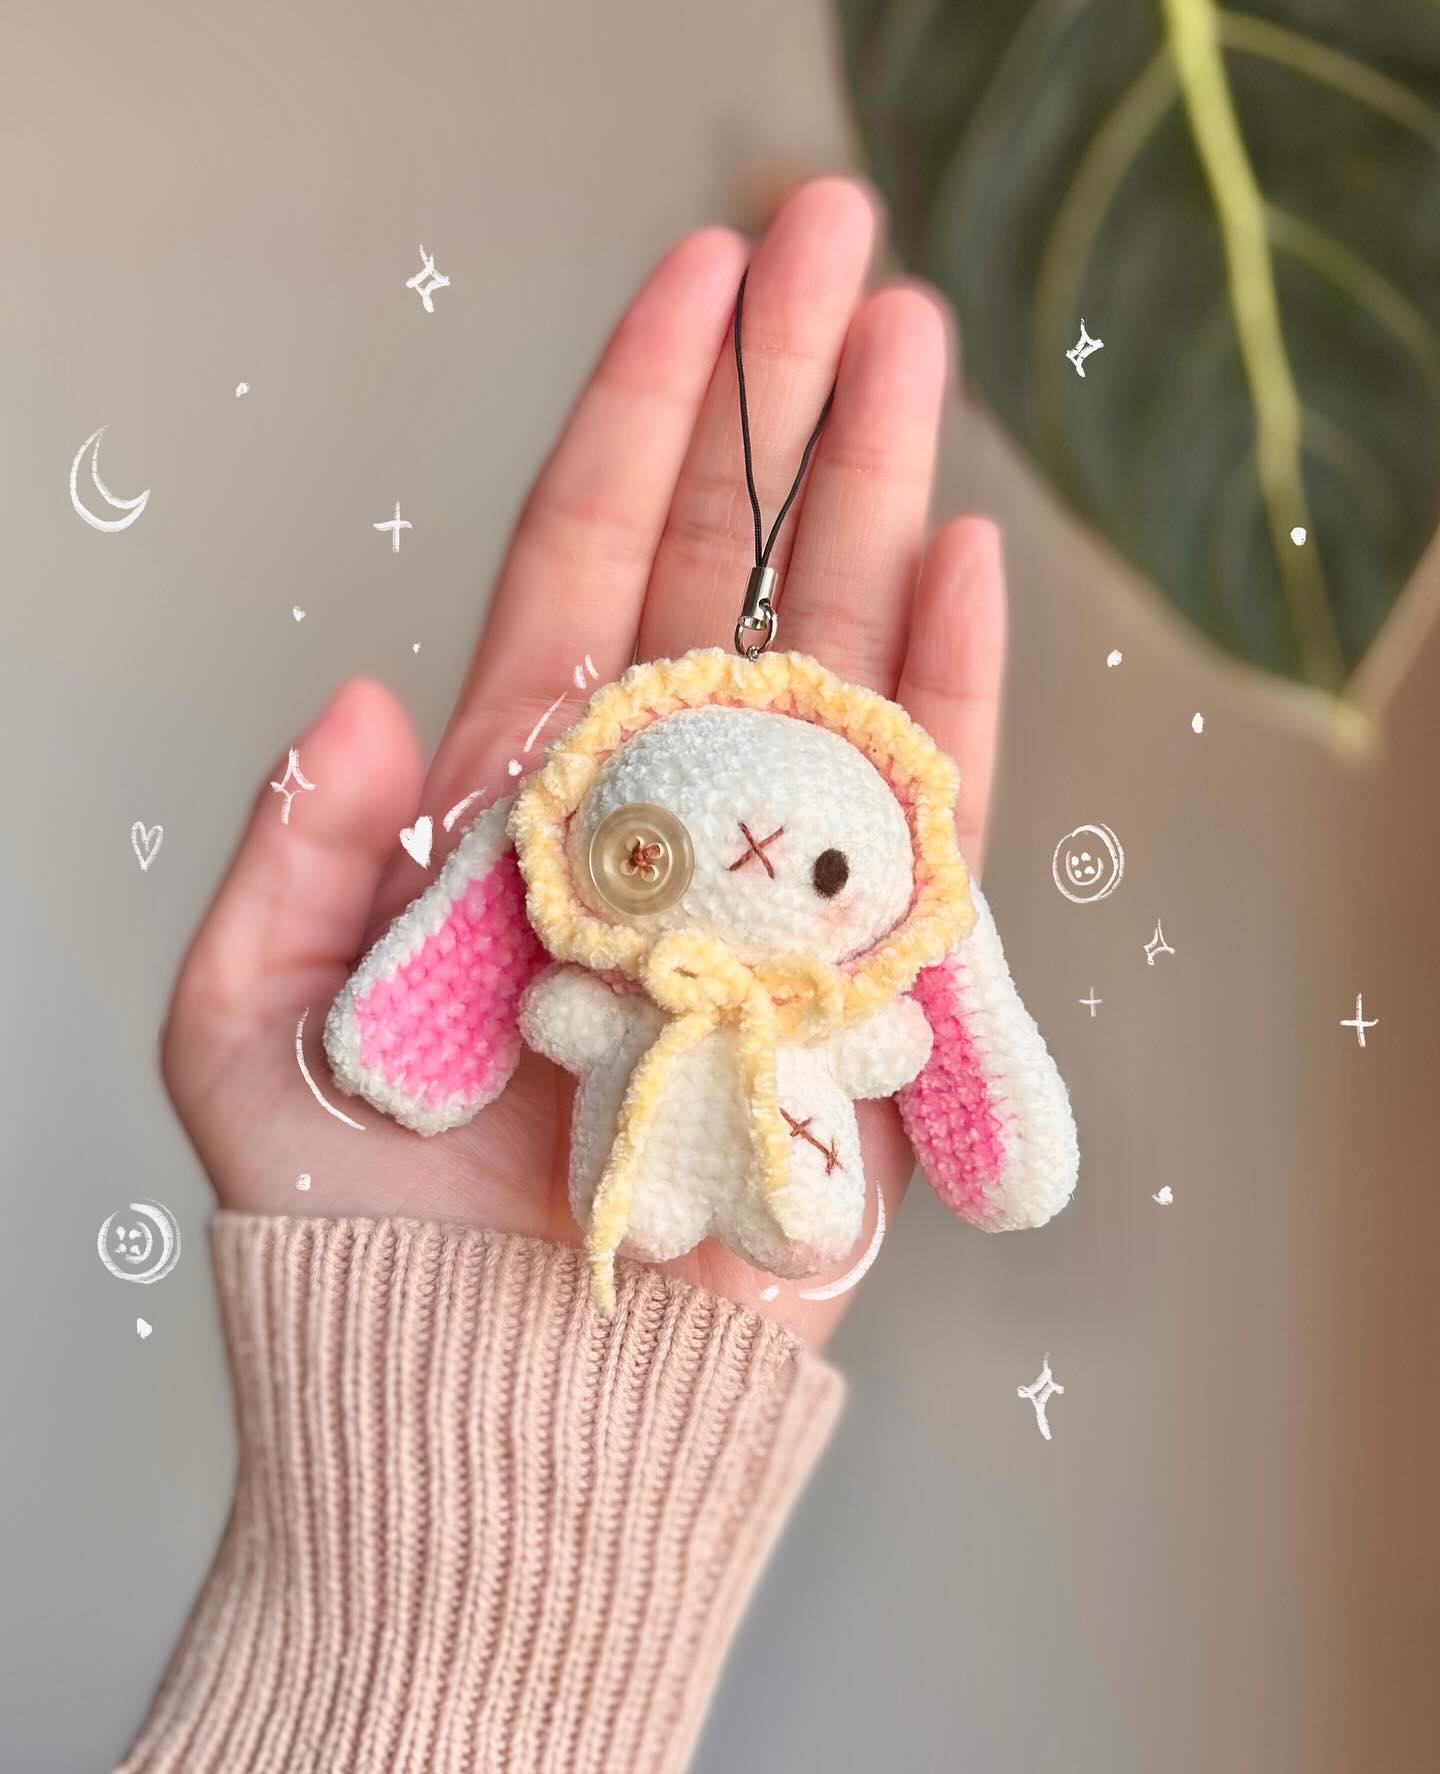
22. Crochet Bunny
To make this cute bunny plush keychain, begin by gathering soft chenille or velvet yarn in cream, pink, and yellow shades, along with stuffing, a button, needle, thread, and a keychain strap. Start by crocheting or sewing two bunny-shaped pieces—one for the front and one for the back. Use pink yarn or fabric for the inner ears and stitch or glue them onto the main body. Sew the two pieces together inside out, leaving a small opening to turn it right side out. Once flipped, stuff it with polyfill and close the opening neatly. Add details like the stitched “X” eye and patch marks using embroidery thread, and sew a button on for the other eye. Finally, create a small hood or scarf from yellow yarn and attach a keychain loop to the top. This handmade plushie makes a delightful and charming accessory or gift!
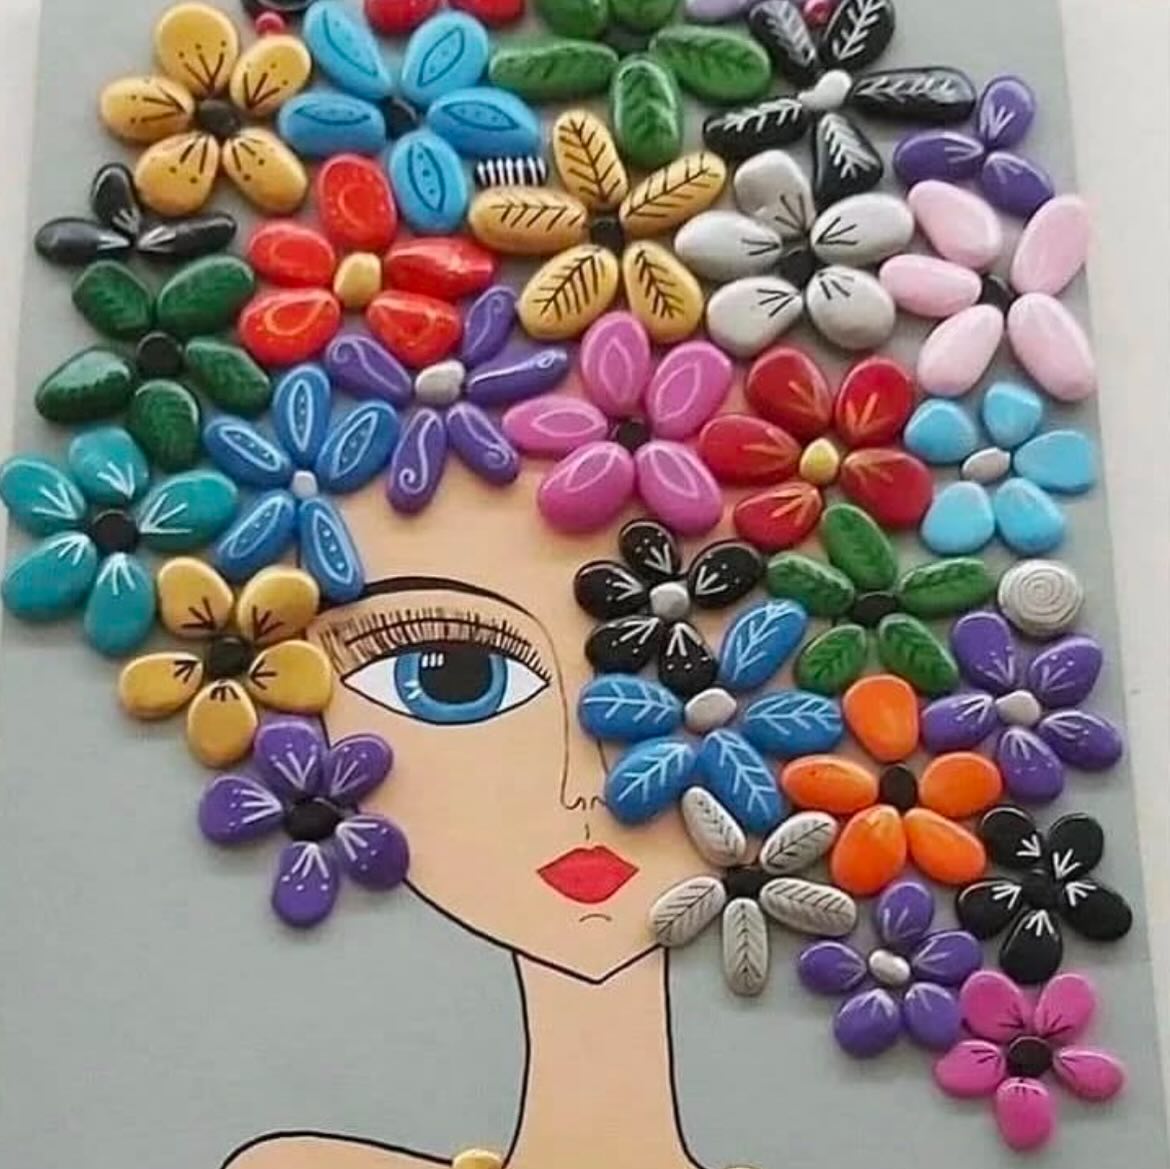
23. Stone Art
To make this vibrant pebble art portrait, start with a canvas or thick board and sketch a minimalist face of a woman using a black fine-tip marker or acrylic paint. Keep the design simple—just one eye, red lips, and a neck outline. Next, collect smooth, flat pebbles of various sizes and paint them with acrylic paints in bright colors. Arrange the pebbles to form flowers, petals, and leaves around the head, representing a colorful floral hairstyle. You can enhance each petal and leaf with painted details like veins, dots, or lines to add texture. Once satisfied with the layout, glue the painted pebbles in place using a strong adhesive. This fun and eye-catching craft combines painting and natural materials to create a stunning, textured art piece full of personality and charm.
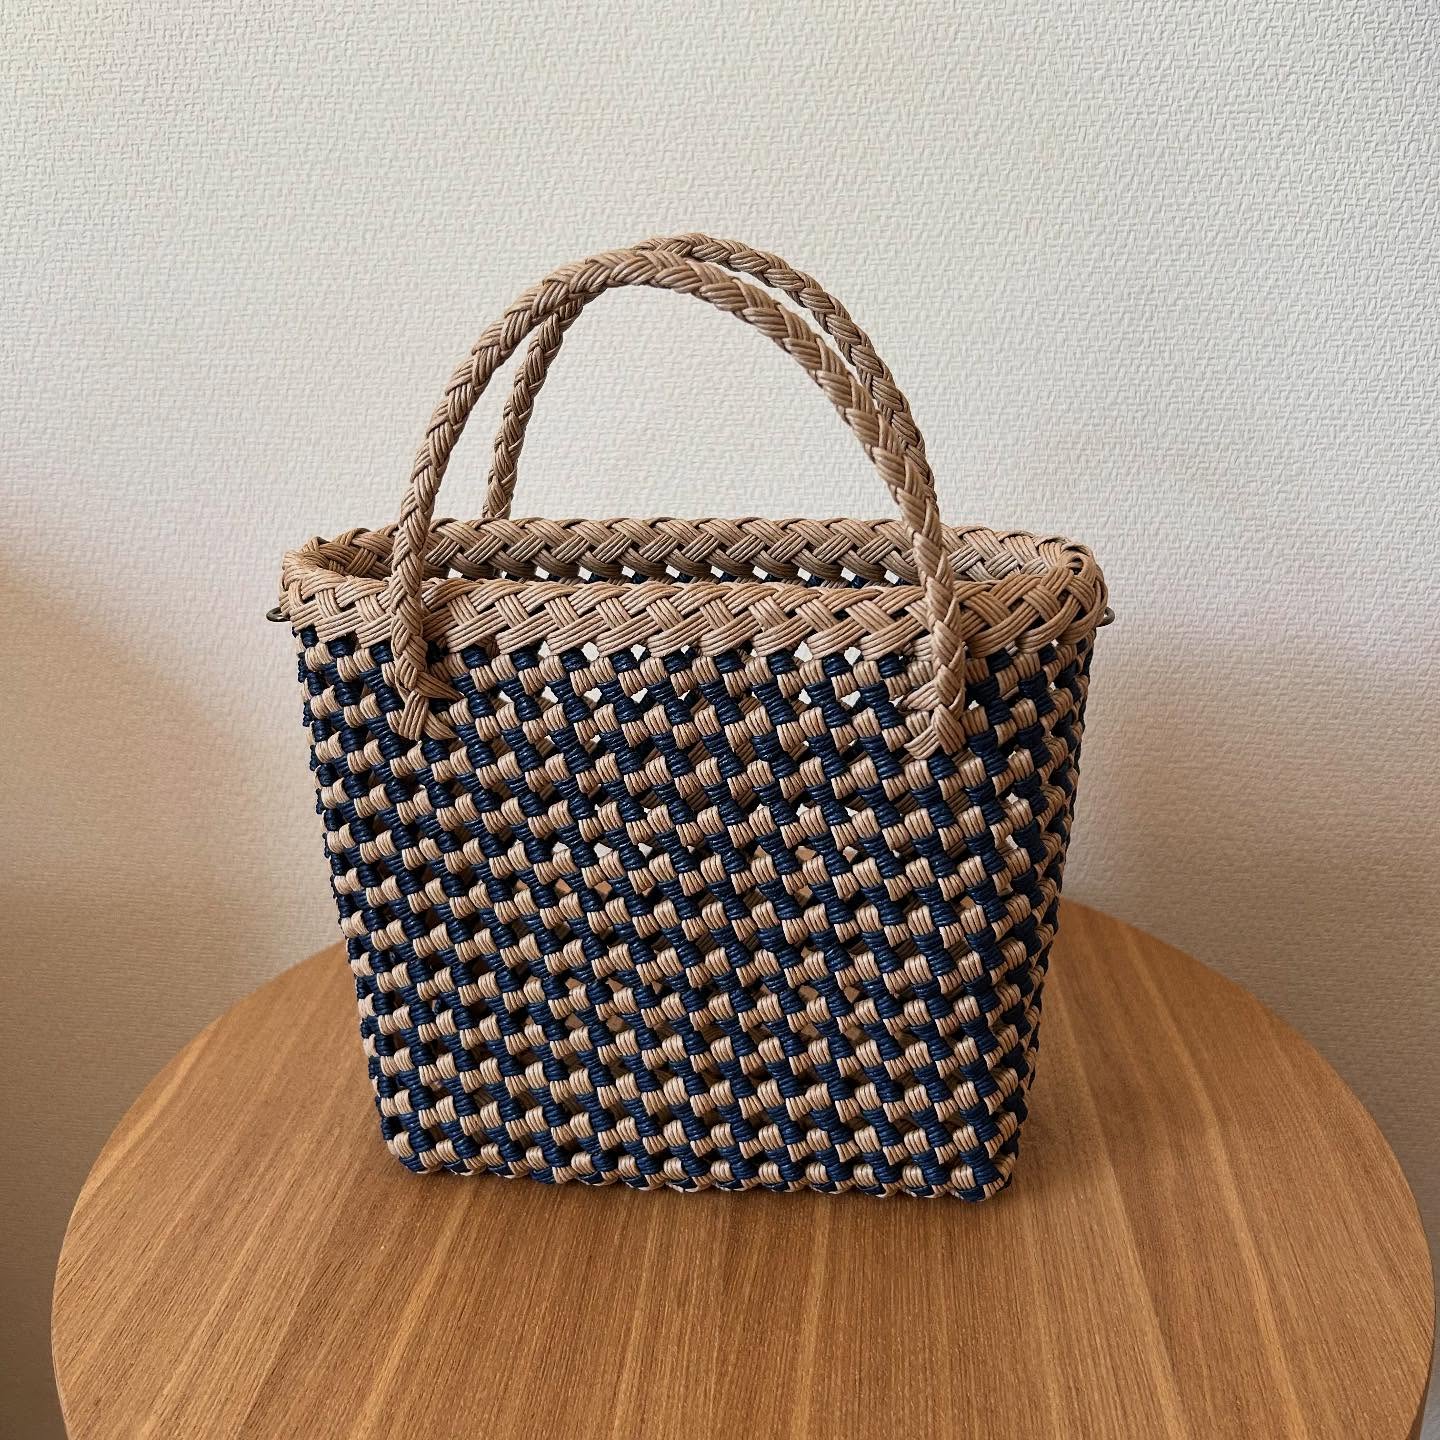
24. Basket
To make a basket like the one in the image, you will need flat paper or plastic cords in two colors—light beige and dark blue, for example. Start by creating the base using an over-under weaving technique with alternating colors to form a checkered pattern. Once the base is complete, continue weaving upward to build the sides, carefully maintaining even tension to keep the shape consistent. For the top edge, finish with a tight braided or twined border to secure the weave and add a decorative touch. Finally, craft the handles by braiding several strands together and securely attaching them to the inside of the basket. This type of basket is often made using Japanese paper cord craft known for its sturdy and stylish results.
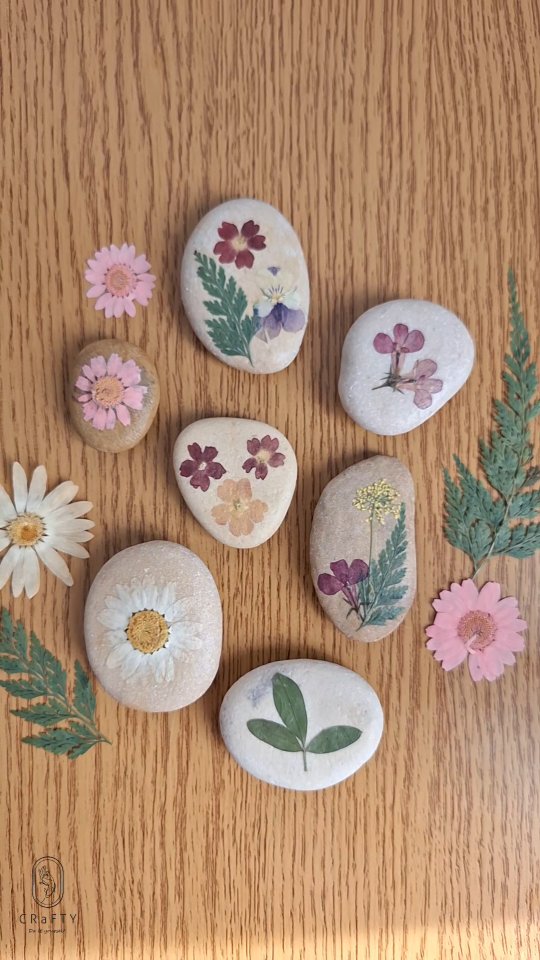
25. Stone Art
These are beautiful miniature painting on the stones with real flowers and leaves. Collect some pebbles and small plants and create design like this to get the art.


